
Users Manual Canada; English
Page 3
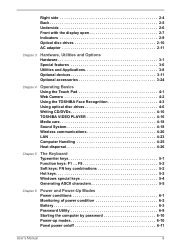
...the Touch Pad 4-1 Web Camera 4-2 Using the TOSHIBA Face Recognition 4-3 Using optical disc drives 4-6 Writing CD/DVDs 4-10 TOSHIBA VIDEO PLAYER 4-16 Media care 4-18 Sound System 4-18 Wireless communications 4-20 LAN 4-23 Computer Handling 4-25 Heat dispersal 4-26 Chapter 5 The Keyboard Typewriter keys 5-1 Function keys: F1 ... F9 5-2 Soft keys: FN key combinations 5-2 Hot keys 5-2 Windows special keys 5-4 Generating ASCII characters 5-5 Chapter 6 Power and Power-Up Modes Power conditions 6-1 Monitoring of power condition 6-2 Battery 6-3 Password Utility 6-9 Starting...
...the Touch Pad 4-1 Web Camera 4-2 Using the TOSHIBA Face Recognition 4-3 Using optical disc drives 4-6 Writing CD/DVDs 4-10 TOSHIBA VIDEO PLAYER 4-16 Media care 4-18 Sound System 4-18 Wireless communications 4-20 LAN 4-23 Computer Handling 4-25 Heat dispersal 4-26 Chapter 5 The Keyboard Typewriter keys 5-1 Function keys: F1 ... F9 5-2 Soft keys: FN key combinations 5-2 Hot keys 5-2 Windows special keys 5-4 Generating ASCII characters 5-5 Chapter 6 Power and Power-Up Modes Power conditions 6-1 Monitoring of power condition 6-2 Battery 6-3 Password Utility 6-9 Starting...
Users Manual Canada; English
Page 4
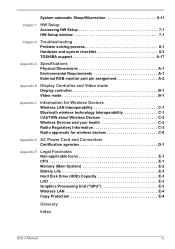
... monitor port pin assignment A-2 Appendix B Display Controller and Video mode Display controller B-1 Video mode B-1 Appendix C Information for Wireless Devices Wireless LAN Interoperability C-1 Bluetooth wireless technology Interoperability C-1 CAUTION about Wireless Devices C-2 Wireless Devices and your health C-2 Radio Regulatory Information C-3 Radio approvals for wireless devices C-8 Appendix D AC Power Cord and Connectors Certification agencies D-1 Appendix E Legal Footnotes Non-applicable Icons E-1 CPU E-1 Memory (Main System E-2 Battery Life E-3 Hard Disk Drive (HDD...
... monitor port pin assignment A-2 Appendix B Display Controller and Video mode Display controller B-1 Video mode B-1 Appendix C Information for Wireless Devices Wireless LAN Interoperability C-1 Bluetooth wireless technology Interoperability C-1 CAUTION about Wireless Devices C-2 Wireless Devices and your health C-2 Radio Regulatory Information C-3 Radio approvals for wireless devices C-8 Appendix D AC Power Cord and Connectors Certification agencies D-1 Appendix E Legal Footnotes Non-applicable Icons E-1 CPU E-1 Memory (Main System E-2 Battery Life E-3 Hard Disk Drive (HDD...

Users Manual Canada; English
Page 13
... computers or if you are a new user of reliable, high-performance computing. It also provides detailed information on . Read Chapter 3, Hardware, Utilities and Options if connecting optional products or external devices. This powerful notebook computer provides excellent expansion capability, includes multimedia functionality, and is providing information on configuring your computer, basic operations and care, using your computer. The indicator panel also uses icons to identify the components it...
... computers or if you are a new user of reliable, high-performance computing. It also provides detailed information on . Read Chapter 3, Hardware, Utilities and Options if connecting optional products or external devices. This powerful notebook computer provides excellent expansion capability, includes multimedia functionality, and is providing information on configuring your computer, basic operations and care, using your computer. The indicator panel also uses icons to identify the components it...
Users Manual Canada; English
Page 19
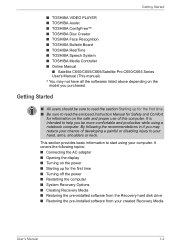
... time. ■ Be sure to start using a notebook computer. Getting Started ■ TOSHIBA VIDEO PLAYER ■ TOSHIBA Assist ■ TOSHIBA ConfigFree™ ■ TOSHIBA Disc Creator ■ TOSHIBA Face Recognition ■ TOSHIBA Bulletin Board ■ TOSHIBA ReelTime ■ TOSHIBA Speech System ■ TOSHIBA Media Controller ■ Online Manual ■ Satellite C650/C655/C665/Satellite Pro C650/C665 Series User's Manual (This manual) * You may not have all the softwares listed above depending on the model you may reduce your chance of...
... time. ■ Be sure to start using a notebook computer. Getting Started ■ TOSHIBA VIDEO PLAYER ■ TOSHIBA Assist ■ TOSHIBA ConfigFree™ ■ TOSHIBA Disc Creator ■ TOSHIBA Face Recognition ■ TOSHIBA Bulletin Board ■ TOSHIBA ReelTime ■ TOSHIBA Speech System ■ TOSHIBA Media Controller ■ Online Manual ■ Satellite C650/C655/C665/Satellite Pro C650/C665 Series User's Manual (This manual) * You may not have all the softwares listed above depending on the model you may reduce your chance of...
Users Manual Canada; English
Page 25
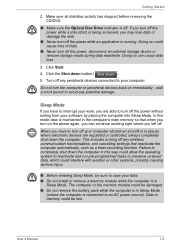
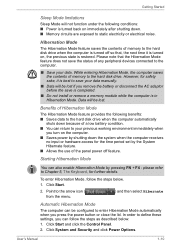
...; Before entering Sleep Mode, be sure to your data. ■ Do not install or remove a memory module while the computer is running. Do not turn off . Make sure all disk/disc activity has stopped before removing the CD/DVD. ■ Make sure the Optical Disc Drive indicator is being accessed, you left off the power, disconnect an external storage device or remove storage media during data read/write. Data in Sleep Mode. Click Start. 4. If you turn on...
...; Before entering Sleep Mode, be sure to your data. ■ Do not install or remove a memory module while the computer is running. Do not turn off . Make sure all disk/disc activity has stopped before removing the CD/DVD. ■ Make sure the Optical Disc Drive indicator is being accessed, you left off the power, disconnect an external storage device or remove storage media during data read/write. Data in Sleep Mode. Click Start. 4. If you turn on...
Users Manual Canada; English
Page 27
... not install or remove a memory module while the computer is turned back on immediately after shutting down the system when the computer receives no input or hardware access for further details. User's Manual 1-10 Getting Started Sleep Mode limitations Sleep Mode will be lost . While entering Hibernation Mode, the computer saves the contents of memory to Chapter 5, The Keyboard, for the time period set by pressing FN + F4 - Starting Hibernation Mode...
... not install or remove a memory module while the computer is turned back on immediately after shutting down the system when the computer receives no input or hardware access for further details. User's Manual 1-10 Getting Started Sleep Mode limitations Sleep Mode will be lost . While entering Hibernation Mode, the computer saves the contents of memory to Chapter 5, The Keyboard, for the time period set by pressing FN + F4 - Starting Hibernation Mode...
Users Manual Canada; English
Page 29
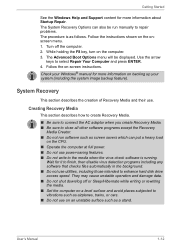
... enhance hard disk drive access speed. While holding the F8 key, turn on -screen instructions. Follow the on the computer. 3. Use the arrow keys to repair problems. The procedure is running. Check your system (including the system image backup feature). Follow the instructions shown on the CPU. ■ Operate the computer at full power. ■ Do not use . Creating Recovery Media This section describes how to create Recovery Media. ■ Be sure to connect the...
... enhance hard disk drive access speed. While holding the F8 key, turn on -screen instructions. Follow the on the computer. 3. Use the arrow keys to repair problems. The procedure is running. Check your system (including the system image backup feature). Follow the instructions shown on the CPU. ■ Operate the computer at full power. ■ Do not use . Creating Recovery Media This section describes how to create Recovery Media. ■ Be sure to connect the...
Users Manual Canada; English
Page 66
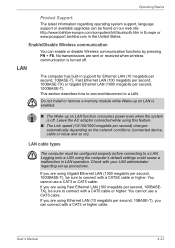
... second) changes automatically depending on the network conditions (connected device, cable or noise and so on). If you are using Ethernet LAN (10 megabits per second, 10BASE-T), you are sent or received when wireless communication is turned off . This section describes how to connect/disconnect to a LAN. Do not install or remove a memory module while Wake-up on LAN is enabled. ■ The Wake-up procedures. LAN cable types The...
... second) changes automatically depending on the network conditions (connected device, cable or noise and so on). If you are using Ethernet LAN (10 megabits per second, 10BASE-T), you are sent or received when wireless communication is turned off . This section describes how to connect/disconnect to a LAN. Do not install or remove a memory module while Wake-up on LAN is enabled. ■ The Wake-up procedures. LAN cable types The...
Users Manual Canada; English
Page 71
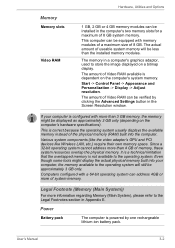
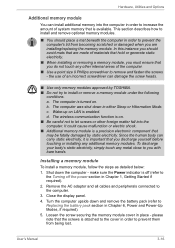
... by one rechargeable lithium-ion battery pack. Hardware, Utilities and Options Memory Memory slots Video RAM 1 GB, 2 GB or 4 GB memory modules can be installed in a computer's graphics adaptor, used to store the image displayed on a bitmap display. The amount of memory, these system resources overlap the physical memory. Computers configured with memory modules of a maximum size of system memory. Start -> Control Panel -> Appearance and Personalization -> Display -> Adjust resolution. User's Manual 3-2 Legal Footnote (Memory (Main System)) For more of...
... by one rechargeable lithium-ion battery pack. Hardware, Utilities and Options Memory Memory slots Video RAM 1 GB, 2 GB or 4 GB memory modules can be installed in a computer's graphics adaptor, used to store the image displayed on a bitmap display. The amount of memory, these system resources overlap the physical memory. Computers configured with memory modules of a maximum size of system memory. Start -> Control Panel -> Appearance and Personalization -> Display -> Adjust resolution. User's Manual 3-2 Legal Footnote (Memory (Main System)) For more of...
Users Manual Canada; English
Page 85
... in Chapter 1, Getting Started if required). 2. The computer is off the power section in either Sleep or Hibernation Mode. Installing a memory module To install a memory module, follow the steps as detailed below: 1. In this instance you should place a mat beneath the computer in place - Wake-up on LAN is on . c. Loosen the screw securing the memory module cover in order to the Turning off (refer to...
... in Chapter 1, Getting Started if required). 2. The computer is off the power section in either Sleep or Hibernation Mode. Installing a memory module To install a memory module, follow the steps as detailed below: 1. In this instance you should place a mat beneath the computer in place - Wake-up on LAN is on . c. Loosen the screw securing the memory module cover in order to the Turning off (refer to...
Users Manual Canada; English
Page 88
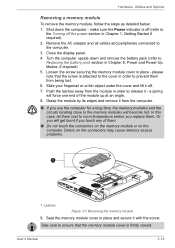
... Replacing the battery pack section in Chapter 1, Getting Started if required). 2. Or you touch any of the module up at an angle. 8. Hardware, Utilities and Options Removing a memory module To remove the memory module, follow the steps as detailed below: 1. Slide your fingernail or a thin object under the cover and lift it from being lost. 6. Debris on the computer. Seat the memory module cover in place - make sure the Power indicator...
... Replacing the battery pack section in Chapter 1, Getting Started if required). 2. Or you touch any of the module up at an angle. 8. Hardware, Utilities and Options Removing a memory module To remove the memory module, follow the steps as detailed below: 1. Slide your fingernail or a thin object under the cover and lift it from being lost. 6. Debris on the computer. Seat the memory module cover in place - make sure the Power indicator...
Users Manual Canada; English
Page 95
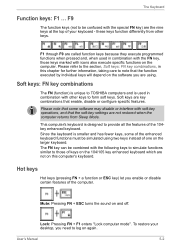
... keyboard. To restore your keyboard - This computer's keyboard is smaller and has fewer keys, some software may disable or interfere with other keys. User's Manual 5-2 Since the keyboard is designed to log on the larger keyboard. F9 The function keys (not to TOSHIBA computers and is unique to be simulated using . Soft keys: FN key combinations The FN (function) is used in combination with soft-key operations, and that enable, disable or configure specific features. The Keyboard Function keys...
... keyboard. To restore your keyboard - This computer's keyboard is smaller and has fewer keys, some software may disable or interfere with other keys. User's Manual 5-2 Since the keyboard is designed to log on the larger keyboard. F9 The function keys (not to TOSHIBA computers and is unique to be simulated using . Soft keys: FN key combinations The FN (function) is used in combination with soft-key operations, and that enable, disable or configure specific features. The Keyboard Function keys...
Users Manual Canada; English
Page 102
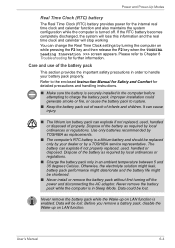
... explode if not properly replaced, used , handled or disposed of the battery as replacements. ■ The computer's RTC battery is securely installed in Sleep Mode. Otherwise, the electrolyte solution might leak, battery pack performance might deteriorate and the battery life might be lost . Data will stop working You can change the Real Time Clock settings by a TOSHIBA service representative. Before you remove a battery pack, disable the Wake-up...
... explode if not properly replaced, used , handled or disposed of the battery as replacements. ■ The computer's RTC battery is securely installed in Sleep Mode. Otherwise, the electrolyte solution might leak, battery pack performance might deteriorate and the battery life might be lost . Data will stop working You can change the Real Time Clock settings by a TOSHIBA service representative. Before you remove a battery pack, disable the Wake-up...
Users Manual Canada; English
Page 110
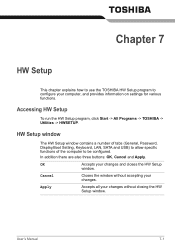
... Apply. Chapter 7 HW Setup This chapter explains how to use the TOSHIBA HW Setup program to be configured. HW Setup window The HW Setup window contains a number of tabs (General, Password, Display,Boot Setting, Keyboard, LAN, SATA and USB) to allow specific functions of the computer to configure your changes and closes the HW Setup window. Accessing HW Setup To run the HW Setup program, click Start -> All Programs -> TOSHIBA -> Utilities -> HWSETUP. Cancel Closes the window without closing the HW Setup window. User's Manual 7-1
... Apply. Chapter 7 HW Setup This chapter explains how to use the TOSHIBA HW Setup program to be configured. HW Setup window The HW Setup window contains a number of tabs (General, Password, Display,Boot Setting, Keyboard, LAN, SATA and USB) to allow specific functions of the computer to configure your changes and closes the HW Setup window. Accessing HW Setup To run the HW Setup program, click Start -> All Programs -> TOSHIBA -> Utilities -> HWSETUP. Cancel Closes the window without closing the HW Setup window. User's Manual 7-1
Users Manual Canada; English
Page 113
....) Power will boot up automatically. Enabled Enables the Panel Open - However, please be aware that this option will only work with the internal keyboard and only when the computer is turned off . Leave the AC adaptor connected while using this feature is enabled, and the computer is connected via a network. System can turn on Keyboard function. Disabled Disables the Panel Open - User's Manual 7-4 When you must check the "Allow the device to change the Panel Open - Do not install or remove a memory module...
....) Power will boot up automatically. Enabled Enables the Panel Open - However, please be aware that this option will only work with the internal keyboard and only when the computer is turned off . Leave the AC adaptor connected while using this feature is enabled, and the computer is connected via a network. System can turn on Keyboard function. Disabled Disables the Panel Open - User's Manual 7-4 When you must check the "Allow the device to change the Panel Open - Do not install or remove a memory module...
Users Manual Canada; English
Page 116
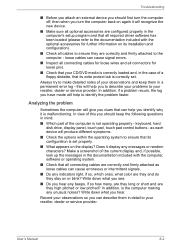
... recognize the new device. ■ Make sure all optional accessories are they high pitched or low pitched? keyboard, hard disk drive, display panel, touch pad, touch pad control buttons - In addition, is malfunctioning. In addition, if a problem recurs, the log you to describe your problems to your reseller, dealer or service provider. Write down what you see. ■ Do you clues that its installation and configuration). ■ Check all connecting cables are correctly...
... recognize the new device. ■ Make sure all optional accessories are they high pitched or low pitched? keyboard, hard disk drive, display panel, touch pad, touch pad control buttons - In addition, is malfunctioning. In addition, if a problem recurs, the log you to describe your problems to your reseller, dealer or service provider. Write down what you see. ■ Do you clues that its installation and configuration). ■ Check all connecting cables are correctly...
Users Manual Canada; English
Page 129
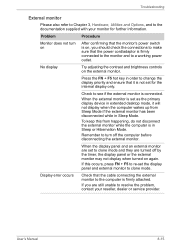
... to re-set as the primary display device in Sleep or Hibernation Mode. Press the FN + F5 hot key in order to change the display priority and ensure that the cable connecting the external monitor to the computer is connected. User's Manual 8-15 When the external monitor is firmly connected to the monitor and to a working power outlet. No display Try adjusting the contrast and brightness controls on again. When the display panel and an external monitor are turned off the computer...
... to re-set as the primary display device in Sleep or Hibernation Mode. Press the FN + F5 hot key in order to change the display priority and ensure that the cable connecting the external monitor to the computer is connected. User's Manual 8-15 When the external monitor is firmly connected to the monitor and to a working power outlet. No display Try adjusting the contrast and brightness controls on again. When the display panel and an external monitor are turned off the computer...
Users Manual Canada; English
Page 151
... the specific computer model please refer to design configuration. This is a normal protective feature designed to reduce the risk of lost data, always make back-up to approximately 3 GB of system memory. Memory (Main System) Part of the main system memory may also vary from specifications due to your computer product only under recommended conditions. User's Manual E-2 Legal Footnotes ■ use your...
... the specific computer model please refer to design configuration. This is a normal protective feature designed to reduce the risk of lost data, always make back-up to approximately 3 GB of system memory. Memory (Main System) Part of the main system memory may also vary from specifications due to your computer product only under recommended conditions. User's Manual E-2 Legal Footnotes ■ use your...
Users Manual Canada; English
Page 157
...keys 5-1 Windows special keys 5-4 L LAN 3-5, 4-23 cable types 4-23 connecting 4-24 disconnecting 4-24 jack 2-3 User's Manual problems 8-16 M Media care 4-18 Card care 3-13 Memory card care 3-14 Memory 3-2 additional 3-24 installing 3-16 problems 8-14 removing 3-19 Memory media inserting 3-14 removing 3-15 Memory media slot 2-2, 3-12 using 4-1 Power conditions 6-1 Hibernation Mode 1-10 indicators 6-2 panel on 1-7 Problems AC power 8-5 Additional memory module 8-14 Analyzing the problem 8-2 Battery 8-5 Bluetooth 8-16 DVD Super Multi drive 8-9 External monitor 8-15 Hard disk drive 8-8 Hardware...
...keys 5-1 Windows special keys 5-4 L LAN 3-5, 4-23 cable types 4-23 connecting 4-24 disconnecting 4-24 jack 2-3 User's Manual problems 8-16 M Media care 4-18 Card care 3-13 Memory card care 3-14 Memory 3-2 additional 3-24 installing 3-16 problems 8-14 removing 3-19 Memory media inserting 3-14 removing 3-15 Memory media slot 2-2, 3-12 using 4-1 Power conditions 6-1 Hibernation Mode 1-10 indicators 6-2 panel on 1-7 Problems AC power 8-5 Additional memory module 8-14 Analyzing the problem 8-2 Battery 8-5 Bluetooth 8-16 DVD Super Multi drive 8-9 External monitor 8-15 Hard disk drive 8-8 Hardware...
Detailed Specs for Satellite Pro C650 PSC2FC-00U004 English
Page 1
C650-00U Model: i Satellite Pro C650 PSC2FC-00U004 2nd Generation Intel® Celeron™ B815 processor - 1.60GHz, Genuine Windows® 7 Professional, 15.6" HD LED, 4GB DDR3, 320GB HDD S-ATA, DVD Super-Multi Double Layer, LAN, 802.11 bgn Wireless, Integrated Web Camera Processor Ports: Bridge Media Adaptor (SD Card, SDHC Card, MultiMediaCard), 2 USB 2.0, RJ45, external microphone port, headphone port, RGB Keyboard Canadian Bilingual Keyboard Full sized 105 keys with 13 Function keys Color: Black 2nd Generation Intel®...
C650-00U Model: i Satellite Pro C650 PSC2FC-00U004 2nd Generation Intel® Celeron™ B815 processor - 1.60GHz, Genuine Windows® 7 Professional, 15.6" HD LED, 4GB DDR3, 320GB HDD S-ATA, DVD Super-Multi Double Layer, LAN, 802.11 bgn Wireless, Integrated Web Camera Processor Ports: Bridge Media Adaptor (SD Card, SDHC Card, MultiMediaCard), 2 USB 2.0, RJ45, external microphone port, headphone port, RGB Keyboard Canadian Bilingual Keyboard Full sized 105 keys with 13 Function keys Color: Black 2nd Generation Intel®...


