
User Guide
Page 3
... usage instructions in the applicable user guides and/or manuals enclosed or provided electronically. TOSHIBA AMERICA INFORMATION SYSTEMS, INC. ("TOSHIBA"), ITS AFFILIATES AND SUPPLIERS DO NOT WARRANT THAT OPERATION OF THE PRODUCT WILL BE UNINTERRUPTED OR ERROR FREE. TOSHIBA DISCLAIMS ANY LIABILITY FOR THE FAILURE TO COPY OR TRANSFER THE DATA CORRECTLY. Model: Satellite® P300 Series Recordable and/or ReWritable Drive(s) and Associated Software...
... usage instructions in the applicable user guides and/or manuals enclosed or provided electronically. TOSHIBA AMERICA INFORMATION SYSTEMS, INC. ("TOSHIBA"), ITS AFFILIATES AND SUPPLIERS DO NOT WARRANT THAT OPERATION OF THE PRODUCT WILL BE UNINTERRUPTED OR ERROR FREE. TOSHIBA DISCLAIMS ANY LIABILITY FOR THE FAILURE TO COPY OR TRANSFER THE DATA CORRECTLY. Model: Satellite® P300 Series Recordable and/or ReWritable Drive(s) and Associated Software...

User Guide
Page 9
...'s radar detection feature will operate under the control of the Access Point in order to avoid operating on a channel occupied by the countries/regions in the following table. This device works on a channel free of this equipment except in the countries/regions in the following table. Do not use for the Atheros AR5001X Mini PCI Wireless Network Adapter This equipment is not...
...'s radar detection feature will operate under the control of the Access Point in order to avoid operating on a channel occupied by the countries/regions in the following table. This device works on a channel free of this equipment except in the countries/regions in the following table. Do not use for the Atheros AR5001X Mini PCI Wireless Network Adapter This equipment is not...

User Guide
Page 20
....gov/powermanagement for both AC power and battery modes. Your computer ships with the help of the Toshiba User's Guide for energy efficiency. See the "Mobile Computing" section of ENERGY STAR®, saved about $14 billion dollars on using power management settings to the EPA, a computer meeting the new ENERGY STAR® specifications will provide the most stable operating environment and optimum system...
....gov/powermanagement for both AC power and battery modes. Your computer ships with the help of the Toshiba User's Guide for energy efficiency. See the "Mobile Computing" section of ENERGY STAR®, saved about $14 billion dollars on using power management settings to the EPA, a computer meeting the new ENERGY STAR® specifications will provide the most stable operating environment and optimum system...

User Guide
Page 26
... of the computer's USB ports. 2 Plug the printer's power cable into a live AC outlet. the printer is USBcompatible, check its documentation. TECHNICAL NOTE: To determine if your printer does not support Plug and Play, you use . Adding memory (optional) HINT: To purchase additional memory modules, see "Setting up a printer" in the electronic user's guide. You will need a suitable USB cable which may also be hot. To determine...
... of the computer's USB ports. 2 Plug the printer's power cable into a live AC outlet. the printer is USBcompatible, check its documentation. TECHNICAL NOTE: To determine if your printer does not support Plug and Play, you use . Adding memory (optional) HINT: To purchase additional memory modules, see "Setting up a printer" in the electronic user's guide. You will need a suitable USB cable which may also be hot. To determine...

User Guide
Page 27
... Sleep or Hibernation mode, data will be installed in the lower-right corner of the Start menu. If the computer is the top slot. Start Arrow Shut Down Menu (Sample Image) Shut Down menu 2 Click Shut Down. For this model Slot A is the bottom slot. If you install or remove a memory module, turn off the computer. 3 Unplug and remove any cables connected to be installed, it must be lost. The operating system turns...
... Sleep or Hibernation mode, data will be installed in the lower-right corner of the Start menu. If the computer is the top slot. Start Arrow Shut Down Menu (Sample Image) Shut Down menu 2 Click Shut Down. For this model Slot A is the bottom slot. If you install or remove a memory module, turn off the computer. 3 Unplug and remove any cables connected to be installed, it must be lost. The operating system turns...

User Guide
Page 28
... the memory module or on the connector may have built up. Back of computer (Sample Illustration) Locating the memory module slot cover 6 Using a small Phillips screwdriver, loosen the captive screws that you can damage the memory module. Static electricity can retrieve them later. 28 Adding memory (optional) 5 Close the display panel and turn the computer upside down to discharge any static electricity you may cause memory access problems.
... the memory module or on the connector may have built up. Back of computer (Sample Illustration) Locating the memory module slot cover 6 Using a small Phillips screwdriver, loosen the captive screws that you can damage the memory module. Static electricity can retrieve them later. 28 Adding memory (optional) 5 Close the display panel and turn the computer upside down to discharge any static electricity you may cause memory access problems.

User Guide
Page 29
...). (Sample Illustration) Inserting the memory module into the socket For this model Slot A is the top slot. Slot B is the bottom slot. notch latch connector latch key (Sample Illustration) Aligning the memory module with its connector. 10 Locate an empty memory module slot on the underside of one memory module is available, you must remove the top module first before removing/installing the bottom module. Position the module toward the socket, aligning...
...). (Sample Illustration) Inserting the memory module into the socket For this model Slot A is the top slot. Slot B is the bottom slot. notch latch connector latch key (Sample Illustration) Aligning the memory module with its connector. 10 Locate an empty memory module slot on the underside of one memory module is available, you must remove the top module first before removing/installing the bottom module. Position the module toward the socket, aligning...

User Guide
Page 30
... place. If the latches and cutouts do not line up . 17 Reconnect the cables. These latches should be installed in slot A. 14 Replace the memory module slot cover and secure it using the screws. 15 Re-insert the main battery. latch latch (Sample Illustration) Pressing down on page 42. 16 Turn the computer right side up correctly, repeat steps 12-13.
... place. If the latches and cutouts do not line up . 17 Reconnect the cables. These latches should be installed in slot A. 14 Replace the memory module slot cover and secure it using the screws. 15 Re-insert the main battery. latch latch (Sample Illustration) Pressing down on page 42. 16 Turn the computer right side up correctly, repeat steps 12-13.

User Guide
Page 31
... scan your system has the memory modules stacked on top of the Safe Mode options is highlighted, it on . If one of one memory module installed for errors or defragment the drive. Removing a memory module If you turn on page 26 to work. TECHNICAL NOTE: You must remove the top module first before removing/installing the bottom module. If your hard drive for the computer to shut down the computer and open the memory module slot cover.
... scan your system has the memory modules stacked on top of the Safe Mode options is highlighted, it on . If one of one memory module installed for errors or defragment the drive. Removing a memory module If you turn on page 26 to work. TECHNICAL NOTE: You must remove the top module first before removing/installing the bottom module. If your hard drive for the computer to shut down the computer and open the memory module slot cover.

User Guide
Page 32
...;, refer to the documentation that may first need to see "Inserting a charged battery" on battery power. To insert an ExpressCard: 1 Locate the ExpressCard slot on . 32 Your computer's TFT display 3 Gently lift the memory module to work. This is manufactured using the screws. 5 Re-insert the main battery. The slot also supports hot swapping, which allows you to replace one memory module installed for the computer to a 30-degree angle...
...;, refer to the documentation that may first need to see "Inserting a charged battery" on battery power. To insert an ExpressCard: 1 Locate the ExpressCard slot on . 32 Your computer's TFT display 3 Gently lift the memory module to work. This is manufactured using the screws. 5 Re-insert the main battery. The slot also supports hot swapping, which allows you to replace one memory module installed for the computer to a 30-degree angle...

User Guide
Page 33
... the card can be removed now, the system displays Safe to Remove Hardware. 2 Gently press the ExpressCard inward to release it locks in a safe place. ❖ Scan all new files for viruses. ❖ Do not turn off the computer if a drive indicator light indicates a drive is unable to prepare the card for safe removal, a message will lose all work since you to try again later. If the network you are using...
... the card can be removed now, the system displays Safe to Remove Hardware. 2 Gently press the ExpressCard inward to release it locks in a safe place. ❖ Scan all new files for viruses. ❖ Do not turn off the computer if a drive indicator light indicates a drive is unable to prepare the card for safe removal, a message will lose all work since you to try again later. If the network you are using...
User Guide
Page 35
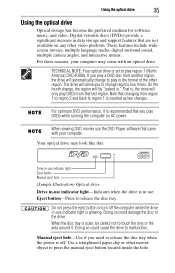
... surround sound, multiple camera angles, and interactive menus. TECHNICAL NOTE: Your optical drive is set to play region 1 (North America) DVD-ROMs. If you play DVDs from another region, the drive will allow you need to release the disc tray when the power is open, be "locked in the format of the other narrow object to press the manual eject button located inside the hole. Eject button-Press...
... surround sound, multiple camera angles, and interactive menus. TECHNICAL NOTE: Your optical drive is set to play region 1 (North America) DVD-ROMs. If you play DVDs from another region, the drive will allow you need to release the disc tray when the power is open, be "locked in the format of the other narrow object to press the manual eject button located inside the hole. Eject button-Press...

User Guide
Page 36
... disc into the drive: 1 Make sure the computer is turned on headphones to loud sound can harm your hearing. The Media button activates a media playing application that is currently playing. Pencil lead can play audio CDs or DVD movies when the computer is on certain models (Sample Illustration) Media Control buttons The Mute button allows you play audio CDs or DVD movies. Do not set the volume too high when using...
... disc into the drive: 1 Make sure the computer is turned on headphones to loud sound can harm your hearing. The Media button activates a media playing application that is currently playing. Pencil lead can play audio CDs or DVD movies when the computer is on certain models (Sample Illustration) Media Control buttons The Mute button allows you play audio CDs or DVD movies. Do not set the volume too high when using...

User Guide
Page 38
... on product model, configuration, applications, power management settings and features utilized, as well as a straightened paper clip, into the manual eject hole. To purchase a new battery pack, see the accessories information included with your Toshiba notebook computer. Use only batteries designed to work with the computer turned off inside the computer and damage it. 2 Pull the tray out until it is fully open , remove the disc, and place...
... on product model, configuration, applications, power management settings and features utilized, as well as a straightened paper clip, into the manual eject hole. To purchase a new battery pack, see the accessories information included with your Toshiba notebook computer. Use only batteries designed to work with the computer turned off inside the computer and damage it. 2 Pull the tray out until it is fully open , remove the disc, and place...

User Guide
Page 40
... serious injury. Setting battery notifications Your computer can be configured to recharge. Your computer's Power Options utility can be used to select a power level setting that reduces the power required for system operation and will allow the battery to warn you have two options: plug in the AC adaptor or install a charged main battery. Changing the main battery When your main battery has run applications, features, and devices. TECHNICAL NOTE...
... serious injury. Setting battery notifications Your computer can be configured to recharge. Your computer's Power Options utility can be used to select a power level setting that reduces the power required for system operation and will allow the battery to warn you have two options: plug in the AC adaptor or install a charged main battery. Changing the main battery When your main battery has run applications, features, and devices. TECHNICAL NOTE...

User Guide
Page 46
... the power button for at the AC power light. If you are some typical display problems and their solutions: The screen is on . Clearing the condition may have registered a password, press any key. Display problems Here are using the AC adaptor, check that came with the conflicting device and "Resolving a hardware conflict" in another device, such as a lamp. Verify that the computer is working . The computer starts but...
... the power button for at the AC power light. If you are some typical display problems and their solutions: The screen is on . Clearing the condition may have registered a password, press any key. Display problems Here are using the AC adaptor, check that came with the conflicting device and "Resolving a hardware conflict" in another device, such as a lamp. Verify that the computer is working . The computer starts but...

User Guide
Page 47
... brightness controls on your computer. This is manufactured using highprecision technology. ExpressCard® problems ExpressCard® checklist ❖ Make sure the card is inserted properly into a working power outlet. ❖ Check that the cable connecting the external monitor to make sure the display priority is firmly plugged into the slot. If you are using an external monitor: ❖ Check that the monitor is turned on. ❖ Check that the monitor's power cord/cable...
... brightness controls on your computer. This is manufactured using highprecision technology. ExpressCard® problems ExpressCard® checklist ❖ Make sure the card is inserted properly into a working power outlet. ❖ Check that the cable connecting the external monitor to make sure the display priority is firmly plugged into the slot. If you are using an external monitor: ❖ Check that the monitor is turned on. ❖ Check that the monitor's power cord/cable...

User Guide
Page 48
... operating system displays your ExpressCard's Properties dialog box, which will be caused by an I /O base address. Contact the software company's technical support group for example: Disk drives, Network adapters, Other, etc. Use Device Manager to make sure each card is important to investigate other sources of assistance first. See "Fixing a problem with device manager" in the system. Check the ExpressCard® status: 1 Click Start, Control Panel, System and Maintenance, and then Device Manager...
... operating system displays your ExpressCard's Properties dialog box, which will be caused by an I /O base address. Contact the software company's technical support group for example: Disk drives, Network adapters, Other, etc. Use Device Manager to make sure each card is important to investigate other sources of assistance first. See "Fixing a problem with device manager" in the system. Check the ExpressCard® status: 1 Click Start, Control Panel, System and Maintenance, and then Device Manager...

User Guide
Page 50
... power cord/cable 25 printer 25 control buttons TouchPad 34 D DC-IN 25 display problems screen is blank 46 E eject button optical drive 35 ExpressCard® inserting 32 removing 33 ExpressCard® problems 47 computer stops working 48 slot appears dead 48 F files backing up 33 saving 33 I inserting CD/DVD 36 installing main battery 40, 42 memory module 26 K keyboard problems not working 46 L lights AC power 24 M main battery changing 40 installing 40, 42 removing 40 memory module installing...
... power cord/cable 25 printer 25 control buttons TouchPad 34 D DC-IN 25 display problems screen is blank 46 E eject button optical drive 35 ExpressCard® inserting 32 removing 33 ExpressCard® problems 47 computer stops working 48 slot appears dead 48 F files backing up 33 saving 33 I inserting CD/DVD 36 installing main battery 40, 42 memory module 26 K keyboard problems not working 46 L lights AC power 24 M main battery changing 40 installing 40, 42 removing 40 memory module installing...

User Guide
Page 51
... battery 40 O optical drive eject button 35 inserting a disc 36 removing disc 37, 38 using 35 P power cable connectors 49 cord/cable 25 power problems computer will not start 46 precautions 22 primary button TouchPad 34 printer connecting 25 problem solving computer hangs when ExpressCard® inserted 48 computer will not start 46 contacting Toshiba 48, 49 display is blank 46 ExpressCard® checklist 47 ExpressCard® slot appears dead 48 external monitor...
... battery 40 O optical drive eject button 35 inserting a disc 36 removing disc 37, 38 using 35 P power cable connectors 49 cord/cable 25 power problems computer will not start 46 precautions 22 primary button TouchPad 34 printer connecting 25 problem solving computer hangs when ExpressCard® inserted 48 computer will not start 46 contacting Toshiba 48, 49 display is blank 46 ExpressCard® checklist 47 ExpressCard® slot appears dead 48 external monitor...


