User Guide
Page 55
...factory image (returning the computer to its out-of Windows® 7 32-bit or 64-bit operating system, select one at this time. The Boot menu appears. 3 Using the arrow keys to scroll down, select the HDD Recovery option, and then press the ENTER key. 4 If your computer's internal... drive or using the first method, follow the procedure below. Be sure to save your computer, press the F12 key when the initial TOSHIBA screen displays. Getting Started 55 Recovering the Internal Storage Drive Recovering to out-of-box state (recommended recovery method) Recovering an internal storage ...
...factory image (returning the computer to its out-of Windows® 7 32-bit or 64-bit operating system, select one at this time. The Boot menu appears. 3 Using the arrow keys to scroll down, select the HDD Recovery option, and then press the ENTER key. 4 If your computer's internal... drive or using the first method, follow the procedure below. Be sure to save your computer, press the F12 key when the initial TOSHIBA screen displays. Getting Started 55 Recovering the Internal Storage Drive Recovering to out-of-box state (recommended recovery method) Recovering an internal storage ...
User Guide
Page 58
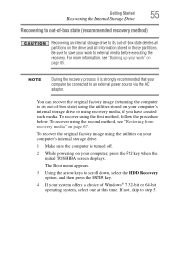
... HDD Recovery option, and then press the ENTER key. 4 If your personal folders. 1 Make sure the computer is selected in the next step. The Boot menu appears. 3 Using the arrow keys to this time. To return the data to step 5. 5 A warning screen appears, stating that when the recovery is...system, select one at this folder during the recovery process. If not, skip to your computer, press the F12 key when the initial TOSHIBA screen displays. The directory structure will be retained, however all data will be deleted and rewritten unless the "Recovery of Factory Default Software with...
... HDD Recovery option, and then press the ENTER key. 4 If your personal folders. 1 Make sure the computer is selected in the next step. The Boot menu appears. 3 Using the arrow keys to this time. To return the data to step 5. 5 A warning screen appears, stating that when the recovery is...system, select one at this folder during the recovery process. If not, skip to your computer, press the F12 key when the initial TOSHIBA screen displays. The directory structure will be retained, however all data will be deleted and rewritten unless the "Recovery of Factory Default Software with...
User Guide
Page 61
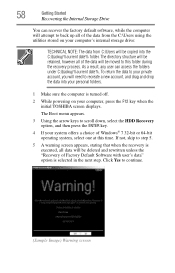
... To recover using the utilities on your computer's internal storage drive: 1 Make sure the computer is executed all data will be deleted and rewritten. The Boot menu appears. 3 Using the arrow keys to continue. (Sample Image) Warning screen Click Yes to scroll down, select the HDD Recovery option, and then press the...
... To recover using the utilities on your computer's internal storage drive: 1 Make sure the computer is executed all data will be deleted and rewritten. The Boot menu appears. 3 Using the arrow keys to continue. (Sample Image) Warning screen Click Yes to scroll down, select the HDD Recovery option, and then press the...
User Guide
Page 63
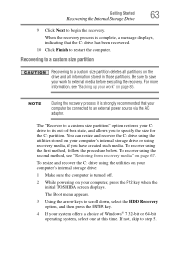
... recover the C: drive using recovery media, if you to begin the recovery. The Boot menu appears. 3 Using the arrow keys to step 5. The "Recover to a custom size partition" option restores your computer, press the F12 key when the initial TOSHIBA screen displays. You can resize and recover the C: drive using the first method...
... recover the C: drive using recovery media, if you to begin the recovery. The Boot menu appears. 3 Using the arrow keys to step 5. The "Recover to a custom size partition" option restores your computer, press the F12 key when the initial TOSHIBA screen displays. You can resize and recover the C: drive using the first method...
User Guide
Page 68
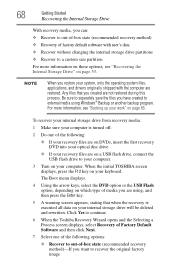
...Toshiba Recovery Wizard opens and the Selecting a Process screen displays, select Recovery of Factory Default Software and then click Next. 7 Select one of media you have created to external media using , and then press the Enter key. 5 A warning screen appears, stating that you restore your computer. 3 Turn on page 85. The Boot menu...to a custom size partition For more information, see "Recovering the Internal Storage Drive" on page 53. When the initial TOSHIBA screen displays, press the F12 key on your recovery files are using Windows® Backup or another backup program. Be ...
...Toshiba Recovery Wizard opens and the Selecting a Process screen displays, select Recovery of Factory Default Software and then click Next. 7 Select one of media you have created to external media using , and then press the Enter key. 5 A warning screen appears, stating that you restore your computer. 3 Turn on page 85. The Boot menu...to a custom size partition For more information, see "Recovering the Internal Storage Drive" on page 53. When the initial TOSHIBA screen displays, press the F12 key on your recovery files are using Windows® Backup or another backup program. Be ...
User Guide
Page 69
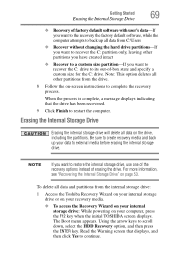
... Storage Drive" on page 53. Be sure to create recovery media and back up all data on the drive, including the partitions. The Boot menu appears. When the process is complete, a message displays indicating that displays, and then click Yes to restart the computer. Read the Warning ...has been recovered. 9 Click Finish to continue. Note: This option deletes all data and partitions from the internal storage drive: 1 Access the Toshiba Recovery Wizard on your internal storage drive or on your recovery media. ❖ To access the Recovery Wizard on your internal storage drive: ...
... Storage Drive" on page 53. Be sure to create recovery media and back up all data on the drive, including the partitions. The Boot menu appears. When the process is complete, a message displays indicating that displays, and then click Yes to restart the computer. Read the Warning ...has been recovered. 9 Click Finish to continue. Note: This option deletes all data and partitions from the internal storage drive: 1 Access the Toshiba Recovery Wizard on your internal storage drive or on your recovery media. ❖ To access the Recovery Wizard on your internal storage drive: ...

User Guide
Page 70
...the Recovery Wizard on your recovery media: Turn off your computer, and then power on the computer. Select Toshiba Recovery Wizard, and then click Next. 2 Select Erase the hard disk and then click Next. 3 Choose...partitions from the hard disk-This option deletes all of your work to your computer. When the initial TOSHIBA screen displays, press F12. Be sure you are using, and then press the Enter key. This process...Using the arrow keys, select the DVD or USB Flash option on the Boot menu, depending on which type of media you have saved your work " on the internal storage drive will be...
...the Recovery Wizard on your recovery media: Turn off your computer, and then power on the computer. Select Toshiba Recovery Wizard, and then click Next. 2 Select Erase the hard disk and then click Next. 3 Choose...partitions from the hard disk-This option deletes all of your work to your computer. When the initial TOSHIBA screen displays, press F12. Be sure you are using, and then press the Enter key. This process...Using the arrow keys, select the DVD or USB Flash option on the Boot menu, depending on which type of media you have saved your work " on the internal storage drive will be...
User Guide
Page 143
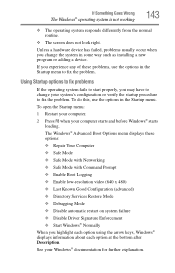
...for further explanation. The Windows® Advanced Boot Options menu displays these problems, use the options in some way such as installing a new program or adding a device. To do this, use the options in the Startup menu to start properly, you highlight each option using... options: ❖ Repair Your Computer ❖ Safe Mode ❖ Safe Mode with Networking ❖ Safe Mode with Command Prompt ❖ Enable Boot Logging ❖ Enable low-resolution video (640 x 480) ❖ Last Known Good Configuration (advanced) ❖ Directory Services Restore Mode ❖...
...for further explanation. The Windows® Advanced Boot Options menu displays these problems, use the options in some way such as installing a new program or adding a device. To do this, use the options in the Startup menu to start properly, you highlight each option using... options: ❖ Repair Your Computer ❖ Safe Mode ❖ Safe Mode with Networking ❖ Safe Mode with Command Prompt ❖ Enable Boot Logging ❖ Enable low-resolution video (640 x 480) ❖ Last Known Good Configuration (advanced) ❖ Directory Services Restore Mode ❖...


