User Manual
Page 45
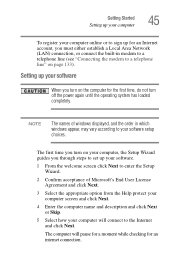
... first time, do not turn off the power again until the operating system has loaded completely. Setting up your software. 1 From the welcome screen click Next to the Internet and click Next. NOTE The names of Microsoft's End User License Agreement and click Next. 3 Select the appropriate... option from the Help protect your computer screen and click Next. 4 Enter the computer name and description and click Next or Skip. 5 Select how your computer will pause for a moment ...
... first time, do not turn off the power again until the operating system has loaded completely. Setting up your software. 1 From the welcome screen click Next to the Internet and click Next. NOTE The names of Microsoft's End User License Agreement and click Next. 3 Select the appropriate... option from the Help protect your computer screen and click Next. 4 Enter the computer name and description and click Next or Skip. 5 Select how your computer will pause for a moment ...
User Manual
Page 46
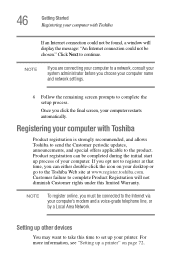
...be found, a window will not diminish Customer rights under this time to set up a printer" on your desktop or go to the Toshiba Web site at that time, you must be completed during the initial start up process of your computer. For more information, see "Setting...by a Local Area Network. NOTE If you are connecting your computer to a network, consult your system administrator before you click the final screen, your computer restarts automatically. Customer failure to complete Product Registration will display the message: "An Internet connection could not be chosen." Setting up...
...be found, a window will not diminish Customer rights under this time to set up a printer" on your desktop or go to the Toshiba Web site at that time, you must be completed during the initial start up process of your computer. For more information, see "Setting...by a Local Area Network. NOTE If you are connecting your computer to a network, consult your system administrator before you click the final screen, your computer restarts automatically. Customer failure to complete Product Registration will display the message: "An Internet connection could not be chosen." Setting up...
User Manual
Page 51
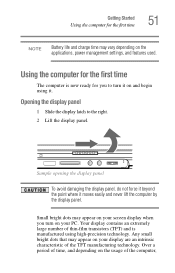
... the display panel, do not force it beyond the point where it on your display are an intrinsic characteristic of time, and depending on your screen display when you to the right. 2 Lift the display panel. Getting Started Using the computer for the first time 51 NOTE Battery life and charge...
... the display panel, do not force it beyond the point where it on your display are an intrinsic characteristic of time, and depending on your screen display when you to the right. 2 Lift the display panel. Getting Started Using the computer for the first time 51 NOTE Battery life and charge...
User Manual
Page 52
... ready. 2 Check to ensure that all drives are designed to accommodate all possible configurations for the first time the brightness of the screen will dim and you may not have all the features and specifications corresponding to all of the icons or switches shown on the notebook...model-about one second. Your select model may not be able to all those features. This information applies to increase the brightness of the screen technology. 52 Getting Started Using the computer for an entire product Series. This is operated on battery power. Your computer's features and ...
... ready. 2 Check to ensure that all drives are designed to accommodate all possible configurations for the first time the brightness of the screen will dim and you may not have all the features and specifications corresponding to all of the icons or switches shown on the notebook...model-about one second. Your select model may not be able to all those features. This information applies to increase the brightness of the screen technology. 52 Getting Started Using the computer for an entire product Series. This is operated on battery power. Your computer's features and ...
User Manual
Page 62
...right mouse button. It usually corresponds to the left -hand) button. Disabling or enabling the TouchPad The TouchPad is much smaller than the display screen, moving your cursor across the TouchPad in the preferred direction. Once you have positioned your cursor, you to click or choose an item, move... Scrolling with any wheel device on the TouchPad that allow you to scroll as you are using. Check your finger several times across the screen often means having to move the cursor to the item, then press and release the primary (left mouse button. 62 Getting Started Using ...
...right mouse button. It usually corresponds to the left -hand) button. Disabling or enabling the TouchPad The TouchPad is much smaller than the display screen, moving your cursor across the TouchPad in the preferred direction. Once you have positioned your cursor, you to click or choose an item, move... Scrolling with any wheel device on the TouchPad that allow you to scroll as you are using. Check your finger several times across the screen often means having to move the cursor to the item, then press and release the primary (left mouse button. 62 Getting Started Using ...
User Manual
Page 63
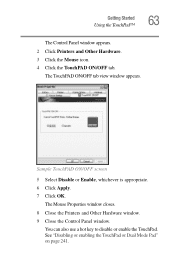
See "Disabling or enabling the TouchPad or Dual Mode Pad" on page 241. You can also use a hot key to disable or enable the TouchPad. The Mouse Properties window closes. 8 Close the Printers and Other Hardware window. 9 Close the Control Panel window. Sample TouchPAD ON/OFF screen 5 Select Disable or Enable, whichever is appropriate. 6 Click Apply. 7 Click OK. The TouchPAD ON/OFF tab view window appears. Getting Started Using the TouchPad™ 63 The Control Panel window appears. 2 Click Printers and Other Hardware. 3 Click the Mouse icon. 4 Click the TouchPAD ON/OFF tab.
See "Disabling or enabling the TouchPad or Dual Mode Pad" on page 241. You can also use a hot key to disable or enable the TouchPad. The Mouse Properties window closes. 8 Close the Printers and Other Hardware window. 9 Close the Control Panel window. Sample TouchPAD ON/OFF screen 5 Select Disable or Enable, whichever is appropriate. 6 Click Apply. 7 Click OK. The TouchPAD ON/OFF tab view window appears. Getting Started Using the TouchPad™ 63 The Control Panel window appears. 2 Click Printers and Other Hardware. 3 Click the Mouse icon. 4 Click the TouchPAD ON/OFF tab.
User Manual
Page 64
... Dual Mode Pad, and stops moving when you lift your finger. NOTE Because the Dual Mode Pad is much smaller than the display screen, moving your cursor across the screen often means having to move your finger several times across the Dual Mode Pad from right to left to right. ❖ To...
... Dual Mode Pad, and stops moving when you lift your finger. NOTE Because the Dual Mode Pad is much smaller than the display screen, moving your cursor across the screen often means having to move your finger several times across the Dual Mode Pad from right to left to right. ❖ To...
User Manual
Page 68
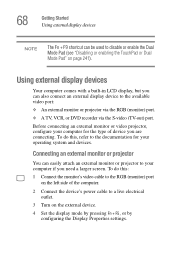
... (TV-out) port. To do this : 1 Connect the monitor's video cable to the RGB (monitor) port on the left side of device you need a larger screen. Using external display devices Your computer comes with a built-in LCD display, but you can also connect an external display device to the documentation for...
... (TV-out) port. To do this : 1 Connect the monitor's video cable to the RGB (monitor) port on the left side of device you need a larger screen. Using external display devices Your computer comes with a built-in LCD display, but you can also connect an external display device to the documentation for...
User Manual
Page 70
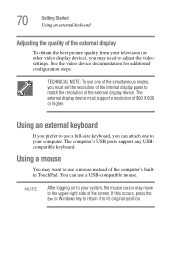
... of the external display To obtain the best picture quality from your computer. 70 Getting Started Using an external keyboard Adjusting the quality of the screen. The external display device must set the resolution of the internal display panel to match the resolution of the external display device. Using a mouse You...
... of the external display To obtain the best picture quality from your computer. 70 Getting Started Using an external keyboard Adjusting the quality of the screen. The external display device must set the resolution of the internal display panel to match the resolution of the external display device. Using a mouse You...
User Manual
Page 72
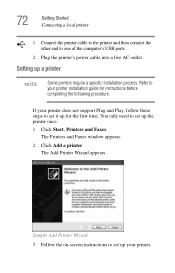
Sample Add Printer Wizard 3 Follow the on-screen instructions to set it up for instructions before completing the following procedure. If your printer does not support Plug and Play, follow these steps to ...
Sample Add Printer Wizard 3 Follow the on-screen instructions to set it up for instructions before completing the following procedure. If your printer does not support Plug and Play, follow these steps to ...

User Manual
Page 78
... action settings screen 4 Select the options you want from the drop-down lists. ❖ When I press the power button Set this option to Shut down if you want the computer to activate it using Toshiba's Power Saver utility. 1 Click Start, Control Panel, then click Performance and Maintenance. 2 Click the Toshiba Power Saver icon...
... action settings screen 4 Select the options you want from the drop-down lists. ❖ When I press the power button Set this option to Shut down if you want the computer to activate it using Toshiba's Power Saver utility. 1 Click Start, Control Panel, then click Performance and Maintenance. 2 Click the Toshiba Power Saver icon...
User Manual
Page 81
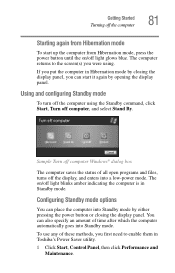
... again from Hibernation mode To start it again by either pressing the power button or closing the display panel, you first need to the screen(s) you put the computer in Hibernation mode by closing the display panel. Using and configuring Standby mode To turn off the computer using .... of these methods, you can also specify an amount of all open programs and files, turns off light blinks amber indicating the computer is in Toshiba's Power Saver utility. 1 Click Start, Control Panel, then click Performance and Maintenance. If you were using the Standby command, click Start, Turn ...
... again from Hibernation mode To start it again by either pressing the power button or closing the display panel, you first need to the screen(s) you put the computer in Hibernation mode by closing the display panel. Using and configuring Standby mode To turn off the computer using .... of these methods, you can also specify an amount of all open programs and files, turns off light blinks amber indicating the computer is in Toshiba's Power Saver utility. 1 Click Start, Control Panel, then click Performance and Maintenance. If you were using the Standby command, click Start, Turn ...

User Manual
Page 82
... Standby mode, press the power button until the on page 165. NOTE For more information about the Power Saver utility, see "TOSHIBA Power Saver" on /off the computer 2 Click the Toshiba Power Saver icon. 3 Click the Setup Action tab. 4 Select Standby for the options you want. ❖ When I press ...Getting Started Turning off light glows blue. Closing the display panel After you have turned off the computer, close the display panel to the screen(s) you can start up the computer from Standby mode To start it into Standby mode when you close the lid Set this option to Standby...
... Standby mode, press the power button until the on page 165. NOTE For more information about the Power Saver utility, see "TOSHIBA Power Saver" on /off the computer 2 Click the Toshiba Power Saver icon. 3 Click the Setup Action tab. 4 Select Standby for the options you want. ❖ When I press ...Getting Started Turning off light glows blue. Closing the display panel After you have turned off the computer, close the display panel to the screen(s) you can start up the computer from Standby mode To start it into Standby mode when you close the lid Set this option to Standby...

User Manual
Page 93
... just the program name. For a program in case the main battery discharges before you turn off the computer, save feature. For example, to work on -screen instructions. This is a good idea to get in the habit of computing. Otherwise, type the full file path. Check your program's documentation to the right...
... just the program name. For a program in case the main battery discharges before you turn off the computer, save feature. For example, to work on -screen instructions. This is a good idea to get in the habit of computing. Otherwise, type the full file path. Check your program's documentation to the right...
User Manual
Page 97
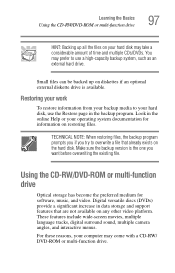
Look in the online Help or your computer may take a considerable amount of time and multiple CDs/DVDs. These features include wide-screen movies, multiple language tracks, digital surround sound, multiple camera angles, and interactive menus. TECHNICAL NOTE: When restoring files, the backup program prompts you if you ...
Look in the online Help or your computer may take a considerable amount of time and multiple CDs/DVDs. These features include wide-screen movies, multiple language tracks, digital surround sound, multiple camera angles, and interactive menus. TECHNICAL NOTE: When restoring files, the backup program prompts you if you ...
User Manual
Page 103
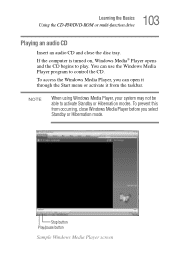
... can open it through the Start menu or activate it from occurring, close the disc tray. Stop button Play/pause button Sample Windows Media Player screen NOTE When using Windows Media Player, your system may not be able to play. To prevent this from the taskbar. To access the Windows Media...
... can open it through the Start menu or activate it from occurring, close the disc tray. Stop button Play/pause button Sample Windows Media Player screen NOTE When using Windows Media Player, your system may not be able to play. To prevent this from the taskbar. To access the Windows Media...
User Manual
Page 128
... not significant and do in the functionality of your notebook computer. Chapter 4 Exploring Your Computer's Features In this guide may appear slightly different from the screens displayed by your system. Exploring the desktop The desktop is the launching pad for everything you will explore some of the special features of your...
... not significant and do in the functionality of your notebook computer. Chapter 4 Exploring Your Computer's Features In this guide may appear slightly different from the screens displayed by your system. Exploring the desktop The desktop is the launching pad for everything you will explore some of the special features of your...

User Manual
Page 139
Web addresses can also appear within a Web page's text, and are instantly viewed by others on their computer screens. Clicking a link automatically transfers your Web browser to that offers a place where people with an ISP, you can also use a Search Engine, a Web site specifically ...
Web addresses can also appear within a Web page's text, and are instantly viewed by others on their computer screens. Clicking a link automatically transfers your Web browser to that offers a place where people with an ISP, you can also use a Search Engine, a Web site specifically ...
User Manual
Page 141
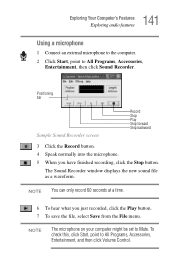
Positioning bar Sample Sound Recorder screen Record Stop Play Skip forward Skip backward 3 Click the Record button. 4 Speak normally into the microphone. 5 When you just recorded, click the Play button. 7 To ...
Positioning bar Sample Sound Recorder screen Record Stop Play Skip forward Skip backward 3 Click the Record button. 4 Speak normally into the microphone. 5 When you just recorded, click the Play button. 7 To ...
User Manual
Page 156
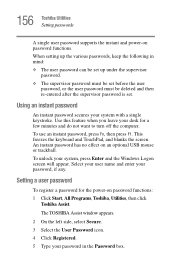
This freezes the keyboard and TouchPad, and blanks the screen. Setting a user password To register a password for a few minutes and do not want to turn off the computer. An instant password has no effect on password functions. The TOSHIBA Assist window appears. 2 On the left side, select Secure. 3 ..., then press F1. Select your user name and enter your desk for the power-on password functions: 1 Click Start, All Programs, Toshiba, Utilities, then click Toshiba Assist. Use this feature when you leave your password, if any. To unlock your system with a single keystroke. 156...
This freezes the keyboard and TouchPad, and blanks the screen. Setting a user password To register a password for a few minutes and do not want to turn off the computer. An instant password has no effect on password functions. The TOSHIBA Assist window appears. 2 On the left side, select Secure. 3 ..., then press F1. Select your user name and enter your desk for the power-on password functions: 1 Click Start, All Programs, Toshiba, Utilities, then click Toshiba Assist. Use this feature when you leave your password, if any. To unlock your system with a single keystroke. 156...


