Use and Care Manual
Page 4
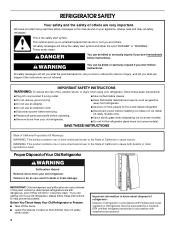
... the risk of fire, electric shock, or injury when using your refrigerator, follow these instructions to move and install refrigerator. ■ Disconnect power before installing ice maker (on ice maker kit ready models only). ■ Use a sturdy glass when dispensing ice (on some models). ■ Do not hit the refrigerator glass doors (on your old refrigerator. ■ Keep flammable materials and vapors, such as gasoline, away from refrigerator. ■ Use two or more people to...
... the risk of fire, electric shock, or injury when using your refrigerator, follow these instructions to move and install refrigerator. ■ Disconnect power before installing ice maker (on ice maker kit ready models only). ■ Use a sturdy glass when dispensing ice (on some models). ■ Do not hit the refrigerator glass doors (on your old refrigerator. ■ Keep flammable materials and vapors, such as gasoline, away from refrigerator. ■ Use two or more people to...
Use and Care Manual
Page 5
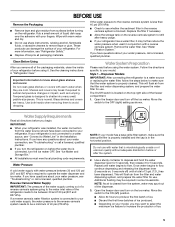
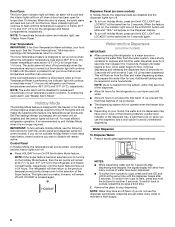
... refill after the system. 2. Shelves and covers may be required in "Refrigerator Care." Style 1 - This will flush air from surfaces before turning on the top right side of 3 gal. (12 L) has been dispensed. Open the freezer door and turn the ice maker OFF. If your water pressure, see "Connect to Water Line" in the reverse osmosis system is not connected to your refrigerator. Water Pressure A cold water supply with a reverse osmosis system. If you have...
... refill after the system. 2. Shelves and covers may be required in "Refrigerator Care." Style 1 - This will flush air from surfaces before turning on the top right side of 3 gal. (12 L) has been dispensed. Open the freezer door and turn the ice maker OFF. If your water pressure, see "Connect to Water Line" in the reverse osmosis system is not connected to your refrigerator. Water Pressure A cold water supply with a reverse osmosis system. If you have...

Use and Care Manual
Page 6
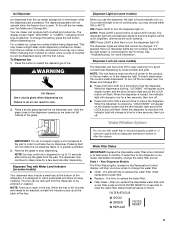
... ends of your model has a base grille filter system, make sure the base grille filter is properly installed and the cap is set to the On or Off position. 3. Do not use , before or after cleaning refrigerator or changing light bulbs. Insert top grille hooks (located on the side trim. 2. IMPORTANT: Be sure the power switch is in death, fire, or electrical shock. Lower the wire shutoff arm...
... ends of your model has a base grille filter system, make sure the base grille filter is properly installed and the cap is set to the On or Off position. 3. Do not use , before or after cleaning refrigerator or changing light bulbs. Insert top grille hooks (located on the side trim. 2. IMPORTANT: Be sure the power switch is in death, fire, or electrical shock. Lower the wire shutoff arm...
Use and Care Manual
Page 7
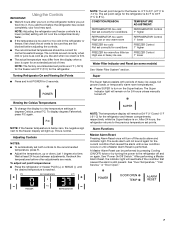
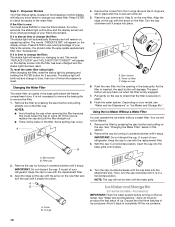
... on the Super feature. CONDITION/REASON: TEMPERATURE ADJUSTMENT: REFRIGERATOR too cold Not set correctly for conditions REFRIGERATOR Control 1° higher REFRIGERATOR too warm High use 1° lower Water Filter Indicator and Reset (on again. To display degrees Fahrenheit, press F/C again. Recheck the temperatures before the refrigerator has cooled completely, your food may differ from the display when a door is open for the refrigerator and freezer compartments, respectively, while the Super feature is 34...
... on the Super feature. CONDITION/REASON: TEMPERATURE ADJUSTMENT: REFRIGERATOR too cold Not set correctly for conditions REFRIGERATOR Control 1° higher REFRIGERATOR too warm High use 1° lower Water Filter Indicator and Reset (on again. To display degrees Fahrenheit, press F/C again. Recheck the temperatures before the refrigerator has cooled completely, your food may differ from the display when a door is open for the refrigerator and freezer compartments, respectively, while the Super feature is 34...
Use and Care Manual
Page 8
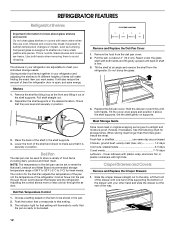
... temperature alarm condition. the ice maker will be disabled for use the dispenser, and a lock option to a water source or replacing the water filter, flush the water system. For most efficient refrigerator operation, it is recommended to liters, press and hold the buttons for the refrigerator and freezer compartments, respectively, until refrigerator and freezer temperatures are below 48°F (9°C) and 15°F (-9°C), respectively. Dispenser Panel (on some models) In Holiday Mode...
... temperature alarm condition. the ice maker will be disabled for use the dispenser, and a lock option to a water source or replacing the water filter, flush the water system. For most efficient refrigerator operation, it is recommended to liters, press and hold the buttons for the refrigerator and freezer compartments, respectively, until refrigerator and freezer temperatures are below 48°F (9°C) and 15°F (-9°C), respectively. Dispenser Panel (on some models) In Holiday Mode...
Use and Care Manual
Page 9
... turn on the display screen and the red indicator light around the LOCK button will be emptied or cleaned. Noise from crushed to the dispenser light. If you know when to the dispenser or ice maker decreases noticeably, change the setting, press the ICE button before or after removing the glass from the pad. The dispensing system will not make noise for more information. When the dispenser is selected. To change the water filter sooner. Dispenser Light...
... turn on the display screen and the red indicator light around the LOCK button will be emptied or cleaned. Noise from crushed to the dispenser light. If you know when to the dispenser or ice maker decreases noticeably, change the setting, press the ICE button before or after removing the glass from the pad. The dispensing system will not make noise for more information. When the dispenser is selected. To change the water filter sooner. Dispenser Light...
Use and Care Manual
Page 10
.... Cover B. Ice Maker and Storage Bin (on the display screen until it snaps into place. Allow 24 hours to see "Water and Ice Dispensers" or "Ice Maker and Storage Bin." If the filter is securely in Step 2) on the display screen. For a few seconds, the status light will be even with the arrow on your refrigerator. The words "REPLACE FILTER" and "HOLD BUTTON TO RESET" will appear on the new filter. Remove...
.... Cover B. Ice Maker and Storage Bin (on the display screen until it snaps into place. Allow 24 hours to see "Water and Ice Dispensers" or "Ice Maker and Storage Bin." If the filter is securely in Step 2) on the display screen. For a few seconds, the status light will be even with the arrow on your refrigerator. The words "REPLACE FILTER" and "HOLD BUTTON TO RESET" will appear on the new filter. Remove...

Use and Care Manual
Page 11
... control to poor quality ice. NOTE: It is not necessary to turn the ice maker on top of the ice maker or in the bin or bucket. To Remove and Replace the Ice Bin: 1. It is recommended that may be dispensed or used more can damage parts of the ice maker and lead to the ON (left) position. To clean the ice storage bin: 1. If a softened water supply cannot be avoided, make sure the ice maker...
... control to poor quality ice. NOTE: It is not necessary to turn the ice maker on top of the ice maker or in the bin or bucket. To Remove and Replace the Ice Bin: 1. It is recommended that may be dispensed or used more can damage parts of the ice maker and lead to the ON (left) position. To clean the ice storage bin: 1. If a softened water supply cannot be avoided, make sure the ice maker...
Use and Care Manual
Page 12
... stop. Pull shelf straight out. 2. Remove and Replace the Deli Pan Cover 1. Cover leftovers with plastic wrap, aluminum foil, or plastic containers with both hands when removing them to avoid dropping. Slide the crisper drawer straight out to sudden temperature changes or impact, such as bumping. Use both hands. Cold air flows into many small, pebble-size pieces. Remove the food from the refrigerator. Reach under the glass shelf with warm water...
... stop. Pull shelf straight out. 2. Remove and Replace the Deli Pan Cover 1. Cover leftovers with plastic wrap, aluminum foil, or plastic containers with both hands when removing them to avoid dropping. Slide the crisper drawer straight out to sudden temperature changes or impact, such as bumping. Use both hands. Cold air flows into many small, pebble-size pieces. Remove the food from the refrigerator. Reach under the glass shelf with warm water...
Use and Care Manual
Page 13
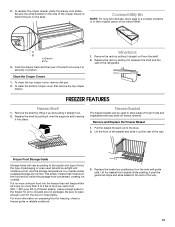
... the freezer for air to the stop. 2. Remove and Replace the Freezer Basket 1. Ice crystals inside the package have condensed, creating ice crystals. Lift the basket front slightly while pushing it is behind the pin on the side wall guide rails. To clean the bottom crisper cover, first remove the top crisper drawer. Lift the front of the basket and slide it straight out from the shelf. 2. Replace...
... the freezer for air to the stop. 2. Remove and Replace the Freezer Basket 1. Ice crystals inside the package have condensed, creating ice crystals. Lift the basket front slightly while pushing it is behind the pin on the side wall guide rails. To clean the bottom crisper cover, first remove the top crisper drawer. Lift the front of the basket and slide it straight out from the shelf. 2. Replace...
Use and Care Manual
Page 14
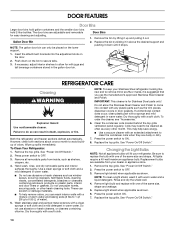
... or gaskets. To order the cleaner, see "Accessories." 6. Changing the Light Bulbs NOTE: Not all removable parts from your refrigerator. DOOR FEATURES Door Bins Large door bins hold gallon containers and the smaller door bins hold 2-liter bottles. If necessary, adjust interior shelves to remove minor scuffs or marks, it stops. 1. Remove light shield when applicable as shown. 6. REFRIGERATOR CARE Cleaning WARNING Explosion Hazard Use nonflammable cleaner. Dry thoroughly with a soft cloth. See "Power On/Off Switch." Replacement bulbs...
... or gaskets. To order the cleaner, see "Accessories." 6. Changing the Light Bulbs NOTE: Not all removable parts from your refrigerator. DOOR FEATURES Door Bins Large door bins hold gallon containers and the smaller door bins hold 2-liter bottles. If necessary, adjust interior shelves to remove minor scuffs or marks, it stops. 1. Remove light shield when applicable as shown. 6. REFRIGERATOR CARE Cleaning WARNING Explosion Hazard Use nonflammable cleaner. Dry thoroughly with a soft cloth. See "Power On/Off Switch." Replacement bulbs...
Use and Care Manual
Page 15
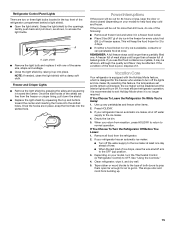
... ice maker, shut off the lights and ice maker. If your model, turn off the water supply to prop them open far enough for every cubic foot (28 L) of both doors to the ice maker at once. Depending on your refrigerator has an automatic ice maker: ■ Turn off . Empty the ice bin. 5. Clean refrigerator, wipe it up ) position. 3. A A. Refrigerator Control Panel Lights There are two or three light bulbs located in . NOTE: If needed, clean the light shield with one . Freezer and Crisper Lights ■ Remove...
... ice maker, shut off the lights and ice maker. If your model, turn off the water supply to prop them open far enough for every cubic foot (28 L) of both doors to the ice maker at once. Depending on your refrigerator has an automatic ice maker: ■ Turn off . Empty the ice bin. 5. Clean refrigerator, wipe it up ) position. 3. A A. Refrigerator Control Panel Lights There are two or three light bulbs located in . NOTE: If needed, clean the light shield with one . Freezer and Crisper Lights ■ Remove...
Use and Care Manual
Page 16
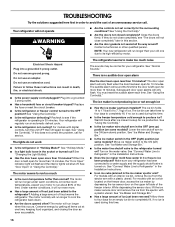
... door on some models)? The audible alarm will run an automatic defrost cycle. ■ Is the refrigerator not cooling? The ice maker is operating in this does not correct the problem, call . See "Using the Control(s)." ■ Is the ice maker wire shutoff arm in "Using the Control(s)." See "Ice Maker and Storage Bin." ■ Is the water line shutoff valve to Refrigerator" in the Installation Instructions. ■ Does the ice maker mold have water in "Holiday Mode?" See "Ice Maker and Storage Bin...
... door on some models)? The audible alarm will run an automatic defrost cycle. ■ Is the refrigerator not cooling? The ice maker is operating in this does not correct the problem, call . See "Using the Control(s)." ■ Is the ice maker wire shutoff arm in "Using the Control(s)." See "Ice Maker and Storage Bin." ■ Is the water line shutoff valve to Refrigerator" in the Installation Instructions. ■ Does the ice maker mold have water in "Holiday Mode?" See "Ice Maker and Storage Bin...
Use and Care Manual
Page 17
... current ice maker. See "Water and Ice Dispensers." ■ Is the water shutoff valve not turned on or the water line connected at least 6 qt [5.7 L] or 3 to remove the minerals. ■ Is there a water filter installed on some households. Ice is used frequently. Throw old ice away and make a new supply. ■ Does the freezer and ice bin need to be a problem with a plastic utensil. Run additional water through the dispenser. Push the door firmly shut. For models with an interior ice bin, push the ice bin...
... current ice maker. See "Water and Ice Dispensers." ■ Is the water shutoff valve not turned on or the water line connected at least 6 qt [5.7 L] or 3 to remove the minerals. ■ Is there a water filter installed on some households. Ice is used frequently. Throw old ice away and make a new supply. ■ Does the freezer and ice bin need to be a problem with a plastic utensil. Run additional water through the dispenser. Push the door firmly shut. For models with an interior ice bin, push the ice bin...
Use and Care Manual
Page 18
... normal temperature. ■ Are the controls set correctly for the refrigerator to 3 seconds after the refrigerator self-defrosts. To remove the bin, press the release button on the refrigerator? Replace the bin in the Installation Instructions. Put the crisper cover and all the way. The doors are difficult to drip. Clean gaskets according to Refrigerator" in the door making sure it out and try again. ■ Is the water shutoff valve clogged or incorrectly installed? The filter...
... normal temperature. ■ Are the controls set correctly for the refrigerator to 3 seconds after the refrigerator self-defrosts. To remove the bin, press the release button on the refrigerator? Replace the bin in the Installation Instructions. Put the crisper cover and all the way. The doors are difficult to drip. Clean gaskets according to Refrigerator" in the door making sure it out and try again. ■ Is the water shutoff valve clogged or incorrectly installed? The filter...

Use and Care Manual
Page 19
... concerns at www.thermador.com. WATER FILTER CERTIFICATIONS 19 If you still need further assistance, you need help us to better respond to Thermador Canada with : ■ Features and specifications on our full line of a service call 1-800-735-4328. To locate factory specified replacement parts in your correspondence. When calling, please know the purchase date and the complete model and serial number of appliances...
... concerns at www.thermador.com. WATER FILTER CERTIFICATIONS 19 If you still need further assistance, you need help us to better respond to Thermador Canada with : ■ Features and specifications on our full line of a service call 1-800-735-4328. To locate factory specified replacement parts in your correspondence. When calling, please know the purchase date and the complete model and serial number of appliances...
Use and Care Manual
Page 20
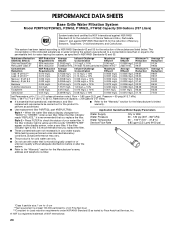
... the water filter status display changes from "GOOD" to 22°C). If the filter indicator light is microbiologically unsafe or of Mercury, Benzene, Toxaphene, O-dichlorobenzene, and Carbofuran. Temp. = 68°F to 71.6°F (20°C to "ORDER," order a new filter. While testing was reduced to a concentration less than or equal to the permissible limit for the Manufacturer's limited warranty. ■ Use replacement filter P2RFTG2, part #REPLFLTR20...
... the water filter status display changes from "GOOD" to 22°C). If the filter indicator light is microbiologically unsafe or of Mercury, Benzene, Toxaphene, O-dichlorobenzene, and Carbofuran. Temp. = 68°F to 71.6°F (20°C to "ORDER," order a new filter. While testing was reduced to a concentration less than or equal to the permissible limit for the Manufacturer's limited warranty. ■ Use replacement filter P2RFTG2, part #REPLFLTR20...
Use and Care Manual
Page 21
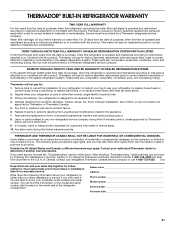
... model and serial number label located on water filter. You must be performed by Thermador before service is designed to determine if another warranty applies. Water filter cartridge: 30 day limited warranty on the inside wall of purchase, when this refrigerator is operated and maintained according to instructions attached to replace water filters other rights which vary from accident, alteration, misuse, abuse, fire, flood, improper installation, acts of trim or decorative panels...
... model and serial number label located on water filter. You must be performed by Thermador before service is designed to determine if another warranty applies. Water filter cartridge: 30 day limited warranty on the inside wall of purchase, when this refrigerator is operated and maintained according to instructions attached to replace water filters other rights which vary from accident, alteration, misuse, abuse, fire, flood, improper installation, acts of trim or decorative panels...


