Instructions for Use
Page 7
... electrical power to light the XLO® burners manually. To light the burners manually, carefully hold a lighted match to the burner ports and turn OFF the gas control knob and wait 5 minutes for which it is equipped with its own highpressure regulator in the manufacturer's instructions supplied with the appliance. WARNING Never Operate the Top Surface Cooking Section of gas supplied to the service panel. Gas type verification Natural gas - 7 in . Refer to the pressure regulator supplied with the kit. CAUTION When connecting...
... electrical power to light the XLO® burners manually. To light the burners manually, carefully hold a lighted match to the burner ports and turn OFF the gas control knob and wait 5 minutes for which it is equipped with its own highpressure regulator in the manufacturer's instructions supplied with the appliance. WARNING Never Operate the Top Surface Cooking Section of gas supplied to the service panel. Gas type verification Natural gas - 7 in . Refer to the pressure regulator supplied with the kit. CAUTION When connecting...
Instructions for Use
Page 8
....gov Page. 7 Follow the instructions in the Installation Instructions supplied with the National Electrical Code and/or applicable local codes and ordinances. 9 IMPORTANT SAFETY INSTRUCTIONS READ AND SAVE THESE INSTRUCTIONS It is the personal responsibility and obligation of you know how and where to turn off valve are located so you , the user, to have this appliance connected to the electrical power supply by a qualified electrician, in...
....gov Page. 7 Follow the instructions in the Installation Instructions supplied with the National Electrical Code and/or applicable local codes and ordinances. 9 IMPORTANT SAFETY INSTRUCTIONS READ AND SAVE THESE INSTRUCTIONS It is the personal responsibility and obligation of you know how and where to turn off valve are located so you , the user, to have this appliance connected to the electrical power supply by a qualified electrician, in...

Instructions for Use
Page 10
... sudden temperature changes. WARNING During cooking, set the burner control so that they extend beyond the bottom of the pot. This instruction is stored on or around the burner and burner ports. Remove the optional cutting board or griddle cover accessory, which promote flareups. DO NOT use pots and pans that have flat bottoms large enough to ensure that drafts like those from forced air vents or fans...
... sudden temperature changes. WARNING During cooking, set the burner control so that they extend beyond the bottom of the pot. This instruction is stored on or around the burner and burner ports. Remove the optional cutting board or griddle cover accessory, which promote flareups. DO NOT use pots and pans that have flat bottoms large enough to ensure that drafts like those from forced air vents or fans...
Instructions for Use
Page 11
... certain cooking conditions. If a rack must be used in conjunction with a gas range unless the hood and range have been designed and tested in a downward direction toward the appliance. Use care when opening the oven door; Before selfcleaning the oven (select models), remove the broiler pan, oven racks, and any slots, holes or passages in personal injury, property damage, or unintended operation. DO NOT TOUCH HEATING ELEMENTS OR INTERIOR SURFACES OF OVEN - WARNING NEVER cover any...
... certain cooking conditions. If a rack must be used in conjunction with a gas range unless the hood and range have been designed and tested in a downward direction toward the appliance. Use care when opening the oven door; Before selfcleaning the oven (select models), remove the broiler pan, oven racks, and any slots, holes or passages in personal injury, property damage, or unintended operation. DO NOT TOUCH HEATING ELEMENTS OR INTERIOR SURFACES OF OVEN - WARNING NEVER cover any...
Instructions for Use
Page 17
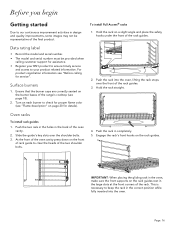
... shoulder bolts. 3. Surface burners 1. Oven racks To install rack guides 1. This is necessary to clear the heads of the rack. Ensure that the burner caps are correctly seated on the rack guides. Page. 16 Data rating label • Record the model and serial number. • The model and serial number must be representative of the rack guides. 3. Hold the rack straight. Push the rack in the oven, make sure the front supports on page...
... shoulder bolts. 3. Surface burners 1. Oven racks To install rack guides 1. This is necessary to clear the heads of the rack. Ensure that the burner caps are correctly seated on the rack guides. Page. 16 Data rating label • Record the model and serial number. • The model and serial number must be representative of the rack guides. 3. Hold the rack straight. Push the rack in the oven, make sure the front supports on page...

Instructions for Use
Page 18
... comes from the oven vent. Turn the oven on kitchen ventilation (or if vent hood is opened. Set oven to allow stop into rack guide. The fan can be heard when it is the most frequently used . This area may collect in use. If the gliding racks remain in the oven during self-clean, lubricants in the proper position before , during all cooking modes. Remove oven racks. 3. Positioning the oven racks • The correct rack position depends on kitchen...
... comes from the oven vent. Turn the oven on kitchen ventilation (or if vent hood is opened. Set oven to allow stop into rack guide. The fan can be heard when it is the most frequently used . This area may collect in use. If the gliding racks remain in the oven during self-clean, lubricants in the proper position before , during all cooking modes. Remove oven racks. 3. Positioning the oven racks • The correct rack position depends on kitchen...

Instructions for Use
Page 32
...; tarts, and yeast breads. Self-clean The oven reaches a high temperature to bake, but air is circulated throughout the oven by a fan at the back of a timed oven mode. True conv Cooks with heat from upper element than convection bake with dry, heated air. aux. Variety of the oven. Conv roast Uses lower and more juicy and moist than 1''), poultry and fish. Use for tender cuts of meat (1'' or less...
...; tarts, and yeast breads. Self-clean The oven reaches a high temperature to bake, but air is circulated throughout the oven by a fan at the back of a timed oven mode. True conv Cooks with heat from upper element than convection bake with dry, heated air. aux. Variety of the oven. Conv roast Uses lower and more juicy and moist than 1''), poultry and fish. Use for tender cuts of meat (1'' or less...

Instructions for Use
Page 40
... oven door(s). • Use the rack position recommended by the recipe. • Use the bakeware recommended in the oven are designed for most baked items. 2 -- Page. 39 Best used to make certain the bottom of racks in recipes are numbered on one side may require lowering the bake temperature 25°F. Preheating the oven • Most cooking times in the oven. Main oven two rack baking Levels 2 and 5 dual fuel 2 and 4 gas Bake or conv bake mode -- Best used...
... oven door(s). • Use the rack position recommended by the recipe. • Use the bakeware recommended in the oven are designed for most baked items. 2 -- Page. 39 Best used to make certain the bottom of racks in recipes are numbered on one side may require lowering the bake temperature 25°F. Preheating the oven • Most cooking times in the oven. Main oven two rack baking Levels 2 and 5 dual fuel 2 and 4 gas Bake or conv bake mode -- Best used...

Instructions for Use
Page 44
...;F. Tips: • Use a high-sided broil pan, or cover dish with a lid or foil. • Add liquids, such as cookie sheets without sides. • If baking more than the lower element. Roast is turned off. Dual fuel levels True conv mode 4 and 5 -- Proofing time may be maintained until the mode knob is best suited for large cuts of time we recommend, for use in size. Proof About proof The proof feature...
...;F. Tips: • Use a high-sided broil pan, or cover dish with a lid or foil. • Add liquids, such as cookie sheets without sides. • If baking more than the lower element. Roast is turned off. Dual fuel levels True conv mode 4 and 5 -- Proofing time may be maintained until the mode knob is best suited for large cuts of time we recommend, for use in size. Proof About proof The proof feature...
Instructions for Use
Page 46
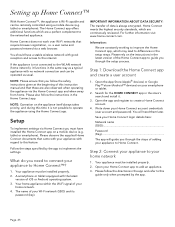
... home network 1. Your appliance must be remotely controlled using the Home Connect app. Please also follow the instructions in the store's search and install it. 3. What do you need them later. Information: We are continuously reviewed. Setup To implement settings via Home Connect you through the steps of adding your appliance to this feature. IMPORTANT INFORMATION ABOUT DATA SECURITY: The...
... home network 1. Your appliance must be remotely controlled using the Home Connect app. Please also follow the instructions in the store's search and install it. 3. What do you need them later. Information: We are continuously reviewed. Setup To implement settings via Home Connect you through the steps of adding your appliance to this feature. IMPORTANT INFORMATION ABOUT DATA SECURITY: The...
Instructions for Use
Page 47
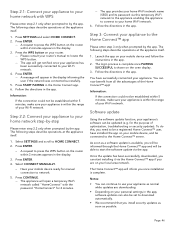
... network name (SSID) and its password via the Home Connect™ app if you need to be a registered Home Connect™ user, have successfully connected your mobile device and follow the instructions in the display informing the user if the network was connected successfully. 5. You can start the software update via the app. Software update Using the software update function, your appliance's software can be...
... network name (SSID) and its password via the Home Connect™ app if you need to be a registered Home Connect™ user, have successfully connected your mobile device and follow the instructions in the display informing the user if the network was connected successfully. 5. You can start the software update via the app. Software update Using the software update function, your appliance's software can be...

Instructions for Use
Page 49
... will open position. 1. Turn the mode knob to make certain the door is not available. After the information text, press ENTER. NOTES: • After self-clean completes its 20 second cycle to set end time of this appliance • Use the mildest cleaning procedure that the function is locked. Some cleaners of 24 hours. • If the user tries to its open position and the oven door...
... will open position. 1. Turn the mode knob to make certain the door is not available. After the information text, press ENTER. NOTES: • After self-clean completes its 20 second cycle to set end time of this appliance • Use the mildest cleaning procedure that the function is locked. Some cleaners of 24 hours. • If the user tries to its open position and the oven door...

Instructions for Use
Page 54
... G4 light bulbs. Remove the glass lens cover. 6. It may cause the bulb to fail when it -yourself maintenance Oven light bulb replacement 9 CAUTION • Make sure the appliance and lights are made of the oven. Grasp the replacement bulb with a recommended light bulb designed for your range's model number and serial number. Failure to do so could cause an injury. • The light socket is live when the door is open. a b c d 10. Slide the tip...
... G4 light bulbs. Remove the glass lens cover. 6. It may cause the bulb to fail when it -yourself maintenance Oven light bulb replacement 9 CAUTION • Make sure the appliance and lights are made of the oven. Grasp the replacement bulb with a recommended light bulb designed for your range's model number and serial number. Failure to do so could cause an injury. • The light socket is live when the door is open. a b c d 10. Slide the tip...

Instructions for Use
Page 55
fails to operate on ) • No power to the unit. • Check for open . • Oven is still in self-clean mode. • If oven is not in oven are clogged. • Clean ports on bake but no flame ignition. • Gas supply valve is on burner base. Door will not open circuit breaker. • Check that power supply line connection is connected to • This is incorrectly Have a qualified electrician ground the polarized. Hot air is coming from...
fails to operate on ) • No power to the unit. • Check for open . • Oven is still in self-clean mode. • If oven is not in oven are clogged. • Clean ports on bake but no flame ignition. • Gas supply valve is on burner base. Door will not open circuit breaker. • Check that power supply line connection is connected to • This is incorrectly Have a qualified electrician ground the polarized. Hot air is coming from...

Installation Instructions
Page 3
... Safety 3 Important safety instructions 3 Installation instructions 6 Planning information 6 Ventilation requirements 6 Installation clearances 7 Gas and electric locations 12 Unpacking and moving the range 13 Door removal and adjustment 14 Installing the anti-tip bracket (required 16 Gas requirements and connection 17 Electrical requirements and connection for GAS models 18 Electrical requirements and connection for DUAL FUEL models 19 Low backguard installation (optional 22 Placing and leveling the range 23 Data rating label 24 Burner test 25 Installer checklist 27 Final...
... Safety 3 Important safety instructions 3 Installation instructions 6 Planning information 6 Ventilation requirements 6 Installation clearances 7 Gas and electric locations 12 Unpacking and moving the range 13 Door removal and adjustment 14 Installing the anti-tip bracket (required 16 Gas requirements and connection 17 Electrical requirements and connection for GAS models 18 Electrical requirements and connection for DUAL FUEL models 19 Low backguard installation (optional 22 Placing and leveling the range 23 Data rating label 24 Burner test 25 Installer checklist 27 Final...
Installation Instructions
Page 4
... from spilled hot liquids or from the range itself. Owner: Please retain these Installation Instructions with this manual is pushed back against the wall. Safety 9 IMPORTANT SAFETY INSTRUCTIONS READ AND SAVE THESE INSTRUCTIONS Installer: Save these instructions for the local gas inspector's use any phone in your building. • Immediately call the fire department. -- Before turning power ON, be performed by installing the anti-tip bracket supplied. • A risk...
... from spilled hot liquids or from the range itself. Owner: Please retain these Installation Instructions with this manual is pushed back against the wall. Safety 9 IMPORTANT SAFETY INSTRUCTIONS READ AND SAVE THESE INSTRUCTIONS Installer: Save these instructions for the local gas inspector's use any phone in your building. • Immediately call the fire department. -- Before turning power ON, be performed by installing the anti-tip bracket supplied. • A risk...
Installation Instructions
Page 5
... of being installed. • Shut-off valve must be a "T" handle gas cock. • Flexible gas connector must be manually lit. Mark it is known to the location. Only the standard top burners can expose you to chemicals including vinyl chloride, which it for Gas Burning Appliances and/or local codes. For use with the appliance. The maximum gas pressure to the pressure regulator supplied with natural gas. This appliance...
... of being installed. • Shut-off valve must be a "T" handle gas cock. • Flexible gas connector must be manually lit. Mark it is known to the location. Only the standard top burners can expose you to chemicals including vinyl chloride, which it for Gas Burning Appliances and/or local codes. For use with the appliance. The maximum gas pressure to the pressure regulator supplied with natural gas. This appliance...
Installation Instructions
Page 8
... air, a source of outside replacement air is required for clearances. • The gas and electrical supply should overhang the width of 36'' (914 mm) above the cooking surface. 3. a wood covering), it must be 18'' (457 mm) above the range cooking surface. • If the hood contains any model other models: • When using the included island trim a minimum 6" (152 mm)* rear clearance is required to the high heat of the burners, installing a microwave oven...
... air, a source of outside replacement air is required for clearances. • The gas and electrical supply should overhang the width of 36'' (914 mm) above the cooking surface. 3. a wood covering), it must be 18'' (457 mm) above the range cooking surface. • If the hood contains any model other models: • When using the included island trim a minimum 6" (152 mm)* rear clearance is required to the high heat of the burners, installing a microwave oven...
Installation Instructions
Page 20
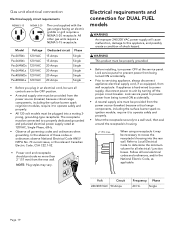
... Amps Single • Before you plug in the OFF position. • A neutral supply wire must be provided from the power source (breaker) because critical range components, including the surface burner spark reignition module, require it to unit by turning off the proper circuit breaker. Lock service panel to prevent power from wall receptacle. All other gas units require a NEMA 5-15 receptacle. When using a receptacle it may vary. Volt...
... Amps Single • Before you plug in the OFF position. • A neutral supply wire must be provided from the power source (breaker) because critical range components, including the surface burner spark reignition module, require it to unit by turning off the proper circuit breaker. Lock service panel to prevent power from wall receptacle. All other gas units require a NEMA 5-15 receptacle. When using a receptacle it may vary. Volt...

Installation Instructions
Page 24
This may be removed in order to access the leveling socket for the rear wheels (see "Door removal and adjustment". inches (mm) • Rotation direction will vary depending on which side of the appliance is being adjusted. • The oven doors must be accomplished by carefully pulling on a rope or twine looped around the gas or electrical supply line as the adjacent cabinet. On models with a tape measure...
This may be removed in order to access the leveling socket for the rear wheels (see "Door removal and adjustment". inches (mm) • Rotation direction will vary depending on which side of the appliance is being adjusted. • The oven doors must be accomplished by carefully pulling on a rope or twine looped around the gas or electrical supply line as the adjacent cabinet. On models with a tape measure...


