
Quick Installation Guide
Page 3
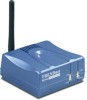
Before You Start Package Content TEW-P1UG Utility CD-ROM Quick Installation Guide 1 x 2dbi Detachable Antenna AC Power Adapter (5V DC, 2.5A) System Requirements CD-ROM Drive CPU: Intel Pentium 100MHz or above Memory: 8MB or above Windows 2003/XP/2000/ME/98SE, Unixware, Linux, Mac OS X Application Notebook with Wireless PC Card (TEW-421PC) 54Mbps 802.11g Wireless 1-Port USB 2.0 Print Server (TEW-P1UG) USB Printer Workstation with Wireless PCI Adapter (TEW-423PI) 54Mbps Wireless 54Mbps 802.11g Wireless Firewall Router (TEW-432BRP) 1 English Internet Cable/DSL Modem 1.
Before You Start Package Content TEW-P1UG Utility CD-ROM Quick Installation Guide 1 x 2dbi Detachable Antenna AC Power Adapter (5V DC, 2.5A) System Requirements CD-ROM Drive CPU: Intel Pentium 100MHz or above Memory: 8MB or above Windows 2003/XP/2000/ME/98SE, Unixware, Linux, Mac OS X Application Notebook with Wireless PC Card (TEW-421PC) 54Mbps 802.11g Wireless 1-Port USB 2.0 Print Server (TEW-P1UG) USB Printer Workstation with Wireless PCI Adapter (TEW-423PI) 54Mbps Wireless 54Mbps 802.11g Wireless Firewall Router (TEW-432BRP) 1 English Internet Cable/DSL Modem 1.

Quick Installation Guide
Page 5
... an IP address of 192.168.0.1. Follow the InstallShield Wizard instructions. For Windows Users 1. Click Start > All Programs > PSUtility, and then click PS-Utility. 3 English Click Finish. 3. Insert the Utility CD-ROM into your computers IP address to access the Print Server's Web Utility. For Mac users, change your computer's CD-ROM Drive...
... an IP address of 192.168.0.1. Follow the InstallShield Wizard instructions. For Windows Users 1. Click Start > All Programs > PSUtility, and then click PS-Utility. 3 English Click Finish. 3. Insert the Utility CD-ROM into your computers IP address to access the Print Server's Web Utility. For Mac users, change your computer's CD-ROM Drive...

Quick Installation Guide
Page 8
Add the Network Printer to this printer and type in the Server Name and the Printer Name in the following format: \\server_name\printer_name Click Next. 6 English Select Network Printer and then click Next. 4. Go into the Control Panel and double-click the Printers and Faxes icon. 2. Select Connect to your PC Note: For TCP/IP Printing instructions, please consult the User's Guide included on the Utility CD-ROM. Windows 2000/XP 1. Click Add Printer and then click Next. 3. 4.
Add the Network Printer to this printer and type in the Server Name and the Printer Name in the following format: \\server_name\printer_name Click Next. 6 English Select Network Printer and then click Next. 4. Go into the Control Panel and double-click the Printers and Faxes icon. 2. Select Connect to your PC Note: For TCP/IP Printing instructions, please consult the User's Guide included on the Utility CD-ROM. Windows 2000/XP 1. Click Add Printer and then click Next. 3. 4.

Windows Setup Guide
Page 1
... to http://www.trendnet.com/downloads/ to the LAN port of the Print Server 4. Connect a RJ-45 Network cable from a switch/router to download the Windows 7 Utility. Note: The IP Address must match the network segment of the Print Server and then click OK. Right click on the Print Server 7. Connect the detachable antenna (for TEW-P1UG only) 5. Save the...
... to http://www.trendnet.com/downloads/ to the LAN port of the Print Server 4. Connect a RJ-45 Network cable from a switch/router to download the Windows 7 Utility. Note: The IP Address must match the network segment of the Print Server and then click OK. Right click on the Print Server 7. Connect the detachable antenna (for TEW-P1UG only) 5. Save the...

Windows Setup Guide
Page 6
... default, there is unable to locate your wireless network settings. 2. ZoneAlarm). Click the Windows icon -> Devices and Printers and verify that the antenna is attached to the Print Server and the WLAN LED on the bottom left-hand corner of the unit. 2. What should I successfully configured the TEW-P1UG to automatically receive an IP Address from...
... default, there is unable to locate your wireless network settings. 2. ZoneAlarm). Click the Windows icon -> Devices and Printers and verify that the antenna is attached to the Print Server and the WLAN LED on the bottom left-hand corner of the unit. 2. What should I successfully configured the TEW-P1UG to automatically receive an IP Address from...
