
Quick Installation Guide
Page 4
... of Connection (Dynamic/Static) ŸIP Address Static IPMode only) ŸSubnet Mask Static IPMode only) ŸName NAT (Enable/Disable) ŸUser Name User Password Confirm Password Max MRU: _____ (576~1492) ŸDNS Enabled (Enable/Disable) ŸDNS Override Allowed (Enable/Disable) ŸDNS Server 1 optional) ŸDNS Server 2 optional...
... of Connection (Dynamic/Static) ŸIP Address Static IPMode only) ŸSubnet Mask Static IPMode only) ŸName NAT (Enable/Disable) ŸUser Name User Password Confirm Password Max MRU: _____ (576~1492) ŸDNS Enabled (Enable/Disable) ŸDNS Override Allowed (Enable/Disable) ŸDNS Server 1 optional) ŸDNS Server 2 optional...

Quick Installation Guide
Page 5
...) ŸState of Connection (Enable/Disable) ŸIPMode of Connection (Dynamic/Static) ŸIP Address Subnet Mask Name NAT (Enable/Disable) ŸUser Name User Password Confirm Password Max MRU: _____ (576~1492) ŸDNS Enabled (Enable/Disable) ŸDNS Override Allowed (Enable/Disable) ŸDNS Server 1 optional) ŸDNS Server 2 optional...
...) ŸState of Connection (Enable/Disable) ŸIPMode of Connection (Dynamic/Static) ŸIP Address Subnet Mask Name NAT (Enable/Disable) ŸUser Name User Password Confirm Password Max MRU: _____ (576~1492) ŸDNS Enabled (Enable/Disable) ŸDNS Override Allowed (Enable/Disable) ŸDNS Server 1 optional) ŸDNS Server 2 optional...

Quick Installation Guide
Page 10
By default: User name: admin Password: admin Note: User name and Password are case sensitive. 3. Open your web browser, type http://192.168.10.1 in the Address bar, and then press Enter. 2. Enter the User Name and password and then click OK. Click Setup Wizard if the Setup Wizard does not automatically appear. 4. Configure the Modem Note: It is recommended that you configure the Modem from a wired computer. 1. Select PVCO and click Next. 8 The Setup wizard will automatically appear. 3.
By default: User name: admin Password: admin Note: User name and Password are case sensitive. 3. Open your web browser, type http://192.168.10.1 in the Address bar, and then press Enter. 2. Enter the User Name and password and then click OK. Click Setup Wizard if the Setup Wizard does not automatically appear. 4. Configure the Modem Note: It is recommended that you configure the Modem from a wired computer. 1. Select PVCO and click Next. 8 The Setup wizard will automatically appear. 3.

Quick Installation Guide
Page 11
5. Then Click Next. User Name User Password Mac Address (Clone Mac) If Static is PPPoE. 6. Subnet Mask: In most cases for IPMode of Idle Disconnect entered. 9 For Connection Trigger, select Continuous to .... Select the desired ADSL connection type and then click Next. 7. Configure the settings based on your network. This IP address should match your network. The TEW-658BRM will automatically disconnect from the Internet if no Internet activity has been detected within the period of Connection you to configure the following : IP address...
5. Then Click Next. User Name User Password Mac Address (Clone Mac) If Static is PPPoE. 6. Subnet Mask: In most cases for IPMode of Idle Disconnect entered. 9 For Connection Trigger, select Continuous to .... Select the desired ADSL connection type and then click Next. 7. Configure the settings based on your network. This IP address should match your network. The TEW-658BRM will automatically disconnect from the Internet if no Internet activity has been detected within the period of Connection you to configure the following : IP address...
Quick Installation Guide
Page 16
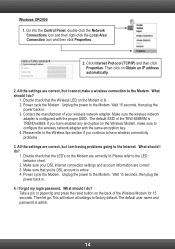
... Protocol (TCP/IP) and then click Properties. Unplug the power to the Internet. Contact the manufacturer of the TEW-658BRM is active 4. Windows XP/2000 1. Power cycle the Modem. What should I forgot my login password. Double check that the Wireless LED on Obtain an IP address automatically. 2. Take a pin or paperclip and press...
... Protocol (TCP/IP) and then click Properties. Unplug the power to the Internet. Contact the manufacturer of the TEW-658BRM is active 4. Windows XP/2000 1. Power cycle the Modem. What should I forgot my login password. Double check that the Wireless LED on Obtain an IP address automatically. 2. Take a pin or paperclip and press...

User's Guide
Page 15
... "admin". Log In to the Modem Router Use the web-based utility to change the user name and password, see "7.1 Password" on page 69. On the address bar, enter http://192.168.10.1, then press Enter. 3. Note the following instructions to log in to the Modem ...
... "admin". Log In to the Modem Router Use the web-based utility to change the user name and password, see "7.1 Password" on page 69. On the address bar, enter http://192.168.10.1, then press Enter. 3. Note the following instructions to log in to the Modem ...

User's Guide
Page 17
c. The following is a PPPoE example. b. Enter the connection Name, User Name, and User Password. d. Click Next to their default settings. a. Re-type the password in the Confirm Password field. Leave the remaining fields to continue. Click Next to enable or disable features such as NAT (Network Address Translation), DNS (Domain Name System), and DNS Override. 3. Select whether to continue. The information required on the next page vary depending on the network protocol you selected here. 4. Select a network protocol.
c. The following is a PPPoE example. b. Enter the connection Name, User Name, and User Password. d. Click Next to their default settings. a. Re-type the password in the Confirm Password field. Leave the remaining fields to continue. Click Next to enable or disable features such as NAT (Network Address Translation), DNS (Domain Name System), and DNS Override. 3. Select whether to continue. The information required on the next page vary depending on the network protocol you selected here. 4. Select a network protocol.

User's Guide
Page 22
..., the Modem Router will automatically reestablish the connection. • Manual: With this setting, you have to enter the user name and password to access the Internet again. LCP Interval - Check this box to enable ICMP (Internet Control Message Protocol) messages to be sent back...Service Name - On the Idle Disconnect Time field, enter the number of time. As system default route - Proxy ARP Enable - Re-enter the password in sending LCP (Link Control Protocol) packets. PPPoE AC Name - Enter a PPPoE service name. Otherwise, leave this box to enable or disable DNS...
..., the Modem Router will automatically reestablish the connection. • Manual: With this setting, you have to enter the user name and password to access the Internet again. LCP Interval - Check this box to enable ICMP (Internet Control Message Protocol) messages to be sent back...Service Name - On the Idle Disconnect Time field, enter the number of time. As system default route - Proxy ARP Enable - Re-enter the password in sending LCP (Link Control Protocol) packets. PPPoE AC Name - Enter a PPPoE service name. Otherwise, leave this box to enable or disable DNS...

User's Guide
Page 23
...Select whether to enable or disable DNS (Domain Name System). Enter your ISP, enter the rate in the Confirm Password field. Max MRU - DNS Enabled - Enable this connection. User Password - PPPoA (RFC-2364 PPP over ATM) If you select PPPoA (Point-to-Point Protocol over ATM), the screen... connect to the Internet. Select the connection mode, options are: • Dynamic: Select Dynamic if the IP address can receive. Enter the password provided by your ISP. This is displayed. If provided by your ISP. IPMode of Connection - Name - Select whether to enable or disable DNS...
...Select whether to enable or disable DNS (Domain Name System). Enter your ISP, enter the rate in the Confirm Password field. Max MRU - DNS Enabled - Enable this connection. User Password - PPPoA (RFC-2364 PPP over ATM) If you select PPPoA (Point-to-Point Protocol over ATM), the screen... connect to the Internet. Select the connection mode, options are: • Dynamic: Select Dynamic if the IP address can receive. Enter the password provided by your ISP. This is displayed. If provided by your ISP. IPMode of Connection - Name - Select whether to enable or disable DNS...

User's Guide
Page 41
Device Password (PIN) - This PIN is used to connect to discard your Modem Router. Click the Apply button to save your changes or click the Cancel button ... default, click the Reset PIN to the wireless network. • Client PIN: Enter the WPS-supported device's PIN. Add Client Setup Methods - Displays the PIN password. To generate a new PIN, click the Generate New PIN button. Select one of the following: • Push Button: Select to connect WPS-supported devices with...
Device Password (PIN) - This PIN is used to connect to discard your Modem Router. Click the Apply button to save your changes or click the Cancel button ... default, click the Reset PIN to the wireless network. • Client PIN: Enter the WPS-supported device's PIN. Add Client Setup Methods - Displays the PIN password. To generate a new PIN, click the Generate New PIN button. Select one of the following: • Push Button: Select to connect WPS-supported devices with...

User's Guide
Page 61
... name to discard your Modem Router. Enter the password of your DNS account assigned by the service provider. Click the Apply button to save your changes or click the Cancel button to be incurred depending on the Confirm Password field. Use Dynamic DNS Service - Use Wildcards ...- Check this account to the DNS server. Password - Enter the user name of your changes. Re-enter the password on the selected service provider. Select a connection from the...
... name to discard your Modem Router. Enter the password of your DNS account assigned by the service provider. Click the Apply button to save your changes or click the Cancel button to be incurred depending on the Confirm Password field. Use Dynamic DNS Service - Use Wildcards ...- Check this account to the DNS server. Password - Enter the user name of your changes. Re-enter the password on the selected service provider. Select a connection from the...

User's Guide
Page 69
...from the drop-down list. • Trap Address: Enter the destination IP address of the SNMP trap. User Name - New Password - Enter an assigned name for your changes. Check this box to configure the web-based utility settings, such as...account: admin or user. Enter a public and private community name. Enter the current password. Password By default, the log in user name and password are "admin". Current Password - Confirm Password - System Name - Trap - Re-enter the new password. Public Community and Private Community - System Contact - Click the Apply button to ...
...from the drop-down list. • Trap Address: Enter the destination IP address of the SNMP trap. User Name - New Password - Enter an assigned name for your changes. Check this box to configure the web-based utility settings, such as...account: admin or user. Enter a public and private community name. Enter the current password. Password By default, the log in user name and password are "admin". Current Password - Confirm Password - System Name - Trap - Re-enter the new password. Public Community and Private Community - System Contact - Click the Apply button to ...

User's Guide
Page 73
...use when connecting to the ACS. Verify Server Certificate - ACS URL Address - Connection Request User Name - Enter the connection request password. ACS Password - Enter the connection request user name. Connection Request Port -Enter the port that your Modem Router when connecting to the ACS.... Re-enter the password on the Confirm Password field. Check this box to enable TR069. Re-enter the password on the Confirm Password field. Use Soap v1.2 - Enter the password that issues the request. Check this box to verify server ...
...use when connecting to the ACS. Verify Server Certificate - ACS URL Address - Connection Request User Name - Enter the connection request password. ACS Password - Enter the connection request user name. Connection Request Port -Enter the port that your Modem Router when connecting to the ACS.... Re-enter the password on the Confirm Password field. Check this box to enable TR069. Re-enter the password on the Confirm Password field. Use Soap v1.2 - Enter the password that issues the request. Check this box to verify server ...

User's Guide
Page 76
Re-enter the password in the Confirm Password field. 59.Select the Frequency of e-mails periodically. 57.Enter the SMTP Server IP, Source E-mail Address, and Destination E-mail Address. 58.If SMTP Authentication ... location. 51.Select Module and Facility. 52.Select Severity level. emerg is the highest level while debug is enabled, enter the SMTP Username and SMTP Password. E-mail Log Periodically To log e-mails periodically, do the following: 56.Check the SMTP Server box to discard your changes or click the Cancel button...
Re-enter the password in the Confirm Password field. 59.Select the Frequency of e-mails periodically. 57.Enter the SMTP Server IP, Source E-mail Address, and Destination E-mail Address. 58.If SMTP Authentication ... location. 51.Select Module and Facility. 52.Select Severity level. emerg is the highest level while debug is enabled, enter the SMTP Username and SMTP Password. E-mail Log Periodically To log e-mails periodically, do the following: 56.Check the SMTP Server box to discard your changes or click the Cancel button...

