
Quick Installation Guide
Page 2
Table of Contents English 1 1. How to your PC 5 Troubleshooting 7 Version 07.21.2010 Configure the Print Server 3 4. Add the Printer to Install 2 3. Before You Start 1 2.
Table of Contents English 1 1. How to your PC 5 Troubleshooting 7 Version 07.21.2010 Configure the Print Server 3 4. Add the Printer to Install 2 3. Before You Start 1 2.

Quick Installation Guide
Page 4
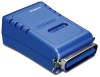
Connect the Parallel Printer to the print server. Then turn on the Print Server. 4. Connect the AC Power Adapter to the Print Server and then to the LAN port on the Print Server. 2. Connect a RJ-45 network cable from a Switch/ Router to a power outlet. 3. Power ON the printer. 2 2. How to Installation Note: Please power off all printers before connecting them to the Parallel port on each printer after you make your hardware connections. 1.
Connect the Parallel Printer to the print server. Then turn on the Print Server. 4. Connect the AC Power Adapter to the Print Server and then to the LAN port on the Print Server. 2. Connect a RJ-45 network cable from a Switch/ Router to a power outlet. 3. Power ON the printer. 2 2. How to Installation Note: Please power off all printers before connecting them to the Parallel port on each printer after you make your hardware connections. 1.

Quick Installation Guide
Page 5
....0.1, make sure no other network devices are assigned an IP address of 192.168.0.1. For Windows Users 1. Since the Print Server's default IP address is an available number from 2-254). Configure the Print Server Note: The Print Server can be managed using the PS Utility or a web browser. Click Run Autorun.exe (Windows 7/Vista only). 3. Click...
....0.1, make sure no other network devices are assigned an IP address of 192.168.0.1. For Windows Users 1. Since the Print Server's default IP address is an available number from 2-254). Configure the Print Server Note: The Print Server can be managed using the PS Utility or a web browser. Click Run Autorun.exe (Windows 7/Vista only). 3. Click...

Quick Installation Guide
Page 6
Click OK. 7. Click Show Web Setup. Select the Print Server and click Change IP Address. Manually assign the IP Address of your network. 6. Click Finish. 5. Print Server configuration is now complete. 4 4. Follow the InstallShield Wizard instructions. Note: The IP Address must match the network segment of the Print Server and then click OK.
Click OK. 7. Click Show Web Setup. Select the Print Server and click Change IP Address. Manually assign the IP Address of your network. 6. Click Finish. 5. Print Server configuration is now complete. 4 4. Follow the InstallShield Wizard instructions. Note: The IP Address must match the network segment of the Print Server and then click OK.

Quick Installation Guide
Page 7
Select the print server, select the desired port and then click Add Printer. 3. Click PS Wizard and then click Windows 7/Vista/2003 Server/XP/2000. 2. Click Select from manufacturer list. Windows 7/Vista/2003 Server/XP/2000 1. 4. Add the Printer to your printer and then click Next. 5 Select the appropriate driver for your PC Note: For printing instructions for Windows ME, 98SE, and Mac OS X, please consult the User's Guide included on the Utility CD-ROM.
Select the print server, select the desired port and then click Add Printer. 3. Click PS Wizard and then click Windows 7/Vista/2003 Server/XP/2000. 2. Click Select from manufacturer list. Windows 7/Vista/2003 Server/XP/2000 1. 4. Add the Printer to your printer and then click Next. 5 Select the appropriate driver for your PC Note: For printing instructions for Windows ME, 98SE, and Mac OS X, please consult the User's Guide included on the Utility CD-ROM.

Quick Installation Guide
Page 9
...on your keyboard. 3. ZoneAlarm). Click Devices and Printers. 3. Uncheck Enable advanced printing features. 6. I do ? What should I successfully added a printer to see my printer server. On Windows XP/2000/20003 Server, click Start and then click Printers & Faxes, verify that your printer icon ...program. 3. On Windows Vista, click the Start Icon ’ Control Panel ’ Classic View ’ Printers and verify that the print server and printer are powered ON and are properly connected. 2. Click the Advanced tab. 5. I inserted the Utility CD-ROM into my computer...
...on your keyboard. 3. ZoneAlarm). Click Devices and Printers. 3. Uncheck Enable advanced printing features. 6. I do ? What should I successfully added a printer to see my printer server. On Windows XP/2000/20003 Server, click Start and then click Printers & Faxes, verify that your printer icon ...program. 3. On Windows Vista, click the Start Icon ’ Control Panel ’ Classic View ’ Printers and verify that the print server and printer are powered ON and are properly connected. 2. Click the Advanced tab. 5. I inserted the Utility CD-ROM into my computer...

Quick Installation Guide
Page 10
.... 1. Click Printers. 5. Type in http://192.168.0.1 in you still encounter problems or have any questions regarding the TE100-P1P, please contact TRENDnet's Technical Support Department. 8 This procedure will reset all settings to locate your print server's IP Address. 6. Click Control Panel. 3. Right click on the bottom left-hand corner of the MAC address. Factory...
.... 1. Click Printers. 5. Type in http://192.168.0.1 in you still encounter problems or have any questions regarding the TE100-P1P, please contact TRENDnet's Technical Support Department. 8 This procedure will reset all settings to locate your print server's IP Address. 6. Click Control Panel. 3. Right click on the bottom left-hand corner of the MAC address. Factory...
