
Datasheet
Page 1
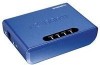
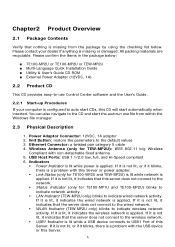
print server 1-Port 10/100Mbps Multi-Function USB 2.0 Print Server TE100-MP1U The 1-Port 10/100Mbps Multi-Function USB 2.0 Print Server (TE100-MP1U) is designed to the challenge of storage access modes: netusb mode and server mode • Supports USB storage devices such as hard drives, flash drives and memory card readers. • Supports auto-connect for printing.... FEATURES • Compliant with Windows 2000/XP/2003 Server/Vista (32-Bit) operating systems • Windows based utility program and Web based configuration • Built-in -one multi-function printers * • One USB...
print server 1-Port 10/100Mbps Multi-Function USB 2.0 Print Server TE100-MP1U The 1-Port 10/100Mbps Multi-Function USB 2.0 Print Server (TE100-MP1U) is designed to the challenge of storage access modes: netusb mode and server mode • Supports USB storage devices such as hard drives, flash drives and memory card readers. • Supports auto-connect for printing.... FEATURES • Compliant with Windows 2000/XP/2003 Server/Vista (32-Bit) operating systems • Windows based utility program and Web based configuration • Built-in -one multi-function printers * • One USB...
Datasheet
Page 2
... x 25mm (3.15 x 2.36 x 0.98 in this document pertain to TRENDnet products and is subject to 158°F) • 10%~90% (non-condensing) • CE, FCC NETWORKING SOLUTIONS 1-Port 10/100Mbps Multi-Function USB 2.0 Print Server (TE100-MP1U) Internet Cable/DSL Modem Cable/DSL 4-Port Broadband Router (TW100-S4W1CA) PACKAGE...) • Power, link, status, USB1 • DHCP, SNMP, UPnP, FTP • TCP/IP • Windows 2000/XP/2003 Server/Vista (32-Bit) • Windows based utility or Web based configuration • 12V DC 1A external switching power adapter • Max: 2.5W (without notice...
... x 25mm (3.15 x 2.36 x 0.98 in this document pertain to TRENDnet products and is subject to 158°F) • 10%~90% (non-condensing) • CE, FCC NETWORKING SOLUTIONS 1-Port 10/100Mbps Multi-Function USB 2.0 Print Server (TE100-MP1U) Internet Cable/DSL Modem Cable/DSL 4-Port Broadband Router (TW100-S4W1CA) PACKAGE...) • Power, link, status, USB1 • DHCP, SNMP, UPnP, FTP • TCP/IP • Windows 2000/XP/2003 Server/Vista (32-Bit) • Windows based utility or Web based configuration • 12V DC 1A external switching power adapter • Max: 2.5W (without notice...

Quick Installation Guide
Page 3
... in order to do so. 2. TE100-MP1U/TE100-MP2U/ TEW-MP2U ? Power Adapter (12V, 1A) System Requirements ? Before You Start Package Contents ? CD-ROM Drive ? Do not install MFP Server Control Center, connect printer to print server and connect the computer to the print server until instructed to use your multi-function printer. 1 English Windows 2000/XP(32/64-bit)/2003...
... in order to do so. 2. TE100-MP1U/TE100-MP2U/ TEW-MP2U ? Power Adapter (12V, 1A) System Requirements ? Before You Start Package Contents ? CD-ROM Drive ? Do not install MFP Server Control Center, connect printer to print server and connect the computer to the print server until instructed to use your multi-function printer. 1 English Windows 2000/XP(32/64-bit)/2003...

Quick Installation Guide
Page 15
Click Disconnect to view files using Windows Explorer and then click OK. 3. Click Connect. 2. 3. Select Open folder to disconnect from the storage device. 13 English NetUSB Mode Note: Only one user can connect to the storage device at a time in NetUSB mode. 1. Select the desired drive letter and then click Finish.
Click Disconnect to view files using Windows Explorer and then click OK. 3. Click Connect. 2. 3. Select Open folder to disconnect from the storage device. 13 English NetUSB Mode Note: Only one user can connect to the storage device at a time in NetUSB mode. 1. Select the desired drive letter and then click Finish.

Quick Installation Guide
Page 16
...printer. In this case, uninstall the printer and the Printer Server utility. You must wait until the other USB port (TE100-MP2U and TEW-MP2U only). Fifth, power cycle the Print Server. Second, connect the printer/storage device with another computer is ...print server, disconnect the USB and network cable and go to System -> Exit in . Q3. Third, click Refresh Server List. In the utility, if there is a computer name next to set my printer or scanner as ZoneAlarm or Norton Internet Security. The Multi-Function Print (MFP) Server Control Center does not detect the Print Server...
...printer. In this case, uninstall the printer and the Printer Server utility. You must wait until the other USB port (TE100-MP2U and TEW-MP2U only). Fifth, power cycle the Print Server. Second, connect the printer/storage device with another computer is ...print server, disconnect the USB and network cable and go to System -> Exit in . Q3. Third, click Refresh Server List. In the utility, if there is a computer name next to set my printer or scanner as ZoneAlarm or Norton Internet Security. The Multi-Function Print (MFP) Server Control Center does not detect the Print Server...
Quick Installation Guide
Page 17
...printing or scanning), other users cannot print or scan until User A has press disconnect in the MFP Server Control Center. Q8. A9. Double click on the Utility CDROM or contact TRENDnet's Technical Support Department. 15 If you still encounter problems or have any questions regarding the TE100-MP1U/ TE100...receive an IP Address from the Print Server, wait 15 seconds, then plug the Print Server back in NetUSB mode. Q10. Q9. Q6. I connect my computer to grab ownership of the printer. No window appears after User A has finished printing or scanning. A10. Third,...
...printing or scanning), other users cannot print or scan until User A has press disconnect in the MFP Server Control Center. Q8. A9. Double click on the Utility CDROM or contact TRENDnet's Technical Support Department. 15 If you still encounter problems or have any questions regarding the TE100-MP1U/ TE100...receive an IP Address from the Print Server, wait 15 seconds, then plug the Print Server back in NetUSB mode. Q10. Q9. Q6. I connect my computer to grab ownership of the printer. No window appears after User A has finished printing or scanning. A10. Third,...
User's Guide
Page 2
......21 Storage Names ...21 CHAPTER4 PRINT SERVER IN WINDOWS 22 4.1 Overview of Installation Methods 22 4.2 Connecting the Server...22 4.2.1 The Server and Windows PC on Same LAN 23 4.2.2 The Server and Windows PC on Different LANs 23 4.3 Setting up Local Windows Printer Driver 23 4.4 Adding Network Printers in Windows 24 4.4.1 Using Standard Windows Methods for LPR Printing Protocol 24 4.4.2 Using the Control...
......21 Storage Names ...21 CHAPTER4 PRINT SERVER IN WINDOWS 22 4.1 Overview of Installation Methods 22 4.2 Connecting the Server...22 4.2.1 The Server and Windows PC on Same LAN 23 4.2.2 The Server and Windows PC on Different LANs 23 4.3 Setting up Local Windows Printer Driver 23 4.4 Adding Network Printers in Windows 24 4.4.1 Using Standard Windows Methods for LPR Printing Protocol 24 4.4.2 Using the Control...

User's Guide
Page 3
...to Network with Security 49 Setting up File Server Using the Control Center 49 Setting up File Server Using Web Pages 51 Using Shared Storages by SMB/CIFS Method for Windows 52 Using Shared Storage by FTP Methods for Windows 53 CHAPTER7 THE NETUSB TECHNOLOGY 55 7.1 7.2... 7.3 7.3.1 7.3.2 7.3.3 7.3.4 7.3.5 7.4 Introduction ...55 Connect & Disconnect...55 How to Use ...56 Remote Installation ...56 NetUSB Printing...
...to Network with Security 49 Setting up File Server Using the Control Center 49 Setting up File Server Using Web Pages 51 Using Shared Storages by SMB/CIFS Method for Windows 52 Using Shared Storage by FTP Methods for Windows 53 CHAPTER7 THE NETUSB TECHNOLOGY 55 7.1 7.2... 7.3 7.3.1 7.3.2 7.3.3 7.3.4 7.3.5 7.4 Introduction ...55 Connect & Disconnect...55 How to Use ...56 Remote Installation ...56 NetUSB Printing...
User's Guide
Page 6
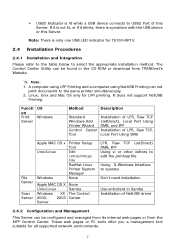
...Windows file manager. 2.3 Physical Description 1. Init Button: restore the parameters to the CD and start automatically when inserted. If it is lit, it indicates the wired network is not lit, it is applied. If it indicates that this server...Server. If it is lit, it indicates that the server does not connect to the wireless network. ƒ USB1 Indicator is applied. Wireless Antenna (only for TE100-MP1U and TE100-... the package by using the checking list below : „ TE100-MP2U or TE100-MP2U or TEW-MP2U „ Multi-Language Quick Installation Guide „ Utility & User's Guide CD...
...Windows file manager. 2.3 Physical Description 1. Init Button: restore the parameters to the CD and start automatically when inserted. If it is lit, it indicates the wired network is not lit, it is applied. If it indicates that this server...Server. If it is lit, it indicates that the server does not connect to the wireless network. ƒ USB1 Indicator is applied. Wireless Antenna (only for TE100-MP1U and TE100-... the package by using the checking list below : „ TE100-MP2U or TE100-MP2U or TEW-MP2U „ Multi-Language Quick Installation Guide „ Utility & User's Guide CD...
User's Guide
Page 7
... method. It does not support NetUSB Printing. A computer using LRP Printing and a computer using NetUSB Printing can be configured and managed from its internal web pages or from TRENDnet's Website. # Note: 1. Note: There is a problem with the USB device or this Server. Functi on Print Server OS Windows Method Description Standard Windows Add Printer Wizard Control Center Tool Installation...
... method. It does not support NetUSB Printing. A computer using LRP Printing and a computer using NetUSB Printing can be configured and managed from its internal web pages or from TRENDnet's Website. # Note: 1. Note: There is a problem with the USB device or this Server. Functi on Print Server OS Windows Method Description Standard Windows Add Printer Wizard Control Center Tool Installation...
User's Guide
Page 9
... In ad-hoc mode, only 802.11b (the maximal transfer rate is 11 Mbps) is available in turn. (For TE100-MP1U, only USB1 indicator will appear. 9 MFP Server Control Center is allowed by WEP64, WEP128, or WPA-PSK/TKIP. Connect the Power Adapter to the USB ports with the...wireless PC/devices with a twisted-pair category 5 cable, 10BaseT or 100BaseTX. 4. Wireless access can be set correctly. Start MFP Server Control Center and Auto-Searching MFP Server window will flash.) When the Link indicator lights up and USB1 and USB2 indicators will flash in the included Product's CD-ROM. ...
... In ad-hoc mode, only 802.11b (the maximal transfer rate is 11 Mbps) is available in turn. (For TE100-MP1U, only USB1 indicator will appear. 9 MFP Server Control Center is allowed by WEP64, WEP128, or WPA-PSK/TKIP. Connect the Power Adapter to the USB ports with the...wireless PC/devices with a twisted-pair category 5 cable, 10BaseT or 100BaseTX. 4. Wireless access can be set correctly. Start MFP Server Control Center and Auto-Searching MFP Server window will flash.) When the Link indicator lights up and USB1 and USB2 indicators will flash in the included Product's CD-ROM. ...
User's Guide
Page 17
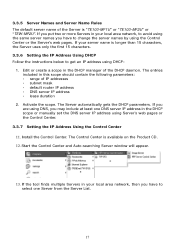
..."TE100-MP1U" or "TE100-MP2U" or "TEW-MP2U". Edit or create a scope in this scope should contain the following parameters: y range of IP addresses y subnet mask y default router IP address y DNS server IP address y lease duration 2. If you are using DNS, you have to change the server names by using Server...Activate the scope. Start the Control Center and Auto-searching Server window will appear. 13. If the tool finds multiple Servers in the DHCP scope or manually set the DNS server IP address using the Control Center or the Server's web pages. The entries included in the DHCP manager ...
..."TE100-MP1U" or "TE100-MP2U" or "TEW-MP2U". Edit or create a scope in this scope should contain the following parameters: y range of IP addresses y subnet mask y default router IP address y DNS server IP address y lease duration 2. If you are using DNS, you have to change the server names by using Server...Activate the scope. Start the Control Center and Auto-searching Server window will appear. 13. If the tool finds multiple Servers in the DHCP scope or manually set the DNS server IP address using the Control Center or the Server's web pages. The entries included in the DHCP manager ...

User's Guide
Page 22
... Your Server 4.2 Connecting the Server To configure your Server is connecting to add network printers. Chapter4 Print Server in Installed Windows Printer Driver Step 5 Add Network Printer by - Windows Standard Method - Table List for Installing Network Printer Windows Platform Windows 98, ME, 2000,XP and 2003 Printing Protocols SMB/CIFS Printing IPP Printing Windows 2000, XP and 2003 LPR Printing Method Standard Windows Add Printer...
... Your Server 4.2 Connecting the Server To configure your Server is connecting to add network printers. Chapter4 Print Server in Installed Windows Printer Driver Step 5 Add Network Printer by - Windows Standard Method - Table List for Installing Network Printer Windows Platform Windows 98, ME, 2000,XP and 2003 Printing Protocols SMB/CIFS Printing IPP Printing Windows 2000, XP and 2003 LPR Printing Method Standard Windows Add Printer...

User's Guide
Page 23
... not find the printer itself and figure out what kind it is. 4.2.1 The Server and Windows PC on Same LAN 4.2.2 The Server and Windows PC on Different LANs Example: Wired Windows PC across Internet 4.3 Setting up Local Windows Printer Driver You are advised to find the printer, the wizard will continue as described in advance. Click...
... not find the printer itself and figure out what kind it is. 4.2.1 The Server and Windows PC on Same LAN 4.2.2 The Server and Windows PC on Different LANs Example: Wired Windows PC across Internet 4.3 Setting up Local Windows Printer Driver You are advised to find the printer, the wizard will continue as described in advance. Click...
User's Guide
Page 24
... you have to change settings, and then click Properties/ports 3. Before using NetUSB printing can use the standard Windows Add Printer Wizard and the Control Center for LPR Printing Protocol Windows Platform: Windows 2000, XP and 2003 1. A computer using LPR or IPP printing and a computer using network printer, you want to the same printer simultaneously 4. Choose...
... you have to change settings, and then click Properties/ports 3. Before using NetUSB printing can use the standard Windows Add Printer Wizard and the Control Center for LPR Printing Protocol Windows Platform: Windows 2000, XP and 2003 1. A computer using LPR or IPP printing and a computer using network printer, you want to the same printer simultaneously 4. Choose...

User's Guide
Page 25
In the Port Name box, enter your desired names or USB1_LPR or USB2_LPR for printer connected to USB1 port and USB2 port, respectively. # If your Server is running on a different LAN than your Windows PC such as Internet PC, you must enter Server's IP address in Printer Name or IP 25 In the Printer Name or IP Address box, enter the Server Name of the Server or IP address of the Server. 5.
In the Port Name box, enter your desired names or USB1_LPR or USB2_LPR for printer connected to USB1 port and USB2 port, respectively. # If your Server is running on a different LAN than your Windows PC such as Internet PC, you must enter Server's IP address in Printer Name or IP 25 In the Printer Name or IP Address box, enter the Server Name of the Server or IP address of the Server. 5.

User's Guide
Page 28
Start the Control Center, right-click on your Server and select Set Printer. 2. Select USB1 Port or USB2 Port to add the printer in Set printer in box, choose to use Server Name or IP address to represent the Server in Select IP address or Host Name in printer port box, and select the network printing protocol of Printing with LPR (Line Printer Remote). 28 4.4.2 Using the Control Center for LPR Printing Windows Platform: Windows 2000, XP and 2003 1.
Start the Control Center, right-click on your Server and select Set Printer. 2. Select USB1 Port or USB2 Port to add the printer in Set printer in box, choose to use Server Name or IP address to represent the Server in Select IP address or Host Name in printer port box, and select the network printing protocol of Printing with LPR (Line Printer Remote). 28 4.4.2 Using the Control Center for LPR Printing Windows Platform: Windows 2000, XP and 2003 1.

User's Guide
Page 29
... address in Printer Name or IP Address box. 6. Click Next. 7. Right-click the printer for Raw TCP Printing Windows Platform: Windows 2000, XP and 2003 1. # If your Server is running on a different LAN than your Windows PC such as below. Clear Enable bidirectional support and click Add port, and then click Standard TCP/IP Port...
... address in Printer Name or IP Address box. 6. Click Next. 7. Right-click the printer for Raw TCP Printing Windows Platform: Windows 2000, XP and 2003 1. # If your Server is running on a different LAN than your Windows PC such as below. Clear Enable bidirectional support and click Add port, and then click Standard TCP/IP Port...

User's Guide
Page 31
Start the Control Center, right-click on your Server and select Set Printer. 2. Select USB1 Port or USB2 Port to add the printer in Set printer in box, choose to use or IP address to represent the Server in Select IP Address or Host Name in printer port box, and select the network printing protocol of Print with Raw TCP Mode. 31 4.4.4 Using the Control Center for Raw TCP/JetDirect Printing Windows Platform: Windows 2000, XP and 2003 1.
Start the Control Center, right-click on your Server and select Set Printer. 2. Select USB1 Port or USB2 Port to add the printer in Set printer in box, choose to use or IP address to represent the Server in Select IP Address or Host Name in printer port box, and select the network printing protocol of Print with Raw TCP Mode. 31 4.4.4 Using the Control Center for Raw TCP/JetDirect Printing Windows Platform: Windows 2000, XP and 2003 1.
User's Guide
Page 32
Click Apply. 4. Select the desired printer driver and click Set Port to Printer. 32 # If your Server is running on a different LAN than your Windows PC such as Internet PC, you must choose IP address in Select IP Address or Host Name in printer port box. 3.
Click Apply. 4. Select the desired printer driver and click Set Port to Printer. 32 # If your Server is running on a different LAN than your Windows PC such as Internet PC, you must choose IP address in Select IP Address or Host Name in printer port box. 3.
