
Operating Instructions
Page 4
... the settings of the Network Media Receiver 54 To bring up the "System Settings" screen 54 Settings available on the "System Settings" screen 55 To update the firmware 55 To return the Network Media Receiver to the default settings 56 To select the TV type 56 To control the file playback...
... the settings of the Network Media Receiver 54 To bring up the "System Settings" screen 54 Settings available on the "System Settings" screen 55 To update the firmware 55 To return the Network Media Receiver to the default settings 56 To select the TV type 56 To control the file playback...

Operating Instructions
Page 8
.../softupdates/vaiomedia41.html For customers in Europe http://vaio-link.com/ • Server equipment compliant to this product: • Sony VAIO computers with Windows XP installed and VAIO Media Version 4.1 preinstalled • Sony VAIO computers sold after September 2002 with VAIO Media Version 2.0 preinstalled and upgraded with ..., check the Web site listed in the U.S.A. For customers in "Getting Help" (page 63). • For VAIO Media updates, visit the Web site listed below. Operating environment Computers that can be connected to the DLNA guidelines (DLNA HNv1 compliant) 8
.../softupdates/vaiomedia41.html For customers in Europe http://vaio-link.com/ • Server equipment compliant to this product: • Sony VAIO computers with Windows XP installed and VAIO Media Version 4.1 preinstalled • Sony VAIO computers sold after September 2002 with VAIO Media Version 2.0 preinstalled and upgraded with ..., check the Web site listed in the U.S.A. For customers in "Getting Help" (page 63). • For VAIO Media updates, visit the Web site listed below. Operating environment Computers that can be connected to the DLNA guidelines (DLNA HNv1 compliant) 8

Operating Instructions
Page 30
..." screen appears. 30 The OPTIONS menu appears. 5 Use the V/v buttons to green, and the "Select a server..." System Settings TV Type Network Settings Playback Preference Firmware Update Default Settings System Information Language Settings SELECT :Select RETURN :Return 6 Use the V/v buttons to turn on the remote control. screen appears on your computer via...
..." screen appears. 30 The OPTIONS menu appears. 5 Use the V/v buttons to green, and the "Select a server..." System Settings TV Type Network Settings Playback Preference Firmware Update Default Settings System Information Language Settings SELECT :Select RETURN :Return 6 Use the V/v buttons to turn on the remote control. screen appears on your computer via...

Operating Instructions
Page 34
... the message about restarting the Network Media Receiver appears, select "OK" and press the SELECT button. System Settings TV Type Network Settings Playback Preference Firmware Update Default Settings System Information Language Settings SELECT :Select RETURN :Return 6 Use the V/v buttons to select "System Settings" , and press the SELECT button. If the environment...
... the message about restarting the Network Media Receiver appears, select "OK" and press the SELECT button. System Settings TV Type Network Settings Playback Preference Firmware Update Default Settings System Information Language Settings SELECT :Select RETURN :Return 6 Use the V/v buttons to select "System Settings" , and press the SELECT button. If the environment...
Operating Instructions
Page 40
... the Network Media Receiver appears (content list). To select a server Use the V/v buttons to appear on functions available when this screen is updated to match the system environment (page 33). • To call up the Options menu, selecting "Refresh", and pressing the SELECT button. ... ready c Check whether all content on this situation, perform the following steps to share media content does not appear on the network configured to update the "Select a server..." screen. The "Select a server..." The OPTIONS menu appears. 2 Use the V/v buttons to bring up the "Select...
... the Network Media Receiver appears (content list). To select a server Use the V/v buttons to appear on functions available when this screen is updated to match the system environment (page 33). • To call up the Options menu, selecting "Refresh", and pressing the SELECT button. ... ready c Check whether all content on this situation, perform the following steps to share media content does not appear on the network configured to update the "Select a server..." screen. The "Select a server..." The OPTIONS menu appears. 2 Use the V/v buttons to bring up the "Select...

Operating Instructions
Page 55
...Preference 57 High compatiblity mode Firmware Update this product, periodically visit the Web site and update the firmware of this page - Notes • During the update process, never disconnect the power cord or the network cable. • After the update is complete, all settings except for... return to the latest version and download any problem-solving firmware updates. Default Settings 56 - System Information - - To update the firmware Visit the Web site listed in "Getting Help" (page 63) to update your Network Media Receiver to the default settings. For information on...
...Preference 57 High compatiblity mode Firmware Update this product, periodically visit the Web site and update the firmware of this page - Notes • During the update process, never disconnect the power cord or the network cable. • After the update is complete, all settings except for... return to the latest version and download any problem-solving firmware updates. Default Settings 56 - System Information - - To update the firmware Visit the Web site listed in "Getting Help" (page 63) to update your Network Media Receiver to the default settings. For information on...
Operating Instructions
Page 58
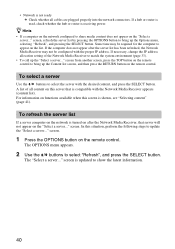
...initializes itself , the standby indicator changes to a wireless LAN, the WIRELESS indicator lights up red or flashes red. When the firmware update process finishes, the indicator goes out. While the hardware diagnosis process is performed when the power cord is first connected, the indicator ...connected, the indicator repeatedly flashes red and green to indicate the progress of the diagnosis routine. STATUS indicator When data is being updated, the indicator lights up green. About the Standby, STATUS and WIRELESS indicators Standby indicator When you turn the Network Media Receiver...
...initializes itself , the standby indicator changes to a wireless LAN, the WIRELESS indicator lights up red or flashes red. When the firmware update process finishes, the indicator goes out. While the hardware diagnosis process is performed when the power cord is first connected, the indicator ...connected, the indicator repeatedly flashes red and green to indicate the progress of the diagnosis routine. STATUS indicator When data is being updated, the indicator lights up green. About the Standby, STATUS and WIRELESS indicators Standby indicator When you turn the Network Media Receiver...
Quick Start Guide
Page 25
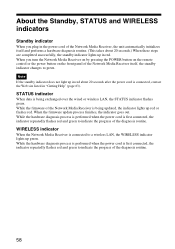
... POWER button to configure the wireless LAN settings. screen appears on the Network Media Receiver. System Settings TV Type Network Settings Playback Preference Firmware Update Default Settings System Information Language Settings SELECT :Select RETURN :Return 6 Use the V/v buttons to select "System Settings" , and press the SELECT...Network Media Receiver to green, and the "Select a server..." The "System Settings" screen appears. The "Network Settings" screen appears. 25 VGP-MR100QSG(GB)_2-580-488-11(1) 5 Configure wireless LAN settings Use the screens displayed on the remote control.
... POWER button to configure the wireless LAN settings. screen appears on the Network Media Receiver. System Settings TV Type Network Settings Playback Preference Firmware Update Default Settings System Information Language Settings SELECT :Select RETURN :Return 6 Use the V/v buttons to select "System Settings" , and press the SELECT...Network Media Receiver to green, and the "Select a server..." The "System Settings" screen appears. The "Network Settings" screen appears. 25 VGP-MR100QSG(GB)_2-580-488-11(1) 5 Configure wireless LAN settings Use the screens displayed on the remote control.

Quick Start Guide
Page 29
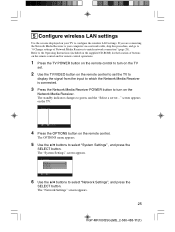
... press the SELECT button. 4 Use the V/v/B/b buttons to select "IP Address", and press the SELECT button. System Settings TV Type Network Settings Playback Preference Firmware Update Default Settings System Information Language Settings SELECT :Select RETURN :Return 6 Use the V/v buttons to select "OK", and press the SELECT button. The "Network Settings" screen... includes a router: select "Obtain an IP address automatically (using router)". 3 If you access the "IP Address" screen after the Network Media Receiver has restarted. 29 VGP-MR100QSG(GB)_2-580-488-11(1)
... press the SELECT button. 4 Use the V/v/B/b buttons to select "IP Address", and press the SELECT button. System Settings TV Type Network Settings Playback Preference Firmware Update Default Settings System Information Language Settings SELECT :Select RETURN :Return 6 Use the V/v buttons to select "OK", and press the SELECT button. The "Network Settings" screen... includes a router: select "Obtain an IP address automatically (using router)". 3 If you access the "IP Address" screen after the Network Media Receiver has restarted. 29 VGP-MR100QSG(GB)_2-580-488-11(1)
Marketing Specifications
Page 2
...sony.com ® Last Updated 2005-03-23 It enables you to enjoy your video, photo and music content on your wireless or wired home network. Specifications PART NUMBER WIRELESS LAN OUTPUT(S) OUTPUT(S) OUTPUT(S) SUPPORTED DEVICES MULTIMEDIA PLAYBACK SUPPORTED FORMATS WEIGHT DIMENSIONS (WXHXD) PACKAGE CONTENTS VGP-MR100U... digital output (square optical jack x 1) Network Connector 100BASE-TX Sony VAIO® Personal Computers with VAIO Media™ software pre-installed Ver. 2.0 or later. (Free update via download to room. - The VAIO® RoomLink™ Receiver supports many common ...
...sony.com ® Last Updated 2005-03-23 It enables you to enjoy your video, photo and music content on your wireless or wired home network. Specifications PART NUMBER WIRELESS LAN OUTPUT(S) OUTPUT(S) OUTPUT(S) SUPPORTED DEVICES MULTIMEDIA PLAYBACK SUPPORTED FORMATS WEIGHT DIMENSIONS (WXHXD) PACKAGE CONTENTS VGP-MR100U... digital output (square optical jack x 1) Network Connector 100BASE-TX Sony VAIO® Personal Computers with VAIO Media™ software pre-installed Ver. 2.0 or later. (Free update via download to room. - The VAIO® RoomLink™ Receiver supports many common ...

Limited Warranty
Page 1
... DURATION OF THIS WARRANTY. For Product information, service assistance, resolution of SONY. To access product support, online knowledge database, frequently asked questions, and free updates via the Internet, visit: http://www.sony.com/pcsupport. 42-159-804-01 215980401 © 2003 Sony Electronics Inc. Please refer to the End User License Agreements included with...
... DURATION OF THIS WARRANTY. For Product information, service assistance, resolution of SONY. To access product support, online knowledge database, frequently asked questions, and free updates via the Internet, visit: http://www.sony.com/pcsupport. 42-159-804-01 215980401 © 2003 Sony Electronics Inc. Please refer to the End User License Agreements included with...