
User Guide
Page 1
4-155-861-11 (1) Network Camera User's Guide Software Version 1.0 Before operating the unit, please read this manual thoroughly and retain it for future reference. SNC-RH124/RS46N/RS46P/RS44N/RS44P SNC-RH164/RS86N/RS86P/RS84N/RS84P © 2009 Sony Corporation
4-155-861-11 (1) Network Camera User's Guide Software Version 1.0 Before operating the unit, please read this manual thoroughly and retain it for future reference. SNC-RH124/RS46N/RS46P/RS44N/RS44P SNC-RH164/RS86N/RS86P/RS84N/RS84P © 2009 Sony Corporation

User Guide
Page 2
... Day/Night Tab 41 Video codec Tab 41 Streaming Tab 43 Configuring the Network - Network Menu .....44 Network Tab 44 Wireless Tab - Adding the CA certificate for client authentication 53 ...Vector dragging mode only 22 Moving the camera to a preset position (Common operations in Area zoom and Vector dragging modes 22 Controlling the Camera on a Panorama Image 23 Facing the camera ...camera ........24 Switching TCP/UDP Transmission Mode ..........25 Using the System Utility 26 SNC Viewer 26 SNC Desktop Viewer 27 Administrating the Camera Basic Operations of the Administrator Menu ...29...
... Day/Night Tab 41 Video codec Tab 41 Streaming Tab 43 Configuring the Network - Network Menu .....44 Network Tab 44 Wireless Tab - Adding the CA certificate for client authentication 53 ...Vector dragging mode only 22 Moving the camera to a preset position (Common operations in Area zoom and Vector dragging modes 22 Controlling the Camera on a Panorama Image 23 Facing the camera ...camera ........24 Switching TCP/UDP Transmission Mode ..........25 Using the System Utility 26 SNC Viewer 26 SNC Desktop Viewer 27 Administrating the Camera Basic Operations of the Administrator Menu ...29...
User Guide
Page 3
Saving pan/tilt/zoom position 63 Position Tour Tab - Setting a shadow tour ........ 66 Sending an ...control I/F Menu 88 Configuring the Viewer - Setting the periodical e-mail sending mode 69 Sending Images to use SNC toolbox 92 Registering in Memory - Setting the periodical recording mode 75 Folder structure of Contents Schedule Menu 81 Setting... sending Tab - Basic setting of 802.1X network ....... 56 Common Tab - Viewer Menu ..........89 Layout tab 89 HTML output tab 91 Others Using the Supplied SNC toolbox 92 Starting SNC toolbox 92 How to FTP Server - Setting...
Saving pan/tilt/zoom position 63 Position Tour Tab - Setting a shadow tour ........ 66 Sending an ...control I/F Menu 88 Configuring the Viewer - Setting the periodical e-mail sending mode 69 Sending Images to use SNC toolbox 92 Registering in Memory - Setting the periodical recording mode 75 Folder structure of Contents Schedule Menu 81 Setting... sending Tab - Basic setting of 802.1X network ....... 56 Common Tab - Viewer Menu ..........89 Layout tab 89 HTML output tab 91 Others Using the Supplied SNC toolbox 92 Starting SNC toolbox 92 How to FTP Server - Setting...
User Guide
Page 4
...CompactFlash and CF are trademarks of SanDisk Corporation, registered in high-quality HD (720P) (SNC-RH124/SNC-RH164). • XDNR and Visibility Enhancer enable clearer images for .... • Single codec mode, dual codec mode, and triple (SNC-RS46N/P, SNC-RS44N/P, SNC-RS86N/P, SNC-RS84N/P only) codec mode are trademarks or registered trademarks of Microsoft Corporation...Sony Corporation. This allows 360° panning and 210° tilting operability. • Optical zoom of 10x (SNC-RH124, RH164), 18x (SNC-RS44, RS84), 36x (SNC-RS46, RS86) and a digital zoom of 12x high-magnification zoom...
...CompactFlash and CF are trademarks of SanDisk Corporation, registered in high-quality HD (720P) (SNC-RH124/SNC-RH164). • XDNR and Visibility Enhancer enable clearer images for .... • Single codec mode, dual codec mode, and triple (SNC-RS46N/P, SNC-RS44N/P, SNC-RS86N/P, SNC-RS84N/P only) codec mode are trademarks or registered trademarks of Microsoft Corporation...Sony Corporation. This allows 360° panning and 210° tilting operability. • Optical zoom of 10x (SNC-RH124, RH164), 18x (SNC-RS44, RS84), 36x (SNC-RS46, RS86) and a digital zoom of 12x high-magnification zoom...
User Guide
Page 5
... Installation Manual describes the names and functions of parts and controls of the camera. (August 2009) SNC-RH124/RH164 CPU Intel Core 2 Duo, 2 GHz or higher. Some displays may differ from a... higher. Overview How to Use This User's Guide This User's Guide explains how to operate the Network Camera from those that appear on your system, certain displays or illustrations in the User's Guide, ...The User's Guide is necessary for the computer to display images and the controls of the Network Camera, connection examples, and how to read it before hand. Jumping to Use This User...
... Installation Manual describes the names and functions of parts and controls of the camera. (August 2009) SNC-RH124/RH164 CPU Intel Core 2 Duo, 2 GHz or higher. Some displays may differ from a... higher. Overview How to Use This User's Guide This User's Guide explains how to operate the Network Camera from those that appear on your system, certain displays or illustrations in the User's Guide, ...The User's Guide is necessary for the computer to display images and the controls of the Network Camera, connection examples, and how to read it before hand. Jumping to Use This User...
User Guide
Page 6
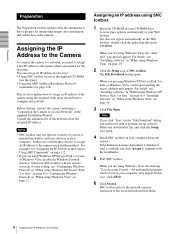
... Agreement is displayed, read it does not appear automatically in "When using the supplied setup program and how to configure the network. Assigning an IP address using SNC toolbox 1 Insert the CD-ROM in the supplied CD-ROM (see page 112) This section explains how to assign an... the Camera When you are using Windows XP Service Pack 2 or later, or Windows Vista, disable the Windows Firewall function. SNC toolbox detects the network cameras connected to the local network and lists them. 6 Assigning the IP Address to the Camera Using ARP Commands" on page 10. 3 Click File Open...
... Agreement is displayed, read it does not appear automatically in "When using the supplied setup program and how to configure the network. Assigning an IP address using SNC toolbox 1 Insert the CD-ROM in the supplied CD-ROM (see page 112) This section explains how to assign an... the Camera When you are using Windows XP Service Pack 2 or later, or Windows Vista, disable the Windows Firewall function. SNC toolbox detects the network cameras connected to the local network and lists them. 6 Assigning the IP Address to the Camera Using ARP Commands" on page 10. 3 Click File Open...

User Guide
Page 8
... of ActiveX Control, the "Information Bar" or "Security Warning" may appear when you install software such as follows: Example: In case of SNC toolbox If message "Internet Explorer" appears, click Yes. Note If you will not be able to set correctly, the viewer does not appear ... in the "File Download - Security Warning" appears, click Run. Installing ActiveX Control During installation of the network camera is not set the IP address again. In this case, operate as SNC toolbox from CD-ROM. Program name The software installation starts. Display sample If the message "File Download -...
... of ActiveX Control, the "Information Bar" or "Security Warning" may appear when you install software such as follows: Example: In case of SNC toolbox If message "Internet Explorer" appears, click Yes. Note If you will not be able to set correctly, the viewer does not appear ... in the "File Download - Security Warning" appears, click Run. Installing ActiveX Control During installation of the network camera is not set the IP address again. In this case, operate as SNC toolbox from CD-ROM. Program name The software installation starts. Display sample If the message "File Download -...

User Guide
Page 9
If " Internet Explorer - Configuring Windows Firewall SNC toolbox or SNC audio upload tool may not operate correctly depending on the bar and select Install ActiveX Control.... 3 Select Windows Firewall and select Off in the Windows ..., click on the configuration of Windows Firewall. (No cameras are detected.) In this case, confirm the Windows Firewall configuration as follows: Example: In case of SNC toolbox 1 Select Control Panel from the Start menu of Windows. 2 Select Security Center of ActiveX Control starts.
If " Internet Explorer - Configuring Windows Firewall SNC toolbox or SNC audio upload tool may not operate correctly depending on the bar and select Install ActiveX Control.... 3 Select Windows Firewall and select Off in the Windows ..., click on the configuration of Windows Firewall. (No cameras are detected.) In this case, confirm the Windows Firewall configuration as follows: Example: In case of SNC toolbox 1 Select Control Panel from the Start menu of Windows. 2 Select Security Center of ActiveX Control starts.

User Guide
Page 10
..., click Run. If the message "File Download - If the pop-up "AutoPlay" appears when a CD-ROM is completed, the camera connected in the local network are displayed in the CD-ROM. Program name When the above procedure is inserted into the CD-ROM drive, click Install or run program. If... the message "Internet Explorer" appears, click Yes. Preparation 6 In the Add Program dialog, select SNC toolbox and click OK. SNC toolbox is added to view files, the Web browser will not open automatically. In this case, double-click the "index.htm" file in...
..., click Run. If the message "File Download - If the pop-up "AutoPlay" appears when a CD-ROM is completed, the camera connected in the local network are displayed in the CD-ROM. Program name When the above procedure is inserted into the CD-ROM drive, click Install or run program. If... the message "Internet Explorer" appears, click Yes. Preparation 6 In the Add Program dialog, select SNC toolbox and click OK. SNC toolbox is added to view files, the Web browser will not open automatically. In this case, double-click the "index.htm" file in...

User Guide
Page 11
... Save in the list even if they are detected.) In this case, confirm the Windows Firewall configuration as follows: Example: In the case of SNC toolbox 1 Select Control Panel from the Start menu of Windows. 2 Click Windows Firewall. 3 Select Turn Windows Firewall on or off. Security Warning... to perform installation correctly. Starting the software When you will not be able to continue" appears, click Continue. Configuring Windows Firewall SNC toolbox or SNC audio upload tool may appear. If the information bar appears, click on the bar and select Install ActiveX Control.... 11 Assigning the...
... Save in the list even if they are detected.) In this case, confirm the Windows Firewall configuration as follows: Example: In the case of SNC toolbox 1 Select Control Panel from the Start menu of Windows. 2 Click Windows Firewall. 3 Select Turn Windows Firewall on or off. Security Warning... to perform installation correctly. Starting the software When you will not be able to continue" appears, click Continue. Configuring Windows Firewall SNC toolbox or SNC audio upload tool may appear. If the information bar appears, click on the bar and select Install ActiveX Control.... 11 Assigning the...

User Guide
Page 12
Preparation The cameras will be displayed in the "General" tab. 8 Click OK. 4 Select Off in the list. If you want to the Camera When the above procedure is added to the Program or port list. 12 Assigning the IP Address to keep Windows Firewall On, continue with the following steps. 5 Select the "Exceptions" tab. 6 Click Add Program.... 7 If the Add Program dialog appears, select SNC toolbox and click OK. SNC toolbox is completed, the cameras connected in the local network are displayed in SNC toolbox.
Preparation The cameras will be displayed in the "General" tab. 8 Click OK. 4 Select Off in the list. If you want to the Camera When the above procedure is added to the Program or port list. 12 Assigning the IP Address to keep Windows Firewall On, continue with the following steps. 5 Select the "Exceptions" tab. 6 Click Add Program.... 7 If the Add Program dialog appears, select SNC toolbox and click OK. SNC toolbox is completed, the cameras connected in the local network are displayed in SNC toolbox.

User Guide
Page 23
... To rotate the panorama image To rotate the panorama image in accordance with SNC toolbox and display it with the supplied SNC toolbox. Panorama window To create a panorama image Create the panorama image with SNC toolbox. See page 99 for details. The camera is moved to face toward a ...displayed panorama image, the camera faces the clicked area. You can be rotated only when a 360degree panorama image has been created using SNC toolbox. Tip The panorama image is displayed in the monitor window. 23 Controlling the Camera on the panorama image indicates the panning home...
... To rotate the panorama image To rotate the panorama image in accordance with SNC toolbox and display it with the supplied SNC toolbox. Panorama window To create a panorama image Create the panorama image with SNC toolbox. See page 99 for details. The camera is moved to face toward a ...displayed panorama image, the camera faces the clicked area. You can be rotated only when a 360degree panorama image has been created using SNC toolbox. Tip The panorama image is displayed in the monitor window. 23 Controlling the Camera on the panorama image indicates the panning home...

User Guide
Page 24
... the supplied Installation Manual. To use this function, you need to make Voice alert1, Voice alert2 and Voice alert3 active in the camera using the SNC audio upload tool. Controlling alarm output 1, 2 You can send a captured still image to the specified mail address. Controlling the Day/Night function You can play...
... the supplied Installation Manual. To use this function, you need to make Voice alert1, Voice alert2 and Voice alert3 active in the camera using the SNC audio upload tool. Controlling alarm output 1, 2 You can send a captured still image to the specified mail address. Controlling the Day/Night function You can play...

User Guide
Page 26
This operation is only available when you to mute sound at start-up sound output. 26 Using the System Utility SNC Viewer SNC Viewer is selected, you can download system utility from the tools tab on the main menu. Connection tab Screen mode You can set the initial ... can select Window or Full. Volume Mute: Select this option to set the frame rate for start -up connection from the image operation modes Area zoom and Vector dragging. Audio tab You can select the view size. If TCP connection is an application which allows you are logged in as administrator...
This operation is only available when you to mute sound at start-up sound output. 26 Using the System Utility SNC Viewer SNC Viewer is selected, you can download system utility from the tools tab on the main menu. Connection tab Screen mode You can set the initial ... can select Window or Full. Volume Mute: Select this option to set the frame rate for start -up connection from the image operation modes Area zoom and Vector dragging. Audio tab You can select the view size. If TCP connection is an application which allows you are logged in as administrator...

User Guide
Page 27
... bar to set the volume for the image to display on the Gadget. When you click , you will see the following setting screen. Save tab SNC Desktop Viewer This is a gadget that displays the camera image in the side bar of Windows Vista. Frame rate Select the frame rate for start...
... bar to set the volume for the image to display on the Gadget. When you click , you will see the following setting screen. Save tab SNC Desktop Viewer This is a gadget that displays the camera image in the side bar of Windows Vista. Frame rate Select the frame rate for start...

User Guide
Page 35
..., and the message "Setup data will be reset to the specified upper right area and click Upper right. 5 Click Set. Phase adjustment (SNC-RS46N/P, SNC-RS44N/ P, SNC-RS86N/P, SNC-RS84N/P only) Enter a value. (0 to specify the folder and save the setting data of NTSC + IP or PAL + IP. appears... will be initialized. Area title Set the display name for NTSC or PAL. Line lock (SNC-RS46N/P, SNC-RS44N/P, SNC-RS86N/P, SNC-RS84N/P only) Select either of the camera and click Set. Restore network setting When this unit while pressing the reset button on page 29. When you sure?" OK...
..., and the message "Setup data will be reset to the specified upper right area and click Upper right. 5 Click Set. Phase adjustment (SNC-RS46N/P, SNC-RS44N/ P, SNC-RS86N/P, SNC-RS84N/P only) Enter a value. (0 to specify the folder and save the setting data of NTSC + IP or PAL + IP. appears... will be initialized. Area title Set the display name for NTSC or PAL. Line lock (SNC-RS46N/P, SNC-RS44N/P, SNC-RS86N/P, SNC-RS84N/P only) Select either of the camera and click Set. Restore network setting When this unit while pressing the reset button on page 29. When you sure?" OK...
User Guide
Page 36
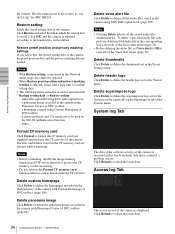
... and privacy masking settings If you select this log. It includes data that is "sncrh124.cfg" for SNC-RH124. Click OK, and the camera is adjusted according to Off in the Network menu (page 44) cannot be restored. • When Restore preset position and privacy masking settings is ... some items in each tab of the camera. Click Reload to reload the latest data. 36 Configuring the System - a homepage created using SNC audio upload tool - Delete panorama image Click Delete to delete the superimposed logo set Voice alert to the loaded data, and restarted. Restore ...
... and privacy masking settings If you select this log. It includes data that is "sncrh124.cfg" for SNC-RH124. Click OK, and the camera is adjusted according to Off in the Network menu (page 44) cannot be restored. • When Restore preset position and privacy masking settings is ... some items in each tab of the camera. Click Reload to reload the latest data. 36 Configuring the System - a homepage created using SNC audio upload tool - Delete panorama image Click Delete to delete the superimposed logo set Voice alert to the loaded data, and restarted. Restore ...
User Guide
Page 37
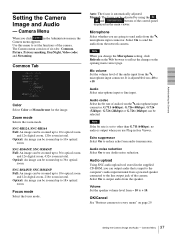
.... SNC-RS46N/P, SNC-RS86N/P Full: An image can output audio that is set the functions of the camera. Note If the bit rate is input to the computer's audio input terminal from a powered speaker connected to send audio from the network camera...zoom mode. SNC-RS44N/P, SNC-RS84N/P Full: An image can be zoomed up to reflect the change the Microphone setting, click Refresh on the opening main viewer page. Administrating the Camera Setting the Camera Image and Audio - Camera Menu When you change on the Web browser to 10× optical zoom. Use this menu to 18× optical zoom...
.... SNC-RS46N/P, SNC-RS86N/P Full: An image can output audio that is set the functions of the camera. Note If the bit rate is input to the computer's audio input terminal from a powered speaker connected to send audio from the network camera...zoom mode. SNC-RS44N/P, SNC-RS84N/P Full: An image can be zoomed up to reflect the change the Microphone setting, click Refresh on the opening main viewer page. Administrating the Camera Setting the Camera Image and Audio - Camera Menu When you change on the Web browser to 10× optical zoom. Use this menu to 18× optical zoom...
User Guide
Page 38
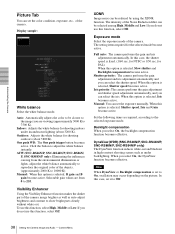
... Full auto: The camera performs the gain and iris adjustment automatically. DynaView (WDR) (SNC-RS46N/P, SNC-RS44N/P, SNC-RS86N/P, SNC-RS84N/P only) The DynaView function reduces white-out and blackout in high-contrast shooting scenes ...such as required, according to the selected exposure mode. Administrating the Camera Picture Tab You can select the shutter speed. If you do not use this function, select High, Middle or Low. for shooting indoors...
... Full auto: The camera performs the gain and iris adjustment automatically. DynaView (WDR) (SNC-RS46N/P, SNC-RS44N/P, SNC-RS86N/P, SNC-RS84N/P only) The DynaView function reduces white-out and blackout in high-contrast shooting scenes ...such as required, according to the selected exposure mode. Administrating the Camera Picture Tab You can select the shutter speed. If you do not use this function, select High, Middle or Low. for shooting indoors...

User Guide
Page 39
...-down list. They are effective for the exposure set in 7 steps, from -3 to compensate for the video output. (SNC-RS46N/P, SNC-RS44N/P, SNC-RS86N/P, SNC-RS84N/P only) OK/Cancel See "Buttons common to +3. Camera Menu Contrast Select the contrast in 7 steps, from -3 to...1 (sec.) Iris Select the iris from the drop-down list. Selectable gain values are as follows: SNC-RS46N/P, SNC-RS44N/P, SNC-RS86N/P, SNC-RS84N/P -3, 0, +2, +4, +6, +8, +10, +12, +14, +16, +18, +20, +22, +24, +26, +28 (dB) SNC-RH124/RH164 -3, 0, +3, +6, +8, +9, +12, +15, +18 (dB) Brightness Fine adjust ...
...-down list. They are effective for the exposure set in 7 steps, from -3 to compensate for the video output. (SNC-RS46N/P, SNC-RS44N/P, SNC-RS86N/P, SNC-RS84N/P only) OK/Cancel See "Buttons common to +3. Camera Menu Contrast Select the contrast in 7 steps, from -3 to...1 (sec.) Iris Select the iris from the drop-down list. Selectable gain values are as follows: SNC-RS46N/P, SNC-RS44N/P, SNC-RS86N/P, SNC-RS84N/P -3, 0, +2, +4, +6, +8, +10, +12, +14, +16, +18, +20, +22, +24, +26, +28 (dB) SNC-RH124/RH164 -3, 0, +3, +6, +8, +9, +12, +15, +18 (dB) Brightness Fine adjust ...


