
Limited Warranty (US Only)
Page 1
..., you must deliver the product, freight prepaid, in either its original specifications. Any parts or product replaced under this Limited Warranty, Sony will, at its option, (i) repair the product using new or refurbished parts or (ii) replace the product wiffla new or refurbished... longer. This Limited Warranty does not cover Sony products sold AS IS or WITH ALL FAULTS or consumables (such as set forth below. SONY® DSLR Cameras and Lenses for DSLR Camera LIMITED INARRANT'f (us Only, Sony Electronics Inc. ("Sony") warrantsthis product against defects in material or workmanship...
..., you must deliver the product, freight prepaid, in either its original specifications. Any parts or product replaced under this Limited Warranty, Sony will, at its option, (i) repair the product using new or refurbished parts or (ii) replace the product wiffla new or refurbished... longer. This Limited Warranty does not cover Sony products sold AS IS or WITH ALL FAULTS or consumables (such as set forth below. SONY® DSLR Cameras and Lenses for DSLR Camera LIMITED INARRANT'f (us Only, Sony Electronics Inc. ("Sony") warrantsthis product against defects in material or workmanship...

α Handbook
Page 1
4-420-756-11(1) Interchangeable Lens Digital Camera α Handbook A-mount Preparing the camera Shooting and viewing images Shooting images to suit your subject Using the shooting functions Using the playback functions Functions list Viewing images on a computer Others Advanced operations Index SLT-A57 ©2012 Sony Corporation
4-420-756-11(1) Interchangeable Lens Digital Camera α Handbook A-mount Preparing the camera Shooting and viewing images Shooting images to suit your subject Using the shooting functions Using the playback functions Functions list Viewing images on a computer Others Advanced operations Index SLT-A57 ©2012 Sony Corporation

α Handbook
Page 2
...information on and setting the clock 27 Before shooting 29 Adjusting the viewfinder to the visual acuity (diopter adjustment 29 Holding the camera properly 29 Shooting and viewing images Shooting still images 31 Recording movies 33 Playing back images 34 Deleting images (Delete 35 ...Shooting images to suit your camera 10 Preparing the camera Checking the supplied items 12 Identifying parts 13 Charging the battery pack 19 Inserting the battery pack/memory card (sold separately...
...information on and setting the clock 27 Before shooting 29 Adjusting the viewfinder to the visual acuity (diopter adjustment 29 Holding the camera properly 29 Shooting and viewing images Shooting still images 31 Recording movies 33 Playing back images 34 Deleting images (Delete 35 ...Shooting images to suit your camera 10 Preparing the camera Checking the supplied items 12 Identifying parts 13 Charging the battery pack 19 Inserting the battery pack/memory card (sold separately...

α Handbook
Page 3
... eyecup 80 The screen displayed for each shooting mode 77 Flash modes available 78 Advanced operations 79 This section provides further information on the camera. Selecting the drive mode 46 Switching the recording information display (DISP) ...... 47 Setting image size 48 Image Size 48 Panorama: Size ... be selected with the Fn (Function) button 55 The functions selected with the MENU button 57 Using the guide function of the camera 64 In-Camera Guide 64 Shooting Tip 64 Viewing images on a computer Using with your computer 66 Using the software 68 Selecting the method for ...
... eyecup 80 The screen displayed for each shooting mode 77 Flash modes available 78 Advanced operations 79 This section provides further information on the camera. Selecting the drive mode 46 Switching the recording information display (DISP) ...... 47 Setting image size 48 Image Size 48 Panorama: Size ... be selected with the Fn (Function) button 55 The functions selected with the MENU button 57 Using the guide function of the camera 64 In-Camera Guide 64 Shooting Tip 64 Viewing images on a computer Using with your computer 66 Using the software 68 Selecting the method for ...

α Handbook
Page 4
... level gauge 83 Monitoring the subject through the lens without effects displayed 83 List of icons for viewfinder mode 84 Shooting a clear image without camera shake 86 Camera shake warning indicator 86 Using the SteadyShot function 86 Using a tripod 87 Selecting the shooting mode 88 Intelligent Auto/ Flash Off 88 Superior Auto...
... level gauge 83 Monitoring the subject through the lens without effects displayed 83 List of icons for viewfinder mode 84 Shooting a clear image without camera shake 86 Camera shake warning indicator 86 Using the SteadyShot function 86 Using a tripod 87 Selecting the shooting mode 88 Intelligent Auto/ Flash Off 88 Superior Auto...
α Handbook
Page 6
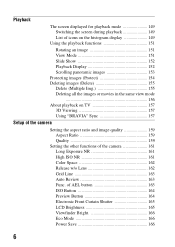
... the images or movies in the same view mode 156 About playback on TV 157 3D Viewing 157 Using "BRAVIA" Sync 157 Setup of the camera Setting the aspect ratio and image quality 159 Aspect Ratio 159 Quality 159 Setting the other functions of AEL button 163 ISO Button 164 Preview... Button 164 Electronic Front Curtain Shutter 165 LCD Brightness 165 Viewfinder Bright 166 Eco Mode 166 Power Save 166 6 of the camera 161 Long Exposure NR 161 High ISO NR 161 Color Space 162 Release w/o Lens 162 Grid Line 163 Auto Review 163 Func.
... the images or movies in the same view mode 156 About playback on TV 157 3D Viewing 157 Using "BRAVIA" Sync 157 Setup of the camera Setting the aspect ratio and image quality 159 Aspect Ratio 159 Quality 159 Setting the other functions of AEL button 163 ISO Button 164 Preview... Button 164 Electronic Front Curtain Shutter 165 LCD Brightness 165 Viewfinder Bright 166 Eco Mode 166 Power Save 166 6 of the camera 161 Long Exposure NR 161 High ISO NR 161 Color Space 162 Release w/o Lens 162 Grid Line 163 Auto Review 163 Func.

α Handbook
Page 7
... Select REC Folder 170 New Folder 170 Recover Image DB 171 Upload Settings 171 Resetting to the default 173 Confirming the version of the camera 177 Connecting the camera to the computer 178 Setting the USB connection 178 Connecting to the computer 178 Importing images to the computer (Windows) ........ 179 Importing images... 182 Creating a standard definition image quality (STD) disc 183 Discs you can use with "PlayMemories Home" ...... 184 Specifying DPOF 185 Date Imprint 185 Cleaning the camera and a lens 186 Cleaning the image sensor 187 7
... Select REC Folder 170 New Folder 170 Recover Image DB 171 Upload Settings 171 Resetting to the default 173 Confirming the version of the camera 177 Connecting the camera to the computer 178 Setting the USB connection 178 Connecting to the computer 178 Importing images to the computer (Windows) ........ 179 Importing images... 182 Creating a standard definition image quality (STD) disc 183 Discs you can use with "PlayMemories Home" ...... 184 Specifying DPOF 185 Date Imprint 185 Cleaning the camera and a lens 186 Cleaning the image sensor 187 7

α Handbook
Page 8
Trouble shooting/Others Troubleshooting 190 Warning messages 199 Precautions 201 To use your camera abroad - Power sources 204 AVCHD format 205 3D-shootings 206 Memory card 207 Battery pack/Battery charger 209 The License 211 Index 212 8
Trouble shooting/Others Troubleshooting 190 Warning messages 199 Precautions 201 To use your camera abroad - Power sources 204 AVCHD format 205 3D-shootings 206 Memory card 207 Battery pack/Battery charger 209 The License 211 Index 212 8

α Handbook
Page 9
Basic operations The contents of the camera, see "Advanced operations" (page 79). 9 To more effectively take advantage of the "Basic operations" section are the same as those in the Instruction Manual supplied. This section provides the basic information on operating the camera.
Basic operations The contents of the camera, see "Advanced operations" (page 79). 9 To more effectively take advantage of the "Basic operations" section are the same as those in the Instruction Manual supplied. This section provides the basic information on operating the camera.

α Handbook
Page 10
... electronic viewfinder. If you monitored before recording. Also, refer to make sure your own standards. Be sure to the operating instructions of your camera or a memory card, etc. Back up ) data to shoot for a long time. Notes on long-time recording • When you... or shoot sunward for a long time, the temperature of data loss, always copy (back up recommendation To avoid the potential risk of the camera rises. However, there may trail across on 3Dcompatible monitors. Notes on a nearby object, it is not a malfunction. The internal mechanism may cause...
... electronic viewfinder. If you monitored before recording. Also, refer to make sure your own standards. Be sure to the operating instructions of your camera or a memory card, etc. Back up ) data to shoot for a long time. Notes on long-time recording • When you... or shoot sunward for a long time, the temperature of data loss, always copy (back up recommendation To avoid the potential risk of the camera rises. However, there may trail across on 3Dcompatible monitors. Notes on a nearby object, it is not a malfunction. The internal mechanism may cause...
α Handbook
Page 11
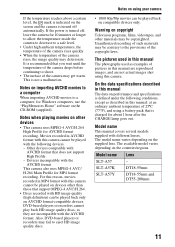
... camera for Windows computers, use the "PlayMemories Home" software on copyright Television programs, films, videotapes, and other than those that support MPEG-4 AVC/H.264. • Discs recorded with AVCHD format that does not support High Profile - Warning on the CD-ROM (supplied). Unauthorized recording of the copyright laws. Model name SLT-A57 SLT-A57K SLT...
... camera for Windows computers, use the "PlayMemories Home" software on copyright Television programs, films, videotapes, and other than those that support MPEG-4 AVC/H.264. • Discs recorded with AVCHD format that does not support High Profile - Warning on the CD-ROM (supplied). Unauthorized recording of the copyright laws. Model name SLT-A57 SLT-A57K SLT...
α Handbook
Page 12
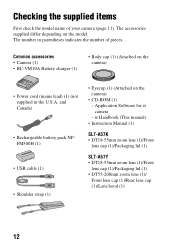
... (1) • USB cable (1) • Shoulder strap (1) • Eyecup (1) (Attached on the model. Application Software for α camera - α Handbook (This manual) • Instruction Manual (1) SLT-A57K • DT18-55mm zoom lens (1)/Front lens cap (1)/Packaging lid (1) SLT-A57Y • DT18-55mm zoom lens (1)/Front lens cap (1)/Packaging lid (1) • DT55-200mm zoom lens (1)/ Front...
... (1) • USB cable (1) • Shoulder strap (1) • Eyecup (1) (Attached on the model. Application Software for α camera - α Handbook (This manual) • Instruction Manual (1) SLT-A57K • DT18-55mm zoom lens (1)/Front lens cap (1)/Packaging lid (1) SLT-A57Y • DT18-55mm zoom lens (1)/Front lens cap (1)/Packaging lid (1) • DT55-200mm zoom lens (1)/ Front...

α Handbook
Page 13
Doing so may cause noise or lower the volume. 13 Front side Preparing the camera A Shutter button (31) B Power switch (27) C Control dial (95, 97, 99) D Remote sensor (148) E Self-timer lamp (145) F Lens contacts* G Mirror* H Preview button (97)/Focus ...
Doing so may cause noise or lower the volume. 13 Front side Preparing the camera A Shutter button (31) B Power switch (27) C Control dial (95, 97, 99) D Remote sensor (148) E Self-timer lamp (145) F Lens contacts* G Mirror* H Preview button (97)/Focus ...

α Handbook
Page 14
... v/V/b/B/DISP (Display) (47, 149)/WB (White balance) (137)/ (Drive) (46, 144)/ (Picture Effect) (134) I Control button (Enter)/AF button (113)/Object Tracking button (114) J (In-Camera Guide) button (64) For viewing: (Delete) button (35) K (Playback) button (34) * Do not directly touch this part. 14
... v/V/b/B/DISP (Display) (47, 149)/WB (White balance) (137)/ (Drive) (46, 144)/ (Picture Effect) (134) I Control button (Enter)/AF button (113)/Object Tracking button (114) J (In-Camera Guide) button (64) For viewing: (Delete) button (35) K (Playback) button (34) * Do not directly touch this part. 14

α Handbook
Page 16
...the connector of the Remote Commander faces forward. 16 C Speaker D DC IN terminal • When connecting the ACPW10AM AC Adaptor (sold separately) to the camera, insert the plug of the Remote Commander into the REMOTE terminal, aligning the guide of the plug with the guide of the strap onto the... camera. F HDMI mini terminal (52, 157) G (USB) terminal (178) H Access lamp (22) I Memory card insertion slot (21) J Memory card cover (21) E Microphone jack • When...
...the connector of the Remote Commander faces forward. 16 C Speaker D DC IN terminal • When connecting the ACPW10AM AC Adaptor (sold separately) to the camera, insert the plug of the Remote Commander into the REMOTE terminal, aligning the guide of the plug with the guide of the strap onto the... camera. F HDMI mini terminal (52, 157) G (USB) terminal (178) H Access lamp (22) I Memory card insertion slot (21) J Memory card cover (21) E Microphone jack • When...

α Handbook
Page 17
Identifying parts Preparing the camera 17 You will be unable to firmly secure the camera to do so may damage the camera. K Battery insertion slot (21) L Battery cover (21) M Tripod receptacle • Use a tripod with a screw length of 5.5 mm (7/32 inch) or longer, and attempting to tripods with a screw length of less than 5.5 mm (7/32 inch).
Identifying parts Preparing the camera 17 You will be unable to firmly secure the camera to do so may damage the camera. K Battery insertion slot (21) L Battery cover (21) M Tripod receptacle • Use a tripod with a screw length of 5.5 mm (7/32 inch) or longer, and attempting to tripods with a screw length of less than 5.5 mm (7/32 inch).

α Handbook
Page 18
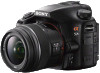
... use these lenses on 35mm-format cameras. • For the lenses other than DT 1855mm F3.5-5.6 SAM/DT 55200mm F4-5.6 SAM, refer to the operating instructions supplied with an APS-C sized image sensor). Lens DT 18-55mm F3.5-5.6 SAM (Supplied with the SLT-A57K/A57Y) DT 55-200mm F4-5.6 ...SAM (Supplied with the SLT-A57Y) Identifying parts A Focusing ring B Zoom ring C Focal-length scale D Focal-length index E Lens contacts F Focusing mode switch G Mounting index • The DT 18-55mm F3.5-5.6 SAM/DT 55-200mm F4-5.6 SAM are designed for Sony Amount cameras (...
... use these lenses on 35mm-format cameras. • For the lenses other than DT 1855mm F3.5-5.6 SAM/DT 55200mm F4-5.6 SAM, refer to the operating instructions supplied with an APS-C sized image sensor). Lens DT 18-55mm F3.5-5.6 SAM (Supplied with the SLT-A57K/A57Y) DT 55-200mm F4-5.6 ...SAM (Supplied with the SLT-A57Y) Identifying parts A Focusing ring B Zoom ring C Focal-length scale D Focal-length index E Lens contacts F Focusing mode switch G Mounting index • The DT 18-55mm F3.5-5.6 SAM/DT 55-200mm F4-5.6 SAM are designed for Sony Amount cameras (...

α Handbook
Page 19
The battery pack is low, charge it . If the battery level is discharged little by little, even when you shoot. Preparing the camera Charging the battery pack When using the camera for the first time, be charged even when it has not been fully depleted. To avoid missing an opportunity to charge the...
The battery pack is low, charge it . If the battery level is discharged little by little, even when you shoot. Preparing the camera Charging the battery pack When using the camera for the first time, be charged even when it has not been fully depleted. To avoid missing an opportunity to charge the...

α Handbook
Page 21
Lock lever 4 While sliding the memory card cover, open the cover. 2 Firmly insert the battery pack all the way while pressing the lock lever with the tip of the battery. 3 Close the cover. Preparing the camera Inserting the battery pack/memory card (sold separately) 1 While sliding the battery cover open lever, open the cover. 21
Lock lever 4 While sliding the memory card cover, open the cover. 2 Firmly insert the battery pack all the way while pressing the lock lever with the tip of the battery. 3 Close the cover. Preparing the camera Inserting the battery pack/memory card (sold separately) 1 While sliding the battery cover open lever, open the cover. 21

α Handbook
Page 22
Be careful not to operating conditions with your camera. 22 Ensure the notched corner faces correctly. 6 Close the cover. Slide the lock lever in percent figures is not lit, then open the cover, and ... lamp is displayed according to the operating conditions of the arrow 10 seconds after turning off the camera. The remaining battery time in the direction of your camera. To remove the battery pack Turn off the camera, then remove the battery pack. Inserting the battery pack/memory card (sold separately) 5 Insert a memory card...
Be careful not to operating conditions with your camera. 22 Ensure the notched corner faces correctly. 6 Close the cover. Slide the lock lever in percent figures is not lit, then open the cover, and ... lamp is displayed according to the operating conditions of the arrow 10 seconds after turning off the camera. The remaining battery time in the direction of your camera. To remove the battery pack Turn off the camera, then remove the battery pack. Inserting the battery pack/memory card (sold separately) 5 Insert a memory card...


