Operating Instructions
Page 1
Record the serial number in the space provided below. Model No. PS-LX250H Serial No PS-LX250H © 1999 Sony Corporation 1GB Refer to them whenever you call upon your Sony dealer regarding this product. 3-866-873-13(1) Stereo Turntable System Operating Instructions GB Mode d'emploi FR OWNER'S RECORD The model and serial numbers are located at the rear.
Record the serial number in the space provided below. Model No. PS-LX250H Serial No PS-LX250H © 1999 Sony Corporation 1GB Refer to them whenever you call upon your Sony dealer regarding this product. 3-866-873-13(1) Stereo Turntable System Operating Instructions GB Mode d'emploi FR OWNER'S RECORD The model and serial numbers are located at the rear.
Operating Instructions
Page 3
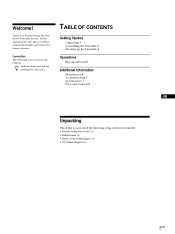
... Playing a Record 5 Additional Information Maintenance 6 Troubleshooting 7 Specifications 7 Parts and Controls 8 GB Unpacking Check that you for purchasing the Sony Stereo Turntable System. Convention The following items with your turntable: • Platter (with drive belt) (1) • Rubber mat (1) • Dust cover (with hinges) (1) • 45 r/min adaptor (1) 3GB Welcome! Thank you received the following icon...
... Playing a Record 5 Additional Information Maintenance 6 Troubleshooting 7 Specifications 7 Parts and Controls 8 GB Unpacking Check that you for purchasing the Sony Stereo Turntable System. Convention The following items with your turntable: • Platter (with drive belt) (1) • Rubber mat (1) • Dust cover (with hinges) (1) • 45 r/min adaptor (1) 3GB Welcome! Thank you received the following icon...
Operating Instructions
Page 4
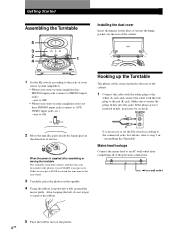
.... / to a wall outlet 5 Place the rubber mat on the rear of the cabinet. 1 Set the EQ switch according to the jacks of your stereo system (amplifier). • When your stereo system (amplifier) has PHONO input jacks (connect to PHONO input jacks) nset to OFF. • When your...ribbon, loop the drive belt around the motor pully. ON OFF 2 Move the metallic parts inside the larger gear in "Assembling the Turntable". Hooking up the Turntable The phono cables come attached to the platter even if START is necessary to set the EQ switch according to insert the plugs firmly...
.... / to a wall outlet 5 Place the rubber mat on the rear of the cabinet. 1 Set the EQ switch according to the jacks of your stereo system (amplifier). • When your stereo system (amplifier) has PHONO input jacks (connect to PHONO input jacks) nset to OFF. • When your...ribbon, loop the drive belt around the motor pully. ON OFF 2 Move the metallic parts inside the larger gear in "Assembling the Turntable". Hooking up the Turntable The phono cables come attached to the platter even if START is necessary to set the EQ switch according to insert the plugs firmly...

