
Note: Recording
Page 1
For details on recording PowerMode NORMAL QUICK ʮPowerMode 61 Make sure "PowerMode" in the menu is set to "NORMAL" whenever you record. If it is set to "QUICK", the battery indicator may give a false reading. Futhermore, the recordable time will be shortened by half or more. MZ-N10 Note on the "PowerMode" setting, refer to page 67 in Japan 0-461-888-01(1) Sony Corporation 2002 Printed in the recorder's operating instructions.
For details on recording PowerMode NORMAL QUICK ʮPowerMode 61 Make sure "PowerMode" in the menu is set to "NORMAL" whenever you record. If it is set to "QUICK", the battery indicator may give a false reading. Futhermore, the recordable time will be shortened by half or more. MZ-N10 Note on the "PowerMode" setting, refer to page 67 in Japan 0-461-888-01(1) Sony Corporation 2002 Printed in the recorder's operating instructions.

Notes: installing & operating OpenMG
Page 1
... Windows Media Player 7.0 or higher is required. "Recover file." In this case, you check-out two or more than "C:\Program Files\Sony\OpenMG Jukebox." • When upgrading to OpenMG Jukebox Ver. 2.2 from an older version, the file-deletion confirmation dialog box may become hidden... is connected to your browser. x Remarques sur l'installation de OpenMG Jukebox • N'installez pas OpenMG Jukebox dans un dossier autre que "C:\Program Files\Sony\OpenMG Jukebox". • A la mise à niveau à OpenMG Jukebox Ver. 2.2 à partir d'une version plus d'un moniteur raccordé...
... Windows Media Player 7.0 or higher is required. "Recover file." In this case, you check-out two or more than "C:\Program Files\Sony\OpenMG Jukebox." • When upgrading to OpenMG Jukebox Ver. 2.2 from an older version, the file-deletion confirmation dialog box may become hidden... is connected to your browser. x Remarques sur l'installation de OpenMG Jukebox • N'installez pas OpenMG Jukebox dans un dossier autre que "C:\Program Files\Sony\OpenMG Jukebox". • A la mise à niveau à OpenMG Jukebox Ver. 2.2 à partir d'une version plus d'un moniteur raccordé...

Notes: using batteries -and- charging
Page 1
... after attaching the dry battery case and inserting a new dry battery into the case. • If the recorder has not been used for a long time. Sony Corporation 2003 Printed in it on the cradle. If this happens, leave the recorder on the cradle for a few days after the battery became... with the recorder. For details, refer to OFF if the recorder will not light up immediately after you place the recorder on the USB cradle. MZ-N10 Notes on using the recorder again.
... after attaching the dry battery case and inserting a new dry battery into the case. • If the recorder has not been used for a long time. Sony Corporation 2003 Printed in it on the cradle. If this happens, leave the recorder on the cradle for a few days after the battery became... with the recorder. For details, refer to OFF if the recorder will not light up immediately after you place the recorder on the USB cradle. MZ-N10 Notes on using the recorder again.

Notice: before using the recorder
Page 1
f Sony Corporation 2003 Printed in Japan 0-883-913-11(1) MZ-N10 Before using the recorder Slide the BUILT-IN BATTERY switch at the rear of the recorder to ON.
f Sony Corporation 2003 Printed in Japan 0-883-913-11(1) MZ-N10 Before using the recorder Slide the BUILT-IN BATTERY switch at the rear of the recorder to ON.

Notice: before using the recorder
Page 2
In this reason, the charging time may be faster than normal the first time you charge the battery. For this case, remove the recorder from the USB cradle, start playback and check the battery condition on charging the built-in rechargeable battery for the first time The built-in rechargeable battery comes charged to some extent when shipping of the MZ-N10. d fΪϤd f d d f m f Note on the display window. : The battery level is sufficient.
In this reason, the charging time may be faster than normal the first time you charge the battery. For this case, remove the recorder from the USB cradle, start playback and check the battery condition on charging the built-in rechargeable battery for the first time The built-in rechargeable battery comes charged to some extent when shipping of the MZ-N10. d fΪϤd f d d f m f Note on the display window. : The battery level is sufficient.

Operating Instructions (primary manual)
Page 1
Portable MiniDisc Recorder MZ-N10 3-250-372-12(1) Portable MiniDisc Recorder Operating Instructions Recorder Operation p_a_g_e_1_3______ Software Operation p_a_g_e_9_6______ "WALKMAN" is a trademark of Sony Corporation to represent Headphone Stereo products. MZ-N10 ©2002 Sony Corporation is a registered trademark of Sony Corporation.
Portable MiniDisc Recorder MZ-N10 3-250-372-12(1) Portable MiniDisc Recorder Operating Instructions Recorder Operation p_a_g_e_1_3______ Software Operation p_a_g_e_9_6______ "WALKMAN" is a trademark of Sony Corporation to represent Headphone Stereo products. MZ-N10 ©2002 Sony Corporation is a registered trademark of Sony Corporation.

Operating Instructions (primary manual)
Page 2
...To prevent fire or shock hazard, do not place objects filled with your Sony dealer regarding this product. Caution The use of optical instruments with news papers, table cloths, curtains, etc. MZ-N10 Serial No. Product registration Please register this product on the apparatus. If ...you call : Sony Customer Information Services 1-(866)-456-7669 Or write to: Sony Customer Information Services 12451 Gateway Blvd. Do not install the...
...To prevent fire or shock hazard, do not place objects filled with your Sony dealer regarding this product. Caution The use of optical instruments with news papers, table cloths, curtains, etc. MZ-N10 Serial No. Product registration Please register this product on the apparatus. If ...you call : Sony Customer Information Services 1-(866)-456-7669 Or write to: Sony Customer Information Services 12451 Gateway Blvd. Do not install the...

Operating Instructions (primary manual)
Page 3
...guarantee that may cause undesired operation. For more of the FCC Rules. Increase the separation between the equipment and receiver. - SONY MZ-N10 Tested To Comply With FCC Standards FOR HOME OR OFFICE USE For customers in a particular installation. This equipment has been ...device must accept any changes or modifications not expressly approved in accordance with Part 15 of Conformity Trade Name: SONY Model No.: MZ-N10 Responsible Party: Sony Electronics Inc. Reorient or relocate the receiving antenna. - Operation is encouraged to try to provide reasonable protection ...
...guarantee that may cause undesired operation. For more of the FCC Rules. Increase the separation between the equipment and receiver. - SONY MZ-N10 Tested To Comply With FCC Standards FOR HOME OR OFFICE USE For customers in a particular installation. This equipment has been ...device must accept any changes or modifications not expressly approved in accordance with Part 15 of Conformity Trade Name: SONY Model No.: MZ-N10 Responsible Party: Sony Electronics Inc. Reorient or relocate the receiving antenna. - Operation is encouraged to try to provide reasonable protection ...
Operating Instructions (primary manual)
Page 4
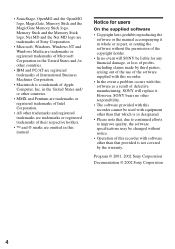
... without notice. • Operation of this recorder with this software as a result of defective manufacturing, SONY will replace it. Program © 2001, 2002 Sony Corporation Documentation © 2002 Sony Corporation 4 • SonicStage, OpenMG and the OpenMG logo, MagicGate, Memory Stick and the MagicGate Memory... Stick logo, Memory Stick and the Memory Stick logo, Net MD and the Net MD logo are trademarks of Sony Corporation. • Microsoft, Windows, Windows NT and Windows Media are trademarks or registered trademarks of Microsoft Corporation in the United...
... without notice. • Operation of this recorder with this software as a result of defective manufacturing, SONY will replace it. Program © 2001, 2002 Sony Corporation Documentation © 2002 Sony Corporation 4 • SonicStage, OpenMG and the OpenMG logo, MagicGate, Memory Stick and the MagicGate Memory... Stick logo, Memory Stick and the Memory Stick logo, Net MD and the Net MD logo are trademarks of Sony Corporation. • Microsoft, Windows, Windows NT and Windows Media are trademarks or registered trademarks of Microsoft Corporation in the United...

Operating Instructions (primary manual)
Page 6
Surround 38 Selecting the sound quality (6-Band Equalizer 38 Changing playback speed (Digital Pitch Control 39 Setting the alarm (Melody Timer 40 Connecting to create different acoustics (Virtual- Table of contents Recorder Operation Looking at controls 14 Getting started 18 Recording an MD right away 22 Playing an MD right away 26 Various ways of recording 28 Viewing various information 28 To start/stop recording in sync with the sound source (Synchro-recording 29 Long-time recording (MDLP 30 Recording from a TV or radio (Analog Recording 31 Recording from a microphone 32 To ...
Surround 38 Selecting the sound quality (6-Band Equalizer 38 Changing playback speed (Digital Pitch Control 39 Setting the alarm (Melody Timer 40 Connecting to create different acoustics (Virtual- Table of contents Recorder Operation Looking at controls 14 Getting started 18 Recording an MD right away 22 Playing an MD right away 26 Various ways of recording 28 Viewing various information 28 To start/stop recording in sync with the sound source (Synchro-recording 29 Long-time recording (MDLP 30 Recording from a TV or radio (Analog Recording 31 Recording from a microphone 32 To ...

Operating Instructions (primary manual)
Page 7
Editing recorded tracks 43 Before editing 43 Labeling a track or a disc (Name 43 Labeling 44 Re-labeling 45 Moving recorded tracks (Move 46 Dividing a track (Divide 47 Dividing a track directly 47 Adjusting the dividing point before dividing a track (Divide Rehearsal 47 Combining tracks (Combine 48 Erasing tracks and the entire disc (Erase 48 To erase a track 49 To erase the whole disc 49 Using the group function 50 What is the group function 50 Using the group function when recording 50 Recording tracks to a new group 50 Recording a track to an existing group 51 Using the ...
Editing recorded tracks 43 Before editing 43 Labeling a track or a disc (Name 43 Labeling 44 Re-labeling 45 Moving recorded tracks (Move 46 Dividing a track (Divide 47 Dividing a track directly 47 Adjusting the dividing point before dividing a track (Divide Rehearsal 47 Combining tracks (Combine 48 Erasing tracks and the entire disc (Erase 48 To erase a track 49 To erase the whole disc 49 Using the group function 50 What is the group function 50 Using the group function when recording 50 Recording tracks to a new group 50 Recording a track to an existing group 51 Using the ...

Operating Instructions (primary manual)
Page 8
Other operations 58 Useful settings 58 How to use the menu items 61 Setting the clock to stamp the recorded time 62 Turning off the beep sound 62 Changing the operational direction of the display 63 Recording without overwriting existing material 63 Creating a new group when recording 63 Selecting the play mode 64 Adjusting the sound (Virtual-Surround • 6-Band Equalizer) .........66 Changing playback speed (Digital Pitch Control 67 Starting the playback quickly (Quick Mode 67 Protecting your hearing (AVLS 68 Viewing various information 68 Turning on/off the backlight 69 ...
Other operations 58 Useful settings 58 How to use the menu items 61 Setting the clock to stamp the recorded time 62 Turning off the beep sound 62 Changing the operational direction of the display 63 Recording without overwriting existing material 63 Creating a new group when recording 63 Selecting the play mode 64 Adjusting the sound (Virtual-Surround • 6-Band Equalizer) .........66 Changing playback speed (Digital Pitch Control 67 Starting the playback quickly (Quick Mode 67 Protecting your hearing (AVLS 68 Viewing various information 68 Turning on/off the backlight 69 ...

Operating Instructions (primary manual)
Page 9
Troubleshooting and explanations 82 Troubleshooting 82 While charging 82 While recording 83 While playing 85 While Editing 87 While using group function 88 Others 88 Messages 90 Explanations 94 9
Troubleshooting and explanations 82 Troubleshooting 82 While charging 82 While recording 83 While playing 85 While Editing 87 While using group function 88 Others 88 Messages 90 Explanations 94 9

Operating Instructions (primary manual)
Page 10
Software Operation What is a Net MD 97 Basic Operations 98 Basic operational flow using the Net MD 98 Providing the required system environment 99 System requirements 99 Installing the software onto your computer 100 Before installing the software 100 Installing SonicStage Ver.1.5 101 Connecting the Net MD to your computer 103 Storing audio data to your computer 104 Starting SonicStage 104 Recording audio CDs to the hard disk drive 105 Labeling audio data 107 Transferring audio data from your computer to the Net MD (Check-out 108 Checking out audio files to the Net MD 108 ...
Software Operation What is a Net MD 97 Basic Operations 98 Basic operational flow using the Net MD 98 Providing the required system environment 99 System requirements 99 Installing the software onto your computer 100 Before installing the software 100 Installing SonicStage Ver.1.5 101 Connecting the Net MD to your computer 103 Storing audio data to your computer 104 Starting SonicStage 104 Recording audio CDs to the hard disk drive 105 Labeling audio data 107 Transferring audio data from your computer to the Net MD (Check-out 108 Checking out audio files to the Net MD 108 ...

Operating Instructions (primary manual)
Page 11
Other information 114 Settings and Precautions 114 Settings according to OS 114 For users with OpenMG Jukebox, SonicStage, or SonicStage Premium installed on their computer 116 Note on hard disk drive space 117 Notes on system suspend/hibernation mode 117 Backing up the audio data 117 Uninstalling the SonicStage software 118 For Windows XP users 118 For Windows Millennium Edition/Windows 98 Second Edition users 118 For Windows 2000 users 119 Troubleshooting 120 If your computer does not recognize the Net MD 122 If the installation was not successful 122 Information and ...
Other information 114 Settings and Precautions 114 Settings according to OS 114 For users with OpenMG Jukebox, SonicStage, or SonicStage Premium installed on their computer 116 Note on hard disk drive space 117 Notes on system suspend/hibernation mode 117 Backing up the audio data 117 Uninstalling the SonicStage software 118 For Windows XP users 118 For Windows Millennium Edition/Windows 98 Second Edition users 118 For Windows 2000 users 119 Troubleshooting 120 If your computer does not recognize the Net MD 122 If the installation was not successful 122 Information and ...

Operating Instructions (primary manual)
Page 12
Troubleshooting and explanations (page 82) This section shows the troubles you may find while using the recorder, and their solutions. is a trademark of Sony MZ-N10 ©2002 Sony Corporation When using the Net MD (the recorder) connected to your computer screen. For details on your computer Software Operation (pages 96 to 129) Pages ...
Troubleshooting and explanations (page 82) This section shows the troubles you may find while using the recorder, and their solutions. is a trademark of Sony MZ-N10 ©2002 Sony Corporation When using the Net MD (the recorder) connected to your computer screen. For details on your computer Software Operation (pages 96 to 129) Pages ...

Operating Instructions (primary manual)
Page 13
Recorder Operation 13 Checking the supplied accessories AC power adaptor (1) USB cradle (1) Headphones/earphones with a remote control (1) Dedicated USB cable (1) Dry battery case (1) Optical cable (1) CD-ROM (SonicStage Ver. 1.5) (1)* Carrying pouch/carrying case with a belt clip (except USA model) (1) Recordable MD (USA and Canada models only) (1) ∗ Do not play a CD-ROM on an audio CD player.
Recorder Operation 13 Checking the supplied accessories AC power adaptor (1) USB cradle (1) Headphones/earphones with a remote control (1) Dedicated USB cable (1) Dry battery case (1) Optical cable (1) CD-ROM (SonicStage Ver. 1.5) (1)* Carrying pouch/carrying case with a belt clip (except USA model) (1) Recordable MD (USA and Canada models only) (1) ∗ Do not play a CD-ROM on an audio CD player.

Operating Instructions (primary manual)
Page 14
B Charge lamp C Display window D OPEN switch E GROUP button 14 Turn to select Push to enter G zREC (record) switch H T MARK button I END SEARCH button J X button K x button L Handstrap hole Use the hole to attach your own strap. O i (headphones/earphones)/LINE OUT jack P USB cradle connecting jack Press towards > Press towards . M LINE IN (OPT) jack N MIC (PLUG IN POWER) jack There is a tactile dot beside the MIC (PLUG IN POWER) jack. Function play rewind fast forward volume 1) The N and VOL + button has a tactile dot. A 5-way control key qa qs qd qf qg qh qj qk ql F Jog ...
B Charge lamp C Display window D OPEN switch E GROUP button 14 Turn to select Push to enter G zREC (record) switch H T MARK button I END SEARCH button J X button K x button L Handstrap hole Use the hole to attach your own strap. O i (headphones/earphones)/LINE OUT jack P USB cradle connecting jack Press towards > Press towards . M LINE IN (OPT) jack N MIC (PLUG IN POWER) jack There is a tactile dot beside the MIC (PLUG IN POWER) jack. Function play rewind fast forward volume 1) The N and VOL + button has a tactile dot. A 5-way control key qa qs qd qf qg qh qj qk ql F Jog ...

Operating Instructions (primary manual)
Page 15
S BUILT-IN BATTERY switch Slide the switch to ON when using the power from being accidentally operated when you carry the recorder, use this function. F Bookmark indication Lights up while recording. The display window of the MD. D Melody timer indication E Disc indication Shows that the disc is rotating for the first time, and keep it ON thereafter (it is factory set to disable the buttons on the recorder. J Battery indication Shows the approximate remaining battery charge. Q A terminal for attaching dry battery case R HOLD switch Slide the switch in rechargeable ...
S BUILT-IN BATTERY switch Slide the switch to ON when using the power from being accidentally operated when you carry the recorder, use this function. F Bookmark indication Lights up while recording. The display window of the MD. D Melody timer indication E Disc indication Shows that the disc is rotating for the first time, and keep it ON thereafter (it is factory set to disable the buttons on the recorder. J Battery indication Shows the approximate remaining battery charge. Q A terminal for attaching dry battery case R HOLD switch Slide the switch in rechargeable ...

Operating Instructions (primary manual)
Page 16
B x (stop) button C Jog lever (NX/ENT, ., >) NX/ENT (to press): play, pause, enter .(to slide towards): REW > (to disable the buttons on the remote control. To prevent the buttons from being accidentally operated when you carry the recorder, use this function. The headphones/earphones with a remote control A F B G C H D I P MODE/ button J SOUND button 16 F Clip G HOLD switch Slide the switch in the direction of the arrow (a yellow mark appears) to slide towards): FF D Display window E (group) +, - H DISPLAY button I J E A Volume control (VOL+, -) Turn to adjust the volume....
B x (stop) button C Jog lever (NX/ENT, ., >) NX/ENT (to press): play, pause, enter .(to slide towards): REW > (to disable the buttons on the remote control. To prevent the buttons from being accidentally operated when you carry the recorder, use this function. The headphones/earphones with a remote control A F B G C H D I P MODE/ button J SOUND button 16 F Clip G HOLD switch Slide the switch in the direction of the arrow (a yellow mark appears) to slide towards): FF D Display window E (group) +, - H DISPLAY button I J E A Volume control (VOL+, -) Turn to adjust the volume....