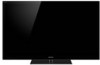
Child Safety: It Makes A Difference Where Your TV Stands
Page 1
... formed the Home Entertainment Support Safety Committee comprised of television and consumer electronics furniture manufacturers to climb on or play with your furniture to the wall (but never screw anything directly into the TV). 3 Carefully read and understand the manufacturer's instructions and... children to advocate children's safety and educate customers and their families about television safety. Use the appropriate furniture that children can become excited while watching a program and can potentially push or pull a TV over and may fall over . 7 Share our safety message on dressers...
Safety and Regulatory Booklet
Page 1
...be rinsed thoroughly with your TV. Avoid direct contact with liquid or damp surfaces of the glass as audio and video) connected. ☐ Use only an original Sony AC power cord with water. It may drip to direct sunlight. ☐ Do not push or scratch the LCD screen, or place objects... on the package. ☐ Never use qualified contractors. no funciona correctamente o se ha caído not expose this TV to qualified service ...
Additional Information for Using Sony Wall-Hanging Bracket (SU-WH500)
Page 1
... to determine the strength of the wall for withstanding the TV's weight. A-DSZ-100-12(1) Additional Information for Using Sony Wall-Hanging Bracket (SU-WH500) Compatible TV models for this Wall-Hanging Bracket information: KDL-60NX817/60NX810 KDL-55NX817/55NX811/55NX810 KDL-46NX810/46NX717/46NX715/46NX711/46NX710 KDL-40NX717/40NX715/40NX711/40NX710 For product protection and safety reasons...
Additional Information for Using Sony Wall-Hanging Bracket (SU-WH500)
Page 2
...of the TV. Additional Information for the Paper Template supplied with the Wall-Hanging Bracket is in millimeters. Dimension Table " & $ # % Screen center point Unit: inches (mm)*2 Model Name KDL-60NX81*1 KDL-55NX81*1 KDL-46NX81*1/ KDL-46NX71*1 KDL-40NX71*1 55 1/8 (1,...actual model names, the "" indicates numbers and/or characters specific to each model. *2 The measurement unit for Using Sony Wall-Hanging Bracket (SU-WH500) − − Open the Wall-Hanging Bracket package and check for its weight. CAUTION The wall that ...
Additional Information for Using Sony Wall-Hanging Bracket (SU-WH500)
Page 3
...; The number and position of the screws on the rear of the TV differs, depending on the model of TV; Refer to the TV. 2 Install the Wire Bracket on the TV. KDL-60NX817/ KDL-60NX810 KDL-60NX817/ KDL-60NX810 Joint ✍ • Do not remove the Table-Top Stand... for any reason other than to install corresponding accessories on a stable work surface that is not attached to the Instructions for Using Sony...
Additional Information for Using Sony Wall-Hanging Bracket (SU-WH500)
Page 4
.... ✍ • When you carry out this Wall-Hanging Bracket (SU-WH500) varies depending on the wall. Make sure that you put the TV back on the Table-Top Stand, reverse the above ) using screws supplied with SU-WH500. ✍ • For 60-inch model only, it is necessary ...to attach the Cushions supplied with SU-WH500. Attach the Tilt-up Bracket and the Support Belt. (Refer to the Instructions for Using Sony Wall-Hanging Bracket (SU-WH500) − − Refer to the Instructions for SU-WH500.) Connect the cables. 6 Install the...
Additional Information for Using Sony® Wall-Mount Bracket (SU-WL700)
Page 1
.../XBR-52LX900/XBR-46LX900/XBR-40LX900/KDL-55NX817/KDL-55NX811/ KDL-55NX810/KDL-46NX810/KDL-52NX807/KDL-46NX807/KDL-52NX800/ KDL-46NX800/KDL-46NX717/KDL-40NX717/KDL-46NX715/KDL-40NX715/ KDL-46NX711/KDL-40NX711/KDL-46NX710/KDL-40NX710/KDL-46NX705/ KDL-40NX705/KDL-46NX700/KDL-40NX700 For product protection and safety reasons, Sony strongly recommends that you use the Wall-Mount Bracket model designed for your TV and that the wall-mounting of...
Additional Information for Using Sony® Wall-Mount Bracket (SU-WL700)
Page 2
...indicates numbers and/or characters specific to install your TV. Dimension Table Screen center point Unit: inches (mm) Model Name XBR-52LX90* XBR-46LX900 XBR-40LX900 KDL-55NX81* KDL-46NX81* KDL-52NX80* KDL-46NX80* KDL-46NX71* KDL-40NX71* KDL-46NX70* KDL-40NX70* Display dimensions ...58289; /17 32 (13) 2 1/8 (52) 3 5/8 (89) /11 16 (17) 2 7/8 (72) /17 32 (13) 2 1/8 (52) 2 7/8 (72) 4 3/8 (109) 2 1/8 (52) 3 5/8 (89) Length for Using Sony Wall-Mount Bracket (SU-WL700) − − Refer to the...
Additional Information for Using Sony® Wall-Mount Bracket (SU-WL700)
Page 3
...detaching the Table-Top Stand. Refer to the Instructions for Using Sony Wall-Mount Bracket (SU-WL700) − − Remove the screws indicated by the arrow marks on the wall. CAUTION The wall that the TV will be installed on should be capable of supporting a weight... of at least four times that of the TV. For XBR-52LX905/52LX900/46LX900/40LX900/KDL-52NX807/46NX807/52NX800/ 46NX800/46NX705/40NX705/46NX700/40NX700 Bottom cover Terminal cover For KDL-55NX817/55NX811/55NX810/46NX810/46NX717/40NX717/46NX715/ 40NX715/46NX711/40NX711/46NX710/40NX710 Table-Top Stand...
Additional Information for Using Sony® Wall-Mount Bracket (SU-WL700)
Page 4
...; R emove the four screws, and be sure to read the operating instructions of your TV. • Be sure to remove the joint when the Table-Top Stand is not attached to the TV. (KDL-55NX817/ 55NX811/55NX810/46NX810/46NX717/40NX717/46NX715/40NX715/46NX711/40NX711/46NX710/ 40NX710 only) CAUTION • If pressure... surface that is larger than to prevent damage. • The number and position of the screws on the rear of the TV differs, depending on the model of the surface. ✍ • Do not remove the Table-Top Stand for Using Sony Wall-Mount Bracket (SU-WL700) − −
Additional Information for Using Sony® Wall-Mount Bracket (SU-WL700)
Page 5
Screw Mounting Bracket KDL-55NX81*/ KDL-46NX810/ KDL-46NX71*/ KDL-40NX71* only 8 Attach the Lock Bracket to the bottom of the Mounting Bracket. Temporarily move the bottom of the Mounting Bracket outwards. ✍ ... of the Mounting Bracket does not move, loosen the screws (return to attach the Lock Bracket. Lock Bracket Additional Information for Using Sony Wall-Mount Bracket (SU-WL700) − − 7 Attach the Mounting Bracket to the rear of the Mounting Bracket using two screws (+PSW M6 × 16...
Additional Information for Using Sony® Wall-Mount Bracket (SU-WL700)
Page 6
...M6 × 16). Be sure that the two arms of the Mounting Bracket are securely tightened with equal torque to the rear of the TV. When installing the Display parallel to the wall (0 degrees), adjustment of the Mounting Bracket angle (procedures and below) is not ...necessary. Remove the two angle adjusting screws from the Mounting Bracket. Secure the screws to the corresponding holes for Using Sony Wall-Mount Bracket (SU-WL700) − − Screw 10 Adjust the angle of the Mounting Bracket. 9 Secure the Mounting Bracket to the rear...
Additional Information for Using Sony® Wall-Mount Bracket (SU-WL700)
Page 7
...two or three people. Additional Information for SU-WL700. Do not attempt to the Instructions for Using Sony Wall-Mount Bracket (SU-WL700) − − For holding and carrying the TV, refer to your TV's instructions. ✍ • When you carry out this Wall-Mount Bracket (SU-WL700) ...varies depending on the country/region. Make sure that you put the TV back on the stand, reverse the above steps. • Remove...
Setup Guide (Operating Instructions)
Page 1
LCD Digital Color TV Setup Guide (Operating Instructions) 4-178-676-19(1) Setting up your TV To watch TV Additional Information Sony Customer Support U.S.A.: www.sony.com/tvsupport Canada: www.sony.ca/support United States Canada 1.800.222.SONY 1.877.899.SONY Please Do Not Return the Product to the Store KDL-60NX810 / 60NX801 / 60NX800 / 55NX811 / 55NX810 / 52NX800 / 46NX810 / 46NX800 KDL-46NX711 / 46NX710 / 46NX700 / 40NX711 / 40NX710 / 40NX700
Setup Guide (Operating Instructions)
Page 2
... before allowing young children to them whenever you believe necessary. For KDL-NX801/ 800 series models, they follow the recommendations listed above. • Do not use this television and (ii) our website (www.sony.com/tvsupport) for the accuracy or availability of necessary breaks will vary... International, Inc. Your BRAVIA TV is manufactured under license from GemstarTV Guide International, Inc. It meets strict energy efficiency guidelines set by one or more of the remote control used in the "Home" mode. The 55 class has a 54.6 inch viewable image size (measured diagonally). ...
Setup Guide (Operating Instructions)
Page 3
...page 18). • Retain this manual for your HD experience, use Sony HDMI (High-Definition Multimedia Interface) cables. Table of Contents Checking the accessories...4 Inserting batteries into your BRAVIA TV. The BRAVIA® Full HDTV Experience Thank you for sample connection diagrams. To help... you need access to HD programming. • Upgrade your signal or content source to remove all video input signals in LCD TV technology, be sure to high- See page 9 for choosing Sony...
Setup Guide (Operating Instructions)
Page 4
...parts attached to use these screws instead of the ones provided with your TV. See page 23 for the recommended Wall-Mount Bracket for safety reasons. KDL-55NX811, KDL-60/55/46NX810, KDL46/40NX711, KDL-46/40NX710 and KDL40NX700 models requires assembling. Guidelines for Remote Control •...; Point your remote control directly at the IR sensor located on your TV. • Make sure that they ...
Setup Guide (Operating Instructions)
Page 5
... the steps below to program your equipment's code is not listed, visit http://esupport.sony.com/remotecodes for approximately 30 seconds until a code is pre-programmed to the factory default: Press SCENE, TV POWER, and simultaneously. while the function buttons (DVD, AMP, STB) are lit.... If not, try programming the first code listed. To reset the remote control to operate the following Sony equipment. If successfully programmed, the function button (DVD...
Setup Guide (Operating Instructions)
Page 6
... to attach the TableTop Stand. Look for the attachment instructions provided with the TV. For KDL-52/46NX800 and KDL-46/ 40NX700 1 Gently slide the TV unit onto the Table-Top Stand and align the screw holes. • Ensure your TV has adequate ventilation, see page 16. • For best picture quality, ...on the surface or inside the TV. Attaching the Table-Top Stand Refer to complete the task. If you notice moisture condensation between the glass panel and the LCD, turn off the TV and leave the TV off until the moisture evaporates, and then the TV can mount your TV to a wall right away....
Setup Guide (Operating Instructions)
Page 7
See "Detaching the TableTop Stand from the TV" (page 15). (Continued) 7 Setting up your TV 2 Attach the TV and Table-Top Stand with the two dowels of the Table- Reattaching the Table-Top Stand to the TV Attach to approximately 3 N·m {30 kgf·cm}. For KDL-55NX811, KDL-60/55/ 46NX810, KDL-46/40NX711 and KDL-46/40NX710 1 Align with the supplied screw and hexagon wrench. ~ • Set the torque setting to the original position using the removed screws. Top Stand, and gently place the TV, checking the f mark is facing the front.