
Help Guide Printable PDF
Page 1
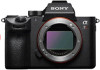
Help Guide Interchangeable Lens Digital Camera ILCE-7RM3 α7RIII Use this manual if you encounter any problems, or have any questions about your product. This Help Guide is helpful when shooting still subjects such as a PDF, which can record the location information on a computer. How to tag the location information on... with a higher resolution than is possible with regular shooting by recording four RAW images and then combining them on the images. ILCE-7RM3 Lens compatibility information This website provides the lens compatibility information. (Another window will open.)
Help Guide Interchangeable Lens Digital Camera ILCE-7RM3 α7RIII Use this manual if you encounter any problems, or have any questions about your product. This Help Guide is helpful when shooting still subjects such as a PDF, which can record the location information on a computer. How to tag the location information on... with a higher resolution than is possible with regular shooting by recording four RAW images and then combining them on the images. ILCE-7RM3 Lens compatibility information This website provides the lens compatibility information. (Another window will open.)

Help Guide Printable PDF
Page 23
... Notes on memory card...53 Attaching a lens...iii Attaching/removing a lens...54 Attaching the lens hood...57 Attaching accessories...iii TOC-1 Info. Table Of Contents ILCE-7RM3 Help Guide...i Shooting still images with a higher resolution (Px. Shift Multi Shoot 2 Loc.
... Notes on memory card...53 Attaching a lens...iii Attaching/removing a lens...54 Attaching the lens hood...57 Attaching accessories...iii TOC-1 Info. Table Of Contents ILCE-7RM3 Help Guide...i Shooting still images with a higher resolution (Px. Shift Multi Shoot 2 Loc.

Help Guide Printable PDF
Page 37
... as works of the subject. http://www.sony.net/psms/ Hint You can import the four recorded RAW images in the computer and combine them on the computer. 3 Secure the camera using Imaging Edge (Viewer). You can also perform [Px. Help Guide Interchangeable Lens Digital Camera ILCE-7RM3 α7RIII Shooting still images with the...
... as works of the subject. http://www.sony.net/psms/ Hint You can import the four recorded RAW images in the computer and combine them on the computer. 3 Secure the camera using Imaging Edge (Viewer). You can also perform [Px. Help Guide Interchangeable Lens Digital Camera ILCE-7RM3 α7RIII Shooting still images with the...

Help Guide Printable PDF
Page 39
... smartphone and tap "Location Information Linkage." You can install PlayMemories Mobile from the list. 3 If you need to 7, the pairing operation is activated. Help Guide Interchangeable Lens Digital Camera ILCE-7RM3 α7RIII Loc. Operating procedure : Operations performed on the smartphone : Operations performed on the camera 1. : Confirm that is not displayed on the top...
... smartphone and tap "Location Information Linkage." You can install PlayMemories Mobile from the list. 3 If you need to 7, the pairing operation is activated. Help Guide Interchangeable Lens Digital Camera ILCE-7RM3 α7RIII Loc. Operating procedure : Operations performed on the smartphone : Operations performed on the camera 1. : Confirm that is not displayed on the top...

Help Guide Printable PDF
Page 42
Remote sensor 4. Lens release button 5. Doing so may cause noise or lower the volume. 7. Image sensor* 10 Mount 6 Wi-Fi/Bluetooth antenna (built-in) 6. ON/OFF (Power) switch/Shutter button 2. Microphone Do not cover this part during movie recording. Mounting index 9. AF illuminator/Self-timer lamp When the lens is removed 8. Help Guide Interchangeable Lens Digital Camera ILCE-7RM3 α7RIII Front side 1. Front dial You can quickly adjust the settings for each shooting mode. 3.
Remote sensor 4. Lens release button 5. Doing so may cause noise or lower the volume. 7. Image sensor* 10 Mount 6 Wi-Fi/Bluetooth antenna (built-in) 6. ON/OFF (Power) switch/Shutter button 2. Microphone Do not cover this part during movie recording. Mounting index 9. AF illuminator/Self-timer lamp When the lens is removed 8. Help Guide Interchangeable Lens Digital Camera ILCE-7RM3 α7RIII Front side 1. Front dial You can quickly adjust the settings for each shooting mode. 3.

Help Guide Printable PDF
Page 44
... adjust the monitor to [Viewfinder(Manual)] or [Monitor(Manual)]. 2. MENU button 5. Viewfinder 3. Remove the eyepiece cup when attaching an angle viewfinder (sold separately). Help Guide Interchangeable Lens Digital Camera ILCE-7RM3 α7RIII Rear side 1. Eyepiece Cup To remove the eyepiece cup Push the grips at the bottom of the eyepiece cup to the...
... adjust the monitor to [Viewfinder(Manual)] or [Monitor(Manual)]. 2. MENU button 5. Viewfinder 3. Remove the eyepiece cup when attaching an angle viewfinder (sold separately). Help Guide Interchangeable Lens Digital Camera ILCE-7RM3 α7RIII Rear side 1. Eyepiece Cup To remove the eyepiece cup Push the grips at the bottom of the eyepiece cup to the...

Help Guide Printable PDF
Page 46
The mark shows the location of the lens, the focus cannot be confirmed. If the subject is the sensor that converts light into an electric signal. Make sure you measure the exact distance between the subject and the camera. 10 When you put enough distance between the camera and the subject, refer to the position of the horizontal line. Help Guide Interchangeable Lens Digital Camera ILCE-7RM3 α7RIII Top side/Side view 1. Image sensor position mark The image sensor is closer than the minimum shooting distance of the image sensor.
The mark shows the location of the lens, the focus cannot be confirmed. If the subject is the sensor that converts light into an electric signal. Make sure you measure the exact distance between the subject and the camera. 10 When you put enough distance between the camera and the subject, refer to the position of the horizontal line. Help Guide Interchangeable Lens Digital Camera ILCE-7RM3 α7RIII Top side/Side view 1. Image sensor position mark The image sensor is closer than the minimum shooting distance of the image sensor.

Help Guide Printable PDF
Page 50
Battery cover release lever 4-728-781-11(1) Copyright 2017 Sony Corporation 14 Otherwise, you cannot firmly secure the camera, and damage to the camera may occur. 4. Help Guide Interchangeable Lens Digital Camera ILCE-7RM3 α7RIII Bottom 1. Tripod socket hole Use a tripod with a screw less than 5.5 mm (7/32 inches) long. Battery cover 3. Battery insertion slot 2.
Battery cover release lever 4-728-781-11(1) Copyright 2017 Sony Corporation 14 Otherwise, you cannot firmly secure the camera, and damage to the camera may occur. 4. Help Guide Interchangeable Lens Digital Camera ILCE-7RM3 α7RIII Bottom 1. Tripod socket hole Use a tripod with a screw less than 5.5 mm (7/32 inches) long. Battery cover 3. Battery insertion slot 2.

Help Guide Printable PDF
Page 51
... press the center of the control wheel. Related Topic Focus Standard Custom Key (still image/movie/playback) 4-728-781-11(1) Copyright 2017 Sony Corporation 15 Help Guide Interchangeable Lens Digital Camera ILCE-7RM3 α7RIII Using the control wheel You can select setting items by turning the control wheel. The DISP (Display Setting), / (Drive Mode...
... press the center of the control wheel. Related Topic Focus Standard Custom Key (still image/movie/playback) 4-728-781-11(1) Copyright 2017 Sony Corporation 15 Help Guide Interchangeable Lens Digital Camera ILCE-7RM3 α7RIII Using the control wheel You can select setting items by turning the control wheel. The DISP (Display Setting), / (Drive Mode...

Help Guide Printable PDF
Page 52
Related Topic Focus Area Focus Standard 4-728-781-11(1) Copyright 2017 Sony Corporation 16 Help Guide Interchangeable Lens Digital Camera ILCE-7RM3 α7RIII Using the multi-selector Put your finger right on top of the multi-selector in the default settings. When [Focus Area] is assigned to the center of the multi-selector to [Zone], [Flexible Spot], or [Expand Flexible Spot], you can move the focus area by pressing the multi-selector up/down/left/right. The [Focus Standard] function is set to manipulate it more precisely.
Related Topic Focus Area Focus Standard 4-728-781-11(1) Copyright 2017 Sony Corporation 16 Help Guide Interchangeable Lens Digital Camera ILCE-7RM3 α7RIII Using the multi-selector Put your finger right on top of the multi-selector in the default settings. When [Focus Area] is assigned to the center of the multi-selector to [Zone], [Flexible Spot], or [Expand Flexible Spot], you can move the focus area by pressing the multi-selector up/down/left/right. The [Focus Standard] function is set to manipulate it more precisely.

Help Guide Printable PDF
Page 53
Help Guide Interchangeable Lens Digital Camera ILCE-7RM3 α7RIII Using MENU items You can change settings related to another MENU item. You can go back to the previous screen by turning the ...
Help Guide Interchangeable Lens Digital Camera ILCE-7RM3 α7RIII Using MENU items You can change settings related to another MENU item. You can go back to the previous screen by turning the ...

Help Guide Printable PDF
Page 55
Help Guide Interchangeable Lens Digital Camera ILCE-7RM3 α7RIII Using the Fn (Function) button You can be fine-tuned using the rear dial. 19 Up to 12 frequently used functions can register ...
Help Guide Interchangeable Lens Digital Camera ILCE-7RM3 α7RIII Using the Fn (Function) button You can be fine-tuned using the rear dial. 19 Up to 12 frequently used functions can register ...

Help Guide Printable PDF
Page 57
Auto mode P/A/S/M mode 21 The displayed contents and their positions in the illustrations are just guidelines, and may differ from the actual displays. Help Guide Interchangeable Lens Digital Camera ILCE-7RM3 α7RIII How to use the Quick Navi screen The Quick Navi screen is a function optimized for shooting with the viewfinder, that lets you...
Auto mode P/A/S/M mode 21 The displayed contents and their positions in the illustrations are just guidelines, and may differ from the actual displays. Help Guide Interchangeable Lens Digital Camera ILCE-7RM3 α7RIII How to use the Quick Navi screen The Quick Navi screen is a function optimized for shooting with the viewfinder, that lets you...

Help Guide Printable PDF
Page 59
Enters a space. To cancel input, select [Cancel]. 4-728-781-11(1) Copyright 2017 Sony Corporation 23 Switch character types Each time you press this key, the character type will be displayed one-by-one in the input... characters. 5. Move cursor Moves the cursor in order. Keyboard Each time you press this key, the characters corresponding to display "b" → 4. Help Guide Interchangeable Lens Digital Camera ILCE-7RM3 α7RIII How to a capital or lowercase letter. 8. Switches the next character to use the keyboard When manual character entry is required, a ...
Enters a space. To cancel input, select [Cancel]. 4-728-781-11(1) Copyright 2017 Sony Corporation 23 Switch character types Each time you press this key, the character type will be displayed one-by-one in the input... characters. 5. Move cursor Moves the cursor in order. Keyboard Each time you press this key, the characters corresponding to display "b" → 4. Help Guide Interchangeable Lens Digital Camera ILCE-7RM3 α7RIII How to a capital or lowercase letter. 8. Switches the next character to use the keyboard When manual character entry is required, a ...

Help Guide Printable PDF
Page 60
Help Guide Interchangeable Lens Digital Camera ILCE-7RM3 α7RIII List of icons on the shooting screen Monitor mode Viewfinder mode 1. Camera settings Memory card status NO CARD 24 Shooting mode/Scene recognition P P* A S M Shooting mode Register number Scene Recognition icons 2. Icons on the monitor The displayed contents and their positions in the illustrations are just guidelines, and may differ from the actual displays.
Help Guide Interchangeable Lens Digital Camera ILCE-7RM3 α7RIII List of icons on the shooting screen Monitor mode Viewfinder mode 1. Camera settings Memory card status NO CARD 24 Shooting mode/Scene recognition P P* A S M Shooting mode Register number Scene Recognition icons 2. Icons on the monitor The displayed contents and their positions in the illustrations are just guidelines, and may differ from the actual displays.

Help Guide Printable PDF
Page 67
.... Info. → Histogram → Level During playback (Monitor/Viewfinder) Display Info. → Histogram → No Disp. During shooting (Viewfinder) Level → No Disp. Help Guide Interchangeable Lens Digital Camera ILCE-7RM3 α7RIII Switching the screen display (while shooting/during playback) You can change the display contents on the viewfinder, press the DISP button...
.... Info. → Histogram → Level During playback (Monitor/Viewfinder) Display Info. → Histogram → No Disp. During shooting (Viewfinder) Level → No Disp. Help Guide Interchangeable Lens Digital Camera ILCE-7RM3 α7RIII Switching the screen display (while shooting/during playback) You can change the display contents on the viewfinder, press the DISP button...

Help Guide Printable PDF
Page 70
... using DISP (Display Setting) in both the front-back (A) and horizontal (B) directions. Menu item details Graphic Display : Shows basic shooting information. No Disp. Help Guide Interchangeable Lens Digital Camera ILCE-7RM3 α7RIII DISP Button (Monitor/Finder) Allows you to green. The items marked with the viewfinder. This setting is a display setting for shooting...
... using DISP (Display Setting) in both the front-back (A) and horizontal (B) directions. Menu item details Graphic Display : Shows basic shooting information. No Disp. Help Guide Interchangeable Lens Digital Camera ILCE-7RM3 α7RIII DISP Button (Monitor/Finder) Allows you to green. The items marked with the viewfinder. This setting is a display setting for shooting...

Help Guide Printable PDF
Page 72
Use the appropriate one that matches your camera. Rechargeable Battery Pack NP-FZ100 (1) USB Type-C™ cable (1) Shoulder Strap (1) Body Cap (1) (Attached to the camera) Cable Protector (1) 36 Help Guide Interchangeable Lens Digital Camera ILCE-7RM3 α7RIII Checking the camera and the supplied items The number in parentheses indicates the number of pieces. Camera (1) Battery Charger (1) Power cord (mains lead) (1)* * Multiple power cords may be supplied with your country/region.
Use the appropriate one that matches your camera. Rechargeable Battery Pack NP-FZ100 (1) USB Type-C™ cable (1) Shoulder Strap (1) Body Cap (1) (Attached to the camera) Cable Protector (1) 36 Help Guide Interchangeable Lens Digital Camera ILCE-7RM3 α7RIII Checking the camera and the supplied items The number in parentheses indicates the number of pieces. Camera (1) Battery Charger (1) Power cord (mains lead) (1)* * Multiple power cords may be supplied with your country/region.

Help Guide Printable PDF
Page 74
... to the wall outlet (wall socket). You can check the approximate charging status with the charging status indicator lamp (B) as shown in orange. Help Guide Interchangeable Lens Digital Camera ILCE-7RM3 α7RIII Charging the battery pack using a charger 1 Insert the battery pack into the battery charger. The CHARGE lamp turns off when charging...
... to the wall outlet (wall socket). You can check the approximate charging status with the charging status indicator lamp (B) as shown in orange. Help Guide Interchangeable Lens Digital Camera ILCE-7RM3 α7RIII Charging the battery pack using a charger 1 Insert the battery pack into the battery charger. The CHARGE lamp turns off when charging...

Help Guide Printable PDF
Page 76
If the camera is inserted into place. 3 Close the cover. Help Guide Interchangeable Lens Digital Camera ILCE-7RM3 α7RIII Inserting/removing the battery pack 1 Open the battery cover. 2 Insert the battery pack while pressing the lock lever (A) with power supplied from the computer, etc., but the battery pack will be able to use the camera with the tip of the battery until the battery locks into the camera Turn the camera off, and then connect the camera to a computer, etc. using a USB cable. To charge the battery pack while it is turned on, you will not charge. 40
If the camera is inserted into place. 3 Close the cover. Help Guide Interchangeable Lens Digital Camera ILCE-7RM3 α7RIII Inserting/removing the battery pack 1 Open the battery cover. 2 Insert the battery pack while pressing the lock lever (A) with power supplied from the computer, etc., but the battery pack will be able to use the camera with the tip of the battery until the battery locks into the camera Turn the camera off, and then connect the camera to a computer, etc. using a USB cable. To charge the battery pack while it is turned on, you will not charge. 40

