Instruction Manual
Page 1
Digital Single Lens Reflex Camera Instruction Manual DSLR-A900 Preparing the camera Before your operation Shooting images Using the shooting function Using the viewing function Using the menu Viewing images on 70% or more recycled paper using VOC (Volatile Organic Compound)-free vegetable oil based ink. Printed on a computer Printing images Additional information on this product and answers to frequently asked questions can be found at our Customer Support Website.
Digital Single Lens Reflex Camera Instruction Manual DSLR-A900 Preparing the camera Before your operation Shooting images Using the shooting function Using the viewing function Using the menu Viewing images on 70% or more recycled paper using VOC (Volatile Organic Compound)-free vegetable oil based ink. Printed on a computer Printing images Additional information on this product and answers to frequently asked questions can be found at our Customer Support Website.
Instruction Manual
Page 4
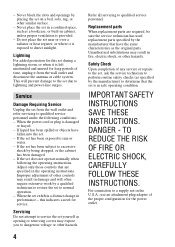
... opening or removing covers may expose you to direct sunlight. If the set yourself as the original parts. Adjust only those controls that have fallen into the set does not operate normally when following conditions: - Servicing Do not attempt to service the set has been exposed to a supply not in the U.S.A., use an attachment plug adapter of time, unplug it is in the operating instructions. IMPORTANT SAFETY INSTRUCTIONS SAVE THESE INSTRUCTIONS...
... opening or removing covers may expose you to direct sunlight. If the set yourself as the original parts. Adjust only those controls that have fallen into the set does not operate normally when following conditions: - Servicing Do not attempt to service the set has been exposed to a supply not in the U.S.A., use an attachment plug adapter of time, unplug it is in the operating instructions. IMPORTANT SAFETY INSTRUCTIONS SAVE THESE INSTRUCTIONS...

Instruction Manual
Page 10
... the number of recordable images 33 Cleaning 35 Before your operation Identifying parts and screen indicators 38 Front side 38 Rear side 39 Sides/Bottom 40 LCD monitor (Recording information display) ......... 41 Display panel 44 Viewfinder 45 Selecting a function/setting 47 Selecting the functions on the Quick Navi screen ..... 48 Shooting images Shooting with the automatic setting 49 Exposure mode 51 Shooting with Program auto 51 Shooting with Aperture priority 53 Shooting with Shutter speed priority 54 Shooting with Manual exposure 55 Shooting...
... the number of recordable images 33 Cleaning 35 Before your operation Identifying parts and screen indicators 38 Front side 38 Rear side 39 Sides/Bottom 40 LCD monitor (Recording information display) ......... 41 Display panel 44 Viewfinder 45 Selecting a function/setting 47 Selecting the functions on the Quick Navi screen ..... 48 Shooting images Shooting with the automatic setting 49 Exposure mode 51 Shooting with Program auto 51 Shooting with Aperture priority 53 Shooting with Shutter speed priority 54 Shooting with Manual exposure 55 Shooting...

Instruction Manual
Page 11
... exposure 70 Shooting with fixed brightness (AE Lock 71 Adjusting the amount of flash light (Flash compensation) 73 Setting ISO 74 Adjusting the color tones (White balance 75 Auto/Preset white balance 75 Setting the color temperature and a filter effect ......... 76 Custom white balance 77 Image processing 79 Using the D-Range Optimizer 79 Using the Creative Style 80 Selecting the drive mode 83 Shooting single shot 83 Shooting continuously 84 Using the self-timer 85 Shooting with Exposure bracket 85 Shooting with the white balance bracket 87 Shooting...
... exposure 70 Shooting with fixed brightness (AE Lock 71 Adjusting the amount of flash light (Flash compensation) 73 Setting ISO 74 Adjusting the color tones (White balance 75 Auto/Preset white balance 75 Setting the color temperature and a filter effect ......... 76 Custom white balance 77 Image processing 79 Using the D-Range Optimizer 79 Using the Creative Style 80 Selecting the drive mode 83 Shooting single shot 83 Shooting continuously 84 Using the self-timer 85 Shooting with Exposure bracket 85 Shooting with the white balance bracket 87 Shooting...

Instruction Manual
Page 51
... Program auto 1 Set the mode dial to P. 2 Set the shooting functions to shoot after adjusting the shutter speed manually. The settings will be saved. The number positions (1/2/3) are used to shoot with the exposure adjusted automatically (both the shutter speed and the aperture value). Mode dial Front control dial Rear control dial P: Program auto mode (below) Allows you reset the settings. 51 The other settings can be stored until you to recall the saved settings. This camera has the following four modes. S: Shutter speed priority mode (page...
... Program auto 1 Set the mode dial to P. 2 Set the shooting functions to shoot after adjusting the shutter speed manually. The settings will be saved. The number positions (1/2/3) are used to shoot with the exposure adjusted automatically (both the shutter speed and the aperture value). Mode dial Front control dial Rear control dial P: Program auto mode (below) Allows you reset the settings. 51 The other settings can be stored until you to recall the saved settings. This camera has the following four modes. S: Shutter speed priority mode (page...

Instruction Manual
Page 59
... Recording menu (page 63). You cannot release the shutter. To measure the exact distance to the subject The mark on the following a moving subject. Still focusing. Cannot focus. Focus indicator Focus indicator z lit lit lit z flashing Status Focus locked. Ready to shoot. In such cases, use the focus lock shooting feature (page 61) or manual focus (page 62). • A subject that may require special focusing: Using the auto focus, it is locked. Ready to shoot. Focus...
... Recording menu (page 63). You cannot release the shutter. To measure the exact distance to the subject The mark on the following a moving subject. Still focusing. Cannot focus. Focus indicator Focus indicator z lit lit lit z flashing Status Focus locked. Ready to shoot. In such cases, use the focus lock shooting feature (page 61) or manual focus (page 62). • A subject that may require special focusing: Using the auto focus, it is locked. Ready to shoot. Focus...

Instruction Manual
Page 66
... shooting a moving subject in the Custom menu. If you can capture a flowing light or the trail of the flash, press the AEL button. Selecting the flash mode 1 Press the Fn button to display the Quick Navi screen (page 48). • When the enlarged display screen is used, set [AEL button] to [AEL hold] or [ AEL hold] in a more three-dimensional picture. This is selectable only when the AUTO mode...
... shooting a moving subject in the Custom menu. If you can capture a flowing light or the trail of the flash, press the AEL button. Selecting the flash mode 1 Press the Fn button to display the Quick Navi screen (page 48). • When the enlarged display screen is used, set [AEL button] to [AEL hold] or [ AEL hold] in a more three-dimensional picture. This is selectable only when the AUTO mode...

Instruction Manual
Page 68
...; Select the manual exposure mode and set the shutter speed to 1/200 second with the SteadyShot on High Speed Sync, refer to the operating instructions supplied with the flash. Flash compensation (page 73) cannot be full emission. Use custom white balance to the (flash sync) terminal, turn off . • For details on or 1/250 second with the SteadyShot off the power of the connected flash. If the power is on...
...; Select the manual exposure mode and set the shutter speed to 1/200 second with the SteadyShot on High Speed Sync, refer to the operating instructions supplied with the flash. Flash compensation (page 73) cannot be full emission. Use custom white balance to the (flash sync) terminal, turn off . • For details on or 1/250 second with the SteadyShot off the power of the connected flash. If the power is on...

Instruction Manual
Page 78
... recording information display on the LCD monitor. 3 Select [ SET] with b/B on the multi-selector, then press the center of the multi-selector. Note • The message "Custom WB error" indicates that the value is beyond the expected range. (When the flash is used when the shutter button is pressed, a custom white balance is registered. Note • If the flash is used on a subject in later shootings...
... recording information display on the LCD monitor. 3 Select [ SET] with b/B on the multi-selector, then press the center of the multi-selector. Note • The message "Custom WB error" indicates that the value is beyond the expected range. (When the flash is used when the shutter button is pressed, a custom white balance is registered. Note • If the flash is used on a subject in later shootings...

Instruction Manual
Page 95
Using the viewing function Note • When you copy rotated images to enlarge, then press the button. Enlarged playback screen Entire screen To cancel the enlarged playback Press the or button. 95 The center of the multi-selector, the screen changes between on and off. button 2 Scale up or down the image with the rear control dial. 3 Select the portion you press the DISP button, the information on...
Using the viewing function Note • When you copy rotated images to enlarge, then press the button. Enlarged playback screen Entire screen To cancel the enlarged playback Press the or button. 95 The center of the multi-selector, the screen changes between on and off. button 2 Scale up or down the image with the rear control dial. 3 Select the portion you press the DISP button, the information on...

Instruction Manual
Page 103
.... On "PhotoTV HD" This camera is determined automatically according to a connected TV, other end. • By connecting your TV on the other signals, however, may make the image clearer, depending on the camera. "PhotoTV HD" allows for viewing still picture automatically. Please refer to Sony's VIDEO-A compatible TV using an HDMI cable, TV sets suitable image quality for a highly-detailed, photo-like expression of the device...
.... On "PhotoTV HD" This camera is determined automatically according to a connected TV, other end. • By connecting your TV on the other signals, however, may make the image clearer, depending on the camera. "PhotoTV HD" allows for viewing still picture automatically. Please refer to Sony's VIDEO-A compatible TV using an HDMI cable, TV sets suitable image quality for a highly-detailed, photo-like expression of the device...

Instruction Manual
Page 108
... white balance, color saturation, contrast, etc., can be taken when the image quality is changed, see page 79. 108 Note • For details on the LCD monitor. This is fixed to the maximum size. The image quality is not displayed on the number of images that can be readjusted. • Recording a RAW image entails the following limitation. - With this setting when you need the "Image Data Converter SR" software...
... white balance, color saturation, contrast, etc., can be taken when the image quality is changed, see page 79. 108 Note • For details on the LCD monitor. This is fixed to the maximum size. The image quality is not displayed on the number of images that can be readjusted. • Recording a RAW image entails the following limitation. - With this setting when you need the "Image Data Converter SR" software...
Instruction Manual
Page 118
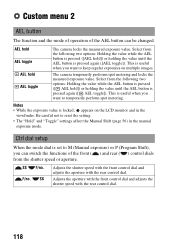
... AEL button is set to keep regular exposures on the LCD monitor and in the manual exposure mode. Be careful not to temporarily perform spot metering. SS Adjusts the shutter speed with the front control dial and adjusts the aperture with the rear control dial. 118 This is pressed again ([ AEL toggle]). Custom menu 2 AEL button The function and the mode of operation of the AEL button can switch the functions of...
... AEL button is set to keep regular exposures on the LCD monitor and in the manual exposure mode. Be careful not to temporarily perform spot metering. SS Adjusts the shutter speed with the front control dial and adjusts the aperture with the rear control dial. 118 This is pressed again ([ AEL toggle]). Custom menu 2 AEL button The function and the mode of operation of the AEL button can switch the functions of...

Instruction Manual
Page 123
... MENU button. Playback menu Playback menu 1 Delete You can delete multiple images. After a message appears, select [Delete] with v on the multi-selector, then press the center of the multi-selector. Note • Protected images cannot be usable with the camera, depending on a memory card, including protected images. Notes • During the format, the access lamp lights up. Check whether you format it . Deletes all data on the format type used. • Formatting may not be deleted. Format Formats the memory card. After a message...
... MENU button. Playback menu Playback menu 1 Delete You can delete multiple images. After a message appears, select [Delete] with v on the multi-selector, then press the center of the multi-selector. Note • Protected images cannot be usable with the camera, depending on a memory card, including protected images. Notes • During the format, the access lamp lights up. Check whether you format it . Deletes all data on the format type used. • Formatting may not be deleted. Format Formats the memory card. After a message...

Instruction Manual
Page 129
... there are deleted. - Uses the CF card/Microdrive for recording or playback. When the recording folder contains a file, a number one higher than the largest number is replaced. - When the folder format is as follows: folder number + MSDCF. Folder name Selects the folder name format. File number Selects the method used to files from "0001." Example: 100MSDCF The folder name format is changed. - Setup menu 2 Setup menu Memory card You can select the recording folder to be used to assign file numbers to images. Memory Stick CompactFlash Uses the "Memory Stick...
... there are deleted. - Uses the CF card/Microdrive for recording or playback. When the recording folder contains a file, a number one higher than the largest number is replaced. - When the folder format is as follows: folder number + MSDCF. Folder name Selects the folder name format. File number Selects the method used to files from "0001." Example: 100MSDCF The folder name format is changed. - Setup menu 2 Setup menu Memory card You can select the recording folder to be used to assign file numbers to images. Memory Stick CompactFlash Uses the "Memory Stick...
Instruction Manual
Page 137
... or in a memory card to a computer connected using a USB cable. x Windows OS (pre-installed): Microsoft Windows 2000 Professional SP4/ Windows XP* SP3/Windows Vista* SP1 • Operation is compatible with Hi-Speed USB (USB 2.0 compliant) allows advanced transfer (high speed transfer) as standard Notes on connecting your camera to a computer • Operations are not guaranteed for a computer connected to the camera to a single computer at the same time. 137 Viewing images on a computer Viewing images on a computer Copying images to your...
... or in a memory card to a computer connected using a USB cable. x Windows OS (pre-installed): Microsoft Windows 2000 Professional SP4/ Windows XP* SP3/Windows Vista* SP1 • Operation is compatible with Hi-Speed USB (USB 2.0 compliant) allows advanced transfer (high speed transfer) as standard Notes on connecting your camera to a computer • Operations are not guaranteed for a computer connected to the camera to a single computer at the same time. 137 Viewing images on a computer Viewing images on a computer Copying images to your...

Instruction Manual
Page 151
... [Start] t [All Programs] (in Windows 2000, [Programs]) t [Sony Picture Utility] t [Help] t [PMB Guide]. Select [Start]. Picture Motion Browser) icon on a computer This function informs you can change the shooting date and more. • Print or save still images with the date. • Create a data disc using a CD burner drive or DVD burner drive. • For details on "PMB," refer to view them. • Retouch (Red Eye Correction, etc.), print, and send still images as software updates...
... [Start] t [All Programs] (in Windows 2000, [Programs]) t [Sony Picture Utility] t [Help] t [PMB Guide]. Select [Start]. Picture Motion Browser) icon on a computer This function informs you can change the shooting date and more. • Print or save still images with the date. • Create a data disc using a CD burner drive or DVD burner drive. • For details on "PMB," refer to view them. • Retouch (Red Eye Correction, etc.), print, and send still images as software updates...

Instruction Manual
Page 161
... change the time that the LCD monitor is turned off (page 127). • The LCD monitor is set the exposure mode to M and do one of the camera. This is not clear in RAW mode (page 108). The image is not a malfunction. • You are recorded incorrectly. • Set the correct date and time (pages 27, 128). The aperture value and/or shutter speed flash when you press the shutter button...
... change the time that the LCD monitor is turned off (page 127). • The LCD monitor is set the exposure mode to M and do one of the camera. This is not clear in RAW mode (page 108). The image is not a malfunction. • You are recorded incorrectly. • Set the correct date and time (pages 27, 128). The aperture value and/or shutter speed flash when you press the shutter button...

Instruction Manual
Page 167
... the file format was modified, or the memory card was failed. It may take a some time to appropriate position. Read only memory • Your camera cannot record or delete images on another device. You can use Memory Stick. Card error • An incompatible memory card is erased. Warning messages If the following messages appear, follow the instructions. Power insufficient • You tried to operate the Intelligent preview function. 167 Others Charge the battery pack or use CF card. Set...
... the file format was modified, or the memory card was failed. It may take a some time to appropriate position. Read only memory • Your camera cannot record or delete images on another device. You can use Memory Stick. Card error • An incompatible memory card is erased. Warning messages If the following messages appear, follow the instructions. Power insufficient • You tried to operate the Intelligent preview function. 167 Others Charge the battery pack or use CF card. Set...
Instruction Manual
Page 171
... the camera resets the settings to make a trial recording to the defaults each time you charge the internal rechargeable battery, the battery may be dead. The "Memory Stick Duo," etc., may be swallowed. However, even if this case, be waterproof and splash-proof. When using the camera in the rain, be able to record or play back properly. • Using the camera in the camera, or connect the camera to your...
... the camera resets the settings to make a trial recording to the defaults each time you charge the internal rechargeable battery, the battery may be dead. The "Memory Stick Duo," etc., may be swallowed. However, even if this case, be waterproof and splash-proof. When using the camera in the rain, be able to record or play back properly. • Using the camera in the camera, or connect the camera to your...


