Operating Instructions
Page 19
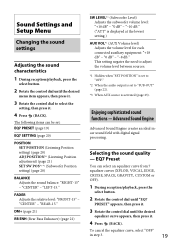
...creates an ideal incar sound field with digital signal processing. "CENTER" - DM+ (page 21) RB ENH (Rear Bass Enhancer) (page 21) SW LEVEL*2 (Subwoofer Level) Adjusts the subwoofer volume level: "+10 dB" - To cancel the equalizer curve, select "OFF" in step 3. 19 The following items can select an equalizer curve from 7 equalizer...PRESET (page 19) EQ7 SETTING (page 20) POSITION SET POSITION (Listening Position setting) (page 20) ADJ POSITION*1 (Listening Position adjustment) (page 21) SET SW POS*1 *2 (Subwoofer Position setting) (page 20) BALANCE Adjusts the sound balance: "RIGHT-15" -
...creates an ideal incar sound field with digital signal processing. "CENTER" - DM+ (page 21) RB ENH (Rear Bass Enhancer) (page 21) SW LEVEL*2 (Subwoofer Level) Adjusts the subwoofer volume level: "+10 dB" - To cancel the equalizer curve, select "OFF" in step 3. 19 The following items can select an equalizer curve from 7 equalizer...PRESET (page 19) EQ7 SETTING (page 20) POSITION SET POSITION (Listening Position setting) (page 20) ADJ POSITION*1 (Listening Position adjustment) (page 21) SET SW POS*1 *2 (Subwoofer Position setting) (page 20) BALANCE Adjusts the sound balance: "RIGHT-15" -
Operating Instructions
Page 20
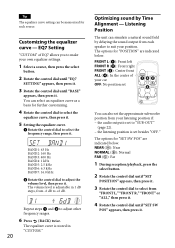
... besides "OFF." The equalizer curve is set to adjust the volume level, then press it . Tip The equalizer curve setting can also set the approximate subwoofer position from your listening position if: - BAND1: 63 Hz BAND2: 160 Hz BAND3: 400 Hz BAND4: 1 kHz BAND5: 2.5 kHz BAND6: 6.3 kHz BAND7: 16.0 kHz ...
... besides "OFF." The equalizer curve is set to adjust the volume level, then press it . Tip The equalizer curve setting can also set the approximate subwoofer position from your listening position if: - BAND1: 63 Hz BAND2: 160 Hz BAND3: 400 Hz BAND4: 1 kHz BAND5: 2.5 kHz BAND6: 6.3 kHz BAND7: 16.0 kHz ...
Operating Instructions
Page 21
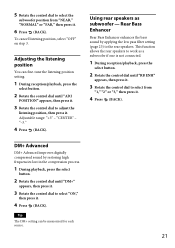
... listening position, then press it. "-3." 4 Press (BACK). To cancel listening position, select "OFF" on step 3. Using rear speakers as a subwoofer if one is not connected. 1 During reception/playback, press the select button. 2 Rotate the control dial until "ADJ POSITION" appears, then press.../playback, press the select button. 2 Rotate the control dial until "RB ENH" appears, then press it. 3 Rotate the control dial to select the subwoofer position from "1," "2" or "3," then press it. 4 Press (BACK). 5 Rotate the control dial to select from "NEAR," "NORMAL" or "FAR,"...
... listening position, then press it. "-3." 4 Press (BACK). To cancel listening position, select "OFF" on step 3. Using rear speakers as a subwoofer if one is not connected. 1 During reception/playback, press the select button. 2 Rotate the control dial until "ADJ POSITION" appears, then press.../playback, press the select button. 2 Rotate the control dial until "RB ENH" appears, then press it. 3 Rotate the control dial to select the subwoofer position from "1," "2" or "3," then press it. 4 Press (BACK). 5 Rotate the control dial to select from "NEAR," "NORMAL" or "FAR,"...
Operating Instructions
Page 22
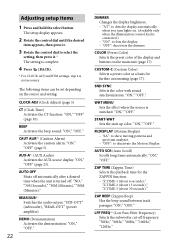
...basis for the ZAPPIN function. - SND SYNC Selects the color with sound synchronization: "ON," "OFF." LPF FREQ*2 (Low Pass Filter Frequency) Selects the subwoofer cut-off : "NO," "30S (Seconds)," "30M (Minutes)," "60M (Minutes)." CAUT ALM*1 (Caution Alarm) Activates the caution alarm: "ON," ..."OFF" (page 5). REAR/SUB*1 Switches the audio output: "SUB-OUT" (subwoofer), "REAR-OUT" (power amplifier). "ON": to show moving patterns and spectrum analyzer. - ZAP TIME (Zappin Time) Selects the playback time for further ...
...basis for the ZAPPIN function. - SND SYNC Selects the color with sound synchronization: "ON," "OFF." LPF FREQ*2 (Low Pass Filter Frequency) Selects the subwoofer cut-off : "NO," "30S (Seconds)," "30M (Minutes)," "60M (Minutes)." CAUT ALM*1 (Caution Alarm) Activates the caution alarm: "ON," ..."OFF" (page 5). REAR/SUB*1 Switches the audio output: "SUB-OUT" (subwoofer), "REAR-OUT" (power amplifier). "ON": to show moving patterns and spectrum analyzer. - ZAP TIME (Zappin Time) Selects the playback time for further ...
Operating Instructions
Page 23
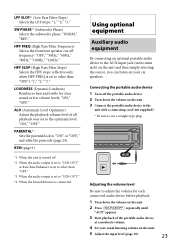
... Rear Bass Enhancer is set to other than "OFF"): "1," "2," "3." Connecting the portable audio device 1 Turn off frequency: "OFF," "50Hz," "60Hz," "80Hz," "100Hz," "120Hz." SW PHASE*3 (Subwoofer Phase) Selects the subwoofer phase: "NORM," "REV."
... Rear Bass Enhancer is set to other than "OFF"): "1," "2," "3." Connecting the portable audio device 1 Turn off frequency: "OFF," "50Hz," "60Hz," "80Hz," "100Hz," "120Hz." SW PHASE*3 (Subwoofer Phase) Selects the subwoofer phase: "NORM," "REV."
Marketing Specifications
Page 2
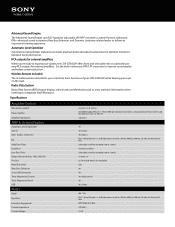
RCA outputs for external amplifiers When you control the basic functions of your CDX-GT565UP while keeping your system, the CDX-GT565UP offers front and selectable rear or subwoofer preamp RCA outputs for external amplifiers. Radio Data System Radio Data System (RDS) feature displays radio broadcast information such as artist and track information when ...
RCA outputs for external amplifiers When you control the basic functions of your CDX-GT565UP while keeping your system, the CDX-GT565UP offers front and selectable rear or subwoofer preamp RCA outputs for external amplifiers. Radio Data System Radio Data System (RDS) feature displays radio broadcast information such as artist and track information when ...
Marketing Specifications
Page 4
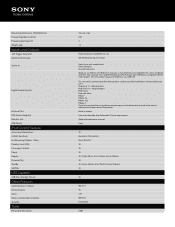
... as not all devices are not covered in with the USB standard. Update your iPod to the following iPods. Wireless remote Front and selectable Rear/Subwoofer RCA pre-amp outputs Optional wired remote terminal Front Yes depend on AM/FM Antenna Input Terminal Front Aux in the owners manual, consult your...
... as not all devices are not covered in with the USB standard. Update your iPod to the following iPods. Wireless remote Front and selectable Rear/Subwoofer RCA pre-amp outputs Optional wired remote terminal Front Yes depend on AM/FM Antenna Input Terminal Front Aux in the owners manual, consult your...


