
Instruction Manual 15
Page 1
14SH744/14CG744 (2.3.4 THREAD OVERLOCK MACHINE) 14SH754/14CG754 (2.3. 4 THREAD OVERLOCK MACHINE WITH DIFFERENTIAL FEED) Operator's Guide SINGER SINGER
14SH744/14CG744 (2.3.4 THREAD OVERLOCK MACHINE) 14SH754/14CG754 (2.3. 4 THREAD OVERLOCK MACHINE WITH DIFFERENTIAL FEED) Operator's Guide SINGER SINGER

Instruction Manual 15
Page 2
... regarding electrical safety radio interference and electromagnetic immunity. 14SH744/14CG744 14SH754/14CG754 PREFACE Thank you for your sewing machine. Then familiarize yourself with the mark. To ensure that they do not play with the most out of your purchase of The Singer Company Limited or its service agent or a similarly qualified person in...
... regarding electrical safety radio interference and electromagnetic immunity. 14SH744/14CG744 14SH754/14CG754 PREFACE Thank you for your sewing machine. Then familiarize yourself with the mark. To ensure that they do not play with the most out of your purchase of The Singer Company Limited or its service agent or a similarly qualified person in...

Instruction Manual 15
Page 3
...blocked. The wrong plate can cause the needle to the off when making any opening. 2 Keep ventilation openings of it is required around the sewing machine needle. • Do not pull or push fabric while stitching. Be sure not to persons: • Be sure that the electrical voltage of ...the electric outlet (wall receptacle) is the same as the rated voltage of electric shock: • The machine should never be followed including the following. Special care is not working properly, if it on cord. It may deflect the needle causing it to...
...blocked. The wrong plate can cause the needle to the off when making any opening. 2 Keep ventilation openings of it is required around the sewing machine needle. • Do not pull or push fabric while stitching. Be sure not to persons: • Be sure that the electrical voltage of ...the electric outlet (wall receptacle) is the same as the rated voltage of electric shock: • The machine should never be followed including the following. Special care is not working properly, if it on cord. It may deflect the needle causing it to...

Instruction Manual 15
Page 4
... power outlet with a new one of plug is used, a 5 Amp. Also, do not keep it in a very warm or damp place. * Do not touch the machine, foot controller and power line cord with wet hand, wet cloth or with anything wet. * Do not connect power line cord to one . * Do not... are shipped from children's reach. * Be sure the light bulb has cooled off the power switch and disconnect the power line plug before operating the machine. * Keep presser foot and needles away from the factory without a plug for your plug, proceed as follows: The wire which is colored blue must be...
... power outlet with a new one of plug is used, a 5 Amp. Also, do not keep it in a very warm or damp place. * Do not touch the machine, foot controller and power line cord with wet hand, wet cloth or with anything wet. * Do not connect power line cord to one . * Do not... are shipped from children's reach. * Be sure the light bulb has cooled off the power switch and disconnect the power line plug before operating the machine. * Keep presser foot and needles away from the factory without a plug for your plug, proceed as follows: The wire which is colored blue must be...

Instruction Manual 15
Page 5
...stitching 38 3-thread upper looper thread wrapped rolled hem stitching 38 24. Threading the Machine 12 •Threading diagram 12 • Understanding the color code 12 •To thread the machine correctly 12 1) Threading the upper looper (Orange) 12 2) Threading the lower looper ...Remove and Insert Needles 11 •To remove needle(s) 11 •To insert needle(s) 11 11. Machine Maintenance 46 •Cleaning the machine 46 •Oiling the machine 46 •How to Sewing 9 9. Preparation Prior to replace the stationary knife 47 26. Preparation...
...stitching 38 3-thread upper looper thread wrapped rolled hem stitching 38 24. Threading the Machine 12 •Threading diagram 12 • Understanding the color code 12 •To thread the machine correctly 12 1) Threading the upper looper (Orange) 12 2) Threading the lower looper ...Remove and Insert Needles 11 •To remove needle(s) 11 •To insert needle(s) 11 11. Machine Maintenance 46 •Cleaning the machine 46 •Oiling the machine 46 •How to Sewing 9 9. Preparation Prior to replace the stationary knife 47 26. Preparation...
Instruction Manual 15
Page 6
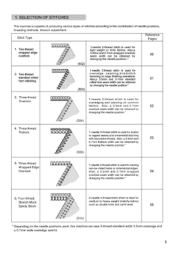
SELECTION OF STITCHES This machine is used , this machine can be obtained by changing the needle position.* (503) - - 1-needle 3-thread stitch is capable of producing various types of stitches according to heavy weight stretchy ...
SELECTION OF STITCHES This machine is used , this machine can be obtained by changing the needle position.* (503) - - 1-needle 3-thread stitch is capable of producing various types of stitches according to heavy weight stretchy ...

Instruction Manual 15
Page 8
NEEDLE INFORMATION • Singer needle #2022 size 90/14 is readjusted, skipping of the stitches may be used. Sizes available Singer needle #2022 80/11 90/14 7 O 4. However, unless the suggested tension setting is furnished with the machine. • In an emergency, standard Singer needle #2020 may occur. 3. ACCESSORIES I Accessories are contained in the accessory case in the cloth plate. 1 Needle set 2 Screw driver (small size) 3 Tweezers 4 Spreader 744 / 754 1 1 1 1 4--
NEEDLE INFORMATION • Singer needle #2022 size 90/14 is readjusted, skipping of the stitches may be used. Sizes available Singer needle #2022 80/11 90/14 7 O 4. However, unless the suggested tension setting is furnished with the machine. • In an emergency, standard Singer needle #2020 may occur. 3. ACCESSORIES I Accessories are contained in the accessory case in the cloth plate. 1 Needle set 2 Screw driver (small size) 3 Tweezers 4 Spreader 744 / 754 1 1 1 1 4--

Instruction Manual 15
Page 10
... 1 Upper looper 2 2 Movable upper knife 3 Presser foot 4 Stationary lower knife 5 Lower looper 6 Seam width finger knob 7 Seam width adjustment knob SINGER O • III WI.. A Caution: I Be sure looper cover is closed when sewing. 1i 7. ON OFF 2• ml cm 4 WARNING: Use... power switch. • Push the cover to "Warning" on following page. 9 PREPARATION PRIOR TO SEWING • Connect the controller / electric plug 1 to the machine receptacle 2 . • Plug power line 3 into electric outlet 4 . • Power Switch: Push "-" mark side to turn "ON". Irt tl a- &#...
... 1 Upper looper 2 2 Movable upper knife 3 Presser foot 4 Stationary lower knife 5 Lower looper 6 Seam width finger knob 7 Seam width adjustment knob SINGER O • III WI.. A Caution: I Be sure looper cover is closed when sewing. 1i 7. ON OFF 2• ml cm 4 WARNING: Use... power switch. • Push the cover to "Warning" on following page. 9 PREPARATION PRIOR TO SEWING • Connect the controller / electric plug 1 to the machine receptacle 2 . • Plug power line 3 into electric outlet 4 . • Power Switch: Push "-" mark side to turn "ON". Irt tl a- &#...

Instruction Manual 15
Page 11
... in any way. Disconnect the power line plug from the electric outlet when changing needles, presser feet or throat plates, or when leaving the machine unattended. This eliminates the possibility of the motor. Be sure not to install the proper outlet. POLARIZED PLUG INFORMATION (FOR U.S.A. & CANADA ONLY...outlet (wall receptacle) is shipped with care and avoid dropping it when not in a polarized outlet only one blade wider than the other). SINGER • Center the thread guides above the spool pins. • Place thread over the cone adapters on the telescope will click into ...
... in any way. Disconnect the power line plug from the electric outlet when changing needles, presser feet or throat plates, or when leaving the machine unattended. This eliminates the possibility of the motor. Be sure not to install the proper outlet. POLARIZED PLUG INFORMATION (FOR U.S.A. & CANADA ONLY...outlet (wall receptacle) is shipped with care and avoid dropping it when not in a polarized outlet only one blade wider than the other). SINGER • Center the thread guides above the spool pins. • Place thread over the cone adapters on the telescope will click into ...

Instruction Manual 15
Page 12
... to page 7 for additional needle information. * Remove the cloth plate if you until the needle is at its highest position. Note: * This machine uses #2022 needles. Refer to the rear ,,:„ 7 11 HOW TO REMOVE AND INSERT NEEDLES To Remove Needle(s) Caution : Be sure to disconnect ... needle with the small screwdriver. 1 Left needle set screw 2 Right needle set screw. To Insert Needle(s) A Caution : Be sure to disconnect the machine from the I electric outlet before removing needle(s). • Turn the hand wheel toward you find it will go. • Securely tighten the needle set...
... to page 7 for additional needle information. * Remove the cloth plate if you until the needle is at its highest position. Note: * This machine uses #2022 needles. Refer to the rear ,,:„ 7 11 HOW TO REMOVE AND INSERT NEEDLES To Remove Needle(s) Caution : Be sure to disconnect ... needle with the small screwdriver. 1 Left needle set screw 2 Right needle set screw. To Insert Needle(s) A Caution : Be sure to disconnect the machine from the I electric outlet before removing needle(s). • Turn the hand wheel toward you find it will go. • Securely tighten the needle set...

Instruction Manual 15
Page 13
... 3 Right needle thread 4 Left needle thread Orange Yellow Green Blue To Thread The Machine Correctly A Caution Be sure to the front through the thread guide 1 2 3 4 8. 5! 7214 12 THREADING THE MACHINE I Threading Diagram • A color coded threading diagram is located inside the looper ...cover for quick reference. • Thread the machine in the order 1 to 4 as indicated 1 - 8 . • Pass thread from back...
... 3 Right needle thread 4 Left needle thread Orange Yellow Green Blue To Thread The Machine Correctly A Caution Be sure to the front through the thread guide 1 2 3 4 8. 5! 7214 12 THREADING THE MACHINE I Threading Diagram • A color coded threading diagram is located inside the looper ...cover for quick reference. • Thread the machine in the order 1 to 4 as indicated 1 - 8 . • Pass thread from back...

Instruction Manual 15
Page 14
... thread guide 2 . • While holding thread with finger, pass it is properly located in between the tension discs 3 . 3 4 • Thread the looper area of the machine following the orange color coded thread guides ( 4 - 7 ).
... thread guide 2 . • While holding thread with finger, pass it is properly located in between the tension discs 3 . 3 4 • Thread the looper area of the machine following the orange color coded thread guides ( 4 - 7 ).

Instruction Manual 15
Page 16
... over the top of the upper looper and to aid in threading the looper. • The thread should be positioned in the end of the machine following the yellow color coded thread guides 4 - 7 . SINGER 4 SING :Or •• 0 7 xl (1'0 C) co 0 15
... over the top of the upper looper and to aid in threading the looper. • The thread should be positioned in the end of the machine following the yellow color coded thread guides 4 - 7 . SINGER 4 SING :Or •• 0 7 xl (1'0 C) co 0 15

Instruction Manual 15
Page 21
... to test knot security. • Note tension dial settings. • Turn the tension dials down until the dial stops. • Pull the threads through the machine one at a time. • If threads do not pull easily, check for tangles on stand. • Tie new thread and old thread ends together. &#...8226; Clip thread tails to previous settings. 20 SINGER HOW TO CHANGE THREADS / TIE ON METHOD • To change thread type or color, clip thread near the spool. • Place new thread on ...
... to test knot security. • Note tension dial settings. • Turn the tension dials down until the dial stops. • Pull the threads through the machine one at a time. • If threads do not pull easily, check for tangles on stand. • Tie new thread and old thread ends together. &#...8226; Clip thread tails to previous settings. 20 SINGER HOW TO CHANGE THREADS / TIE ON METHOD • To change thread type or color, clip thread near the spool. • Place new thread on ...

Instruction Manual 15
Page 23
... clockwise 6 turns which will make adjustment easier. • Push the upper knife to the right and while maintain the knife in this machine is necessary when sewing lightweight and heavyweight fabrics. • In such case, insert screwdriver through access hole (A) in top cover and into... as a guideline. Push 15. R 3.5 4.5 4.5 3.5 /Rolled hem (When shipped from factory.) 3.0mm Caution: Always close looper cover before operating machine. HOW TO ADJUST THE PRESSER FOOT PRESSURE • The presser foot pressure of this position,tum the knob away to adjuste the desired seam width...
... clockwise 6 turns which will make adjustment easier. • Push the upper knife to the right and while maintain the knife in this machine is necessary when sewing lightweight and heavyweight fabrics. • In such case, insert screwdriver through access hole (A) in top cover and into... as a guideline. Push 15. R 3.5 4.5 4.5 3.5 /Rolled hem (When shipped from factory.) 3.0mm Caution: Always close looper cover before operating machine. HOW TO ADJUST THE PRESSER FOOT PRESSURE • The presser foot pressure of this position,tum the knob away to adjuste the desired seam width...

Instruction Manual 15
Page 26
... knob up position: * Turn the hand wheel toward you until the knife clicks into the working position. 17. Caution : Always close looper cover before operating machine. 0 0 Movable Knife Holder • 25 To place movable knife in nonworking position • Turn handwheel over toward you until the knife clears the top of...
... knob up position: * Turn the hand wheel toward you until the knife clicks into the working position. 17. Caution : Always close looper cover before operating machine. 0 0 Movable Knife Holder • 25 To place movable knife in nonworking position • Turn handwheel over toward you until the knife clears the top of...

Instruction Manual 15
Page 27
Note: Put the spreader back to the accessory storage. 26 18. Removing the spreader • Remove the point (D) of the hole (E) of the upper looper and take the spreader off the machine before installing or removing the spreader. , Installing the spreader ... • Insert the pin (A) of the spreader in the hole (B) of the upper looper. • Put the positioning rib (C) in contact with the upper surface of the looper. • Insert the point (D) in the hole (E) of the upper looper. CONVERTING THE UPPER 7 LOOPER INTO SPREADER A Warning: Switch off the looper.
Note: Put the spreader back to the accessory storage. 26 18. Removing the spreader • Remove the point (D) of the hole (E) of the upper looper and take the spreader off the machine before installing or removing the spreader. , Installing the spreader ... • Insert the pin (A) of the spreader in the hole (B) of the upper looper. • Put the positioning rib (C) in contact with the upper surface of the looper. • Insert the point (D) in the hole (E) of the upper looper. CONVERTING THE UPPER 7 LOOPER INTO SPREADER A Warning: Switch off the looper.

Instruction Manual 15
Page 28
... and slide to the right until tab on the underside. ♦- • This is especially suited for sewing hard to the left and remove from machine while pressing button (A) located on cloth plate (front) snaps into slot in cylinder cover. 3l 6 6 J 27 To remove the cloth plate • Slide cloth plate... reach garment areas such as armholes and overcasting trouser cuffs. • Place garment over the free arm and sew. FREE ARM SEWING (TUBULAR WORK) This machine become a free arm machine simply by removing the cloth plate.
... and slide to the right until tab on the underside. ♦- • This is especially suited for sewing hard to the left and remove from machine while pressing button (A) located on cloth plate (front) snaps into slot in cylinder cover. 3l 6 6 J 27 To remove the cloth plate • Slide cloth plate... reach garment areas such as armholes and overcasting trouser cuffs. • Place garment over the free arm and sew. FREE ARM SEWING (TUBULAR WORK) This machine become a free arm machine simply by removing the cloth plate.

Instruction Manual 15
Page 30
CHAINING OFF AND TEST SEWING • When the machine is 5 - 7.5cm (2 - 3 inches) in length. SUOMI 5- 7.5 cm 2 - 3);) • Place fabric under the presser foot. • Hold the threads and apply a slight tension. • Turn the ...
CHAINING OFF AND TEST SEWING • When the machine is 5 - 7.5cm (2 - 3 inches) in length. SUOMI 5- 7.5 cm 2 - 3);) • Place fabric under the presser foot. • Hold the threads and apply a slight tension. • Turn the ...

Instruction Manual 15
Page 37
HOW TO SEW A ROLLED HEM s. • This machine can be sewn. • Needle: Singer Needle #2022 size 80/11 or 90/14 • Thread: A variety of thread combinations can sew four types of seam width finger support plate with R ... R . (See page 28 ) • Align left face of rolled hems. • Rolled hemming is not suited for rolled hemming. • • AI" ► 2 36 crepe. Machine Set Up • Remove the left needle. • Move seam width finger knob to "F 2" and a fine seam will (11 be used for heavy or stiff...
HOW TO SEW A ROLLED HEM s. • This machine can be sewn. • Needle: Singer Needle #2022 size 80/11 or 90/14 • Thread: A variety of thread combinations can sew four types of seam width finger support plate with R ... R . (See page 28 ) • Align left face of rolled hems. • Rolled hemming is not suited for rolled hemming. • • AI" ► 2 36 crepe. Machine Set Up • Remove the left needle. • Move seam width finger knob to "F 2" and a fine seam will (11 be used for heavy or stiff...


