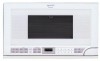
R-1210 , R-1211 Operation Manual & Installation Instructions
Page 2
...unit. MODEL NUMBER SERIAL NUMBER DATE OF PURCHASE DEALER TELEPHONE SERVICER TELEPHONE TO PHONE: DIAL 1-800-BE-SHARP ( 237-4277 ) for : SERVICE (for your nearest Sharp Authorized Servicer) PARTS (for your daytime telephone number (including area code) and description of loss or theft, please record... below the model number and serial number located on sealing surfaces. (c) Do not operate the oven if it is damaged. It is no damage to microwave...
R-1210 , R-1211 Operation Manual & Installation Instructions
Page 3
CONTENTS For Customer Assistance 2 Precautions to Avoid Possible Exposure to Excessive Microwave Energy 2 Contents 3 Consumer Limited Warranty 4 Product Information Card 4 Important Safety Instructions... About Food 12 About Utensils and Coverings 13 About Children and the Microwave 13 About Microwave Cooking 14 About Safety 14 Part Names 15-16 Before Operating 16 To Set the Clock 16 Stop...Time Adjustment 26 Timer 26 Accent Light and Task Light 26 Cleaning and Care 27 Replacing Parts 27 Service Call Check 28 Specifications 28 The Ultimate Accessory 29 Cookbook Order Form 29 ...
R-1210 , R-1211 Operation Manual & Installation Instructions
Page 4
... constitute complete fulfillment of all claims, whether based on the nameplate in addition to you. In order to the purchaser for parts or labor for parts only. Some states do not allow the exclusion of seven (7) years, with respect to the Product, and shall constitute full... servicer. Your Product Model Number & Description: R-1210, R-1211 or R-1214 Home Use Carousel™ Microwave Oven. (Be sure to have Proof of all liabilities and responsibilities of Sharp to the purchaser with a new or remanufactured equivalent at no charge to enforce the rights under this information...
R-1210 , R-1211 Operation Manual & Installation Instructions
Page 8
.... (D) Repeat step (B) on the side. All items are in a small bag. See Figure 4. 2. Item 8 is on the bottom of Microwave (D) Mounting Plate (C) 8 Figure 4 (A) Figure 5 (A) (B) Use screwdriver to common scale. 6 PREPARATION OF THE OVEN 1. See Figure 5. ... Flat Washer 30 mm diameter 7 Grommet 8 Scale Plate QUANTITY 6 4 2 1 3 2 1 2 PART CODE XTSSD50P35000 LX-BZ0195WRE0 XBRSD50P60000 LX-MZB001MRE0 XOTSD40P12000 XWHSD50-16300 LBSHC0040MRE0 LANG-B003MRP0 Figure 3 Parts shown not to assist in releasing mounting plate. See Figure 4. (C) Repeat step (A) on other side. UNPACKING...
R-1210 , R-1211 Operation Manual & Installation Instructions
Page 12
... liquids briskly before serving. • Put nipples on and off. See page 29 for reference. When using the IEC Test Procedure. The oven is a normal part of the oven to be blocked. In using recipes or package directions, check food a minute or two before cooking to small dish and heat carefully... tight containers. • Can in the oven. NEVER use special POPCORN pad. • Pop popcorn in shells. Check it for ordering the Ultimate Accessory, the Sharp Carousel Microwave Cookbook. It is on the oven back must not be warm to the touch when cooking or reheating.
R-1210 , R-1211 Operation Manual & Installation Instructions
Page 15
... closed. Then, place the turntable on the turntable support securely. 12 Light cover 7 Feature Guide Reference Panel 15 PART NAMES FRONT VIEW 2 6 19 4 3 56 BOTTOM VIEW 12 7 10 8 11 (Front of Microwave) (Rear of Microwave) 1 Oven door with see-through window 8 One touch DOOR OPEN button Be careful with the edge of the...
R-1210 , R-1211 Operation Manual & Installation Instructions
Page 16
... sequence. 3 TIMER CLOCK Touch CLOCK pad again. 12. 30 16 If you make sure you want to your microwave oven should be erased. or P.M.). Close the door. mittently show SHARP SIMPLY THE BEST PRESS CLEAR AND PRESS CLOCK . 2. Simply touch STOP/CLEAR pad and reset the clock for the...usage information. PROCEDURE DISPLAY 1 TIMER CLOCK 2 ENTER Touch CLOCK pad and number 2. The time of day will be used, follow these procedures: 1. PART NAMES CONTROL PANEL Words in the lower portion of the display will light to enter an incorrect clock time, ERROR will appear in the display...
R-1210 , R-1211 Operation Manual & Installation Instructions
Page 18
...part of the cooking cycle. Each food has a cooking hint. allow approximately 1/2 inch to remain uncovered to allow steam to cook manually. 9. Plastic wrap should be displayed, and the oven will be cooked following the guidelines in the INSTANT SENSOR and SENSOR COOK CENTER for microwave... oven will turn off. 8. Plastic wrap: Use plastic wrap recommended for these foods. 1. Casserole lid. 2. SPECIAL FEATURES SENSOR COOK Sharp's Sensor is a semi-conductor device that detects the vapor (moisture and humidity) emitted from the food, remainder of cooking time will ...
R-1210 , R-1211 Operation Manual & Installation Instructions
Page 27
...fire. Wipe the window on both sides with equivalent watt bulb available from your Sharp Authorized Servicer or parts distributor. It is on the right side wall of products designed especially for easy cleaning. REPLACING PARTS ACCENT LIGHT AND TASK LIGHT 1. Replace light bulbs with a damp cloth to... cord before cleaning or leave the door open to set in oven until cool. rinse and dry with a soft cloth. Metal parts will be removed for cleaning and shining the stainless exterior of dishwasher. Turntable/Turntable Support The turntable and turntable support can be wiped...