User Guide
Page 18
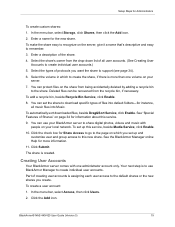
... click the Add icon. 2. Deleted files can protect files on the server, give it a name that's descriptive and easy to the share. Click the check box for information about this service, beside Media Service, click Enable. 10. Enter a name for more than one administrator account only. Select the share's owner from...
... click the Add icon. 2. Deleted files can protect files on the server, give it a name that's descriptive and easy to the share. Click the check box for information about this service, beside Media Service, click Enable. 10. Enter a name for more than one administrator account only. Select the share's owner from...
User Guide
Page 20
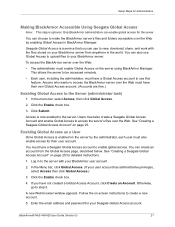
...Access page, described below. In the Menu bar, click Global Access. (If your BlackArmor server. A new Web browser window appears. Seagate Global Access is enabled on page 25 for the server. Click Submit. Only BlackArmor administrators can enable global access for detailed instructions. 1....server by enabling Global Access in BlackArmor Manager. To access the BlackArmor server over the Web. Click the Enable check box. 3. Users must also create a Seagate Global Access Account and enable Global Access to access the server's files over the Web: • The administrator must ...
...Access page, described below. In the Menu bar, click Global Access. (If your BlackArmor server. A new Web browser window appears. Seagate Global Access is enabled on page 25 for the server. Click Submit. Only BlackArmor administrators can enable global access for detailed instructions. 1....server by enabling Global Access in BlackArmor Manager. To access the BlackArmor server over the Web. Click the Enable check box. 3. Users must also create a Seagate Global Access Account and enable Global Access to access the server's files over the Web: • The administrator must ...
User Guide
Page 36
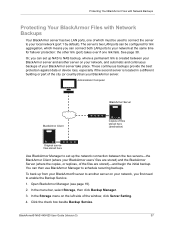
... server on your network, and automatic and continuous backups of your network, you can then use BlackArmor Manager to schedule recurring backups. Click the check box beside Backup Service. See page 38. Administrator Computer BlackArmor Server BlackArmor Client Copies of files stored here (destination) Original source files stored here Use BlackArmor...
... server on your network, and automatic and continuous backups of your network, you can then use BlackArmor Manager to schedule recurring backups. Click the check box beside Backup Service. See page 38. Administrator Computer BlackArmor Server BlackArmor Client Copies of files stored here (destination) Original source files stored here Use BlackArmor...
Seagate Global Access User Guide
Page 16
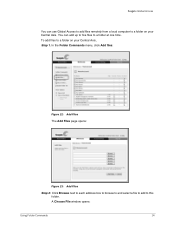
To add files to a folder on your Central Axis, Step 1. You can use Global Access to add files remotely from a local computer to a folder on your Central Axis. A Choose File window opens: Using Folder Commands 14 Seagate Global Access You can add up to five files to this folder. In the Folder Commands menu, click Add files: Figure 22: Add Files The Add Files page opens: Figure 23: Add Files Step 2: Click Browse next to each address box to browse to and select a file to add to a folder at one time.
To add files to a folder on your Central Axis, Step 1. You can use Global Access to add files remotely from a local computer to a folder on your Central Axis. A Choose File window opens: Using Folder Commands 14 Seagate Global Access You can add up to five files to this folder. In the Folder Commands menu, click Add files: Figure 22: Add Files The Add Files page opens: Figure 23: Add Files Step 2: Click Browse next to each address box to browse to and select a file to add to a folder at one time.
Seagate Global Access User Guide
Page 17
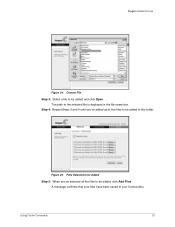
A message confirms that your files have been saved to be added and click Open. Seagate Global Access Figure 24: Choose File Step 3: Select a file to your Central Axis. Using Folder Commands 15 The path to this folder. Step 4: Repeat Steps 3 and 4 until you 've selected all the files to be added to the selected file is displayed in the file name box. Figure 25: Files Selected to be Added Step 5: When you 've added up to five files to be added, click Add Files.
A message confirms that your files have been saved to be added and click Open. Seagate Global Access Figure 24: Choose File Step 3: Select a file to your Central Axis. Using Folder Commands 15 The path to this folder. Step 4: Repeat Steps 3 and 4 until you 've selected all the files to be added to the selected file is displayed in the file name box. Figure 25: Files Selected to be Added Step 5: When you 've added up to five files to be added, click Add Files.
Seagate Global Access User Guide
Page 25
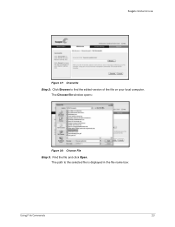
The Choose file window opens: Figure 38: Choose File Step 3: Find the file and click Open. The path to find the edited version of the file on your local computer. Seagate Global Access Figure 37: Overwrite Step 2: Click Browse to the selected file is displayed in the file name box: Using File Commands 23
The Choose file window opens: Figure 38: Choose File Step 3: Find the file and click Open. The path to find the edited version of the file on your local computer. Seagate Global Access Figure 37: Overwrite Step 2: Click Browse to the selected file is displayed in the file name box: Using File Commands 23