Product Information
Page 2
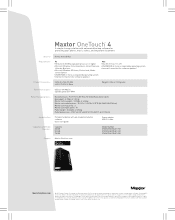
... offerings or specifications. In addition, some of measurement and report a lower capacity. All other functions, and thus will not be available for data storage. Seagate Technology, 920 Disc Drive, Scotts Valley, CA 95066 U.S.A One gigabyte, or GB, equals one of their respective owners. Maxtor OneTouch™ 4... 750GB Model Number STM302503OTA3E1-RK STM305004OTA3E1-RK STM307504OTA3E1-RK Support MaxtorSolutions.com MaxtorSolutions.com © 2007 Seagate, Seagate Technology, the Wave logo, Maxtor, OneTouch, and the Maxtor stylized logo are the property of its affiliates.
... offerings or specifications. In addition, some of measurement and report a lower capacity. All other functions, and thus will not be available for data storage. Seagate Technology, 920 Disc Drive, Scotts Valley, CA 95066 U.S.A One gigabyte, or GB, equals one of their respective owners. Maxtor OneTouch™ 4... 750GB Model Number STM302503OTA3E1-RK STM305004OTA3E1-RK STM307504OTA3E1-RK Support MaxtorSolutions.com MaxtorSolutions.com © 2007 Seagate, Seagate Technology, the Wave logo, Maxtor, OneTouch, and the Maxtor stylized logo are the property of its affiliates.
User Guide for Mac
Page 29
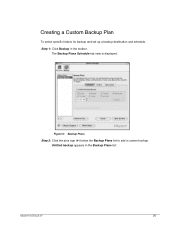
Untitled backup appears in the toolbar. The Backup Plans Schedule tab view is displayed: Figure 6: Backup Plans Step 2: Click the plus sign (+) below the Backup Plans list to add a custom backup. Creating a Custom Backup Plan To select specific folders for backup and set up a backup destination and schedule, Step 1: Click Backup in the Backup Plans list: Maxtor OneTouch IV 26
Untitled backup appears in the toolbar. The Backup Plans Schedule tab view is displayed: Figure 6: Backup Plans Step 2: Click the plus sign (+) below the Backup Plans list to add a custom backup. Creating a Custom Backup Plan To select specific folders for backup and set up a backup destination and schedule, Step 1: Click Backup in the Backup Plans list: Maxtor OneTouch IV 26
User Guide for Windows
Page 30
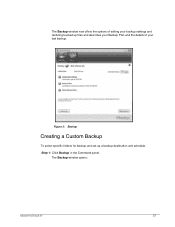
Figure 3: Backup Creating a Custom Backup To select specific folders for backup and set up files and describes your Backup Plan and the details of your last backup. The Backup window opens: Maxtor OneTouch IV 27 The Backup window now offers the options of editing your backup settings and restoring backed up a backup destination and schedule, Step 1: Click Backup in the Command panel.
Figure 3: Backup Creating a Custom Backup To select specific folders for backup and set up files and describes your Backup Plan and the details of your last backup. The Backup window opens: Maxtor OneTouch IV 27 The Backup window now offers the options of editing your backup settings and restoring backed up a backup destination and schedule, Step 1: Click Backup in the Command panel.

User Guide for Windows
Page 34
Select each file type you do want to back up only a few of the available file types, 1. Maxtor OneTouch IV 31 To back up and click Add to move it to include or exclude for backup: - Select Include these file types. 2. To back up and click Add to move it to the Include list. - Select each file type you don't want to back up most of the available file types, 1. Select Exclude these file types. 2. Figure 7: File Types: Photo, Music, Video, Documents • Custom Select specific file types to the Exclude list.
Select each file type you do want to back up only a few of the available file types, 1. Maxtor OneTouch IV 31 To back up and click Add to move it to include or exclude for backup: - Select Include these file types. 2. To back up and click Add to move it to the Include list. - Select each file type you don't want to back up most of the available file types, 1. Select Exclude these file types. 2. Figure 7: File Types: Photo, Music, Video, Documents • Custom Select specific file types to the Exclude list.
User Guide for Windows
Page 80
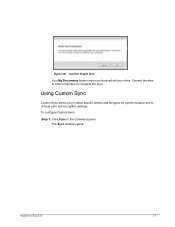
The Sync window opens: Maxtor OneTouch IV 77 Figure 28: Confirm Simple Sync Your My Documents folder is now synchronized with your drive. Using Custom Sync Custom Sync allows you to select specific folders and file types for synchronization and to complete the Sync. To configure Custom Sync, Step 1: Click Sync in the Command panel. Connect the drive to other computers to choose sync and encryption settings.
The Sync window opens: Maxtor OneTouch IV 77 Figure 28: Confirm Simple Sync Your My Documents folder is now synchronized with your drive. Using Custom Sync Custom Sync allows you to select specific folders and file types for synchronization and to complete the Sync. To configure Custom Sync, Step 1: Click Sync in the Command panel. Connect the drive to other computers to choose sync and encryption settings.

User Guide for Windows
Page 84
Select Exclude these file types. 2. Select Include these file types. 2. Select each file type you do want to sync and click Add to move it to the Exclude window. Figure 32: File Types: Photo, Music, Video, Documents • Custom Select specific file types to the Include window. - Maxtor OneTouch IV 81 Select each file type you don't want to sync and click Add to move it to include or exclude for sync: - To sync most of the available file types, 1. To sync only a few of the available file types, 1.
Select Exclude these file types. 2. Select Include these file types. 2. Select each file type you do want to sync and click Add to move it to the Exclude window. Figure 32: File Types: Photo, Music, Video, Documents • Custom Select specific file types to the Include window. - Maxtor OneTouch IV 81 Select each file type you don't want to sync and click Add to move it to include or exclude for sync: - To sync most of the available file types, 1. To sync only a few of the available file types, 1.