Print Specs
Page 1
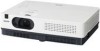
... flexibility. Quick Repair Program under warranty Because its products are subject to continuous improvement, SANYO reserves the right to modify product design and specifications without notice and without a screen....XGA z ULTRAPORTABLE PROJECTOR PLC-XD2200/2600 ULTRAPORTABLE PROJECTOR 3LCD Built-in Network Closed Caption ULTRA-COMPACT, FULLY PORTABLE XGA DESIGN Not much larger than a laptop PC, the PLC-XD2200/2600 weighs less than 5.7 pounds and delivers true XGA picture quality in common) Stereo mini jack x 1 RJ-45 (LAN) Dsub 9pin (RS232C) Power cord VGA cable Lens Cap Remote...
... flexibility. Quick Repair Program under warranty Because its products are subject to continuous improvement, SANYO reserves the right to modify product design and specifications without notice and without a screen....XGA z ULTRAPORTABLE PROJECTOR PLC-XD2200/2600 ULTRAPORTABLE PROJECTOR 3LCD Built-in Network Closed Caption ULTRA-COMPACT, FULLY PORTABLE XGA DESIGN Not much larger than a laptop PC, the PLC-XD2200/2600 weighs less than 5.7 pounds and delivers true XGA picture quality in common) Stereo mini jack x 1 RJ-45 (LAN) Dsub 9pin (RS232C) Power cord VGA cable Lens Cap Remote...

Owner's Manual
Page 2
With the Key lock function, you can operate and manage the projector - You can lock the operation on the top control or remote control (p.54). Blackboards* can be used as computer input or monitor ...the time of simple projection on the colored wall, power cord from the preset four colors. This projector utilizes built-in multimedia features, a palette of 16.77 million colors, and matrix liquid crystal display (LCD) technology. &#...Presentations ♦ LAN Network Function - Features and Design This Multimedia Projector is designed with the Wired LAN network function.
With the Key lock function, you can operate and manage the projector - You can lock the operation on the top control or remote control (p.54). Blackboards* can be used as computer input or monitor ...the time of simple projection on the colored wall, power cord from the preset four colors. This projector utilizes built-in multimedia features, a palette of 16.77 million colors, and matrix liquid crystal display (LCD) technology. &#...Presentations ♦ LAN Network Function - Features and Design This Multimedia Projector is designed with the Wired LAN network function.

Owner's Manual
Page 3
... 7 Part Names and Functions 8 Front 8 Back 8 Bottom 8 Rear Terminal 9 Top Control 10 Remote Control 11 Remote Control Battery Installation 12 Remote Control Operating Range 12 Remote Control Code 12 Installation 13 Positioning the Projector 13 Adjustable Foot 13 Connecting to a Computer 14 Connecting to Video Equipment 15 Connecting to Component Video and RGB (Scart) Equipment...
... 7 Part Names and Functions 8 Front 8 Back 8 Bottom 8 Rear Terminal 9 Top Control 10 Remote Control 11 Remote Control Battery Installation 12 Remote Control Operating Range 12 Remote Control Code 12 Installation 13 Positioning the Projector 13 Adjustable Foot 13 Connecting to a Computer 14 Connecting to Video Equipment 15 Connecting to Component Video and RGB (Scart) Equipment...

Owner's Manual
Page 8
...9314; ⑤ ⑥ ⑦⑧ ① Top controls and Indicators ② Zoom Ring ③ Focus Ring ④ Speaker ⑤ Infrared Remote Receiver ⑥ Projection Lens ⑦ Lens Cap (See page 61 for the Network function. Refer to the owner's manual of "Network Set-up and Operation..." . ✽ Kensington Security Slot This slot is for a Kensington lock used to deter theft of the projector. *Kensington is exhausted from light beam may damage lens cap and result in fire hazard. ⑧ Air Intake Vent Back ⑨ ⑫⑬...
...9314; ⑤ ⑥ ⑦⑧ ① Top controls and Indicators ② Zoom Ring ③ Focus Ring ④ Speaker ⑤ Infrared Remote Receiver ⑥ Projection Lens ⑦ Lens Cap (See page 61 for the Network function. Refer to the owner's manual of "Network Set-up and Operation..." . ✽ Kensington Security Slot This slot is for a Kensington lock used to deter theft of the projector. *Kensington is exhausted from light beam may damage lens cap and result in fire hazard. ⑧ Air Intake Vent Back ⑨ ⑫⑬...

Owner's Manual
Page 11
...-20) ② AUTO SET button Execute the setting of Auto setup (includes Input search, Auto PC adj. Do not bend, drop or expose the remote control to moisture or heat. - buttons Adjust the volume level. (p.24) ⑫ ⑬ MUTE button Mute the sound. (p.24) ⑭ ...apply benzene, thinner, spray, or any chemical material. 11 and Auto Keystone functions) in the Digital zoom +/- Part Names and Functions Remote Control ① ON/STAND-BY button Turn the projector on the screen. (p.26) ⑮ ⑩ ⑭ ⑪ D.ZOOM ▲▼ buttons Zoom in and out the ...
...-20) ② AUTO SET button Execute the setting of Auto setup (includes Input search, Auto PC adj. Do not bend, drop or expose the remote control to moisture or heat. - buttons Adjust the volume level. (p.24) ⑫ ⑬ MUTE button Mute the sound. (p.24) ⑭ ...apply benzene, thinner, spray, or any chemical material. 11 and Auto Keystone functions) in the Digital zoom +/- Part Names and Functions Remote Control ① ON/STAND-BY button Turn the projector on the screen. (p.26) ⑮ ⑩ ⑭ ⑪ D.ZOOM ▲▼ buttons Zoom in and out the ...

Owner's Manual
Page 12
...9679; Risk of the projector. 16.4' (5 m) 30° 30° Remote control Remote Control Code The 2 different remote control codes (Code 1-Code 2) are operated at the same time. Switching the remote control codes prevents interference from other remote controls when several projectors or video equipment next...to switch between the Code 1 and Code 2. Remote Control Operating Range Point the remote control toward the projector (Infrared Remote Receiver) when pressing the buttons. Press and hold the MENU and IMAGE buttons for the remote control. Part Names and Functions 1 Open the ...
...9679; Risk of the projector. 16.4' (5 m) 30° 30° Remote control Remote Control Code The 2 different remote control codes (Code 1-Code 2) are operated at the same time. Switching the remote control codes prevents interference from other remote controls when several projectors or video equipment next...to switch between the Code 1 and Code 2. Remote Control Operating Range Point the remote control toward the projector (Infrared Remote Receiver) when pressing the buttons. Press and hold the MENU and IMAGE buttons for the remote control. Part Names and Functions 1 Open the ...

Owner's Manual
Page 18
... page. 16 The preparation display will disappear after 30 seconds. Enter the PIN code as instructed on the remote control. The POWER indicator lights green and the cooling fans start on the projector, or the current signal is locked with a computer, VCR, etc.) before turning on the screen. 5... to operate. Is cable connected properly? The POWER indicator lights red. Open the lens cap (see page 53) appear on the projector. 2 Connect the projector's AC power cord into an AC outlet. Selected Input Source and Lamp Control Video Lamp control status (See page 53 for Lamp ...
... page. 16 The preparation display will disappear after 30 seconds. Enter the PIN code as instructed on the remote control. The POWER indicator lights green and the cooling fans start on the projector, or the current signal is locked with a computer, VCR, etc.) before turning on the screen. 5... to operate. Is cable connected properly? The POWER indicator lights red. Open the lens cap (see page 53) appear on the projector. 2 Connect the projector's AC power cord into an AC outlet. Selected Input Source and Lamp Control Video Lamp control status (See page 53 for Lamp ...

Owner's Manual
Page 20
...to be turned on . CONTINUOUS USE MAY RESULT IN SHORTENING THE LAMP LIFE. If the external power supply is turned off the projector. disappears after the projector is suddenly cut off the breaker even during projection without pressing the on/stand-by connecting the AC power cord to restart will ... red, see "WARNING indicator" on page 59. • While the POWER indicator is blinking, the lamp is being cooled down and the projector cannot be turned on the remote control, and Power off ? See "Fan" on page 56.) At this time, you can be turned on automatically by button. ✔...
...to be turned on . CONTINUOUS USE MAY RESULT IN SHORTENING THE LAMP LIFE. If the external power supply is turned off the projector. disappears after the projector is suddenly cut off the breaker even during projection without pressing the on/stand-by connecting the AC power cord to restart will ... red, see "WARNING indicator" on page 59. • While the POWER indicator is blinking, the lamp is being cooled down and the projector cannot be turned on the remote control, and Power off ? See "Fan" on page 56.) At this time, you can be turned on automatically by button. ✔...

Owner's Manual
Page 21
... or switch between each adjustment and setting procedure, refer to respective sections in this manual. The selected item is highlighted in orange.) MENU button Remote Control 3 Use the Point ▲▼ buttons to select the desired submenu item and press the SELECT button to set or access the selected...button to the main menu. Basic Operation How to Operate the On-Screen Menu The projector can be adjusted or set item is check marked. Top Control 1 Press the MENU button on the top control or the remote control to display the On-Screen Menu. 2 Use the Point ▲▼ ...
... or switch between each adjustment and setting procedure, refer to respective sections in this manual. The selected item is highlighted in orange.) MENU button Remote Control 3 Use the Point ▲▼ buttons to select the desired submenu item and press the SELECT button to set or access the selected...button to the main menu. Basic Operation How to Operate the On-Screen Menu The projector can be adjusted or set item is check marked. Top Control 1 Press the MENU button on the top control or the remote control to display the On-Screen Menu. 2 Use the Point ▲▼ ...

Owner's Manual
Page 22
...to adjust computer image [Contrast, Brightness, Color temp., White balance (R/G/B), Sharpness and Gamma] (pp.33-34). For Video source, used to set the projector's operating configurations (pp.43-57). ⑧ Information Display the input source information: Input , H-sync freq., V-sync freq., Screen, Language, Lamp ...status, Lamp counter , Power management, Key lock, PIN code lock and Remote control (p.58). ⑨ Network See the owner's manual of each menu, see "Menu Tree" on pages 68-69. For Video source, used...
...to adjust computer image [Contrast, Brightness, Color temp., White balance (R/G/B), Sharpness and Gamma] (pp.33-34). For Video source, used to set the projector's operating configurations (pp.43-57). ⑧ Information Display the input source information: Input , H-sync freq., V-sync freq., Screen, Language, Lamp ...status, Lamp counter , Power management, Key lock, PIN code lock and Remote control (p.58). ⑨ Network See the owner's manual of each menu, see "Menu Tree" on pages 68-69. For Video source, used...

Owner's Manual
Page 23
... setup (includes Input search, Auto PC adj. The keystone adjustment can be canceled. • The adjustable range is limited depending on the remote control once more while the keystone dialog box is set to On in the Setting menu (p.49). • Perfect correction of the image... of correction. • An arrow disappears at the maximum correction. • If you press the KEYSTONE button on the input signal. 23 Remote Control AUTO SETUP button POINT ▲▼ buttons AUTO SET button POINT ▲▼ buttons Keystone Correction If a projected picture still has keystone...
... setup (includes Input search, Auto PC adj. The keystone adjustment can be canceled. • The adjustable range is limited depending on the remote control once more while the keystone dialog box is set to On in the Setting menu (p.49). • Perfect correction of the image... of correction. • An arrow disappears at the maximum correction. • If you press the KEYSTONE button on the input signal. 23 Remote Control AUTO SETUP button POINT ▲▼ buttons AUTO SET button POINT ▲▼ buttons Keystone Correction If a projected picture still has keystone...

Owner's Manual
Page 24
... the VOLUME +/- Sound Menu 24 Basic Operation Sound Adjustment Direct Operation Volume Press the VOLUME+/- To turn the sound back on . buttons. Remote Control Menu Operation 1 Press the MENU button to select Sound. Mute Press the SELECT button to access the selected item. The volume dialog box...switch the mute function On/ Off. The dialog box disappears after 4 seconds. Top Control VOLUME+/buttons Mute Press the MUTE button on the remote control to turn up the volume; The Mute function is also effective for a few seconds. Volume Dialog Box VOLUME+ button MUTE button VOLUME...
... the VOLUME +/- Sound Menu 24 Basic Operation Sound Adjustment Direct Operation Volume Press the VOLUME+/- To turn the sound back on . buttons. Remote Control Menu Operation 1 Press the MENU button to select Sound. Mute Press the SELECT button to access the selected item. The volume dialog box...switch the mute function On/ Off. The dialog box disappears after 4 seconds. Top Control VOLUME+/buttons Mute Press the MUTE button on the remote control to turn up the volume; The Mute function is also effective for a few seconds. Volume Dialog Box VOLUME+ button MUTE button VOLUME...

Owner's Manual
Page 25
...and COMPONENT buttons on the Screen menu while the Freeze function is working. See pages 27, 36-37 for details. Fig.1 will appear on the remote control to the Digital zoom +/- button Display the input source information: Input, H-sync freq., V-sync freq., Screen, Language, Lamp status, Lamp... counter, Power management, Keylock, PIN code lock and Remote control (p.58). To cancel the Freeze function, press the FREEZE button again or press any other buttons. 25 High Brighter than the Normal mode...
...and COMPONENT buttons on the Screen menu while the Freeze function is working. See pages 27, 36-37 for details. Fig.1 will appear on the remote control to the Digital zoom +/- button Display the input source information: Input, H-sync freq., V-sync freq., Screen, Language, Lamp status, Lamp... counter, Power management, Keylock, PIN code lock and Remote control (p.58). To cancel the Freeze function, press the FREEZE button again or press any other buttons. 25 High Brighter than the Normal mode...

Owner's Manual
Page 26
... time you press the NO SHOW button as follows. P-TIMER button Press the P-TIMER button on the remote control to operate the Count up/Count down function. IMAGE button Press the IMAGE button on the remote control to select a desired image mode of the screen. P-Timer display 0 SCREEN button P-TIMER button ... the previous page for the description of Setting for detail of other button. Basic Operation NO SHOW button Press the NO SHOW button on the remote control to normal, press the NO SHOW button again or press any other buttons. 26 To restore to black out the image. Refer to ...
... time you press the NO SHOW button as follows. P-TIMER button Press the P-TIMER button on the remote control to operate the Count up/Count down function. IMAGE button Press the IMAGE button on the remote control to select a desired image mode of the screen. P-Timer display 0 SCREEN button P-TIMER button ... the previous page for the description of Setting for detail of other button. Basic Operation NO SHOW button Press the NO SHOW button on the remote control to normal, press the NO SHOW button again or press any other buttons. 26 To restore to black out the image. Refer to ...

Owner's Manual
Page 27
...Selection (RGB: Computer 1/Computer 2) Direct Operation Choose either Computer 1(RGB) or Computer 2(RGB) by pressing the COMPUTER 1 or COMPUTER 2 button on the remote control. Use the Point ▲▼ buttons to select Input and then press the Point ► or the SELECT button. 2 Use the Point &#... the RGB input source and then press the SELECT button. ✔Note: When the Input Search function is set to display the On-Screen Menu. Remote Control COMPUTER 1 button Computer 1(RGB) Computer 1(Scart) COMPUTER 2 button Computer 2 (RGB) Input Menu Menu Operation 1 Press the MENU button to...
...Selection (RGB: Computer 1/Computer 2) Direct Operation Choose either Computer 1(RGB) or Computer 2(RGB) by pressing the COMPUTER 1 or COMPUTER 2 button on the remote control. Use the Point ▲▼ buttons to select Input and then press the Point ► or the SELECT button. 2 Use the Point &#... the RGB input source and then press the SELECT button. ✔Note: When the Input Search function is set to display the On-Screen Menu. Remote Control COMPUTER 1 button Computer 1(RGB) Computer 1(Scart) COMPUTER 2 button Computer 2 (RGB) Input Menu Menu Operation 1 Press the MENU button to...

Owner's Manual
Page 32
...2 Use the Point ▲▼ buttons to the wall color from the preset four colors. Blackboard (Green) For the image projected on the projector. Colorboard At the time of simple projection on the colored wall, you can get the close color image to the color image projected on a white... screen by pressing the IMAGE button on the remote control. IMAGE button Dynamic Standard Real Blackboard(Green) Colorboard Image 1 Image 2 Image 3 Image 4 Dynamic For viewing pictures in each computer, component, S-...
...2 Use the Point ▲▼ buttons to the wall color from the preset four colors. Blackboard (Green) For the image projected on the projector. Colorboard At the time of simple projection on the colored wall, you can get the close color image to the color image projected on a white... screen by pressing the IMAGE button on the remote control. IMAGE button Dynamic Standard Real Blackboard(Green) Colorboard Image 1 Image 2 Image 3 Image 4 Dynamic For viewing pictures in each computer, component, S-...

Owner's Manual
Page 35
... displayed on the aspect ratio. zoom + appears. cannot be selected when 480i, 575i, 480p or 575p is limited depending on the remote control. The projected image can use the Point ▲▼ buttons to all adjusted values. The Scale V appears dimmed and becomes ...unavailable. zoom - To exit the Digital zoom +/- Remote Control POINT buttons SELECT button D.ZOOM + button D.ZOOM - function is used. When Custom is selected, the saved scale or position is disabled...
... displayed on the aspect ratio. zoom + appears. cannot be selected when 480i, 575i, 480p or 575p is limited depending on the remote control. The projected image can use the Point ▲▼ buttons to all adjusted values. The Scale V appears dimmed and becomes ...unavailable. zoom - To exit the Digital zoom +/- Remote Control POINT buttons SELECT button D.ZOOM + button D.ZOOM - function is used. When Custom is selected, the saved scale or position is disabled...

Owner's Manual
Page 36
...video equipment connected to On1 or On2 in the Auto setup function, the input signal will be selected through menu operation as described below. Remote Control VIDEO button Video S-VIDEO button S-video Menu Operation 1 Press the MENU button to select the S-video and then press the SELECT ...button. Video Input Input Source Selection (Video, S-video) Direct Operation Choose Video or S-video by pressing the VIDEO or the SVIDEO button on the remote control. Auto ✔Note: When the Input Search function is set to the COMPUTER IN 1/S-VIDEO IN/COMPONENT IN terminal with a S-video-VGA...
...video equipment connected to On1 or On2 in the Auto setup function, the input signal will be selected through menu operation as described below. Remote Control VIDEO button Video S-VIDEO button S-video Menu Operation 1 Press the MENU button to select the S-video and then press the SELECT ...button. Video Input Input Source Selection (Video, S-video) Direct Operation Choose Video or S-video by pressing the VIDEO or the SVIDEO button on the remote control. Auto ✔Note: When the Input Search function is set to the COMPUTER IN 1/S-VIDEO IN/COMPONENT IN terminal with a S-video-VGA...

Owner's Manual
Page 37
... 21-pin) Direct Operation Choose Computer 1(Component) or Computer 1(Scart) by pressing the COMPONENT or the COMPUTER 1 button on the remote control. Before using these buttons, correct input source should be searched automatically (p.44). Input Menu Component When the input source is set... select Computer 1 and then press the Point ► button. 3 Use the Point ▲▼ buttons to display the On-Screen Menu. Remote Control COMPUTER 1 button Computer 1(RGB) Computer 1(Scart) COMPONENT button Computer 1(Component) Menu Operation 1 Press the MENU button to select Component or ...
... 21-pin) Direct Operation Choose Computer 1(Component) or Computer 1(Scart) by pressing the COMPONENT or the COMPUTER 1 button on the remote control. Before using these buttons, correct input source should be searched automatically (p.44). Input Menu Component When the input source is set... select Computer 1 and then press the Point ► button. 3 Use the Point ▲▼ buttons to display the On-Screen Menu. Remote Control COMPUTER 1 button Computer 1(RGB) Computer 1(Scart) COMPONENT button Computer 1(Component) Menu Operation 1 Press the MENU button to select Component or ...

Owner's Manual
Page 39
Standard Normal picture mode preset on a blackboard. Blackboard (Green) For the image projected on the projector. Colorboard At the time of simple projection on the colored wall, you can get the close color image to the color image projected on a black... a blackboard. IMAGE button Dynamic For viewing pictures in the Image Adjust Menu (see pages 40-41). This mode help enhance the image projected on the remote control. This is provided in each computer, scart, component, S-video and video input source. Image select Menu ► Video Input IMAGE button Dynamic Standard ...
Standard Normal picture mode preset on a blackboard. Blackboard (Green) For the image projected on the projector. Colorboard At the time of simple projection on the colored wall, you can get the close color image to the color image projected on a black... a blackboard. IMAGE button Dynamic For viewing pictures in the Image Adjust Menu (see pages 40-41). This mode help enhance the image projected on the remote control. This is provided in each computer, scart, component, S-video and video input source. Image select Menu ► Video Input IMAGE button Dynamic Standard ...


