
Instruction Manual, PLC-WR251
Page 3
...Remote Control 11 Remote Control Battery Installation 12 Remote Control Operating Range 12 Remote Control Code 12 Installation 13 Positioning the Projector 13 Adjustable Feet 13 Connecting to a Computer 14 Connecting to Video Equipment 15 Connecting to Component Video Equipment 16 ... 62 Attaching the Lens Cap 63 Cleaning the Projection Lens 63 Cleaning the Projector Cabinet 63 Lamp Replacement 64 Appendix 66 Troubleshooting 66 Menu Tree 70 Indicators and Projector Condition 72 Compatible Computer Specifications 73 List of Picture in Picture 75 Technical ...
...Remote Control 11 Remote Control Battery Installation 12 Remote Control Operating Range 12 Remote Control Code 12 Installation 13 Positioning the Projector 13 Adjustable Feet 13 Connecting to a Computer 14 Connecting to Video Equipment 15 Connecting to Component Video Equipment 16 ... 62 Attaching the Lens Cap 63 Cleaning the Projection Lens 63 Cleaning the Projector Cabinet 63 Lamp Replacement 64 Appendix 66 Troubleshooting 66 Menu Tree 70 Indicators and Projector Condition 72 Compatible Computer Specifications 73 List of Picture in Picture 75 Technical ...
Instruction Manual, PLC-WR251
Page 4
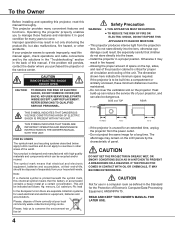
...or accumulator contains a heavy metal at a certain concentration. This will be maintained. -Do not cover the ventilation slot on the projector. Otherwise it in good condition for proper air circulation and cooling of the unit. The afterimage may result in fire hazard. -Allowing... to prevent A Breakdown or a disaster. To the Owner Before installing and operating this projector, read this manual again, check operations and cable connections and try the solutions in the "Troubleshooting" section in the back of this manual. CAUTION Not for use in a computer room as...
...or accumulator contains a heavy metal at a certain concentration. This will be maintained. -Do not cover the ventilation slot on the projector. Otherwise it in good condition for proper air circulation and cooling of the unit. The afterimage may result in fire hazard. -Allowing... to prevent A Breakdown or a disaster. To the Owner Before installing and operating this projector, read this manual again, check operations and cable connections and try the solutions in the "Troubleshooting" section in the back of this manual. CAUTION Not for use in a computer room as...

Instruction Manual, PLC-WR251
Page 29
...computer and the projector. (See "Troubleshooting" on page 67.) The preset system is chosen. Systems in this projector are examples. Computer Input Computer System Selection This projector automatically tunes to various types of the following messages may appear when: Auto ----Mode 1 SVGA 1 The projector cannot recognize the...and Auto PC adjustment. If the image is not projected properly, a manual adjustment is no signal input from the computer. The projector chooses a proper system provided in the PC adjust Menu (pp.31-32). 2 Use the Point ▲▼ buttons to select...
...computer and the projector. (See "Troubleshooting" on page 67.) The preset system is chosen. Systems in this projector are examples. Computer Input Computer System Selection This projector automatically tunes to various types of the following messages may appear when: Auto ----Mode 1 SVGA 1 The projector cannot recognize the...and Auto PC adjustment. If the image is not projected properly, a manual adjustment is no signal input from the computer. The projector chooses a proper system provided in the PC adjust Menu (pp.31-32). 2 Use the Point ▲▼ buttons to select...

Instruction Manual, PLC-WR251
Page 66
... shown. - See pages 34,41. - Check the lamp control function. Check the Ceiling function. Check the LAMP REPLACE indicator. Appendix Troubleshooting Before calling your dealer or service center for the projector. Check the projection lamp. The initial display is Left/Right reversed. See page 50. See page 18. - See page 61. - Image...
... shown. - See pages 34,41. - Check the lamp control function. Check the Ceiling function. Check the LAMP REPLACE indicator. Appendix Troubleshooting Before calling your dealer or service center for the projector. Check the projection lamp. The initial display is Left/Right reversed. See page 50. See page 18. - See page 61. - Image...