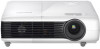
User Manual (user Manual) (ver.1.0) (English)
Page 1
The specifications are subject to change without prior notice to improve performance. SP-M200 SP-M220 SP-M250 LCD Projector Owner's Instructions The color and the appearance of the product may differ from the illustrations in this manual.
User Manual (user Manual) (ver.1.0) (English)
Page 2
...Table Of Contents MAJOR SAFETY PRECAUTIONS Before You Start 1-1 Care and Maintenance 1-2 Safety Precautions 1-3 INSTALLATION AND CONNECTION Package Contents 2-1 Installing the Projector 2-2 Leveling with Adjustable Feet 2-3 Zoom and Focus Adjustment 2-4 Screen Size and Projection Distance 2-5 Lamp Replacement 2-6 Rear Side 2-7 Supported Display ... the Screen Adjustment Menu (OSD: On Screen Display) . . . . 3-5 TROUBLESHOOTING Before Requesting Service 4-1 MORE INFORMATION Specifications 5-1 RS232C Command Table 5-2 Contact SAMSUNG WORLDWIDE 5-3 Correct Disposal - Europe only 5-4
User Manual (user Manual) (ver.1.0) (English)
Page 4
...product with a wet cloth or by directly spraying water onto the product. 1-2 Care and Maintenance Cleaning the Surface and the Lens Clean the projector using a soft dry cloth. • Avoid cleaning the product with a flammable substance such as benzene or thinner. • Avoid scratching the... with the product. • A white stain may appear on the surface of the projector, contact an authorized Samsung Service Center. • Contact a Service Center if dust or other substances are inside the projector. The appearance and the color may result in fire, electric shock, or a problem ...
User Manual (user Manual) (ver.1.0) (English)
Page 8
... is exposed to dust, water or alien substances, clean it may occur due to the surrounding environment. Do not touch any outer part of the projector at least once per year. If the power plug pin or jack is installed in a location where the operating conditions vary considerably, a serious quality problem...
User Manual (user Manual) (ver.1.0) (English)
Page 9
...Keep you hands or body off . Be careful not to keep your body away from the projector lamp. Avoid using water spray or a wet cloth. Be careful to touch the ventilation hole while the projector is hot. (Children and those who have sensitive skin should be more careful.) Major Safety .... Do not clean the product using any chemicals such as detergents, industrial or automotive polish, abrasive, wax, benzene, alcohol on any cover on as projector case, since this may cause damage. Do not open any plastic part of the product. • The lens could get damaged. Take care not...
User Manual (user Manual) (ver.1.0) (English)
Page 10
Use the included screws to attach the projector to move the product at a later date. 2 Installation and Connection 2-1 Package Contents • Unpack the product and check if all locations) Cleaning Cloth D-Sub Cable ... (For bracket of the contents listed below have been included. • Store the packaging box in all of ceiling mount.) Projector case A ceiling mount is not included and must be purchased separately. Projector CONTENTS Quick Installation Guide Warranty Card / Registration Card (Not available in all locations) User Manual Power Cord Remote Control...
User Manual (user Manual) (ver.1.0) (English)
Page 11
...the picture so that it displays correctly, depending on the screen will be washed out and not display clearly. • When using the projector in bright surroundings, use curtains to block the light. • You can use the menu to adjust the picture so that it displays... For rear-ceiling, press : Menu > Setup > Install > Rear-Ceiling To adjust the picture when you install the projector behind the screen Installing behind a semi-transparent screen, you 've located the projector, rearfloor (or low) or rear-ceiling. 1. To view the installation position settings, see below. For rear-floor, ...
User Manual (user Manual) (ver.1.0) (English)
Page 12
The projector can be adjusted to a height of up to adjust the legs and level the projector. 2-3 Leveling with Adjustable Feet Press the PUSH buttons, as shown, to 30 mm (about 12 °) from the reference point. If is set to , is required after auto-adjustment, use . 2-3 Installation and Connection If fine tuning is adjusted automatically.
User Manual (user Manual) (ver.1.0) (English)
Page 13
Focus Ring : Focus the picture on the screen using the Focus Ring. Installation and Connection 2-4 If you will not be able to adjust the focus correctly. The size of the image within the zoom range by manipulating the Zoom Knob. 2-4 Zoom and Focus Adjustment Zoom Knob : You can adjust the size of your screen determines the distance you set your projector at the projection distance specified in the Screen Size and Projection Distance table in Section 2-5, you do not install your projector from the screen.
User Manual (user Manual) (ver.1.0) (English)
Page 14
If images are not clear, adjust them using the adjustable feet to Image Bottom Install the projector on a flat, even surface and level the projector using the Zoom Knob or Focus Ring, or move the projector forward and backward. 2-5 Screen Size and Projection Distance A. Distance from Lens Center to obtain optimal picture quality. SCREEN...
User Manual (user Manual) (ver.1.0) (English)
Page 15
....1 1112. 30.6 77.7 5 578.8 541.1 1374.2 449.9 1142. 31.4 79.8 6 594.0 555.4 1410.3 461.8 1172. 32.3 81.9 6 609.2 569.6 1446.4 473.6 1202. 33.1 84.0 6 This projector is designed to show images optimally on a 80 ~ 120 inches sized screen.
User Manual (user Manual) (ver.1.0) (English)
Page 16
...SAMSUNG WORLDWIDE' in section 5-3. • Check that the power cord is unplugged before replacing the lamp. • Because the lamp is a high temperature and high voltage product, wait at least one specified below . 2-6 Installation and Connection Lamp Model Name : 200W NSHA200SS(SP-M250), 180W NSHA180SS(SP-M220, SP-M200) - The projector... lamp is an expendable item. Lamp Manufacturer : Ushio - If the projector does not work if the lamp cover is ...
User Manual (user Manual) (ver.1.0) (English)
Page 17
...when replacing the projector filter: • The filter is torn, it completely. Ventilation openings For the location of removal. To remove the lamp, hold and then pull the lamp handle as shown in the reverse order of the ventilation openings, see 'Contact SAMSUNG WORLDWIDE' in ...the menu. Installation and Connection 2-6 Turn off the power of the projector, and then disconnect the power cord after the projector has cooled sufficiently. Install a new lamp in the figure below : ...
User Manual (user Manual) (ver.1.0) (English)
Page 21
... 136.750 162.000 All resolutions higher or lower than 1024x768 are converted to 1024x768 by the PC matches the real resolution (1024x768) of the projector, the screen quality is optimal. If the resolution of the signal out put by the Scaler chip inside the... projector. AV Timing (D-Sub) FORMAT BT.601 SMPTE 267M BT.1358 SMPTE 293M BT.601 BT.1358 SMPTE 296M BT.709 SMPTE 274M 480i 480p 576i ...
User Manual (user Manual) (ver.1.0) (English)
Page 22
No adjustments are necessary. 2-8 Installation and Connection FORMAT RESOLUTION EIA-861 EIA-861 EIA-861 EIA-861 Format5 Format17,18 Format19 Format20 1920 x 1080 720 x 576 1280 x 720 1920 x 1080 SCAN Interlaced Progressive Progressive Interlaced HORIZONTAL FREQUENCY (KHZ) 60.000 50.000 50.000 50.000 VERTICAL FREQUENCY (HZ) 33.750 31.250 37.500 28.125 PIXEL FREQUENCY (MHZ) 74.250 27.000 74.250 74.250 AV Timing (VIDEO) NTSC, NTSC 4.43, PAL, PAL60, PAL-N, PAL-M, SECAM Your projector supports the standard video formats listed above through its video inputs.
User Manual (user Manual) (ver.1.0) (English)
Page 23
Plug the power cord into the power terminal on the rear side of the projector. Installation and Connection 2-9 2-9 Connecting the Power 1.
User Manual (user Manual) (ver.1.0) (English)
Page 24
... Setting up the PC Environment Check the following items before connecting your PC to your projector. 1. The optimal resolution for the projector is 1024 x 768. Click the [Monitor] tab and set the . For other resolutions supported by the projector, see the refresh rate (60 Hz, 70 Hz, etc.) next to your selected resolution...
User Manual (user Manual) (ver.1.0) (English)
Page 25
... 2. The setup process might vary depending on your monitor depending on your PC and projector are turned off. 1. Using the Projector Installation and Connection 2-10 When connecting the projector to the projector. Plug in 1.) This projector supports 32 bit color quality (per pixel) when it to a PC, make sure...[Properties (R)] as a PC monitor. Connect the [PC IN] port on the window to the PC video out (D-sub) port of the projector and the PC. Setting the refresh rate sets both the vertical and horizontal frequencies. 5. Click the [OK] button to close the window, ...
User Manual (user Manual) (ver.1.0) (English)
Page 26
Turn on the projector, and then press the [SOURCE] button to select . Adjust the screen. 2-10 Installation and Connection Turn on the PC, and then set the PC Environment (screen resolution, etc.) if necessary. 3. 1. If the Mode is not available, make sure the PC video cable is properly connected. 2.
User Manual (user Manual) (ver.1.0) (English)
Page 27
If you are connecting to the HDMI or DVI terminal of your PC and projector are turned off. 1. Installation and Connection 2-11 Connect the [HDMI/DVI IN] terminal of the projector to the HDMI terminal of your PC using an HDMI/DVI cable Make sure that your PC, use an HDMI/HDMI cable (Not supplied). - For the supported resolutions and refresh rates, see PC Timing (D-Sub/HDMI) in Section 2-8, "Supported Display Modes". 2-11 Connecting a PC using a HDMI/HDMI or HDMI/DVI cable (Not supplied). -