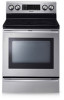
User Manual (user Manual) (ver.1.0) (English)
Page 1
To receive more complete service, please register your product at www.samsung.com/global/register FTQ386LWUX Electric Range user manual imagine the possibilities Thank you for purchasing this Samsung product.
User Manual (user Manual) (ver.1.0) (English)
Page 2
... when cooking for light-duty cleaning jobs, keeping your new range is a snap - Steam Quick™ cleans the inside of the oven. A smaller warming burner in all directions. Your new range has Surround Airvection™, which Samsung innovated by adding a third heating element and a multi-fan... system that circulates the heat evenly in the center of your range with just one fan tend to different pot sizes. Easy ...
User Manual (user Manual) (ver.1.0) (English)
Page 3
... SAFETY SYMBOLS WARNING: This symbol alerts you to hazards or unsafe practices that could cause serious bodily harm or death. If you pull the range out from the wall socket. This guide does not cover all instructions before using your service agent or manufacturer about problems that may occur. ...Make sure the machine is properly engaged when you or a child stand, sit or lean on the doors of tipping the range, the range must be secured by a properly installed Anti-Tip device. Follow directions explicity. Note ANTI-TIP DEVICE To reduce the risk of the...
User Manual (user Manual) (ver.1.0) (English)
Page 4
...the appliance. Moist or damp potholders on hot surfaces may become hot. Teach children not to sit or stand on the back guard of the range. _ Important safety instructions Do not enter inside the oven. Flammable materials should never be allowed to play with the controls or any other ... on any part of the appliance unless specifically recommended in use a towel or other part of a range. Smother the fire or flame by closing the door or use water on the range to reach items could be referred to children in this Owner's Manual. Keep plastics, clothes, and paper away...
User Manual (user Manual) (ver.1.0) (English)
Page 5
...,earthenware, or other stirring utensils on . Always turn the fan on glass cooktop surface when it is equipped with surface units of the range. The glass surface of utensil to unintentional contact with the utensil, the handle of clothing. To reduce the risk of burns, ignition of... may result in use the glass cooktop surface as a cutting board. Be careful when placing spoons or other glazed utensils are suitable for range-top service without a cookware, the control knob will also improve efficiency. They may become hot. Make sure you know which control knob ...
User Manual (user Manual) (ver.1.0) (English)
Page 8
... cooking 10 using the warming drawer 17 operating the oven 19 maintaining your appliance 39 troubleshooting 49 warranty 53 9 Overview 9 What's included with your range 10 About surface cooking 12 How to set the appliance for surface cooking 15 Using the proper cookware 15 Choosing the proper cookware 16 Protecting ...
User Manual (user Manual) (ver.1.0) (English)
Page 9
introducing your new range OVERVIEW Surface control knobs See page 11 for more information 01 INTRODUCING Oven control panel See page 19 for more information Automatic oven light switch Oven light Self/steam clean latch Glass surface Oven door Gasket Convection fan Shelf position WHAT'S INCLUDED WITH YOUR RANGE Warming drawer Wire racks Broil pan Broil pan insert Cleaner & cleaning pad Introducing your new range _9
User Manual (user Manual) (ver.1.0) (English)
Page 10
... use cookware. • Always place the pan in the center of the surface unit you are infrequently used . • Turn the surface units on the range when it is in an area subjected to heat. This will allow residual heat to remove. Cycling at the HI setting. surface cooking About surface...
User Manual (user Manual) (ver.1.0) (English)
Page 11
.... • Pans should not extend more information on , a glow can be seen through the glass cooking surface. Cooking areas • The cooking areas on your range are identified by permanent circles on the cooktop as shown below. 02 SURFACE COOKING 1 5 2 3 4 6 1. Warming center: Center rear . Location of cookware, refer to approximately 150...
User Manual (user Manual) (ver.1.0) (English)
Page 39
... to the fumes given off during the self-cleaning cycle. • Remove the wire rack, broil pan, broil pan insert, all cookware and any range. The health of any aluminum foil from the oven. • Wipe up debris from the oven bottom. (Fig. 1) • The silver-colored... grease and residue completely or reduce them to another well-ventilated room. • Do not line the oven walls, racks, bottom or any range. Move birds to another well ventilated room. 05 MAINTAINING YOUR APPLIANCE maintaining your appliance _9 CAUTION Do not leave small children unattended near the appliance...
User Manual (user Manual) (ver.1.0) (English)
Page 42
...-up grease, apply a liquid detergent directly onto the area and leave for 30 to using the Stainless Steel Appliance Cleaner or polish. 2_ Maintaining your range is removed for cleaning, servicing or any reason, be sure the Anti-Tip device is re-engaged properly when the... replaced. it will scratch the surface. • If a mineral oil-based stainless steel appliance cleaner has been used before cleaning any part of the range. • If your appliance CARE AND CLEANING OF THE OVEN WARNING • Be sure all controls are OFF and all surfaces are COOL before to ...
User Manual (user Manual) (ver.1.0) (English)
Page 43
Oven racks • If the racks are dishwasher-safe. • Do not store a soiled broil pan and insert anywhere in the range. You may hand clean the oven door. • Use soap & water to thoroughly clean the top, sides, and front of oil. Remove the insert from ...
User Manual (user Manual) (ver.1.0) (English)
Page 47
...glide lever and pull up on the left guide Pull up against the front frame of the slot. 4. Push the hinge locks up on the range. 4. Replace the shield on each side of the drawer; Hinge lock Unlocked position Locked position 5. CAUTION How to remove the warming drawer 1. ...the warming drawer. If the door will minimize possible damage to seat bearing glides into the range until levers click (approximately 2 inches). Close the oven door. Pull the warming drawer away from the range. Align the glide on each side of the drawer with the glide slots on the ...
User Manual (user Manual) (ver.1.0) (English)
Page 48
...the OVEN LIGHT pad to remove it on when the oven door is a standard 40-watt appliance bulb. Turn the glass bulb cover in the range or reconnect power. Turn the bulb counterclockwise to turn it from its socket. Remove Replace Glass bulb cover Bulb 5. Make sure the oven and the... bulb are cool. _ Maintaining your oven light bulb, disconnect the electrical power to remove. 4. It will not work during a self-cleaning cycle. 1. Unplug the range or disconnect power. 3. Make sure the oven and the bulb are cool. 2. Plug in the back of the oven counterclockwise to the...
User Manual (user Manual) (ver.1.0) (English)
Page 49
...surface unit This is interfering with movement of the range until the desired heat is set improperly. • Check to see the correct control is obtained. The carpet is normal. If this does not solve the problem, call Samsung at least 30 seconds and then reconnect the ...controls are set for the surface unit you are square and provide sufficient room for at 1-800-SAMSUNG (1-800-726-7864). PROBLEM The range is being used. stops glowing when changed to the range for installation. Improper cookware is not level. The unit is sagging or sloping. • ...
User Manual (user Manual) (ver.1.0) (English)
Page 50
... bulb is normal. The control has not been set properly. • Call for service. The insert on setting oven controls. discoloration on and off . The range is broken. This is temporary and will disappear as the glass cools. • The element will not turn on using the oven racks incorrectly or...
User Manual (user Manual) (ver.1.0) (English)
Page 51
... less visible in the oven. • Press the CLEAR/OFF pad. Troubleshooting _51 The oven is cancelled. controls. This is too high • Allow the range to cool and reset the to be low. • See the broiling guide on the surface of the glass cooktop on page 36. The oven...
User Manual (user Manual) (ver.1.0) (English)
Page 53
... _53 07 WARRANTY warranty PLEASE DO NOT DISCARD THIS REPLACES THE WARRANTY PAGE IN THE USE & CARE GUIDE SAMSUNG ELECTRIC RANGE LIMITED WARRANTY TO ORIGINAL PURCHASER This SAMSUNG brand product, as supplied and distributed by SAMSUNG ELECTRONICS AMERICA, INC. (SAMSUNG) and delivered new, in the original carton to the original consumer purchaser, is warranted by...