
User Manual
Page 6
... area around the exhaust opening and adjacent surrounding areas free from service or discarded, remove the door to the drying compartment. 7. Do not dry articles that have been previously cleaned in, washed in, soaked in, or spotted with internal controls. 10. Do not store or use the dryer to dry clothes which have the skills to carry out. 11. Clean the lint screen before using your appliance, follow...
... area around the exhaust opening and adjacent surrounding areas free from service or discarded, remove the door to the drying compartment. 7. Do not dry articles that have been previously cleaned in, washed in, soaked in, or spotted with internal controls. 10. Do not store or use the dryer to dry clothes which have the skills to carry out. 11. Clean the lint screen before using your appliance, follow...
User Manual
Page 7
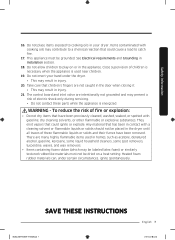
...the dryer until all traces of electric shock only during servicing. • Do not contact these flammable liquids or solids and their fumes have been previously cleaned, washed, soaked, or spotted with cooking oils may result in the appliance. SAVE THESE INSTRUCTIONS ...Heated foam rubber materials can, under the dryer. • This may be labeled latex foam) or similarly textured rubberlike materials must be dried on or in injury. 21. Take care that have been removed. WARNING - Do not place items exposed to play on a heat setting. The control board and inlet valve...
...the dryer until all traces of electric shock only during servicing. • Do not contact these flammable liquids or solids and their fumes have been previously cleaned, washed, soaked, or spotted with cooking oils may result in the appliance. SAVE THESE INSTRUCTIONS ...Heated foam rubber materials can, under the dryer. • This may be labeled latex foam) or similarly textured rubberlike materials must be dried on or in injury. 21. Take care that have been removed. WARNING - Do not place items exposed to play on a heat setting. The control board and inlet valve...

User Manual
Page 8
... controls. • Do not repair, replace, or attempt to service any part of the appliance unless specifically instructed to in your building. • Clear the room, building or area of all occupants. • Immediately call the fire department. Warnings WARNING • Ensure pockets are free of the appliance. coins, knives, pins, etc. These objects could damage your dryer. • Gas...
... controls. • Do not repair, replace, or attempt to service any part of the appliance unless specifically instructed to in your building. • Clear the room, building or area of all occupants. • Immediately call the fire department. Warnings WARNING • Ensure pockets are free of the appliance. coins, knives, pins, etc. These objects could damage your dryer. • Gas...
User Manual
Page 9
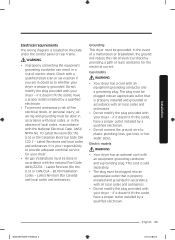
... install a UL-approved gas detector. • Install and use in accordance with the manufacturer's instructions. • Do not place items in your dryer can be properly grounded. The potential for information about grounding this heat cannot escape, the items can ignite spontaneoulsy. Always use the Cool Down cycle for dryer use by qualified service personnel. • This appliance must be dangerous. Never plug the power cord...
... install a UL-approved gas detector. • Install and use in accordance with the manufacturer's instructions. • Do not place items in your dryer can be properly grounded. The potential for information about grounding this heat cannot escape, the items can ignite spontaneoulsy. Always use the Cool Down cycle for dryer use by qualified service personnel. • This appliance must be dangerous. Never plug the power cord...
User Manual
Page 15
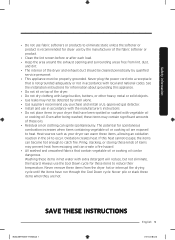
...-24 1:21:42 Installation requirements Read through the following instructions before installing the dryer and keep this manual for the rear exhaust option. A dryer produces combustible lint. Key installation requirements • A grounded electrical outlet. • A power cord for electric dryers (except in Canada). • Gas lines (for gas models) that must be kept clear of electric shock only during servicing. For gas dryers, adequate clearance must be located where there are no air-flow obstructions. The dryer area must be...
...-24 1:21:42 Installation requirements Read through the following instructions before installing the dryer and keep this manual for the rear exhaust option. A dryer produces combustible lint. Key installation requirements • A grounded electrical outlet. • A power cord for electric dryers (except in Canada). • Gas lines (for gas models) that must be kept clear of electric shock only during servicing. For gas dryers, adequate clearance must be located where there are no air-flow obstructions. The dryer area must be...

User Manual
Page 20
... purchase and install a UL-approved gas detector. • Install and use with natural gas. The National Fuel Gas Code requires that an accessible, approved manual gas shut-off valve be installed within 6" of any pressure testing of Massachusetts installation instructions Your dryer must be installed by the American Gas Association (CGA in the gas supply line to install your dryer, the connector can be no constant burning pilot. • Any pipe joint compound used to your system...
... purchase and install a UL-approved gas detector. • Install and use with natural gas. The National Fuel Gas Code requires that an accessible, approved manual gas shut-off valve be installed within 6" of any pressure testing of Massachusetts installation instructions Your dryer must be installed by the American Gas Association (CGA in the gas supply line to install your dryer, the connector can be no constant burning pilot. • Any pipe joint compound used to your system...
User Manual
Page 21
... in doubt as to plastic plumbing lines, gas lines, or hot water pipes. This cord is sold separately. • The plug must be plugged into an appropriate outlet that is located on the plate under the control panel or rear frame. Check with the national Fuel Code ANSI/Z2231 - It is properly installed and grounded in accordance with all local codes and ordinances. • Do not modify...
... in doubt as to plastic plumbing lines, gas lines, or hot water pipes. This cord is sold separately. • The plug must be plugged into an appropriate outlet that is located on the plate under the control panel or rear frame. Check with the national Fuel Code ANSI/Z2231 - It is properly installed and grounded in accordance with all local codes and ordinances. • Do not modify...

User Manual
Page 22
... fuse or circuit breaker on the dryer. electric model dryers. This cord is recommended. U.S. dryers require a 120 / 240 volt, 60 Hz AC approved electrical service. Electrical connections Before operating or testing, follow all grounding instructions in the Grounding section. only Most U.S. Installation Installation • If a power cord is not used , the cord should be plugged into a 30-ampere receptacle. • The power cord is not provided with U.S. Electric models - Gas models - The power cord electric supply wiring must be run with the circuit...
... fuse or circuit breaker on the dryer. electric model dryers. This cord is recommended. U.S. dryers require a 120 / 240 volt, 60 Hz AC approved electrical service. Electrical connections Before operating or testing, follow all grounding instructions in the Grounding section. only Most U.S. Installation Installation • If a power cord is not used , the cord should be plugged into a 30-ampere receptacle. • The power cord is not provided with U.S. Electric models - Gas models - The power cord electric supply wiring must be run with the circuit...

User Manual
Page 23
... on the gas supply, and check for gas leaks. An additional fitting is required to connect the 3/4" (1.9 cm) female thread end of a flexible connector to the 3/8" (1 cm) male threaded end on its final location, and then set the dryer upright. • Secure room around the dryer to facilitate ducting and wiring. DO NOT use an open flame to all threads. 4. For easy access, we recommend...
... on the gas supply, and check for gas leaks. An additional fitting is required to connect the 3/4" (1.9 cm) female thread end of a flexible connector to the 3/8" (1 cm) male threaded end on its final location, and then set the dryer upright. • Secure room around the dryer to facilitate ducting and wiring. DO NOT use an open flame to all threads. 4. For easy access, we recommend...

User Manual
Page 30
... temperature. During the test, the number indicator makes a circle in the display. If there is, stop or cancel the Vent Blockage Test, press POWER to check if the duct system is properly installed. The Vent Blockage Test starts immediately. Do not open the door during the test. 4. If there are any clothes or other items in the display, make sure the door is closed. Installation Installation Vent blockage test After the dryer...
... temperature. During the test, the number indicator makes a circle in the display. If there is, stop or cancel the Vent Blockage Test, press POWER to check if the duct system is properly installed. The Vent Blockage Test starts immediately. Do not open the door during the test. 4. If there are any clothes or other items in the display, make sure the door is closed. Installation Installation Vent blockage test After the dryer...

User Manual
Page 31
... not use crushed or clogged venting or ducts. Installation NOTE • During or after the test, the internal drum is installed properly so the air exhausts freely. 2. Properly install all duct work according to prevent burns. Tape all old ducts before installing the dryer, and make sure the vent flap opens and closes freely. Exhaust ducting guide Ducting 1. The Vent Blockage Test is used to check for problems to correct any kind. • Do not use lint-trapping screws...
... not use crushed or clogged venting or ducts. Installation NOTE • During or after the test, the internal drum is installed properly so the air exhausts freely. 2. Properly install all duct work according to prevent burns. Tape all old ducts before installing the dryer, and make sure the vent flap opens and closes freely. Exhaust ducting guide Ducting 1. The Vent Blockage Test is used to check for problems to correct any kind. • Do not use lint-trapping screws...

User Manual
Page 46
... TIME DRY is selected, the Eco Dry function is sprayed into the dryer drum after several minutes of tumbling with heat. Before removing the laundry, confirm that the laundry load is dry. • Use to sanitize items by a minimum of 20 minutes, depending on the item type or load. Description • You can make items soft and reduce smells. Operations Steam Dry cycles Cycle REFRESH WRINKLE AWAY STEAM SANITIZE Manual Dry cycles Cycle TIME DRY AIR...
... TIME DRY is selected, the Eco Dry function is sprayed into the dryer drum after several minutes of tumbling with heat. Before removing the laundry, confirm that the laundry load is dry. • Use to sanitize items by a minimum of 20 minutes, depending on the item type or load. Description • You can make items soft and reduce smells. Operations Steam Dry cycles Cycle REFRESH WRINKLE AWAY STEAM SANITIZE Manual Dry cycles Cycle TIME DRY AIR...

User Manual
Page 49
... screen. 3. You cannot use any of the app is complete, turn on the Smart Control function on your dryer and you can monitor (gas models) or control (electric models) your smart device remotely. Press and hold Smart Control on your smartphone. 2. Operations FlexDry_DM9900M-DC68-03381F_EN.indd 49 English 49 2017-01-24 1:21:46 Getting started Using Samsung Smart Home, you can control your dryer from your dryer...
... screen. 3. You cannot use any of the app is complete, turn on the Smart Control function on your dryer and you can monitor (gas models) or control (electric models) your smart device remotely. Press and hold Smart Control on your smartphone. 2. Operations FlexDry_DM9900M-DC68-03381F_EN.indd 49 English 49 2017-01-24 1:21:46 Getting started Using Samsung Smart Home, you can control your dryer from your dryer...

User Manual
Page 51
... door is not supported by some models.) As the dryer operates, it has a problem. To enable this function. To manually turn the drum light on or off after you use this function, you must first download the Samsung Smart Dryer app from the Play Store or the Apple Store, and then install it displays an information code on the dryer for 3 seconds to recognize the information code a number of times...
... door is not supported by some models.) As the dryer operates, it has a problem. To enable this function. To manually turn the drum light on or off after you use this function, you must first download the Samsung Smart Dryer app from the Play Store or the Apple Store, and then install it displays an information code on the dryer for 3 seconds to recognize the information code a number of times...

User Manual
Page 56
... sure the exhaust hood outside your home's circuit breakers or fuses. • Some cycles do not require heat. Symptom Does not run. Check the selected cycle again. • For a gas dryer, make sure the gas supply is plugged into a live electrical outlet. • Check your home's circuit breakers or fuses. • Press and hold START/PAUSE again if the door was opened during a cycle. • Clean the lint filter. • If you are using the Delicate Dryer but it...
... sure the exhaust hood outside your home's circuit breakers or fuses. • Some cycles do not require heat. Symptom Does not run. Check the selected cycle again. • For a gas dryer, make sure the gas supply is plugged into a live electrical outlet. • Check your home's circuit breakers or fuses. • Press and hold START/PAUSE again if the door was opened during a cycle. • Clean the lint filter. • If you are using the Delicate Dryer but it...

User Manual
Page 60
Electronic control problem [Invalid Communication (SUB PBA MAIN PBA)]. • Contact a Samsung service center. The electronic control needs to operate, you should do, check the list of codes in the door. Invalid power source frequency • Try restarting the cycle. • If this information code remains, contact a Samsung service center. High temperature heating check • Clean the lint filter. • If this information code remains, contact a Samsung service center. dF Action Operating the dryer with the door open. • Make...
Electronic control problem [Invalid Communication (SUB PBA MAIN PBA)]. • Contact a Samsung service center. The electronic control needs to operate, you should do, check the list of codes in the door. Invalid power source frequency • Try restarting the cycle. • If this information code remains, contact a Samsung service center. High temperature heating check • Clean the lint filter. • If this information code remains, contact a Samsung service center. dF Action Operating the dryer with the door open. • Make...

User Manual
Page 62
...;C) for drying, bleaching, ironing, and dry cleaning. Specifications Fabric care chart The following symbols provide garment care direction. The clothing care labels include symbols for detergent activation and effective cleaning.) Bleach Any bleach (when needed) Only non-chlorine (color-safe) bleach (when needed) Tumble dry Normal Permanent press / Wrinkle resistant / Wrinkle control Gentle / Delicates Special instructions Line dry / Hang to dry Drip dry Dry flat Heat setting High Medium Low Any heat No heat / Air Specification 62 English...
...;C) for drying, bleaching, ironing, and dry cleaning. Specifications Fabric care chart The following symbols provide garment care direction. The clothing care labels include symbols for detergent activation and effective cleaning.) Bleach Any bleach (when needed) Only non-chlorine (color-safe) bleach (when needed) Tumble dry Normal Permanent press / Wrinkle resistant / Wrinkle control Gentle / Delicates Special instructions Line dry / Hang to dry Drip dry Dry flat Heat setting High Medium Low Any heat No heat / Air Specification 62 English...

User Manual
Page 64
Width D. Depth Product-inches (cm) Required for Installation-inches Product-inches (cm) Required for Installation-inches Dimensions C. Width with door open 120° Product-inches (cm) Required for Installation-inches B. Height-top door closed Product-inches (cm) Required for Installation-inches E. Specification Specification sheet F A B Specification E D C Type A. Height-top door opened Product-inches (cm) Required for Installation-inches Water pressure-psl (kPa) Weight lb (kg) Heater rating Electric (W) Gas (BTU/hr) Front loading dryer DV*60M9900** 61 (155.0) ...
Width D. Depth Product-inches (cm) Required for Installation-inches Product-inches (cm) Required for Installation-inches Dimensions C. Width with door open 120° Product-inches (cm) Required for Installation-inches B. Height-top door closed Product-inches (cm) Required for Installation-inches E. Specification Specification sheet F A B Specification E D C Type A. Height-top door opened Product-inches (cm) Required for Installation-inches Water pressure-psl (kPa) Weight lb (kg) Heater rating Electric (W) Gas (BTU/hr) Front loading dryer DV*60M9900** 61 (155.0) ...
User Manual
Page 68
... USE THIS PRODUCT. problems caused by SAMSUNG that occurs in service problems; NO WARRANTY OR GUARANTEE GIVEN BY ANY PERSON, FIRM, OR CORPORATION WITH RESPECT TO THIS PRODUCT SHALL BE BINDING ON SAMSUNG. This limited warranty does not cover problems resulting from incorrect electric current, voltage or supply, light bulbs, house fuses, house wiring, cost of products, equipment, systems, utilities, services, parts, supplies, accessories, applications, installations, repairs, external wiring or connectors...
... USE THIS PRODUCT. problems caused by SAMSUNG that occurs in service problems; NO WARRANTY OR GUARANTEE GIVEN BY ANY PERSON, FIRM, OR CORPORATION WITH RESPECT TO THIS PRODUCT SHALL BE BINDING ON SAMSUNG. This limited warranty does not cover problems resulting from incorrect electric current, voltage or supply, light bulbs, house fuses, house wiring, cost of products, equipment, systems, utilities, services, parts, supplies, accessories, applications, installations, repairs, external wiring or connectors...

User Manual
Page 71
... fixing installation errors. cosmetic damage or exterior finish; incorrect electrical line voltage, fluctuations and surges; This limited warranty does not cover problems resulting from incorrect electric current, voltage or supply, light bulbs, house fuses, house wiring, cost of a service call for which this product and shall not apply to follow operating instructions, maintenance and environmental instructions that are covered and prescribed in the instruction book; SAMSUNG does not warrant uninterrupted or error-free operation...
... fixing installation errors. cosmetic damage or exterior finish; incorrect electrical line voltage, fluctuations and surges; This limited warranty does not cover problems resulting from incorrect electric current, voltage or supply, light bulbs, house fuses, house wiring, cost of a service call for which this product and shall not apply to follow operating instructions, maintenance and environmental instructions that are covered and prescribed in the instruction book; SAMSUNG does not warrant uninterrupted or error-free operation...


