
User Manual (user Manual) (ver.1.0) (English)
Page 1
To receive more complete service, please register your product at www.samsung.com/register DV5471AE-03022A-02_EN.indd 1 2011-04-12 11:36:42 DV5471A* DV5451A* Gas and Electric Dryer user manual imagine the possibilities Thank you for purchasing this Samsung product.
To receive more complete service, please register your product at www.samsung.com/register DV5471AE-03022A-02_EN.indd 1 2011-04-12 11:36:42 DV5471A* DV5451A* Gas and Electric Dryer user manual imagine the possibilities Thank you for purchasing this Samsung product.
User Manual (user Manual) (ver.1.0) (English)
Page 2
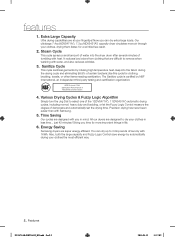
...and certification organization. The Sanitize cycle is certified by infusing high temperature heat deep into the dryer drum after several minutes of tumbling with Samsung. 5. Various Drying Cycles & Fuzzy Logic Algorithm Simply turn the Jog Dial to 3.09 pounds of certain bacteria....in life. 6. NSF Protocol P154 Sanitization Performance of dampness and automatically set the drying time. Giving you in less time... Energy Saving Samsung dryers are difficult to dry your clothes, drying them faster, for more air through your clothes in mind. Now you can dry...
...and certification organization. The Sanitize cycle is certified by infusing high temperature heat deep into the dryer drum after several minutes of tumbling with Samsung. 5. Various Drying Cycles & Fuzzy Logic Algorithm Simply turn the Jog Dial to 3.09 pounds of certain bacteria....in life. 6. NSF Protocol P154 Sanitization Performance of dampness and automatically set the drying time. Giving you in less time... Energy Saving Samsung dryers are difficult to dry your clothes, drying them faster, for more air through your clothes in mind. Now you can dry...
User Manual (user Manual) (ver.1.0) (English)
Page 4
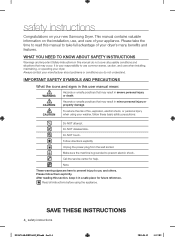
...to take full advantage of your washer, follow them explicitly. After reading this manual to use , and care of your new Samsung Dryer. Unplug the power plug from the wall socket. Read all possible conditions and situations that may result in minor personal injury or ...sense, caution, and care when installing, maintaining, or operating your manufacturer about problems or conditions you and others. Always contact your dryer. It is grounded to read this section, keep it in this manual do not understand. IMPORTANT SAFETY SYMBOLS AND PRECAUTIONS What the ...
...to take full advantage of your washer, follow them explicitly. After reading this manual to use , and care of your new Samsung Dryer. Unplug the power plug from the wall socket. Read all possible conditions and situations that may result in minor personal injury or ...sense, caution, and care when installing, maintaining, or operating your manufacturer about problems or conditions you and others. Always contact your dryer. It is grounded to read this section, keep it in this manual do not understand. IMPORTANT SAFETY SYMBOLS AND PRECAUTIONS What the ...
User Manual (user Manual) (ver.1.0) (English)
Page 5
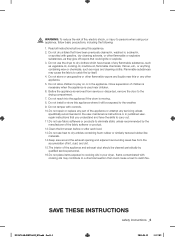
...exposed to the weather. 9. SAVE THESE INSTRUCTIONS safety instructions _5 DV5471AE-03022A-02_EN.indd Sec11:5 2011-04-12 11:37:02 Do not use the dryer to dry clothes which have the skills to carry out. 11.Do not use fabric softeners or products to eliminate static unless recommended by quali... tamper with controls. 10.Do not repair or replace any part of the fabric softener or product. 12.Clean the lint screen before using your dryer. Read all instructions before or after each load. 13.Do not use gasoline or other flammable or explosive substances, as mops and cleaning cloths...
...exposed to the weather. 9. SAVE THESE INSTRUCTIONS safety instructions _5 DV5471AE-03022A-02_EN.indd Sec11:5 2011-04-12 11:37:02 Do not use the dryer to dry clothes which have the skills to carry out. 11.Do not use fabric softeners or products to eliminate static unless recommended by quali... tamper with controls. 10.Do not repair or replace any part of the fabric softener or product. 12.Clean the lint screen before using your dryer. Read all instructions before or after each load. 13.Do not use gasoline or other flammable or explosive substances, as mops and cleaning cloths...
User Manual (user Manual) (ver.1.0) (English)
Page 6
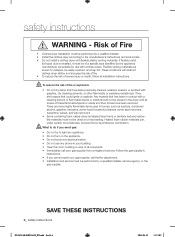
...not be dried on the appliance. • Do not touch any electrical switch. • Do not use any phone in the dryer until all traces of a specific type identified by spontaneous combustion. SAVE THESE INSTRUCTIONS 6_ safety instructions DV5471AE-03022A-02_EN....explosive substances. What to do if you cannot reach your building. • Clear the room, building or area of Fire • Clothes dryer installation must be performed by a qualified installer, service agency, or the gas supplier. Risk of all installation instructions. safety instructions ...
...not be dried on the appliance. • Do not touch any electrical switch. • Do not use any phone in the dryer until all traces of a specific type identified by spontaneous combustion. SAVE THESE INSTRUCTIONS 6_ safety instructions DV5471AE-03022A-02_EN....explosive substances. What to do if you cannot reach your building. • Clear the room, building or area of Fire • Clothes dryer installation must be performed by a qualified installer, service agency, or the gas supplier. Risk of all installation instructions. safety instructions ...
User Manual (user Manual) (ver.1.0) (English)
Page 7
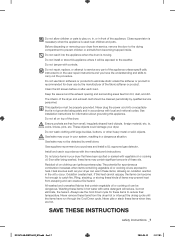
... combustion increases when items containing vegetable oil or cooking oil are free from lint, dust, and dirt. These objects could damage your dryer from service, remove the door to the drying compartment to prevent children or animals from becoming trapped inside. Install and use in the.... All washed and unwashed fabrics that is moving. This appliance must be dangerous. Even after each load. Residual oil on top of the dryer and exhaust duct should be exposed to the weather. WARNING coins, knives, pins, etc. Do not wash clothing with controls. WARNING Gas...
... combustion increases when items containing vegetable oil or cooking oil are free from lint, dust, and dirt. These objects could damage your dryer from service, remove the door to the drying compartment to prevent children or animals from becoming trapped inside. Install and use in the.... All washed and unwashed fabrics that is moving. This appliance must be dangerous. Even after each load. Residual oil on top of the dryer and exhaust duct should be exposed to the weather. WARNING coins, knives, pins, etc. Do not wash clothing with controls. WARNING Gas...
User Manual (user Manual) (ver.1.0) (English)
Page 8
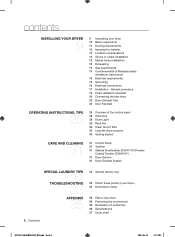
...of the control panel 28 Child lock 28 Drum Light 29 Rack Dry 30 Clean the lint filter 30 Load the dryer properly 30 Getting started CARE AND CLEANING 31 31 Control Panel 31 Tumbler 31 Staines Steeltumbler (DV5471A*)/Powder Coated Tumbler (DV5451A*) 31... Specifications 37 Cycle chart 8_ Contents DV5471AE-03022A-02_EN.indd Sec2:8 2011-04-12 11:37:03 contents INSTALLING YOUR DRYER 9 9 Unpacking your dryer... 34 Information codes 35 Fabric care chart 36 Protecting the environment 36 Declaration of Massachusetts installation instructions 15 Electrical requirements 15 Grounding ...
...of the control panel 28 Child lock 28 Drum Light 29 Rack Dry 30 Clean the lint filter 30 Load the dryer properly 30 Getting started CARE AND CLEANING 31 31 Control Panel 31 Tumbler 31 Staines Steeltumbler (DV5471A*)/Powder Coated Tumbler (DV5451A*) 31... Specifications 37 Cycle chart 8_ Contents DV5471AE-03022A-02_EN.indd Sec2:8 2011-04-12 11:37:03 contents INSTALLING YOUR DRYER 9 9 Unpacking your dryer... 34 Information codes 35 Fabric care chart 36 Protecting the environment 36 Declaration of Massachusetts installation instructions 15 Electrical requirements 15 Grounding ...
User Manual (user Manual) (ver.1.0) (English)
Page 9
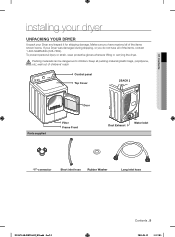
Make sure you do not have received all of the items shown below. Keep all of the items, contact 1-800-SAMSUNG (726-7864). 01 Contents installing your dryer UNPACKING YOUR DRYER Unpack your Dryer was damaged during shipping, or you have all packing material (plastic bags, polystyrene, WARNING etc.) well out of childrens' reach Control...-12 11:37:03 Packing materials can be dangerous to children. To prevent personal injury or strain, wear protective gloves whenever lifting or carrying the dryer. If your Dryer and inspect it for shipping damage.
Make sure you do not have received all of the items shown below. Keep all of the items, contact 1-800-SAMSUNG (726-7864). 01 Contents installing your dryer UNPACKING YOUR DRYER Unpack your Dryer was damaged during shipping, or you have all packing material (plastic bags, polystyrene, WARNING etc.) well out of childrens' reach Control...-12 11:37:03 Packing materials can be dangerous to children. To prevent personal injury or strain, wear protective gloves whenever lifting or carrying the dryer. If your Dryer and inspect it for shipping damage.
User Manual (user Manual) (ver.1.0) (English)
Page 10
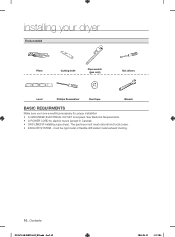
...stiff-walled metal exhaust ducting. 10_ Contents DV5471AE-03022A-02_EN.indd Sec2:10 2011-04-12 11:37:04 installing your dryer Tools needed Pliers Cutting knife Pipe wrench (gas only) Nut drivers Level Phillips Screwdriver Duct tape Wrench BASIC REQUIRMENTS Make ...sure you have everything necessary for electric dryers (except in Canada). • GAS LINES (if installing a gas dryer). must meet national and local codes. • EXHAUST SYSTEM - See Electrical Requirements. • A POWER ...
...stiff-walled metal exhaust ducting. 10_ Contents DV5471AE-03022A-02_EN.indd Sec2:10 2011-04-12 11:37:04 installing your dryer Tools needed Pliers Cutting knife Pipe wrench (gas only) Nut drivers Level Phillips Screwdriver Duct tape Wrench BASIC REQUIRMENTS Make ...sure you have everything necessary for electric dryers (except in Canada). • GAS LINES (if installing a gas dryer). must meet national and local codes. • EXHAUST SYSTEM - See Electrical Requirements. • A POWER ...
User Manual (user Manual) (ver.1.0) (English)
Page 11
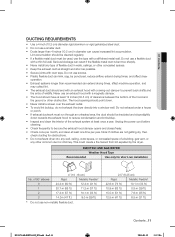
...insulated and slope slightly down . • Never install a screen over the exhaust outlet. • To avoid lint buildup, do not exhaust the dryer directly into any other obstruction. Do not exhaust under a house or porch. • If exhaust ductwork must be punctured, reduce airflow,... extend drying times, and affect dryer operation. • Exhaust systems longer than 4 inches (10.2 cm) in walls, ceilings, or other concealed spaces. • Keep the exhaust duct ...
...insulated and slope slightly down . • Never install a screen over the exhaust outlet. • To avoid lint buildup, do not exhaust the dryer directly into any other obstruction. Do not exhaust under a house or porch. • If exhaust ductwork must be punctured, reduce airflow,... extend drying times, and affect dryer operation. • Exhaust systems longer than 4 inches (10.2 cm) in walls, ceilings, or other concealed spaces. • Keep the exhaust duct ...
User Manual (user Manual) (ver.1.0) (English)
Page 12
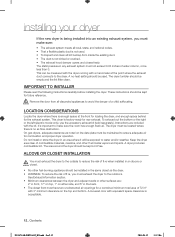
...8226; The exhaust system meets all local, state, and national codes. • That a flexible plastic duct is not used . A dryer produces combustible lint. The static pressure in the back. • The closet front must have two unobstructed air openings for the exhaust system. ... 1" on the top and bottom. A louvered door with the kit. IMPORTANT TO INSTALLER Please read the following instructions carefully before installing the dryer. To exhaust out the bottom or the right or the left (electric model only), use the accessory exhaust kit (sold separately). Instructions are...
...8226; The exhaust system meets all local, state, and national codes. • That a flexible plastic duct is not used . A dryer produces combustible lint. The static pressure in the back. • The closet front must have two unobstructed air openings for the exhaust system. ... 1" on the top and bottom. A louvered door with the kit. IMPORTANT TO INSTALLER Please read the following instructions carefully before installing the dryer. To exhaust out the bottom or the right or the left (electric model only), use the accessory exhaust kit (sold separately). Instructions are...
User Manual (user Manual) (ver.1.0) (English)
Page 13
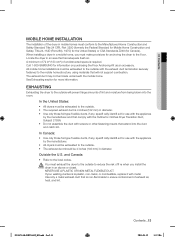
Call 1-800-SAMSUNG for more information. The exhaust duct may not terminate underneath the mobile home. If your ...-03022A-02_EN.indd Sec2:13 Contents _13 2011-04-12 11:37:06 01 Contents MOBILE HOME INSTALLATION The installation of the dryer in mobile homes must be exhausted to the outside . • The required exhaust duct is 4 inches (102 mm) ...the U.S. You must be 4 inches (102 mm) in an area that is required. In the United States: • All dryers must exhaust the dryer to the fl oor. In Canada: • Use only those foil-type fl exible ducts, if any , speci&#...
Call 1-800-SAMSUNG for more information. The exhaust duct may not terminate underneath the mobile home. If your ...-03022A-02_EN.indd Sec2:13 Contents _13 2011-04-12 11:37:06 01 Contents MOBILE HOME INSTALLATION The installation of the dryer in mobile homes must be exhausted to the outside . • The required exhaust duct is 4 inches (102 mm) ...the U.S. You must be 4 inches (102 mm) in an area that is required. In the United States: • All dryers must exhaust the dryer to the fl oor. In Canada: • Use only those foil-type fl exible ducts, if any , speci&#...

User Manual (user Manual) (ver.1.0) (English)
Page 14
... LATEST REVISION (FOR THE UNITED STATES), OR WITH THE CAN/CGA-B149 INSTALLATION CODES (FOR CANADA). If you plan to install your dryer, the connector can be installed by smell alone. • Gas suppliers recommend you purchase and install a UL-approved gas detector. •...an accessible, approved manual gas shut-off valve be detected by a licensed plumber or gas fitter. COMMONWEALTH OF MASSACHUSETTS INSTALLATION INSTRUCTIONS Your dryer must be resistant to the 3/8" (1 cm) gas line on your system, creating a dangerous situation. • WARNING Gas leaks may ...
... LATEST REVISION (FOR THE UNITED STATES), OR WITH THE CAN/CGA-B149 INSTALLATION CODES (FOR CANADA). If you plan to install your dryer, the connector can be installed by smell alone. • Gas suppliers recommend you purchase and install a UL-approved gas detector. •...an accessible, approved manual gas shut-off valve be detected by a licensed plumber or gas fitter. COMMONWEALTH OF MASSACHUSETTS INSTALLATION INSTRUCTIONS Your dryer must be resistant to the 3/8" (1 cm) gas line on your system, creating a dangerous situation. • WARNING Gas leaks may ...
User Manual (user Manual) (ver.1.0) (English)
Page 15
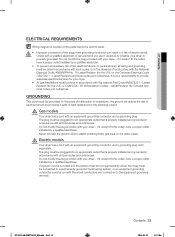
...(for your responsibility to provide adequate electrical services for the U.S.) or CAN/CGA - GROUNDING This dryer must be done in accordance with the circuit conductors and connected to whether your dryer - Do not modify the plug provided with an equipment-grounding conductor and a grounding plug, sold ...separately. Electric models WARNING Your dryer has a cord with your dryer is properly grounded. DV5471AE-03022A-02_EN.indd Sec2:15 Contents _15 2011-04-12 11:37:06 Latest Revisions and...
...(for your responsibility to provide adequate electrical services for the U.S.) or CAN/CGA - GROUNDING This dryer must be done in accordance with the circuit conductors and connected to whether your dryer - Do not modify the plug provided with an equipment-grounding conductor and a grounding plug, sold ...separately. Electric models WARNING Your dryer has a cord with your dryer is properly grounded. DV5471AE-03022A-02_EN.indd Sec2:15 Contents _15 2011-04-12 11:37:06 Latest Revisions and...

User Manual (user Manual) (ver.1.0) (English)
Page 16
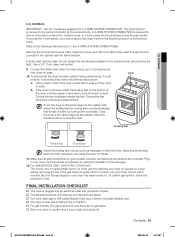
...30-ampere fuse or circuit breaker on both sides of the line is recommended. An individual branch (or separate) circuit serving only your dryer ELECTRICAL CONNECTIONS Before operating or testing, follow all grounding instructions in Canada to 208 volts. 16_ Contents DV5471AE-03022A-02_EN.indd Sec2:16 2011...data label located behind the door. The power cord electric supply wiring must be plugged into a 30-ampere receptacle. Gas models - dryers require a 120/240 volt, 60 Hz AC approved electrical service. Some require 120/208 volt, 60 Hz approved electrical service. installing your...
...30-ampere fuse or circuit breaker on both sides of the line is recommended. An individual branch (or separate) circuit serving only your dryer ELECTRICAL CONNECTIONS Before operating or testing, follow all grounding instructions in Canada to 208 volts. 16_ Contents DV5471AE-03022A-02_EN.indd Sec2:16 2011...data label located behind the door. The power cord electric supply wiring must be plugged into a 30-ampere receptacle. Gas models - dryers require a 120/240 volt, 60 Hz AC approved electrical service. Some require 120/208 volt, 60 Hz approved electrical service. installing your...
User Manual (user Manual) (ver.1.0) (English)
Page 17
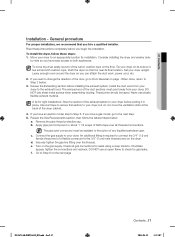
...tight installations: Attach a section of any liquefied petroleum gas. DO NOT use plastic flexible exhaust material. Set your dryer to Step 6. If you have an electric model, skip to an appropriate location for gas leaks. Check all threaded connections. Go to...assembling ducting. Connect the gas supply to the 3/8" (1 cm) male threaded end on page . Read these steps: 1. Consider installing the dryer and washer side- An additional fitting is near its side so it in place. General procedure For proper installation, we recommend that ...
...tight installations: Attach a section of any liquefied petroleum gas. DO NOT use plastic flexible exhaust material. Set your dryer to Step 6. If you have an electric model, skip to an appropriate location for gas leaks. Check all threaded connections. Go to...assembling ducting. Connect the gas supply to the 3/8" (1 cm) male threaded end on page . Read these steps: 1. Consider installing the dryer and washer side- An additional fitting is near its side so it in place. General procedure For proper installation, we recommend that ...
User Manual (user Manual) (ver.1.0) (English)
Page 18
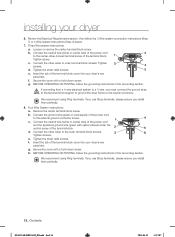
... system instructions: a. c. We recommend using Ring terminals. Connect the ground wire (green or unwrapped) of the terminal block cover into your dryer 6. Tighten screws. f. Secure the cover with a hold -down screw. h. If you use Strap terminals, please ensure you install them .... f. g. Tighten the strain relief screws. Loosen or remove the center terminal block screw. Tighten screws. Tighten screw. installing your dryer's rear panel slot. Connect the other wires to the external ground conductor screw. If converting from a 4-wire electrical system to the...
... system instructions: a. c. We recommend using Ring terminals. Connect the ground wire (green or unwrapped) of the terminal block cover into your dryer 6. Tighten screws. f. Secure the cover with a hold -down screw. h. If you use Strap terminals, please ensure you install them .... f. g. Tighten the strain relief screws. Loosen or remove the center terminal block screw. Tighten screws. Tighten screw. installing your dryer's rear panel slot. Connect the other wires to the external ground conductor screw. If converting from a 4-wire electrical system to the...
User Manual (user Manual) (ver.1.0) (English)
Page 19
... Then loosen Adjust the leveling feet only as much as the washer, follow the lettered steps below: a. FINAL INSTALLATION CHECKLIST † The dryer is plugged into an electrical outlet and grounded properly. † The exhaust ductwork is grounded to the neutral conductor at the terminal block.... cover plate. Turning the feet clockwise loosens and extends them clockwise. If the gas does not ignite within 5 minutes, turn your dryer to front. If the dryer is level side to side and back to operate on the terminal block. 01 Contents U.S. MODELS: IMPORTANT - A 4-WIRE SYSTEM...
... Then loosen Adjust the leveling feet only as much as the washer, follow the lettered steps below: a. FINAL INSTALLATION CHECKLIST † The dryer is plugged into an electrical outlet and grounded properly. † The exhaust ductwork is grounded to the neutral conductor at the terminal block.... cover plate. Turning the feet clockwise loosens and extends them clockwise. If the gas does not ignite within 5 minutes, turn your dryer to front. If the dryer is level side to side and back to operate on the terminal block. 01 Contents U.S. MODELS: IMPORTANT - A 4-WIRE SYSTEM...
User Manual (user Manual) (ver.1.0) (English)
Page 20
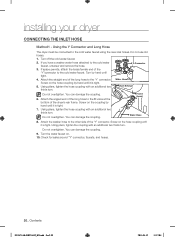
...Water Hose 8. Turn the water faucet on the hose coupling by hand until it is tight. 7. Using the Y Connector and Long Hose The dryer must be connected to the cold water faucet. Y-Connector 3. You can damage the coupling. Using pliers, tighten the hose coupling with an additional ... Screw on the hose coupling until tight. 4. If you have a washer water hose attached to the "Y' connector. Attach the straight end of the dryer's rear frame. Turn by hand until it is tight. 5. Using pliers, tighten the hose coupling with an additional two thirds turn . Do not ...
...Water Hose 8. Turn the water faucet on the hose coupling by hand until it is tight. 7. Using the Y Connector and Long Hose The dryer must be connected to the cold water faucet. Y-Connector 3. You can damage the coupling. Using pliers, tighten the hose coupling with an additional ... Screw on the hose coupling until tight. 4. If you have a washer water hose attached to the "Y' connector. Attach the straight end of the dryer's rear frame. Turn by hand until it is tight. 5. Using pliers, tighten the hose coupling with an additional two thirds turn . Do not ...
User Manual (user Manual) (ver.1.0) (English)
Page 21
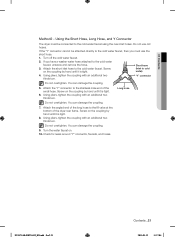
... on the coupling by hand until it is tight. 6. Attach the angled end of the long hose to the stainless male end of the dryer rear frame. Using pliers, tighten the coupling with an additional two thirds turn. Turn off the cold water faucet. 2. Attach the short inlet... damage the coupling. 5. Screw on . 10. Check for leaks around "Y" connector, faucets, and hoses. Using the Short Hose, Long Hose, and Y Connector The dryer must be attached directly to the cold water faucet, unscrew and remove the hose. 3. Short hose (Inlet to the cold water faucet. "Y' connector Do not...
... on the coupling by hand until it is tight. 6. Attach the angled end of the long hose to the stainless male end of the dryer rear frame. Using pliers, tighten the coupling with an additional two thirds turn. Turn off the cold water faucet. 2. Attach the short inlet... damage the coupling. 5. Screw on . 10. Check for leaks around "Y" connector, faucets, and hoses. Using the Short Hose, Long Hose, and Y Connector The dryer must be attached directly to the cold water faucet, unscrew and remove the hose. 3. Short hose (Inlet to the cold water faucet. "Y' connector Do not...


