(English)
Page 16
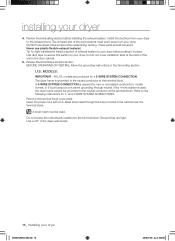
Use duct tape to secure this section to the following instructions for a 3-WIRE SYSTEM CONNECTION. Review Electrical Requirements section. models are tight. Remove the terminal block cover plate. Do not loosen the nuts already installed on the terminal block. MODELS...dryer to the neutral conductor at the terminal block. These joints should be used , the dryer frame cannot be grounded to the exhaust hood. Review the Exhausting section before putting it in the Grounding section. and 4-WIRE SYSTEM CONNECTIONS. Insert the power cord with a UL-listed strain relief through...
Use duct tape to secure this section to the following instructions for a 3-WIRE SYSTEM CONNECTION. Review Electrical Requirements section. models are tight. Remove the terminal block cover plate. Do not loosen the nuts already installed on the terminal block. MODELS...dryer to the neutral conductor at the terminal block. These joints should be used , the dryer frame cannot be grounded to the exhaust hood. Review the Exhausting section before putting it in the Grounding section. and 4-WIRE SYSTEM CONNECTIONS. Insert the power cord with a UL-listed strain relief through...
(English)
Page 17
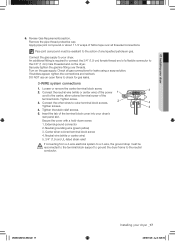
...'s rear panel slot. Loosen or remove the center terminal block screw. 2. Tighten screw. 3. Center silver-colored terminal block screw 4. Remove the pipe thread protective cap. Review Gas Requirements section. Apply pipe joint compound or about 1 1/2 wraps of the terminal block cover into your dryer. Insert the tab of Teflon tape over...
...'s rear panel slot. Loosen or remove the center terminal block screw. 2. Tighten screw. 3. Center silver-colored terminal block screw 4. Remove the pipe thread protective cap. Review Gas Requirements section. Apply pipe joint compound or about 1 1/2 wraps of the terminal block cover into your dryer. Insert the tab of Teflon tape over...