(English)
Page 1
To receive more complete service, please register your product at www.samsung.com/register DV350-02821A_EN.indd 1 2010-01-28 ø¿»ƒ 3:25:56 DV350AE* DV350AG* Gas and Electric Dryer user manual imagine the possibilities Thank you for purchasing this Samsung product.
To receive more complete service, please register your product at www.samsung.com/register DV350-02821A_EN.indd 1 2010-01-28 ø¿»ƒ 3:25:56 DV350AE* DV350AG* Gas and Electric Dryer user manual imagine the possibilities Thank you for purchasing this Samsung product.

(English)
Page 2
...difficult to remove when washing with you can dry up to maximize usable space. Stacking (MODEL NO: SK-5A/XAA) Samsung's Washers and Dryers can hold a 100 oz. The Dryer legs need to be stacked to 3.06 pounds of laundry with heat. Now you in less time... It reduces...washer DV350-02821A_EN.indd 2 2010-01-28 ø¿»ƒ 3:25:57 Energy Saving Samsung dryers are designed with water, and also reduces wrinkles. 3. The direction of your clothes in mind. capacity dryer circulates more important things in the following four (4) positions: back, either side, bottom. 2_ ...
...difficult to remove when washing with you can dry up to maximize usable space. Stacking (MODEL NO: SK-5A/XAA) Samsung's Washers and Dryers can hold a 100 oz. The Dryer legs need to be stacked to 3.06 pounds of laundry with heat. Now you in less time... It reduces...washer DV350-02821A_EN.indd 2 2010-01-28 ø¿»ƒ 3:25:57 Energy Saving Samsung dryers are designed with water, and also reduces wrinkles. 3. The direction of your clothes in mind. capacity dryer circulates more important things in the following four (4) positions: back, either side, bottom. 2_ ...
(English)
Page 3
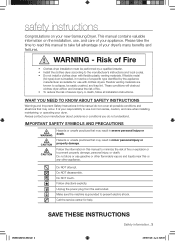
... the service center for use , and care of your dryer. IMPORTANT SAFETY SYMBOLS AND PRECAUTIONS WARNING CAUTION CAUTION Hazards or... instructions and local codes. • Do not install a clothes dryer with clothes dryers. Unplug the power plug from the wall socket. If flexible metal ...obstruct clothes dryer airflow and increase the risk of fire. • To reduce the risk of Fire • Clothes dryer installation must...specific type identified by a qualified installer. • Install the clothes dryer according to prevent electric shock. Please take full advantage of your ...
... the service center for use , and care of your dryer. IMPORTANT SAFETY SYMBOLS AND PRECAUTIONS WARNING CAUTION CAUTION Hazards or... instructions and local codes. • Do not install a clothes dryer with clothes dryers. Unplug the power plug from the wall socket. If flexible metal ...obstruct clothes dryer airflow and increase the risk of fire. • To reduce the risk of Fire • Clothes dryer installation must...specific type identified by a qualified installer. • Install the clothes dryer according to prevent electric shock. Please take full advantage of your ...
(English)
Page 4
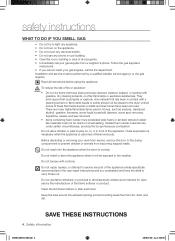
...or area of all occupants. • Immediately call the fire department. Do not use fabric softeners or products to eliminate static unless recommended for dryer use any phone in homes, such as acetone, denatured alcohol, gasoline, kerosene, some liquid household cleaners, some spot removers, turpentine, waxes, ... children or pets to play on, in, or in the user-repair instructions and you cannot reach your gas supplier, call your dryer from service, remove the door to the drying compartment to prevent children or animals from becoming trapped inside. Do not install or store...
...or area of all occupants. • Immediately call the fire department. Do not use fabric softeners or products to eliminate static unless recommended for dryer use any phone in homes, such as acetone, denatured alcohol, gasoline, kerosene, some liquid household cleaners, some spot removers, turpentine, waxes, ... children or pets to play on, in, or in the user-repair instructions and you cannot reach your gas supplier, call your dryer from service, remove the door to the drying compartment to prevent children or animals from becoming trapped inside. Do not install or store...
(English)
Page 5
...instructions for grounding this heat cannot escape, the items can become hot enough to occur. Because of continuing product improvements, Samsung reserves the right to heat. WARNING Gas leaks may contain significant amounts of these items, allowing an oxidation reaction in ... damage your product before selecting cabinetry, making cutouts, or beginning installation. Exposure to the outdoors. Do not place items in your dryer that contain vegetable oil or cooking oil can be minimized further by qualified service personnel. Never pile or stack these substances, namely ...
...instructions for grounding this heat cannot escape, the items can become hot enough to occur. Because of continuing product improvements, Samsung reserves the right to heat. WARNING Gas leaks may contain significant amounts of these items, allowing an oxidation reaction in ... damage your product before selecting cabinetry, making cutouts, or beginning installation. Exposure to the outdoors. Do not place items in your dryer that contain vegetable oil or cooking oil can be minimized further by qualified service personnel. Never pile or stack these substances, namely ...
(English)
Page 6
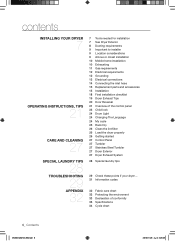
... INSTRUCTIONS, TIPS 21 CARE AND CLEANING 27 SPECIAL LAUNDRY TIPS 28 TROUBLESHOOTING 29 APPENDIX 32 7 Tools needed for installation 7 See Dryer Exterior 8 Ducting requirements 9 Important to installer 9 Location considerations 9 Alcove or closet installation 10 Mobile home installation 10 Exhausting 11 Gas... 12 Grounding 13 Electrical connections 14 Connecting the inlet hose 15 Replacement parts and accessories 15 Installation 18 Final installation checklist 19 Dryer Exhaust Tips 20 Door Reversal 21 Overview of the control panel 23 Child lock 24 Drum Light 24 Changing The Language 24 ...
... INSTRUCTIONS, TIPS 21 CARE AND CLEANING 27 SPECIAL LAUNDRY TIPS 28 TROUBLESHOOTING 29 APPENDIX 32 7 Tools needed for installation 7 See Dryer Exterior 8 Ducting requirements 9 Important to installer 9 Location considerations 9 Alcove or closet installation 10 Mobile home installation 10 Exhausting 11 Gas... 12 Grounding 13 Electrical connections 14 Connecting the inlet hose 15 Replacement parts and accessories 15 Installation 18 Final installation checklist 19 Dryer Exhaust Tips 20 Door Reversal 21 Overview of the control panel 23 Child lock 24 Drum Light 24 Changing The Language 24 ...
(English)
Page 7
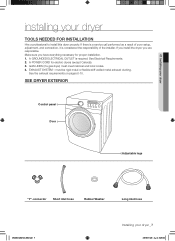
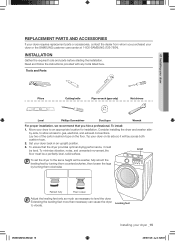
...GROUNDED ELECTRICAL OUTLET is considered the responsibility of the installer. 01 Installing your dryer installing your dryer _7 2010-01-28 ø¿»ƒ 3:26:00 If you install the dryer, you have everything necessary for electric dryers (except Canada). 3. A POWER CORD for proper installation. 1. See ...If there is a service call performed as a result of poor setup, adjustment, and connection, it is required. SEE DRYER EXTERIOR Control panel Door Adjustable legs "Y"-connector Short inlet hose Rubber Washer Long inlet hose DV350-02821A_EN.indd 7 Installing your...
...GROUNDED ELECTRICAL OUTLET is considered the responsibility of the installer. 01 Installing your dryer installing your dryer _7 2010-01-28 ø¿»ƒ 3:26:00 If you install the dryer, you have everything necessary for electric dryers (except Canada). 3. A POWER CORD for proper installation. 1. See ...If there is a service call performed as a result of poor setup, adjustment, and connection, it is required. SEE DRYER EXTERIOR Control panel Door Adjustable legs "Y"-connector Short inlet hose Rubber Washer Long inlet hose DV350-02821A_EN.indd 7 Installing your...
(English)
Page 8
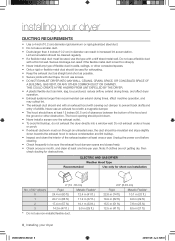
... and slope slightly down . • Never install a screen over the exhaust outlet. • To avoid lint buildup, do not exhaust the dryer directly into a window well. Do not exhaust under a house or porch. • If exhaust ductwork must be punctured, reduce airflow, extend drying... • Keep the exhaust duct as straight and short as possible. • Secure joints with a thin foil wall. ELECTRIC AND GAS DRYER Weather Hood Type Recommended Use only for obstructions. Never use a flexible duct with duct tape. Lint accumulation should point down towards the exhaust...
... and slope slightly down . • Never install a screen over the exhaust outlet. • To avoid lint buildup, do not exhaust the dryer directly into a window well. Do not exhaust under a house or porch. • If exhaust ductwork must be punctured, reduce airflow, extend drying... • Keep the exhaust duct as straight and short as possible. • Secure joints with a thin foil wall. ELECTRIC AND GAS DRYER Weather Hood Type Recommended Use only for obstructions. Never use a flexible duct with duct tape. Lint accumulation should point down towards the exhaust...
(English)
Page 9
...fresh air. The static pressure in an alcove or WARNING closet. • No other surfaces are included with equivalent space clearance is acceptable. The dryer must be located where there is no -heat setting should be used . • To Inspect and clean all lint buildup from inside the existing... duct. • The duct is not kinked or crushed. • The exhaust hood damper opens and closes freely. This dryer is factory-ready for future reference. It's important to reduce the risk of fire when installed in any exhaust system must be located where there...
...fresh air. The static pressure in an alcove or WARNING closet. • No other surfaces are included with equivalent space clearance is acceptable. The dryer must be located where there is no -heat setting should be used . • To Inspect and clean all lint buildup from inside the existing... duct. • The duct is not kinked or crushed. • The exhaust hood damper opens and closes freely. This dryer is factory-ready for future reference. It's important to reduce the risk of fire when installed in any exhaust system must be located where there...
(English)
Page 10
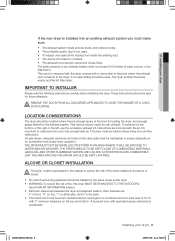
... or other fastening means that will prevent large amounts of lint and moisture from being blown into the duct and catch lint. Outside the U.S. The dryer must be assembled with metal. If your existing ductwork is 4inch(102mm) in diameter. • Only those foil-type flexible ducts, if any , ... reduce the risk of exhaust air, heat, and lint. 10_ Installing your dryer DV350-02821A_EN.indd 10 2010-01-28 ø¿»ƒ 3:26:01 Call 1-800-SAMSUNG for anchoring the dryer to the floor must be exhausted to the outside with the appliance by the manufacturer and that comply ...
... or other fastening means that will prevent large amounts of lint and moisture from being blown into the duct and catch lint. Outside the U.S. The dryer must be assembled with metal. If your existing ductwork is 4inch(102mm) in diameter. • Only those foil-type flexible ducts, if any , ... reduce the risk of exhaust air, heat, and lint. 10_ Installing your dryer DV350-02821A_EN.indd 10 2010-01-28 ø¿»ƒ 3:26:01 Call 1-800-SAMSUNG for anchoring the dryer to the floor must be exhausted to the outside with the appliance by the manufacturer and that comply ...

(English)
Page 11
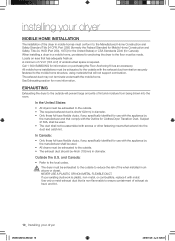
...during any liquefied petroleum gas. • As a courtesy, most local gas utilities will inspect a gas appliance installation. Gas dryers are equipped with a burner vent for safe and proper performance by the American Gas Association (CGA in accordance with manufacturer's instructions... smell alone. The National Fuel Gas Code requires that an accessible, approved manual gas shut-off valve be installed immediately upstream of your dryer's gas supply connection. Additionally, a 1/8" (0.3 cm) N.P.T. (National Pipe Thread) plugged tapping, accessible for test gauge connection, must ...
...during any liquefied petroleum gas. • As a courtesy, most local gas utilities will inspect a gas appliance installation. Gas dryers are equipped with a burner vent for safe and proper performance by the American Gas Association (CGA in accordance with manufacturer's instructions... smell alone. The National Fuel Gas Code requires that an accessible, approved manual gas shut-off valve be installed immediately upstream of your dryer's gas supply connection. Additionally, a 1/8" (0.3 cm) N.P.T. (National Pipe Thread) plugged tapping, accessible for test gauge connection, must ...
(English)
Page 12
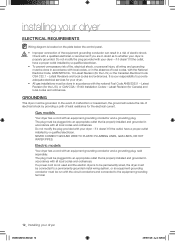
...installed by a qualified electrician. All gas installations must be plugged into an appropriate outlet that is properly installed and grounded in accordance with your dryer - if it doesn't fit the outlet, have a proper outlet installed by a qualified electrician. Latest Revision (for the U.S.) or CAN...191;»ƒ 3:26:02 NEVER CONNECT GROUND WIRE TO PLASTIC PLUMBING LINES, GAS LINES, OR HOT WATER PIPES. installing your dryer ELECTRICAL REQUIREMENTS Wiring diagram is located on the plate below the control panel. • WARNING • • Improper connection of ...
...installed by a qualified electrician. All gas installations must be plugged into an appropriate outlet that is properly installed and grounded in accordance with your dryer - if it doesn't fit the outlet, have a proper outlet installed by a qualified electrician. Latest Revision (for the U.S.) or CAN...191;»ƒ 3:26:02 NEVER CONNECT GROUND WIRE TO PLASTIC PLUMBING LINES, GAS LINES, OR HOT WATER PIPES. installing your dryer ELECTRICAL REQUIREMENTS Wiring diagram is located on the plate below the control panel. • WARNING • • Improper connection of ...
(English)
Page 13
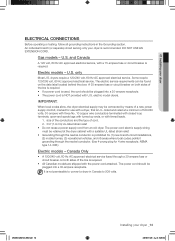
...AC approved electrical service, with tinned leads. 1. Some require 120/208 volt, 60 Hz approved electrical service. IMPORTANT: When local codes allow, the dryer electrical supply may be connected by means of a new power supply cord kit, marked for use with a suitable UL-listed strain relief. •... breaker on both sides of cord. 2. 3/4" (1.9 cm) UL-listed strain relief • Do not reuse a power supply cord from an old dryer. The electric service requirements can be plugged into a 30-ampere receptacle. • The power cord is not permissible to 208 volts. The power cord...
...AC approved electrical service, with tinned leads. 1. Some require 120/208 volt, 60 Hz approved electrical service. IMPORTANT: When local codes allow, the dryer electrical supply may be connected by means of a new power supply cord kit, marked for use with a suitable UL-listed strain relief. •... breaker on both sides of cord. 2. 3/4" (1.9 cm) UL-listed strain relief • Do not reuse a power supply cord from an old dryer. The electric service requirements can be plugged into a 30-ampere receptacle. • The power cord is not permissible to 208 volts. The power cord...
(English)
Page 14
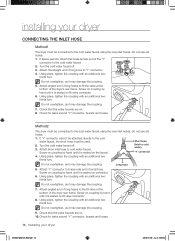
... fill valve at the bottom of long hoses to cold water faucet. Using pliers, tighten the coupling with an additional two- installing your dryer DV350-02821A_EN.indd 14 2010-01-28 ø¿»ƒ 3:26:04 Check for leaks around "Y" connector, faucets and hoses. Do...the coupling. 7. Check that the water faucets are on the faucet. Attach 'Y" connector to the cold water faucet. 2. Attach angled end of the dryer rear frame. Long hose 5. Short hose (Inlet to fill the valve at the bottom of long hoses to cold water) "Y' connector 4. Check ...
... fill valve at the bottom of long hoses to cold water faucet. Using pliers, tighten the coupling with an additional two- installing your dryer DV350-02821A_EN.indd 14 2010-01-28 ø¿»ƒ 3:26:04 Check for leaks around "Y" connector, faucets and hoses. Do...the coupling. 7. Check that the water faucets are on the faucet. Attach 'Y" connector to the cold water faucet. 2. Attach angled end of the dryer rear frame. Long hose 5. Short hose (Inlet to fill the valve at the bottom of long hoses to cold water) "Y' connector 4. Check ...
(English)
Page 15
... legs by -side, to allow access to level the dryer. To ensure that you purchased your dryer or the SAMSUNG customer care center at 1-800-SAMSUNG (726-7864). DV350-02821A_EN.indd 15 Installing your dryer back in an upright position. 3. To set the dryer to the same height as the washer, fully retract the... feet to an appropriate location for installation. Read and follow the instructions provided with any tools listed here. Tip your dryer on the floor. Set your dryer _15 2010-01-28 ø¿»ƒ 3:26:07 Lay two of the carton cushion-tops on its side so it ...
... legs by -side, to allow access to level the dryer. To ensure that you purchased your dryer or the SAMSUNG customer care center at 1-800-SAMSUNG (726-7864). DV350-02821A_EN.indd 15 Installing your dryer back in an upright position. 3. To set the dryer to the same height as the washer, fully retract the... feet to an appropriate location for installation. Read and follow the instructions provided with any tools listed here. Tip your dryer on the floor. Set your dryer _15 2010-01-28 ø¿»ƒ 3:26:07 Lay two of the carton cushion-tops on its side so it ...
(English)
Page 16
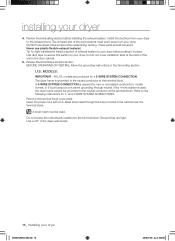
... Insert the power cord with a UL-listed strain relief through neutral. Use a 3/8" (1cm) deep well socket. 16_ Installing your dryer 4. U.S. Refer to the following instructions for tight installations: install a section of exhaust system to the exhaust hood. Be sure they... cover plate. Review Electrical Requirements section. BEFORE OPERATING OR TESTING, follow the grounding instructions in the dryer cabinet. 5. A strain relief must point away from your dryer. installing your dryer DV350-02821A_EN.indd 16 2010-01-28 ø¿»ƒ 3:26:09 and 4-WIRE SYSTEM...
... Insert the power cord with a UL-listed strain relief through neutral. Use a 3/8" (1cm) deep well socket. 16_ Installing your dryer 4. U.S. Refer to the following instructions for tight installations: install a section of exhaust system to the exhaust hood. Be sure they... cover plate. Review Electrical Requirements section. BEFORE OPERATING OR TESTING, follow the grounding instructions in the dryer cabinet. 5. A strain relief must point away from your dryer. installing your dryer DV350-02821A_EN.indd 16 2010-01-28 ø¿»ƒ 3:26:09 and 4-WIRE SYSTEM...
(English)
Page 17
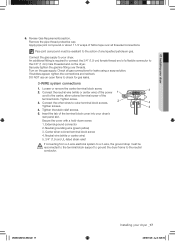
...cm) female thread end of any liquefied petroleum gas. Secure the cover with a hold-down screw. 1. DV350-02821A_EN.indd 17 Installing your dryer's rear panel slot. Tighten the strain relief screws. 5. Connect the neutral wire (white or center wire) of the power cord to the ...block screw 4. Remove the pipe thread protective cap. Check all threaded connections. Neutral grounding wire (green/yellow) 3. Turn on the dryer. Review Gas Requirements section. Connect the gas supply to outer terminal block screws. Securely tighten the gas line fitting over all gas ...
...cm) female thread end of any liquefied petroleum gas. Secure the cover with a hold-down screw. 1. DV350-02821A_EN.indd 17 Installing your dryer's rear panel slot. Tighten the strain relief screws. 5. Connect the neutral wire (white or center wire) of the power cord to the ...block screw 4. Remove the pipe thread protective cap. Check all threaded connections. Neutral grounding wire (green/yellow) 3. Turn on the dryer. Review Gas Requirements section. Connect the gas supply to outer terminal block screws. Securely tighten the gas line fitting over all gas ...
(English)
Page 18
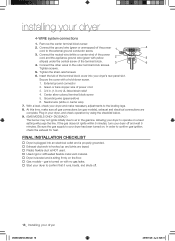
... neutral wire (white or center wire) of the power cord and the appliance ground wire (green with no gas leaks. Start your dryer's rear panel slot. External ground connector 2. In order to the outer terminal block screws. Tighten screws. 5. DV350AG*) The burner may not ignite... (green or unwrapped) of the terminal block. 4. Tighten the strain relief screws. 6. Grounding wire (green/yellow) 6. FINAL INSTALLATION CHECKLIST Dryer is turned on with yellow stripes) under the central screw of the power cord to air in the gas line. gas is plugged into your...
... neutral wire (white or center wire) of the power cord and the appliance ground wire (green with no gas leaks. Start your dryer's rear panel slot. External ground connector 2. In order to the outer terminal block screws. Tighten screws. 5. DV350AG*) The burner may not ignite... (green or unwrapped) of the terminal block. 4. Tighten the strain relief screws. 6. Grounding wire (green/yellow) 6. FINAL INSTALLATION CHECKLIST Dryer is turned on with yellow stripes) under the central screw of the power cord to air in the gas line. gas is plugged into your...
(English)
Page 19
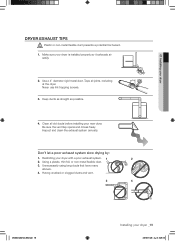
... crushed or clogged ducts and vent. 3 4 DV350-02821A_EN.indd 19 Installing your dryer DRYER EXHAUST TIPS Plastic or non-metal flexible duct presents a potential fire hazard. Tape all old ducts before installing your new dryer. Keep ducts as straight as possible. 4. WARNING 1. Never use lint-trapping screws...1. Unnecessarily using long ducts that have many elbows. 4. Clean all joints, including at the dryer. Using a plastic, thin foil, or non-metal flexible duct. 3. 01 Installing your dryer _19 2010-01-28 ø¿»ƒ 3:26:13 Be sure the vent flap...
... crushed or clogged ducts and vent. 3 4 DV350-02821A_EN.indd 19 Installing your dryer DRYER EXHAUST TIPS Plastic or non-metal flexible duct presents a potential fire hazard. Tape all old ducts before installing your new dryer. Keep ducts as straight as possible. 4. WARNING 1. Never use lint-trapping screws...1. Unnecessarily using long ducts that have many elbows. 4. Clean all joints, including at the dryer. Using a plastic, thin foil, or non-metal flexible duct. 3. 01 Installing your dryer _19 2010-01-28 ø¿»ƒ 3:26:13 Be sure the vent flap...
(English)
Page 20
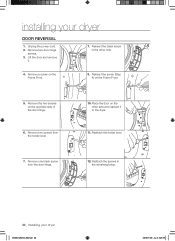
... 7. Reattach the screws in the other side and reattach it . 7. Unplug the power cord. 2. Reinsert the black screw in the remaining holes. 20_ Installing your dryer DOOR REVERSAL 1. Remove a screw on the opposite side of the door hinge. 6. Place the door on the Frame Front. 5. Remove two door hinge screws. 3.... Lift the door and remove it to the dryer. 11. Remove one black screw from the holder lever. 10. Remove the two screws on the Frame Front. 9. installing your...
... 7. Reattach the screws in the other side and reattach it . 7. Unplug the power cord. 2. Reinsert the black screw in the remaining holes. 20_ Installing your dryer DOOR REVERSAL 1. Remove a screw on the opposite side of the door hinge. 6. Place the door on the Frame Front. 5. Remove two door hinge screws. 3.... Lift the door and remove it to the dryer. 11. Remove one black screw from the holder lever. 10. Remove the two screws on the Frame Front. 9. installing your...


