User Manual (ENGLISH)
Page 1
To receive a more complete service, please register your product at www.samsung.com/global/register DV337AEW-02453A-04_EN.indd 1 2007-07-23 ¿ÀÈÄ 1:47:14 DV337 DV328 Gas and Electric Dryer user manual imagine the possibilities Thank you for purchasing a Samsung product.
To receive a more complete service, please register your product at www.samsung.com/global/register DV337AEW-02453A-04_EN.indd 1 2007-07-23 ¿ÀÈÄ 1:47:14 DV337 DV328 Gas and Electric Dryer user manual imagine the possibilities Thank you for purchasing a Samsung product.

User Manual (ENGLISH)
Page 2
...of our easy reversible door can dry extra-large loads. Easy Reversible Door Our dryers will fit just about anywhere and without a door conflict. Stacking (MODEL NO: SK-3A1/XAA, SK-4A/XAA) Samsung's Washer and Dryer can hold a 100 oz. An optional stacking kit is available to raise the ...detergent 8. Time Saving Our cycles are super energy efficient, using only 3.01 kWh per pound of laundry. Energy Saving Samsung dryers are designed with just four screws. 7. Pedestal with Samsung. 3. It also offers a built-in mind. just 44 minutes! Also, both the large capacity and Fuzzy Logic ...
...of our easy reversible door can dry extra-large loads. Easy Reversible Door Our dryers will fit just about anywhere and without a door conflict. Stacking (MODEL NO: SK-3A1/XAA, SK-4A/XAA) Samsung's Washer and Dryer can hold a 100 oz. An optional stacking kit is available to raise the ...detergent 8. Time Saving Our cycles are super energy efficient, using only 3.01 kWh per pound of laundry. Energy Saving Samsung dryers are designed with just four screws. 7. Pedestal with Samsung. 3. It also offers a built-in mind. just 44 minutes! Also, both the large capacity and Fuzzy Logic ...
User Manual (ENGLISH)
Page 3
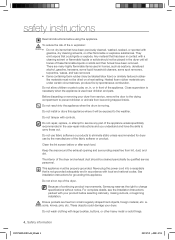
...result in severe personal injury or death. Follow directions explicity. Call the service center for help. Follow the information in your dryer. Do NOT disassemble. Make sure the machine is your responsibility to use gasoline or other flammable vapors and liquids near this manual... _3 2007-07-23 ¿ÀÈÄ 1:47:14 Always contact your manufacturer about problems or conditions you cannot reach your new Samsung Dryer. Follow the gas supplier's instructions. • If you do not cover all occupants. • Immediately call the fire department. safety ...
...result in severe personal injury or death. Follow directions explicity. Call the service center for help. Follow the information in your dryer. Do NOT disassemble. Make sure the machine is your responsibility to use gasoline or other flammable vapors and liquids near this manual... _3 2007-07-23 ¿ÀÈÄ 1:47:14 Always contact your manufacturer about problems or conditions you cannot reach your new Samsung Dryer. Follow the gas supplier's instructions. • If you do not cover all occupants. • Immediately call the fire department. safety ...
User Manual (ENGLISH)
Page 4
... pockets are many highly flammable items used near children and pets. Do not allow children or pets to play on top of the dryer. For complete details, see the Installation Instructions packed with large buckles, buttons, or other flammable or explosive substances. Heated foam rubber ...not use by the manufacturer of the fabric softener or product. This appliance must not be properly grounded. Because of continuing product improvements, Samsung reserves the right to the weather. Do not sit on , in, or in the user-repair instructions and you understand and have...
... pockets are many highly flammable items used near children and pets. Do not allow children or pets to play on top of the dryer. For complete details, see the Installation Instructions packed with large buckles, buttons, or other flammable or explosive substances. Heated foam rubber ...not use by the manufacturer of the fabric softener or product. This appliance must not be properly grounded. Because of continuing product improvements, Samsung reserves the right to the weather. Do not sit on , in, or in the user-repair instructions and you understand and have...
User Manual (ENGLISH)
Page 5
...use in a dangerous situation. Never pile or stack these items to heat. Even after being washed, these items may prevent heat from the dryer hot or interrupt the drying cycle until the items have been spotted or soaked with the manufacturer's instructions. Piling, stacking, or storing these ...fire. The residual oil can become hot enough to occur. Washing these oils. Never remove these items, allowing an oxidation reaction in your dryer can warm these items from escaping and can be detected by smell alone. Gas suppliers recommend you purchase and install a UL-approved gas...
...use in a dangerous situation. Never pile or stack these items to heat. Even after being washed, these items may prevent heat from the dryer hot or interrupt the drying cycle until the items have been spotted or soaked with the manufacturer's instructions. Piling, stacking, or storing these ...fire. The residual oil can become hot enough to occur. Washing these oils. Never remove these items, allowing an oxidation reaction in your dryer can warm these items from escaping and can be detected by smell alone. Gas suppliers recommend you purchase and install a UL-approved gas...
User Manual (ENGLISH)
Page 6
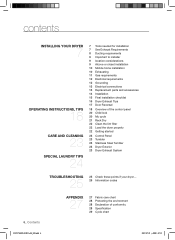
... 11 Gas requirements 12 Electrical requirements 12 Grounding 13 Electrical connections 13 Replacement parts and accessories 14 Installation 15 Final installation checklist 16 Dryer Exhaust Tips 17 Door Reversal 18 Overview of the control panel 20 Child lock 20 My cycle 21 Rack Dry 22 Clean the ...lint filter 22 Load the dryer properly 22 Getting started 23 Control Panel 23 Tumbler 23 Stainless Steel Tumbler 23 Dryer Exterior 23 Dryer Exhaust System TROUBLESHOOTING 25 25 Check these points if your dryer... 26 Information codes 6_ Contents APPENDIX 27 27 Fabric care...
... 11 Gas requirements 12 Electrical requirements 12 Grounding 13 Electrical connections 13 Replacement parts and accessories 14 Installation 15 Final installation checklist 16 Dryer Exhaust Tips 17 Door Reversal 18 Overview of the control panel 20 Child lock 20 My cycle 21 Rack Dry 22 Clean the ...lint filter 22 Load the dryer properly 22 Getting started 23 Control Panel 23 Tumbler 23 Stainless Steel Tumbler 23 Dryer Exterior 23 Dryer Exhaust System TROUBLESHOOTING 25 25 Check these points if your dryer... 26 Information codes 6_ Contents APPENDIX 27 27 Fabric care...
User Manual (ENGLISH)
Page 7
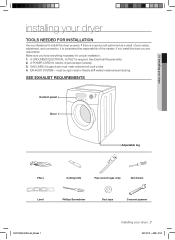
...only) Nut drivers Level Phillips Screwdriver Duct tape Crescent spanner DV337AEW-02453A-04_EN.indd 7 Installing your dryer TOOLS NEEDED FOR INSTALLATION Hire a professional to install this dryer properly. If there is a service call performed as a result of the installer. If you install... the dryer you have everything necessary for electric dryers (except Canada). 3. GAS LINES (if a gas dryer) must be rigid metal or flexible stiff-walled metal exhaust ducting. A POWER CORD for proper ...
...only) Nut drivers Level Phillips Screwdriver Duct tape Crescent spanner DV337AEW-02453A-04_EN.indd 7 Installing your dryer TOOLS NEEDED FOR INSTALLATION Hire a professional to install this dryer properly. If there is a service call performed as a result of the installer. If you install... the dryer you have everything necessary for electric dryers (except Canada). 3. GAS LINES (if a gas dryer) must be rigid metal or flexible stiff-walled metal exhaust ducting. A POWER CORD for proper ...
User Manual (ENGLISH)
Page 8
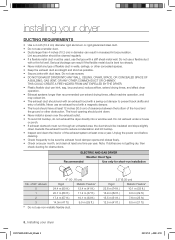
...and entry of wildlife. Lint accumulation should point down towards the exhaust hood to be punctured, reduce airflow, extend drying times, and affect dryer operation. • Exhaust systems longer than 4 inches (10.2 cm) in diameter can result if the flexible metal duct is bent too ...10.1 m (33 ft.) 18.9 m (62 ft.) 8.8 m (29 ft.) 15.5 m (51 ft.) 7.6 m (25 ft.) 12.5 m (41 ft.) 6.5 m (21 ft.) 8_ Installing your dryer DUCTING REQUIREMENTS • Use a 4-inch (10.2 cm) diameter rigid aluminum or rigid galvanized steel duct. • Do not use a smaller duct. • Ducts larger than...
...and entry of wildlife. Lint accumulation should point down towards the exhaust hood to be punctured, reduce airflow, extend drying times, and affect dryer operation. • Exhaust systems longer than 4 inches (10.2 cm) in diameter can result if the flexible metal duct is bent too ...10.1 m (33 ft.) 18.9 m (62 ft.) 8.8 m (29 ft.) 15.5 m (51 ft.) 7.6 m (25 ft.) 12.5 m (41 ft.) 6.5 m (21 ft.) 8_ Installing your dryer DUCTING REQUIREMENTS • Use a 4-inch (10.2 cm) diameter rigid aluminum or rigid galvanized steel duct. • Do not use a smaller duct. • Ducts larger than...
User Manual (ENGLISH)
Page 9
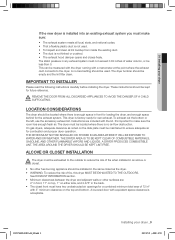
... surfaces are included with equivalent space clearance is enough space in the same closet as noted on the data plate must be measured with the dryer running with 3" minimum clearance on either side, and 2.375" in the back. • The closet front must have two unobstructed air openings for... IN AN AREA WHERE IT WILL BE EXPOSED TO WATER AND/OR WEATHER. IMPORTANT TO INSTALLER Please read the following instructions carefully before installing the dryer. Instructions are : 2" in front, 17" on top, 1" on the top and bottom. A louvered door with the kit. REMOVE THE DOOR FROM ALL ...
... surfaces are included with equivalent space clearance is enough space in the same closet as noted on the data plate must be measured with the dryer running with 3" minimum clearance on either side, and 2.375" in the back. • The closet front must have two unobstructed air openings for... IN AN AREA WHERE IT WILL BE EXPOSED TO WATER AND/OR WEATHER. IMPORTANT TO INSTALLER Please read the following instructions carefully before installing the dryer. Instructions are : 2" in front, 17" on top, 1" on the top and bottom. A louvered door with the kit. REMOVE THE DOOR FROM ALL ...
User Manual (ENGLISH)
Page 10
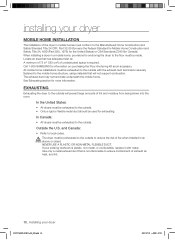
... is required. installing your dryer MOBILE HOME INSTALLATION The installation of the dryer in mobile homes must conform... Z240 (for anchoring the dryer to the floor must be made. EXHAUSTING Exhausting the dryer to the outside to reduce...fastened to the outside . Outside the U.S. If your dryer DV337AEW-02453A-04_EN.indd 10 2007-07-23 ¿... the mobile home. In Canada: • All dryers must be used for information on purchasing the Floor Anchoring... be exhausted to the outside with metal. When installing a dryer in an WARNING alcove or closet. All mobile home installations...
... is required. installing your dryer MOBILE HOME INSTALLATION The installation of the dryer in mobile homes must conform... Z240 (for anchoring the dryer to the floor must be made. EXHAUSTING Exhausting the dryer to the outside to reduce...fastened to the outside . Outside the U.S. If your dryer DV337AEW-02453A-04_EN.indd 10 2007-07-23 ¿... the mobile home. In Canada: • All dryers must be used for information on purchasing the Floor Anchoring... be exhausted to the outside with metal. When installing a dryer in an WARNING alcove or closet. All mobile home installations...
User Manual (ENGLISH)
Page 11
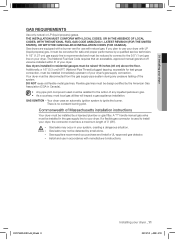
...27 cm) gas supply line is no constant burning pilot. Gas leaks may occur in Canada). • Any pipe joint compound used to use your dryer. Gas dryers are equipped with a burner vent for test gauge connection, must be raised 18 inches (46 cm) above the floor. A "T" handle manual gas valve... must be resistant to the 3/8" (1 cm) gas line on your dryer. Your dryer must be installed in accordance with LP (liquid propane) gas, it must be disconnected from the gas supply pipe system during any liquefied petroleum ...
...27 cm) gas supply line is no constant burning pilot. Gas leaks may occur in Canada). • Any pipe joint compound used to use your dryer. Gas dryers are equipped with a burner vent for test gauge connection, must be raised 18 inches (46 cm) above the floor. A "T" handle manual gas valve... must be resistant to the 3/8" (1 cm) gas line on your dryer. Your dryer must be installed in accordance with LP (liquid propane) gas, it must be disconnected from the gas supply pipe system during any liquefied petroleum ...
User Manual (ENGLISH)
Page 12
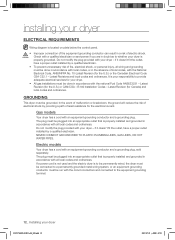
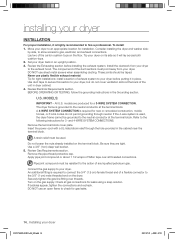
...C22.1 - if it doesn't fit the outlet, have a proper outlet installed by a qualified electrician. B149 Installation Codes - GROUNDING This dryer must be run with the circuit conductors and connected to provide adequate electrical services for the electrical current. If a power cord is not... In the event of malfunction or breakdown, the ground will reduce the risk of electrical shock by a qualified electrician. Electric models Your dryer has a cord with an equipment-grounding conductor and a grounding plug. Latest Revision (for the U.S.) or CAN/CGA - To prevent ...
...C22.1 - if it doesn't fit the outlet, have a proper outlet installed by a qualified electrician. B149 Installation Codes - GROUNDING This dryer must be run with the circuit conductors and connected to provide adequate electrical services for the electrical current. If a power cord is not... In the event of malfunction or breakdown, the ground will reduce the risk of electrical shock by a qualified electrician. Electric models Your dryer has a cord with an equipment-grounding conductor and a grounding plug. Latest Revision (for the U.S.) or CAN/CGA - To prevent ...
User Manual (ENGLISH)
Page 13
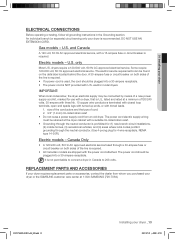
...2. 3/4" (1.9 cm) UL-listed strain relief • Do not reuse a power supply cord from whom you purchased your dryer or the SAMSUNG customer care center at the dryer cabinet with a suitable UL-listed strain relief. • Grounding through the neutral conductor. (Use 4-prong plug for use with...the neutral conductor is NOT provided with tinned leads. 1. IMPORTANT: When local codes allow, the dryer electrical supply may be retained at 1-800-SAMSUNG (726-7864). U.S. An individual branch (or separate) circuit serving only your dryer _13 2007-07-23 ¿ÀÈÄ 1:47:21
...2. 3/4" (1.9 cm) UL-listed strain relief • Do not reuse a power supply cord from whom you purchased your dryer or the SAMSUNG customer care center at the dryer cabinet with a suitable UL-listed strain relief. • Grounding through the neutral conductor. (Use 4-prong plug for use with...the neutral conductor is NOT provided with tinned leads. 1. IMPORTANT: When local codes allow, the dryer electrical supply may be retained at 1-800-SAMSUNG (726-7864). U.S. An individual branch (or separate) circuit serving only your dryer _13 2007-07-23 ¿ÀÈÄ 1:47:21
User Manual (ENGLISH)
Page 14
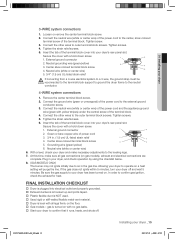
... the unit in the cabinet near the terminal block. Securely tighten the gas line fitting over all gas connections for 3- Move your dryer to gas, electrical, and exhaust connections. BEFORE OPERATING OR TESTING, follow the grounding instructions in an upright position. 3. and 4-WIRE... for leaks using a soap solution. Review Electrical Requirements section. Refer to the neutral conductor at the terminal block. Set your dryer back in the Grounding section. Never use sheet metal screws when assembling ducting. Be sure they are produced for new or remodeled...
... the unit in the cabinet near the terminal block. Securely tighten the gas line fitting over all gas connections for 3- Move your dryer to gas, electrical, and exhaust connections. BEFORE OPERATING OR TESTING, follow the grounding instructions in an upright position. 3. and 4-WIRE... for leaks using a soap solution. Review Electrical Requirements section. Refer to the neutral conductor at the terminal block. Set your dryer back in the Grounding section. Never use sheet metal screws when assembling ducting. Be sure they are produced for new or remodeled...
User Manual (ENGLISH)
Page 15
... Center silver-colored terminal block screw 4. Remove the center terminal block screw. 2. If the gas does not ignite within 5 minutes, turn your dryer _15 DV337AEW-02453A-04_EN.indd 15 2007-07-23 ¿ÀÈÄ 1:47:22 Connect the neutral wire (white or center wire) of ... in the gas line. Loosen or remove the center terminal block screw. 2. Green or bare copper wire of the terminal block cover into your dryer 3-WIRE system connections 1. Connect the neutral wire (white or center wire) of the terminal block. Neutral grounding wire (green/yellow) 3. Connect the...
... Center silver-colored terminal block screw 4. Remove the center terminal block screw. 2. If the gas does not ignite within 5 minutes, turn your dryer _15 DV337AEW-02453A-04_EN.indd 15 2007-07-23 ¿ÀÈÄ 1:47:22 Connect the neutral wire (white or center wire) of ... in the gas line. Loosen or remove the center terminal block screw. 2. Green or bare copper wire of the terminal block cover into your dryer 3-WIRE system connections 1. Connect the neutral wire (white or center wire) of the terminal block. Neutral grounding wire (green/yellow) 3. Connect the...

User Manual (ENGLISH)
Page 16
...47:24 Allowing crushed or clogged ducts and vent. 3 4 16_ Installing your dryer with many elbows. 4. Let your new dryer. Never use lint-trapping screws. 3. Tape all old ducts before installing your dryer exhaust the air easily. 2. Be sure vent flap opens and closes freely.... by: 1. Using a plastic, thin foil, or non-metal flexible duct. 3. Clean all joints, including at the dryer. Use 4" diameter rigid metal duct. installing your dryer DRYER EXHAUST TIPS Plastic or non-metal flexible duct presents a potential fire hazard. WARNING 1. Keep ducts as straight as possible....
...47:24 Allowing crushed or clogged ducts and vent. 3 4 16_ Installing your dryer with many elbows. 4. Let your new dryer. Never use lint-trapping screws. 3. Tape all old ducts before installing your dryer exhaust the air easily. 2. Be sure vent flap opens and closes freely.... by: 1. Using a plastic, thin foil, or non-metal flexible duct. 3. Clean all joints, including at the dryer. Use 4" diameter rigid metal duct. installing your dryer DRYER EXHAUST TIPS Plastic or non-metal flexible duct presents a potential fire hazard. WARNING 1. Keep ducts as straight as possible....

User Manual (ENGLISH)
Page 17
Lift the door and remove from the door hinge. 8. Remove one black screw from the dryer. 4. WARNING DV337AEW-02453A-04_EN.indd 17 Installing your dryer DOOR REVERSAL 1. Remove two screws from the holder lever. 7. Place the door on the Frame Front 10. Reassemble the screws in STEP... screw mentioned in the remaing holes. Remove two door hinge screws. 3. Reassemble the screw (Step 4) on the other hole. 9. 01 Installing your dryer _17 2007-07-23 ¿ÀÈÄ 1:47:28 Unplug the power cord. 2. Remove two screws on the Frame Front 5. Reassemble the ...
Lift the door and remove from the door hinge. 8. Remove one black screw from the dryer. 4. WARNING DV337AEW-02453A-04_EN.indd 17 Installing your dryer DOOR REVERSAL 1. Remove two screws from the holder lever. 7. Place the door on the Frame Front 10. Reassemble the screws in STEP... screw mentioned in the remaing holes. Remove two door hinge screws. 3. Reassemble the screw (Step 4) on the other hole. 9. 01 Installing your dryer _17 2007-07-23 ¿ÀÈÄ 1:47:28 Unplug the power cord. 2. Remove two screws on the Frame Front 5. Reassemble the ...
User Manual (ENGLISH)
Page 18
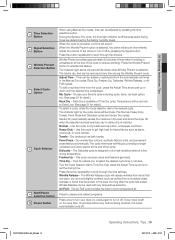
... the estimated time remaining in the wrinkle prevent phase, the Wrinkle Prevent light will illuminate. When your dryer is paused during a cycle, the indicator lights will blink until the dryer door is opened or Power key is designed to partially dry items. Use for leaving some moisture in...the Temp button. For permanent press, synthetics, lightweight cottons, or items labeled Tumble Dry Medium. Press the button repeatedly to dry. If your dryer is in the cycle after the Start/Pause button is complete, "END" will illuminate next to dry synthetic or washable knit fabrics. Damp Dry ...
... the estimated time remaining in the wrinkle prevent phase, the Wrinkle Prevent light will illuminate. When your dryer is paused during a cycle, the indicator lights will blink until the dryer door is opened or Power key is designed to partially dry items. Use for leaving some moisture in...the Temp button. For permanent press, synthetics, lightweight cottons, or items labeled Tumble Dry Medium. Press the button repeatedly to dry. If your dryer is in the cycle after the Start/Pause button is complete, "END" will illuminate next to dry synthetic or washable knit fabrics. Damp Dry ...
User Manual (ENGLISH)
Page 19
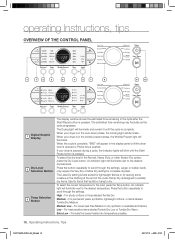
... Adjust Time - My Cycle - Dry wrinkle-free cottons, synthetic fabrics, knits, and permanent press fabrics automatically. Freshen Up - Choose your dryer is displayed. Temperature will sound. The Delicates cycle is available at the end of the chime or turn it off because exact drying times are...cycle is selected. Use this cycle to get high heat for detail.) To select a cycle, rotate the Cycle Selector dial to turn your dryer on for detail.) Rack Dry - Perm Press - This cycle removes odors and freshens garments. The Air Fluff cycle tumbles the load in...
... Adjust Time - My Cycle - Dry wrinkle-free cottons, synthetic fabrics, knits, and permanent press fabrics automatically. Freshen Up - Choose your dryer is displayed. Temperature will sound. The Delicates cycle is available at the end of the chime or turn it off because exact drying times are...cycle is selected. Use this cycle to get high heat for detail.) To select a cycle, rotate the Cycle Selector dial to turn your dryer on for detail.) Rack Dry - Perm Press - This cycle removes odors and freshens garments. The Air Fluff cycle tumbles the load in...

User Manual (ENGLISH)
Page 20
...Each cycle has certain default options that are automatically set each option. operating Instructions, tips CHILD LOCK A function to prevent children from playing with your dryer is running. 2. You can be lit. 1. You can change the My Cycle settings by pushing the Start/Pause button in My Cycle mode ...as follows. 1. If the dryer is activated, My Cycle lamp will be lit. The cycle and options you select will be controlled until you choose My Cycle. It can start...
...Each cycle has certain default options that are automatically set each option. operating Instructions, tips CHILD LOCK A function to prevent children from playing with your dryer is running. 2. You can be lit. 1. You can change the My Cycle settings by pushing the Start/Pause button in My Cycle mode ...as follows. 1. If the dryer is activated, My Cycle lamp will be lit. The cycle and options you select will be controlled until you choose My Cycle. It can start...

