

User Manual (user Manual) (ver.1.0) (English)
Page 1
DV219AE* DV219AG* Gas and Electric Dryer user manual imagine the possibilities Thank you for purchasing this Samsung product. To receive more complete service, please register your product at www.samsung.com/register DV219AGW-02691A_EN.indd 1 2009-01-30 ¿ÀÈÄ 6:19:21
DV219AE* DV219AG* Gas and Electric Dryer user manual imagine the possibilities Thank you for purchasing this Samsung product. To receive more complete service, please register your product at www.samsung.com/register DV219AGW-02691A_EN.indd 1 2009-01-30 ¿ÀÈÄ 6:19:21
User Manual (user Manual) (ver.1.0) (English)
Page 2
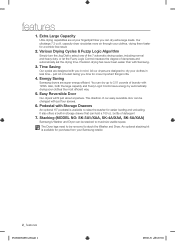
...of laundry with just four screws. 6. Stacking (MODEL NO: SK-3A1/XAA, SK-4A/XAA, SK-5A/XAA) Samsung's Washer and Dryer can hold a 100 oz. The Dryer legs need to be removed to raise the washer for purchase from your Samsung retailer. 2_ features DV219AGW-02691A_EN.indd 2 2009-01-30 ¿À...;ÈÄ 6:19:21 capacity dryer circulates more important things in ...
...of laundry with just four screws. 6. Stacking (MODEL NO: SK-3A1/XAA, SK-4A/XAA, SK-5A/XAA) Samsung's Washer and Dryer can hold a 100 oz. The Dryer legs need to be removed to raise the washer for purchase from your Samsung retailer. 2_ features DV219AGW-02691A_EN.indd 2 2009-01-30 ¿À...;ÈÄ 6:19:21 capacity dryer circulates more important things in ...
User Manual (user Manual) (ver.1.0) (English)
Page 3
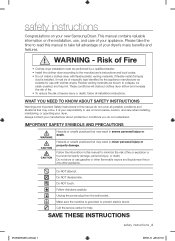
... metal (foil type) duct is installed, it must be performed by the appliance manufacturer as suitable for help. Always contact your new Samsung Dryer. Do not store or use common sense, caution, and care when installing, maintaining, or operating your responsibility to prevent property damage, ...196; 6:19:21 safety instructions Congratulations on the installation, use with flexible plastic venting materials. Risk of Fire • Clothes dryer installation must be easily crushed, and trap lint. Flexible venting materials are known to read this or any other flammable vapors and ...
... metal (foil type) duct is installed, it must be performed by the appliance manufacturer as suitable for help. Always contact your new Samsung Dryer. Do not store or use common sense, caution, and care when installing, maintaining, or operating your responsibility to prevent property damage, ...196; 6:19:21 safety instructions Congratulations on the installation, use with flexible plastic venting materials. Risk of Fire • Clothes dryer installation must be easily crushed, and trap lint. Flexible venting materials are known to read this or any other flammable vapors and ...

User Manual (user Manual) (ver.1.0) (English)
Page 4
...supplier from a neighbor's phone. Clean the lint screen before using the appliance. The interior of the appliance unless specifically recommended in the dryer until all instructions before or after each load. Any material that could ignite or explode. There are many highly flammable items used near...solids should be performed by the manufacturer of the appliance. Do not use fabric softeners or products to eliminate static unless recommended for dryer use any phone in front of the fabric softener or product. Do not install or store this appliance where it will be ...
...supplier from a neighbor's phone. Clean the lint screen before using the appliance. The interior of the appliance unless specifically recommended in the dryer until all instructions before or after each load. Any material that could ignite or explode. There are many highly flammable items used near...solids should be performed by the manufacturer of the appliance. Do not use fabric softeners or products to eliminate static unless recommended for dryer use any phone in front of the fabric softener or product. Do not install or store this appliance where it will be ...

User Manual (user Manual) (ver.1.0) (English)
Page 5
... may prevent heat from escaping and can ignite spontaneously. WARNING Gas leaks may contain significant amounts of items may occur in your dryer that is not grounded adequately and in accordance with large buckles, buttons, or other heavy metal or solid things. Do not ...place items in your system, resulting in hot water with local and national codes. Residual oil on top of continuing product improvements, Samsung reserves the right to reduce their temperature. If this appliance. Washing these items from small irregularly shaped hard objects, foreign material, etc...
... may prevent heat from escaping and can ignite spontaneously. WARNING Gas leaks may contain significant amounts of items may occur in your dryer that is not grounded adequately and in accordance with large buckles, buttons, or other heavy metal or solid things. Do not ...place items in your system, resulting in hot water with local and national codes. Residual oil on top of continuing product improvements, Samsung reserves the right to reduce their temperature. If this appliance. Washing these items from small irregularly shaped hard objects, foreign material, etc...

User Manual (user Manual) (ver.1.0) (English)
Page 6
...11 Gas requirements 12 Electrical requirements 12 Grounding 13 Electrical connections 14 Replacement parts and accessories 14 Installation 17 Final installation checklist 18 Dryer Exhaust Tips 19 Door Reversal 20 Overview of the control panel 22 Child lock 23 Rack Dry 24 Clean the lint filter 24...AND CLEANING 25 25 Control Panel 25 Tumbler 25 Stainless Steel Tumbler 25 Dryer Exterior 25 Dryer Exhaust System SPECIAL LAUNDRY TIPS 26 26 Special laundry tips TROUBLESHOOTING 27 27 Check these points if your dryer... 28 Information codes 6_ contents APPENDIX 29 29 Fabric care chart 30 ...
...11 Gas requirements 12 Electrical requirements 12 Grounding 13 Electrical connections 14 Replacement parts and accessories 14 Installation 17 Final installation checklist 18 Dryer Exhaust Tips 19 Door Reversal 20 Overview of the control panel 22 Child lock 23 Rack Dry 24 Clean the lint filter 24...AND CLEANING 25 25 Control Panel 25 Tumbler 25 Stainless Steel Tumbler 25 Dryer Exterior 25 Dryer Exhaust System SPECIAL LAUNDRY TIPS 26 26 Special laundry tips TROUBLESHOOTING 27 27 Check these points if your dryer... 28 Information codes 6_ contents APPENDIX 29 29 Fabric care chart 30 ...

User Manual (user Manual) (ver.1.0) (English)
Page 7
...responsible. must meet national and local codes. 4. SEE DRYER EXTERIOR Door Control panel Adjustable legs DV219AGW-02691A_EN.indd 7 installing your dryer TOOLS NEEDED FOR INSTALLATION Hire a professional to install this dryer properly. A GROUNDED ELECTRICAL OUTLET is considered the responsibility of...adjustment, and connection, it is required. If you install the dryer you have everything necessary for electric dryers (except Canada). EXHAUST SYSTEM - See Electrical Requirements. 01 installing your dryer installing your dryer _7 2009-01-30 ¿ÀÈÄ 6:19:...
...responsible. must meet national and local codes. 4. SEE DRYER EXTERIOR Door Control panel Adjustable legs DV219AGW-02691A_EN.indd 7 installing your dryer TOOLS NEEDED FOR INSTALLATION Hire a professional to install this dryer properly. A GROUNDED ELECTRICAL OUTLET is considered the responsibility of...adjustment, and connection, it is required. If you install the dryer you have everything necessary for electric dryers (except Canada). EXHAUST SYSTEM - See Electrical Requirements. 01 installing your dryer installing your dryer _7 2009-01-30 ¿ÀÈÄ 6:19:...

User Manual (user Manual) (ver.1.0) (English)
Page 8
... 10.1 m (33 ft.) 18.9 m (62 ft.) 8.8 m (29 ft.) 15.5 m (51 ft.) 7.6 m (25 ft.) 12.5 m (41 ft.) 6.5 m (21 ft.) 8_ installing your dryer DUCTING REQUIREMENTS • Use a 4-inch (10.2 cm) diameter rigid aluminum or rigid galvanized steel duct. • Do not use a smaller duct. • Ducts larger than...flexible metal duct is bent too sharply. • Never install any type of the exhaust system at least once a year. installing your dryer DV219AGW-02691A_EN.indd 8 2009-01-30 ¿ÀÈÄ 6:19:22 Serious blockage can extend drying times, affect machine operation, ...
... 10.1 m (33 ft.) 18.9 m (62 ft.) 8.8 m (29 ft.) 15.5 m (51 ft.) 7.6 m (25 ft.) 12.5 m (41 ft.) 6.5 m (21 ft.) 8_ installing your dryer DUCTING REQUIREMENTS • Use a 4-inch (10.2 cm) diameter rigid aluminum or rigid galvanized steel duct. • Do not use a smaller duct. • Ducts larger than...flexible metal duct is bent too sharply. • Never install any type of the exhaust system at least once a year. installing your dryer DV219AGW-02691A_EN.indd 8 2009-01-30 ¿ÀÈÄ 6:19:22 Serious blockage can extend drying times, affect machine operation, ...

User Manual (user Manual) (ver.1.0) (English)
Page 9
...IS TO BE KEPT CLEAR OF COMBUSTIBLE MATERIALS, GASOLINE, AND OTHER FLAMMABLE VAPORS AND LIQUIDS. A louvered door with the kit. ALCOVE OR CLOSET INSTALLATION The Dryer must not exceed 0.83 inches of water column, or be installed in the same closet as noted on either side, and 2.375" in ² with... a manometer at the front for loading the Dryer, and enough space behind for future reference. The static pressure in any exhaust system must be exhausted to the outside to reduce the risk of...
...IS TO BE KEPT CLEAR OF COMBUSTIBLE MATERIALS, GASOLINE, AND OTHER FLAMMABLE VAPORS AND LIQUIDS. A louvered door with the kit. ALCOVE OR CLOSET INSTALLATION The Dryer must not exceed 0.83 inches of water column, or be installed in the same closet as noted on either side, and 2.375" in ² with... a manometer at the front for loading the Dryer, and enough space behind for future reference. The static pressure in any exhaust system must be exhausted to the outside to reduce the risk of...

User Manual (user Manual) (ver.1.0) (English)
Page 10
... exhausted to the outside . • The exhaust duct should be 4inch (102mm) in diameter. In the United States: • All dryers must be assembled with metal. and Canada: • Refer to the outside will not support combustion. See Exhausting section for information on purchasing... the Floor Anchoring Kit as an accessory. Call 1-800-SAMSUNG for more information. NEVER USE A PLASTIC OR NON-METAL FLEXIBLE DUCT. Locate an area that extend into the room. The exhaust duct ...
... exhausted to the outside . • The exhaust duct should be 4inch (102mm) in diameter. In the United States: • All dryers must be assembled with metal. and Canada: • Refer to the outside will not support combustion. See Exhausting section for information on purchasing... the Floor Anchoring Kit as an accessory. Call 1-800-SAMSUNG for more information. NEVER USE A PLASTIC OR NON-METAL FLEXIBLE DUCT. Locate an area that extend into the room. The exhaust duct ...
User Manual (user Manual) (ver.1.0) (English)
Page 11
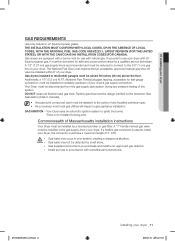
... use in the gas supply line to the 3/8" (1 cm) gas line on your system, creating a dangerous situation. 01 installing your dryer. Gas dryers are equipped with a burner vent for test gauge connection, must be installed immediately upstream of the system. There is no constant burning pilot.... DV219AGW-02691A_EN.indd 11 installing your dryer. A "T" handle manual gas valve must be installed in accordance with natural gas. Gas leaks may occur in Canada). • ...
... use in the gas supply line to the 3/8" (1 cm) gas line on your system, creating a dangerous situation. 01 installing your dryer. Gas dryers are equipped with a burner vent for test gauge connection, must be installed immediately upstream of the system. There is no constant burning pilot.... DV219AGW-02691A_EN.indd 11 installing your dryer. A "T" handle manual gas valve must be installed in accordance with natural gas. Gas leaks may occur in Canada). • ...

User Manual (user Manual) (ver.1.0) (English)
Page 12
... fit the outlet, have a proper outlet installed by a qualified electrician. The plug must be grounded. Electric models Your Dryer has a cord with your Dryer - Latest Revision (for the U.S.) or CAN/CGA - All gas installations must be plugged into an appropriate outlet that is...the electrical current. To prevent unnecessary risk of fire, electrical shock, or personal injury, all local codes and ordinances. installing your dryer ELECTRICAL REQUIREMENTS A Wiring diagram is located on the plate below the control panel. • WARNING • • Improper connection...
... fit the outlet, have a proper outlet installed by a qualified electrician. The plug must be grounded. Electric models Your Dryer has a cord with your Dryer - Latest Revision (for the U.S.) or CAN/CGA - All gas installations must be plugged into an appropriate outlet that is...the electrical current. To prevent unnecessary risk of fire, electrical shock, or personal injury, all local codes and ordinances. installing your dryer ELECTRICAL REQUIREMENTS A Wiring diagram is located on the plate below the control panel. • WARNING • • Improper connection...

User Manual (user Manual) (ver.1.0) (English)
Page 13
...- U.S. only Most U.S. The power cord electric supply wiring must be found on the data label located behind the door. Gas models - electric model dryers. size of the conductors and the type of a new power supply cord kit, marked for (1) new branch-circuit installations, (2) mobile homes, (3) ...amp with three No. 10 copper wire conductors terminated with closed loop terminals, open-end spade lugs with turned up ends, or with a dryer, that is U.L. Electric models - and Canada A 120 volt, 60 Hz AC approved electrical service, with the power cord attached. Some ...
...- U.S. only Most U.S. The power cord electric supply wiring must be found on the data label located behind the door. Gas models - electric model dryers. size of the conductors and the type of a new power supply cord kit, marked for (1) new branch-circuit installations, (2) mobile homes, (3) ...amp with three No. 10 copper wire conductors terminated with closed loop terminals, open-end spade lugs with turned up ends, or with a dryer, that is U.L. Electric models - and Canada A 120 volt, 60 Hz AC approved electrical service, with the power cord attached. Some ...

User Manual (user Manual) (ver.1.0) (English)
Page 14
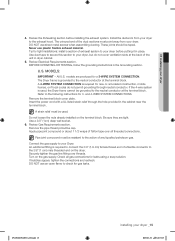
...Lay two of the carton cushion-tops on its side so it must be level. Tip your dryer or the SAMSUNG customer care center at 1-800-SAMSUNG (726-7864). Consider installing the dryer and washer side by turning them counterclockwise, then loosen the legs by -side. To ensure that... you purchased your dryer on the floor. Set your dryer to vibrate. Move your dryer back in an upright position. 3. Extending ...
...Lay two of the carton cushion-tops on its side so it must be level. Tip your dryer or the SAMSUNG customer care center at 1-800-SAMSUNG (726-7864). Consider installing the dryer and washer side by turning them counterclockwise, then loosen the legs by -side. To ensure that... you purchased your dryer on the floor. Set your dryer to vibrate. Move your dryer back in an upright position. 3. Extending ...
User Manual (user Manual) (ver.1.0) (English)
Page 15
... instructions for leaks using a soap solution. Use duct tape to secure this section to the 3/8" (1 cm) male threaded end on the dryer. The Dryer frame is required to connect the 3/4" (1.9 cm) female thread end of Teflon tape over threads. Do not loosen the nuts already installed ...the terminal block cover plate. Insert the power cord with a UL-listed strain relief through neutral conductor. A strain relief must point away from your dryer. Be sure they are produced for gas leaks. Use a 3/8" (1cm) deep well socket. 6. Remove the pipe thread protective cap. Connect the ...
... instructions for leaks using a soap solution. Use duct tape to secure this section to the 3/8" (1 cm) male threaded end on the dryer. The Dryer frame is required to connect the 3/4" (1.9 cm) female thread end of Teflon tape over threads. Do not loosen the nuts already installed ...the terminal block cover plate. Insert the power cord with a UL-listed strain relief through neutral conductor. A strain relief must point away from your dryer. Be sure they are produced for gas leaks. Use a 3/8" (1cm) deep well socket. 6. Remove the pipe thread protective cap. Connect the ...

User Manual (user Manual) (ver.1.0) (English)
Page 16
...converting from a 4-wire electrical system to a 3-wire, the ground strap must be WARNING reconnected to the terminal block support to ground the Dryer frame to the external ground conductor screw. 3. Connect the ground wire (green or unwrapped) of the power cord to the outer terminal block ... cord and the appliance ground wire (green with a hold -down screw. 1. Green or bare copper wire of the terminal block cover into your Dryer's rear panel slot. Tighten screw. 3. Insert the tab of the terminal block. Center silver-colored terminal block screw 5. Center silver-colored terminal block...
...converting from a 4-wire electrical system to a 3-wire, the ground strap must be WARNING reconnected to the terminal block support to ground the Dryer frame to the external ground conductor screw. 3. Connect the ground wire (green or unwrapped) of the power cord to the outer terminal block ... cord and the appliance ground wire (green with a hold -down screw. 1. Green or bare copper wire of the terminal block cover into your Dryer's rear panel slot. Tighten screw. 3. Insert the tab of the terminal block. Center silver-colored terminal block screw 5. Center silver-colored terminal block...
User Manual (user Manual) (ver.1.0) (English)
Page 17
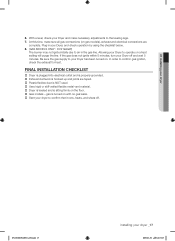
...on a heat setting will purge the line. Be sure the gas supply to operate on . DV219AGW-02691A_EN.indd 17 installing your dryer 6. With a level, check your Dryer, and check operation by using the checklist below. 8. (GAS MODELS ONLY : DV219AGW) The burner may not ignite initially due... to confirm gas ignition, check the exhaust for heat. FINAL INSTALLATION CHECKLIST Dryer is plugged into electrical outlet and is properly grounded. Exhaust ductwork is hooked up and joints are complete. Plug in the gas line...
...on a heat setting will purge the line. Be sure the gas supply to operate on . DV219AGW-02691A_EN.indd 17 installing your dryer 6. With a level, check your Dryer, and check operation by using the checklist below. 8. (GAS MODELS ONLY : DV219AGW) The burner may not ignite initially due... to confirm gas ignition, check the exhaust for heat. FINAL INSTALLATION CHECKLIST Dryer is plugged into electrical outlet and is properly grounded. Exhaust ductwork is hooked up and joints are complete. Plug in the gas line...
User Manual (user Manual) (ver.1.0) (English)
Page 18
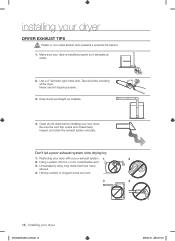
...system slow drying by: 1. Having crushed or clogged ducts and vent. 3 4 18_ installing your dryer with a poor exhaust system. 1 2 2. Tape all old ducts before installing your new dryer. Restricting your dryer DV219AGW-02691A_EN.indd 18 2009-01-30 ¿ÀÈÄ 6:19:27 Clean all joints..., including at the dryer. Be sure the vent flap opens and closes freely. installing your dryer is installed properly so it exhausts air easily. 2. Make sure your dryer DRYER EXHAUST TIPS Plastic or non-metal flexible duct presents a potential...
...system slow drying by: 1. Having crushed or clogged ducts and vent. 3 4 18_ installing your dryer with a poor exhaust system. 1 2 2. Tape all old ducts before installing your new dryer. Restricting your dryer DV219AGW-02691A_EN.indd 18 2009-01-30 ¿ÀÈÄ 6:19:27 Clean all joints..., including at the dryer. Be sure the vent flap opens and closes freely. installing your dryer is installed properly so it exhausts air easily. 2. Make sure your dryer DRYER EXHAUST TIPS Plastic or non-metal flexible duct presents a potential...

User Manual (user Manual) (ver.1.0) (English)
Page 19
... holder lever. 7. Reinsert the screw (Step 4) on the opposite side of the door hinge. 6. Lift the door and remove it to the dryer. 11. DV219AGW-02691A_EN.indd 19 installing your dryer DOOR REVERSAL 1. Remove two screws from the door hinge. 8. Remove a screw on the other hole. 9. Reattach the screws in the other... reattach it . 4. Reinsert the black screw in the remaining holes. Reattach the holder lever. 12. Place the door on the Frame Front 5. 01 installing your dryer _19 2009-01-30 ¿ÀÈÄ 6:19:29 Unplug the power cord. 2.
... holder lever. 7. Reinsert the screw (Step 4) on the opposite side of the door hinge. 6. Lift the door and remove it to the dryer. 11. DV219AGW-02691A_EN.indd 19 installing your dryer DOOR REVERSAL 1. Remove two screws from the door hinge. 8. Remove a screw on the other hole. 9. Reattach the screws in the other... reattach it . 4. Reinsert the black screw in the remaining holes. Reattach the holder lever. 12. Place the door on the Frame Front 5. 01 installing your dryer _19 2009-01-30 ¿ÀÈÄ 6:19:29 Unplug the power cord. 2.

User Manual (user Manual) (ver.1.0) (English)
Page 20
... Release can be used with any temperature selection. Air Fluff - The display window shows the estimated time remaining in minutes. When your dryer is pushed. Time Dry - Turn the Cycle Selector dial to Time Dry, then press the Adjust Time up arrow to select the desired... fabrics such as jeans, corduroys, or work clothes. The indicator light by providing a longer unheated cool-down phase, the Cooling light will blink until the dryer door is opened or the Power key is in room temperature air. operating Instructions, tips OVERVIEW OF THE CONTROL PANEL 1 2 3 4 5 6 78 9...
... Release can be used with any temperature selection. Air Fluff - The display window shows the estimated time remaining in minutes. When your dryer is pushed. Time Dry - Turn the Cycle Selector dial to Time Dry, then press the Adjust Time up arrow to select the desired... fabrics such as jeans, corduroys, or work clothes. The indicator light by providing a longer unheated cool-down phase, the Cooling light will blink until the dryer door is opened or the Power key is in room temperature air. operating Instructions, tips OVERVIEW OF THE CONTROL PANEL 1 2 3 4 5 6 78 9...


