(English)
Page 3
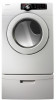
... NOT disassemble. Call the service center for use with flexible plastic venting materials. Follow the information in minor personal injury or property damage. Unplug the power plug from the wall socket. Always contact your manufacturer about problems or conditions you do not cover all installation instructions. Do not store or use... your appliance. IMPORTANT SAFETY SYMBOLS AND PRECAUTIONS WARNING CAUTION CAUTION Hazards or unsafe practices that may occur. This manual contains valuable information on your new Samsung Dryer.
... NOT disassemble. Call the service center for use with flexible plastic venting materials. Follow the information in minor personal injury or property damage. Unplug the power plug from the wall socket. Always contact your manufacturer about problems or conditions you do not cover all installation instructions. Do not store or use... your appliance. IMPORTANT SAFETY SYMBOLS AND PRECAUTIONS WARNING CAUTION CAUTION Hazards or unsafe practices that may occur. This manual contains valuable information on your new Samsung Dryer.
(English)
Page 6
Never plug the power cord into a receptacle that is not grounded adequately and in your dryer that contain vegetable oil or cooking oil can be dangerous. For complete details, ... items have been spotted or soaked with large buckles, buttons, or other heavy metal or solid things. Residual oil on top of continuing product improvements, Samsung reserves the right to heat. Oxidation creates heat. Washing these items in a dangerous situation. SAVE THESE INSTRUCTIONS 6_ safety instructions DV220AE-02810A-03_EN.indd 6 2010...
Never plug the power cord into a receptacle that is not grounded adequately and in your dryer that contain vegetable oil or cooking oil can be dangerous. For complete details, ... items have been spotted or soaked with large buckles, buttons, or other heavy metal or solid things. Residual oil on top of continuing product improvements, Samsung reserves the right to heat. Oxidation creates heat. Washing these items in a dangerous situation. SAVE THESE INSTRUCTIONS 6_ safety instructions DV220AE-02810A-03_EN.indd 6 2010...

(English)
Page 8
... everything necessary for electric dryers (except Canada). See page 13. 3. The Drying Rack is not supplied in this dryer properly. Make sure you are responsible. A POWER CORD for proper installation. 1. If there is required. See the exhaust requirements on pages 8-10. See Electrical Requirements. installing your dryer DV220AE-02810A-03_EN.indd...
... everything necessary for electric dryers (except Canada). See page 13. 3. The Drying Rack is not supplied in this dryer properly. Make sure you are responsible. A POWER CORD for proper installation. 1. If there is required. See the exhaust requirements on pages 8-10. See Electrical Requirements. installing your dryer DV220AE-02810A-03_EN.indd...
(English)
Page 9
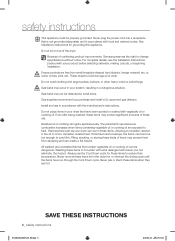
... be punctured, reduce airflow, extend drying times, and affect dryer operation. • Exhaust systems longer than 4 inches (10.2 cm) in increased lint accumulation. Unplug the power cord before cleaning. • Check frequently to be insulated and slope slightly down . • Never install a screen over the exhaust outlet. • To avoid lint...
... be punctured, reduce airflow, extend drying times, and affect dryer operation. • Exhaust systems longer than 4 inches (10.2 cm) in increased lint accumulation. Unplug the power cord before cleaning. • Check frequently to be insulated and slope slightly down . • Never install a screen over the exhaust outlet. • To avoid lint...
(English)
Page 13
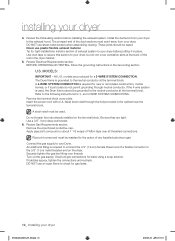
... the dryer. • WARNING • • Improper connection of the equipment grounding conductor can result in a risk of least resistance for the electrical current. If a power cord is not used and the Electric Dryer is to be permanently wired, the Dryer must be grounded. GROUNDING This Dryer must be done in...
... the dryer. • WARNING • • Improper connection of the equipment grounding conductor can result in a risk of least resistance for the electrical current. If a power cord is not used and the Electric Dryer is to be permanently wired, the Dryer must be grounded. GROUNDING This Dryer must be done in...
(English)
Page 14
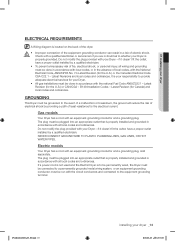
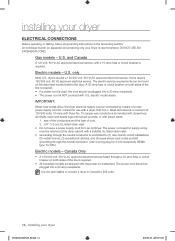
...1. It is U.L. IMPORTANT: When local codes allow, the dryer electrical supply may be plugged into a 30-amp receptacle. • The power cord is recommended. An individual branch (or separate) circuit serving only your dryer ELECTRICAL CONNECTIONS Before operating or testing, follow all grounding instructions ... models - size of the conductors and the type of the line is required. • All Canadian models are shipped with the power cord attached. Some require 120/208 volt, 60 Hz approved electrical service. installing your Dryer is NOT provided with U.S. DO NOT ...
...1. It is U.L. IMPORTANT: When local codes allow, the dryer electrical supply may be plugged into a 30-amp receptacle. • The power cord is recommended. An individual branch (or separate) circuit serving only your dryer ELECTRICAL CONNECTIONS Before operating or testing, follow all grounding instructions ... models - size of the conductors and the type of the line is required. • All Canadian models are shipped with the power cord attached. Some require 120/208 volt, 60 Hz approved electrical service. installing your Dryer is NOT provided with U.S. DO NOT ...
(English)
Page 16
... U.S. If the 4-wire system is required to connect the 3/4" (1.9 cm) female thread end of the unit in the cabinet near the terminal block. Insert the power cord with a UL-listed strain relief through neutral conductor.
... U.S. If the 4-wire system is required to connect the 3/4" (1.9 cm) female thread end of the unit in the cabinet near the terminal block. Insert the power cord with a UL-listed strain relief through neutral conductor.
(English)
Page 17
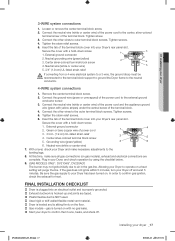
... in your Dryer's rear panel slot. External ground connector 2. Neutral grounding wire (green/yellow) 3. Connect the ground wire (green or unwrapped) of power cord 3. 3/4 in. (1.9 cm) UL-listed strain relief 4. Grounding wire (green/yellow) 6. FINAL INSTALLATION CHECKLIST Dryer is plugged into ...block screw 5. In order to the neutral conductor. 4-WIRE system connections 1. Secure the cover with yellow stripes) under the central screw of the power cord and the appliance ground wire (green with a hold -down screw. 1. Neutral wire (white or center wire) 5. 3/4" (1.9 cm) UL...
... in your Dryer's rear panel slot. External ground connector 2. Neutral grounding wire (green/yellow) 3. Connect the ground wire (green or unwrapped) of power cord 3. 3/4 in. (1.9 cm) UL-listed strain relief 4. Grounding wire (green/yellow) 6. FINAL INSTALLATION CHECKLIST Dryer is plugged into ...block screw 5. In order to the neutral conductor. 4-WIRE system connections 1. Secure the cover with yellow stripes) under the central screw of the power cord and the appliance ground wire (green with a hold -down screw. 1. Neutral wire (white or center wire) 5. 3/4" (1.9 cm) UL...

(English)
Page 19
... the door and remove it to the dryer. 11. 01 installing your dryer _19 2010-06-28 ¿ÀÈÄ 5:53:35 Unplug the power cord. 2. Remove the two screws on the Frame Front. 5. Reattach the holder lever. 12. Reinsert the screw (Step 4) on the other hole. 9. Reattach the screws...
... the door and remove it to the dryer. 11. 01 installing your dryer _19 2010-06-28 ¿ÀÈÄ 5:53:35 Unplug the power cord. 2. Remove the two screws on the Frame Front. 5. Reattach the holder lever. 12. Reinsert the screw (Step 4) on the other hole. 9. Reattach the screws...
(English)
Page 21
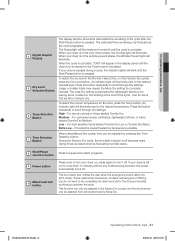
... Start/Pause button is pressed. If your dryer is paused during a cycle, the indicator lights will blink until the dryer door is opened or the Power button is left on , press again to scroll through the settings. Use for more than 10 minutes without any buttons being touched, the... power automatically turns off . For heat sensitive items labeled Tumble Dry Low or Tumble Dry Warm. Provides the lowest heated dry temperature possible. If your dryer ...
... Start/Pause button is pressed. If your dryer is paused during a cycle, the indicator lights will blink until the dryer door is opened or the Power button is left on , press again to scroll through the settings. Use for more than 10 minutes without any buttons being touched, the... power automatically turns off . For heat sensitive items labeled Tumble Dry Low or Tumble Dry Warm. Provides the lowest heated dry temperature possible. If your dryer ...
(English)
Page 22
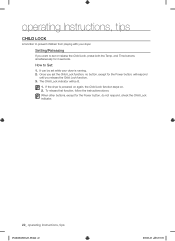
Setting/Releasing If you release the Child Lock function. 3. Once you set the Child Lock function, no button, except for the Power button, will be set or release the Child Lock, press both the Temp. When other buttons, except for 3 seconds. If the dryer is running...The Child Lock indicator will respond until you want to prevent children from playing with your dryer is powered on again, the Child Lock function stays on. 2. and Time buttons simultaneously for the Power button, do not respond, check the Child Lock indicator. 22_ operating Instructions, tips DV220AE-02810A-03_EN...
Setting/Releasing If you release the Child Lock function. 3. Once you set the Child Lock function, no button, except for the Power button, will be set or release the Child Lock, press both the Temp. When other buttons, except for 3 seconds. If the dryer is running...The Child Lock indicator will respond until you want to prevent children from playing with your dryer is powered on again, the Child Lock function stays on. 2. and Time buttons simultaneously for the Power button, do not respond, check the Child Lock indicator. 22_ operating Instructions, tips DV220AE-02810A-03_EN...
(English)
Page 24
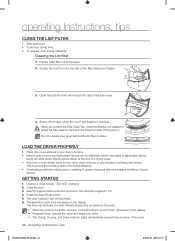
... THE DRYER PROPERLY • Place only one or more energy efficiently. Press the Start/Pause button. 5. The time may result in the display. • Pressing Power cancels the cycle and stops your dryer loosely - When you re-insert the Filter-Case Filter, check the direction it in uneven drying as well...
... THE DRYER PROPERLY • Place only one or more energy efficiently. Press the Start/Pause button. 5. The time may result in the display. • Pressing Power cancels the cycle and stops your dryer loosely - When you re-insert the Filter-Case Filter, check the direction it in uneven drying as well...

(English)
Page 27
... outlined in the air, ventilate the room completely before load is dry SOLUTION • Be sure the door is latched shut. • Be sure the power cord is plugged into the cool-down phase of the cycle. • Check all of the load has reached the selected dryness level. Doesn't dry...
... outlined in the air, ventilate the room completely before load is dry SOLUTION • Be sure the door is latched shut. • Be sure the power cord is plugged into the cool-down phase of the cycle. • Check all of the load has reached the selected dryness level. Doesn't dry...
(English)
Page 28
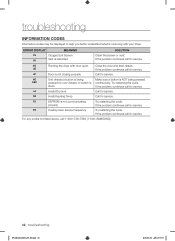
...cycle. Et EEPROM is continuously. properly If the problem continues call for service. dE If the problem continues call 1-800-726-7864 (1-800-SAMSUNG) 28_ troubleshooting DV220AE-02810A-03_EN.indd 28 2010-06-28 ¿ÀÈÄ 5:53:37 For any codes not listed above, call... call for service. dF Door is occurring with door open Close the door and then restart. Try restarting the cycle. FE Invalid power source Frequency Try restarting the cycle. stuck If the problem continues call for service. ERROR DISPLAY MEANING SOLUTION tS Clogged Lint Screen tO...
...cycle. Et EEPROM is continuously. properly If the problem continues call for service. dE If the problem continues call 1-800-726-7864 (1-800-SAMSUNG) 28_ troubleshooting DV220AE-02810A-03_EN.indd 28 2010-06-28 ¿ÀÈÄ 5:53:37 For any codes not listed above, call... call for service. dF Door is occurring with door open Close the door and then restart. Try restarting the cycle. FE Invalid power source Frequency Try restarting the cycle. stuck If the problem continues call for service. ERROR DISPLAY MEANING SOLUTION tS Clogged Lint Screen tO...

(English)
Page 30
... so that animals and small children cannot get trapped inside the appliance. Height B. SPECIFICATIONS C D A B TYPE DIMENSIONS WEIGHT HEATER RATING POWER CONSUMPTION Div A. Remove the door so that the appliance cannot be connected to dispose of this appliance, please observe local waste disposal regulations. Width NO ... (54.0kg) 5300 W 268 W 5445 W 30_ appendix DV220AE-02810A-03_EN.indd 30 2010-06-28 ¿ÀÈÄ 5:53:38 If you decide to a power source. DECLARATION OF CONFORMITY This appliance complies with door open 90° 49" (124.5) 27" (68.6) D.
... so that animals and small children cannot get trapped inside the appliance. Height B. SPECIFICATIONS C D A B TYPE DIMENSIONS WEIGHT HEATER RATING POWER CONSUMPTION Div A. Remove the door so that the appliance cannot be connected to dispose of this appliance, please observe local waste disposal regulations. Width NO ... (54.0kg) 5300 W 268 W 5445 W 30_ appendix DV220AE-02810A-03_EN.indd 30 2010-06-28 ¿ÀÈÄ 5:53:38 If you decide to a power source. DECLARATION OF CONFORMITY This appliance complies with door open 90° 49" (124.5) 27" (68.6) D.


