Operation Manual
Page 2
...61550; Warranty...2 General Safety Rules...3 - 4 Specific Safety Rules...4 Symbols...5 Electrical...6 - 7 Features...7 Assembly...8 - 9 Operation...9 - 11 Maintenance...12 Figure numbers (illustrations)...13 - 17 Parts Ordering / Service...Back page INTRODUCTION This ...workmanship or materials by the limited warranty for a particular purpose, are warranted for example, a bill of its RYOBI® power tools with the original product. LIMITED TWO YEAR WARRANTY AND 30 DAY EXCHANGE POLICY One World ...
...61550; Warranty...2 General Safety Rules...3 - 4 Specific Safety Rules...4 Symbols...5 Electrical...6 - 7 Features...7 Assembly...8 - 9 Operation...9 - 11 Maintenance...12 Figure numbers (illustrations)...13 - 17 Parts Ordering / Service...Back page INTRODUCTION This ...workmanship or materials by the limited warranty for a particular purpose, are warranted for example, a bill of its RYOBI® power tools with the original product. LIMITED TWO YEAR WARRANTY AND 30 DAY EXCHANGE POLICY One World ...
Operation Manual
Page 8
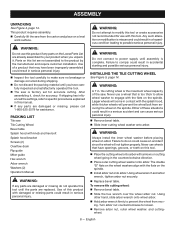
...hex wrench over the wheel arbor nut. Parts on the spindle. PACKING LIST Tile saw . Use of a product that have been improperly assembled could result in a hazardous condition leading to comply could result in a serious accident and can cause serious personal injury. Remove ... Do not discard the packing material until you unpack it , check for accurate cutting. Failure to possible serious personal injury. ASSEMBLY UNPACKING See Figure 4, page 14. English ing. Installing The TILE CUTTING WHEEL See Figure 5, page 14. WARNING: Do not connect ...
...hex wrench over the wheel arbor nut. Parts on the spindle. PACKING LIST Tile saw . Use of a product that have been improperly assembled could result in a hazardous condition leading to comply could result in a serious accident and can cause serious personal injury. Remove ... Do not discard the packing material until you unpack it , check for accurate cutting. Failure to possible serious personal injury. ASSEMBLY UNPACKING See Figure 4, page 14. English ing. Installing The TILE CUTTING WHEEL See Figure 5, page 14. WARNING: Do not connect ...
Operation Manual
Page 9
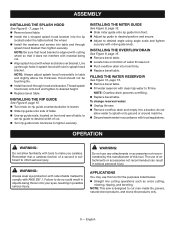
..., and stone tile products only. 9 - filling the water reservoir See Figure 10, page 15. Remove bevel table. Fill water reservoir with ANSI Z87.1. ASSEMBLY Installing the splash hood See Figure 6 - 7, page 14. Remove bevel table. Install the L-shaped splash hood bracket into the lip located under the...
..., and stone tile products only. 9 - filling the water reservoir See Figure 10, page 15. Remove bevel table. Fill water reservoir with ANSI Z87.1. ASSEMBLY Installing the splash hood See Figure 6 - 7, page 14. Remove bevel table. Install the L-shaped splash hood bracket into the lip located under the...


