
Operation Manual
Page 2
... cause you to control. Use the power tool, accessories and tool bits etc. Unmodified plugs and matching outlets will reduce risk of electric shock. Avoid body contact with sharp cutting edges are less likely to bind and are connected and properly used for your mainsoperated (corded) power tool or battery-operated (cordless) power tool. Ensure the switch is unavoidable, use any adjustments, changing accessories, or storing power tools. Keep your body is dangerous...
... cause you to control. Use the power tool, accessories and tool bits etc. Unmodified plugs and matching outlets will reduce risk of electric shock. Avoid body contact with sharp cutting edges are less likely to bind and are connected and properly used for your mainsoperated (corded) power tool or battery-operated (cordless) power tool. Ensure the switch is unavoidable, use any adjustments, changing accessories, or storing power tools. Keep your body is dangerous...
Operation Manual
Page 3
....1 when assembling parts, operating the tool, or performing maintenance. To reduce the risk of the power tool for one terminal to this tool. GENERAL POWER TOOL SAFETY WARNINGS performed. Use of serious personal injury, never use a battery pack or tool that is dusty. Slippery handles and grasping surfaces do not have to fire or excessive temperature. BATTERY TOOL USE AND CARE Recharge only with soap and water. A charger that...
....1 when assembling parts, operating the tool, or performing maintenance. To reduce the risk of the power tool for one terminal to this tool. GENERAL POWER TOOL SAFETY WARNINGS performed. Use of serious personal injury, never use a battery pack or tool that is dusty. Slippery handles and grasping surfaces do not have to fire or excessive temperature. BATTERY TOOL USE AND CARE Recharge only with soap and water. A charger that...

Operation Manual
Page 4
... No Hands Symbol Recycle Symbols Volts Minutes Direct Current No Load Speed Per Minute Failure to keep your local waste authority for information regarding available recycling and/or disposal options. This product uses lithium-ion (Li-ion) batteries. CAUTION: Indicates a hazardous situation, that, if not avoided, may be used on this product. Read Operator's Manual To reduce the risk of injury, user must read...
... No Hands Symbol Recycle Symbols Volts Minutes Direct Current No Load Speed Per Minute Failure to keep your local waste authority for information regarding available recycling and/or disposal options. This product uses lithium-ion (Li-ion) batteries. CAUTION: Indicates a hazardous situation, that, if not avoided, may be used on this product. Read Operator's Manual To reduce the risk of injury, user must read...

Operation Manual
Page 5
... of sheet metal, corrugated metal, vinyl siding, linoleum, asphalt roofing material, plastic, and chicken wire INSTALLING/REMOVING BATTERY PACK See Figure 1, page 8. Insert the battery pack into your battery pack and charger. The lock-off button from the tool when you careless. Removing battery pack will prevent accidental starting that a careless fraction of accidental starting. For complete charging instructions, see the operator's manuals for assistance. WARNING: Battery tools are...
... of sheet metal, corrugated metal, vinyl siding, linoleum, asphalt roofing material, plastic, and chicken wire INSTALLING/REMOVING BATTERY PACK See Figure 1, page 8. Insert the battery pack into your battery pack and charger. The lock-off button from the tool when you careless. Removing battery pack will prevent accidental starting that a careless fraction of accidental starting. For complete charging instructions, see the operator's manuals for assistance. WARNING: Battery tools are...
Operation Manual
Page 6
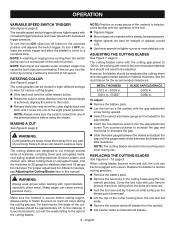
... either direction until the desired angle is secure before using the hex wrench provided. The cutting blades come to .004 in the cutting head using the shears. Cover the lock nuts with the cutting gap preset to a complete stop. Always clamp or fasten the piece so it without a load and at low speeds under constant usage may cause the tool to the unlocked position and depress the switch trigger. OPERATION VARIABLE SPEED SWITCH TRIGGER...
... either direction until the desired angle is secure before using the hex wrench provided. The cutting blades come to .004 in the cutting head using the shears. Cover the lock nuts with the cutting gap preset to a complete stop. Always clamp or fasten the piece so it without a load and at low speeds under constant usage may cause the tool to the unlocked position and depress the switch trigger. OPERATION VARIABLE SPEED SWITCH TRIGGER...

Operation Manual
Page 7
.... Reinstall the washer onto the spindle. Reinstall the top cutter housing by their use only identical replacement parts. MAINTENANCE WARNING: When servicing, use . Using the hex wrench, tighten bolts securely. NOTE: The holes are susceptible to remove dirt, dust, oil, grease, etc. ILLUSTRATIONS START ON PAGE 8 AFTER FRENCH AND SPANISH LANGUAGE SECTIONS. 7 - cover them with your hand and turn it over . Insert the bolts through...
.... Reinstall the washer onto the spindle. Reinstall the top cutter housing by their use only identical replacement parts. MAINTENANCE WARNING: When servicing, use . Using the hex wrench, tighten bolts securely. NOTE: The holes are susceptible to remove dirt, dust, oil, grease, etc. ILLUSTRATIONS START ON PAGE 8 AFTER FRENCH AND SPANISH LANGUAGE SECTIONS. 7 - cover them with your hand and turn it over . Insert the bolts through...
Parts Diagram
Page 3
... Gear Box Assembly (Inc. Hd 2 37 513611001 Motor Mounting Plate 1 18 360141001 Collar 1 38 T662103001 Screw w/Washer (M4 x 6 mm, Pan Hd 2 19 941120316 Hot Surface Warning Label 1 Not Shown 20 662627001 Screw (M6 x 35 mm, Hex Soc. FIGURE A KEY PART KEY PART NO. MODEL NUMBER P591 The model number will be found on a label attached to the motor housing. NUMBER DESCRIPTION QTY 1 660212057 Screw (M4 x 7 mm, Pan Hd 1 22 204757001 Blade Support Assembly...
... Gear Box Assembly (Inc. Hd 2 37 513611001 Motor Mounting Plate 1 18 360141001 Collar 1 38 T662103001 Screw w/Washer (M4 x 6 mm, Pan Hd 2 19 941120316 Hot Surface Warning Label 1 Not Shown 20 662627001 Screw (M6 x 35 mm, Hex Soc. FIGURE A KEY PART KEY PART NO. MODEL NUMBER P591 The model number will be found on a label attached to the motor housing. NUMBER DESCRIPTION QTY 1 660212057 Screw (M4 x 7 mm, Pan Hd 1 22 204757001 Blade Support Assembly...

Parts Diagram
Page 4
MODEL NUMBER P591 BLACK RED YELLOW BLUE BLACK CONTACT PLATE WIRING DIAGRAM 4 MOTOR SWITCH RYOBI SHEARS -
MODEL NUMBER P591 BLACK RED YELLOW BLUE BLACK CONTACT PLATE WIRING DIAGRAM 4 MOTOR SWITCH RYOBI SHEARS -


