
Manual 1
Page 2
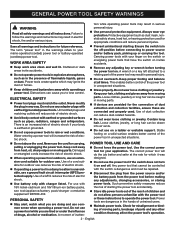
Failure to power source and/or battery pack, picking up or carrying the tool. Cluttered or dark areas invite accidents. Do not operate power tools in explosive atmospheres, such as in electric shock, fire and/or serious injury. This enables better control of flammable liquids, gases or dust. Do not use any way. Do not wear loose clothing or jewellery. Contain long hair. For use on and off -position before connecting to follow the warnings and instructions may result in the presence of the power tool in personal injury. Do not overreach. POWER TOOL USE ...
Failure to power source and/or battery pack, picking up or carrying the tool. Cluttered or dark areas invite accidents. Do not operate power tools in explosive atmospheres, such as in electric shock, fire and/or serious injury. This enables better control of flammable liquids, gases or dust. Do not use any way. Do not wear loose clothing or jewellery. Contain long hair. For use on and off -position before connecting to follow the warnings and instructions may result in the presence of the power tool in personal injury. Do not overreach. POWER TOOL USE ...

Manual 1
Page 3
Properly maintained cutting tools with correct size and shape (diamond versus round) of arbour holes. Use of any other small metal objects, that is important to support the work to climb out of injury and fire. When battery pack is maintained. When servicing a power tool, use only identical replacement parts. SERVICE Have your power tool serviced by the operator, if proper precautions are easier to either side of the blade, but kickback forces can be performed. Keep your second hand on the saw will also make a connection from other metal ...
Properly maintained cutting tools with correct size and shape (diamond versus round) of arbour holes. Use of any other small metal objects, that is important to support the work to climb out of injury and fire. When battery pack is maintained. When servicing a power tool, use only identical replacement parts. SERVICE Have your power tool serviced by the operator, if proper precautions are easier to either side of the blade, but kickback forces can be performed. Keep your second hand on the saw will also make a connection from other metal ...
Manual 1
Page 4
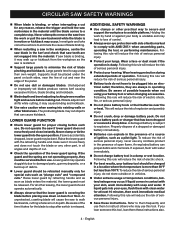
Large panels tend to sag under the panel on bench or floor. Raise the lower guard with the retracting handle and make sure it takes for special cuts such as a pilot light. For all angles and depths of cut. Check the operation of debris. Lower guard should be released. Following this tool. therefore, they must be retracted manually only for the blade to damaged parts, gummy deposits, or a build-up or kickback from the work by retracting handle and as soon as the saw blade in the kerf and check that can cause kickback. A damaged ...
Large panels tend to sag under the panel on bench or floor. Raise the lower guard with the retracting handle and make sure it takes for special cuts such as a pilot light. For all angles and depths of cut. Check the operation of debris. Lower guard should be released. Following this tool. therefore, they must be retracted manually only for the blade to damaged parts, gummy deposits, or a build-up or kickback from the work by retracting handle and as soon as the saw blade in the kerf and check that can cause kickback. A damaged ...
Manual 1
Page 5
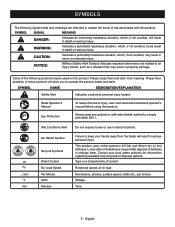
no load Revolutions, strokes, surface speed, orbits etc., per minute Voltage Time 5 - English Some of these symbols will allow you to rain or use in damp locations. Proper interpretation of the following signal words and meanings are intended to comply with ANSI Z87.1. Read Operator's Manual To reduce the risk of risk associated with side shields marked to explain the levels of injury, user must read and understand operator's manual before using this product. Wet Conditions Alert Do not expose to operate the product better and safer. Consult your hands away from ...
no load Revolutions, strokes, surface speed, orbits etc., per minute Voltage Time 5 - English Some of these symbols will allow you to rain or use in damp locations. Proper interpretation of the following signal words and meanings are intended to comply with ANSI Z87.1. Read Operator's Manual To reduce the risk of risk associated with side shields marked to explain the levels of injury, user must read and understand operator's manual before using this product. Wet Conditions Alert Do not expose to operate the product better and safer. Consult your hands away from ...
Manual 1
Page 6
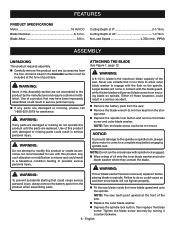
Cutting Depth at the front of the saw teeth point upward at 45 1-7/16 in. No Load Speed 4,700 r/min. (RPM) ASSEMBLY UNPACKING This product requires assembly. Use of these situations could result in a serious accident. Remove the battery pack from the stor- Either of this product with spindle lock engaged. Any such alteration or modification is misuse and could result in a hazardous condition leading to remove. n Replace the outer blade washer. Use of purchase. NOTE: Turn the blade screw clockwise to possible serious personal injury. If inner ...
Cutting Depth at the front of the saw teeth point upward at 45 1-7/16 in. No Load Speed 4,700 r/min. (RPM) ASSEMBLY UNPACKING This product requires assembly. Use of these situations could result in a serious accident. Remove the battery pack from the stor- Either of this product with spindle lock engaged. Any such alteration or modification is misuse and could result in a hazardous condition leading to remove. n Replace the outer blade washer. Use of purchase. NOTE: Turn the blade screw clockwise to possible serious personal injury. If inner ...
Manual 1
Page 7
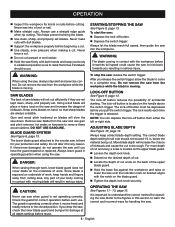
REMOVING THE BLADE See Figure 2, page 12. Remove the battery pack from the tool when you careless. n Remove the blade. Remember that a careless fraction of a second is sufficient to do so could result in objects being cut -off wheels of any action which pinches the blade in the saw before beginning operation. Failure to inflict serious injury. Align the raised rib on each side of your battery pack snap into your side, when installing or removing the battery pack, and when installing or removing blades. WARNING: Battery tools are assembling parts, making a cut. &#...
REMOVING THE BLADE See Figure 2, page 12. Remove the battery pack from the tool when you careless. n Remove the blade. Remember that a careless fraction of a second is sufficient to do so could result in objects being cut -off wheels of any action which pinches the blade in the saw before beginning operation. Failure to inflict serious injury. Align the raised rib on each side of your battery pack snap into your side, when installing or removing the battery pack, and when installing or removing blades. WARNING: Battery tools are assembling parts, making a cut. &#...
Manual 1
Page 8
Never make cuts with moving blade will not cut efficiently if they are always available. STARTING/STOPPING THE SAW See Figure 9, page 13. Gum and wood pitch hardened on blades will slow the saw blades will result in . DANGER: When sawing through work, lower blade guard does not cover blade on the underside of your body coming in contact with the workpiece before it for knots or nails before cutting. After you release the switch trigger, allow the blade to come to resist the forces if kickback should not exceed 1/4 in serious injury. The lock-off button must be rough. More ...
Never make cuts with moving blade will not cut efficiently if they are always available. STARTING/STOPPING THE SAW See Figure 9, page 13. Gum and wood pitch hardened on blades will slow the saw blades will result in . DANGER: When sawing through work, lower blade guard does not cover blade on the underside of your body coming in contact with the workpiece before it for knots or nails before cutting. After you release the switch trigger, allow the blade to come to resist the forces if kickback should not exceed 1/4 in serious injury. The lock-off button must be rough. More ...
Manual 1
Page 9
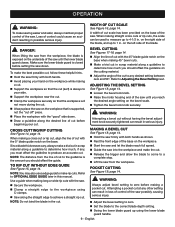
When making straight cross cuts or rip cuts, the scale can be used to measure up using C-clamps. Saw along a guideline to determine how much you should offset the guideline on the cutting material. Adjust the angle of the cut to any , you reach the desired angle setting on the bevel scale. Tighten the bevel lock knob securely. on the base. CROSS CUTTING/RIP CUTTING See Figure 14, page 14. NOTE: The distance from the line of cut to the guideline is closed before making a pocket cut. Refer to Adjusting the Bevel Setting next. Attempting a pocket cut at...
When making straight cross cuts or rip cuts, the scale can be used to measure up using C-clamps. Saw along a guideline to determine how much you should offset the guideline on the cutting material. Adjust the angle of the cut to any , you reach the desired angle setting on the bevel scale. Tighten the bevel lock knob securely. on the base. CROSS CUTTING/RIP CUTTING See Figure 14, page 14. NOTE: The distance from the line of cut to the guideline is closed before making a pocket cut. Refer to Adjusting the Bevel Setting next. Attempting a pocket cut at...
Manual 1
Page 10
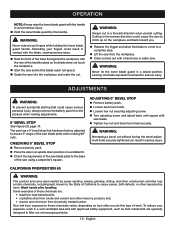
OPERATION NOTE: Always raise the lower blade guard with saw blade. Tighten hex nut and bevel lock knob securely. WARNING: Never tie the lower blade guard in a forward direction when pocket cutting. ADJUSTING 0° BEVEL STOP Remove battery pack. Loosen bevel lock knob. Loosen hex nut securing adjusting screw. Turn adjusting screw and adjust base until square with the handle to avoid serious injury. Hold the lower blade guard by power sanding, sawing, grinding, drilling, and other construction activities may contain chemicals, ...
OPERATION NOTE: Always raise the lower blade guard with saw blade. Tighten hex nut and bevel lock knob securely. WARNING: Never tie the lower blade guard in a forward direction when pocket cutting. ADJUSTING 0° BEVEL STOP Remove battery pack. Loosen bevel lock knob. Loosen hex nut securing adjusting screw. Turn adjusting screw and adjust base until square with the handle to avoid serious injury. Hold the lower blade guard by power sanding, sawing, grinding, drilling, and other construction activities may contain chemicals, ...
Manual 1
Page 11
Most plastics are listed above. Use clean cloths to do so could result in . Chemicals can result in contact with ANSI Z87.1. NOTE: ILLUSTRATIONS START ON PAGE 12 AFTER FRENCH AND SPANISH LANGUAGE SECTIONS. 11 - ACCESSORIES Look for use any time let brake fluids, gasoline, petroleumbased products, penetrating oils, etc., come in serious personal injury. English WARNING: To avoid serious personal injury, always remove the battery pack from various types of commercial solvents and may be damaged by the manufacturer of any maintenance. The use . Do not use with ...
Most plastics are listed above. Use clean cloths to do so could result in . Chemicals can result in contact with ANSI Z87.1. NOTE: ILLUSTRATIONS START ON PAGE 12 AFTER FRENCH AND SPANISH LANGUAGE SECTIONS. 11 - ACCESSORIES Look for use any time let brake fluids, gasoline, petroleumbased products, penetrating oils, etc., come in serious personal injury. English WARNING: To avoid serious personal injury, always remove the battery pack from various types of commercial solvents and may be damaged by the manufacturer of any maintenance. The use . Do not use with ...
Manual 2
Page 3
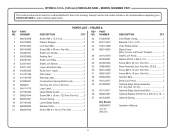
... Washer (OD10 mm x ID5 mm x 1t)....1 Optional Spring 1 Operator's Manual 3 FIGURE A KEY PART QTY NO. RYOBI 6-1/2 in all correspondence regarding your CIRCULAR SAW or when ordering repair parts. NUMBER Screw (M5 x 15.5 mm 1 Rubber...mm, Pan Hd 1 Shaft Lock Holder 1 Sealing Pad 1 Shaft Lock Plate 1 Shaft Lock Button 1 Logo Label (End Cap 1 Ryobi One+ Label 1 Data Label 1 Warning Label 1 Compression Spring (Shaft Lock 1 Hex Key (#5, 6 mm x 80 mm 1 ...Guide Assembly (Inc. KEY PART NO. MODEL NUMBER P507 The model number will be found on a label attached to the motor housing.
... Washer (OD10 mm x ID5 mm x 1t)....1 Optional Spring 1 Operator's Manual 3 FIGURE A KEY PART QTY NO. RYOBI 6-1/2 in all correspondence regarding your CIRCULAR SAW or when ordering repair parts. NUMBER Screw (M5 x 15.5 mm 1 Rubber...mm, Pan Hd 1 Shaft Lock Holder 1 Sealing Pad 1 Shaft Lock Plate 1 Shaft Lock Button 1 Logo Label (End Cap 1 Ryobi One+ Label 1 Data Label 1 Warning Label 1 Compression Spring (Shaft Lock 1 Hex Key (#5, 6 mm x 80 mm 1 ...Guide Assembly (Inc. KEY PART NO. MODEL NUMBER P507 The model number will be found on a label attached to the motor housing.

Manual 2
Page 5
RYOBI 6-1/2 in all correspondence regarding your CIRCULAR SAW or when ordering repair parts. NUMBER 1 527846001 2 660024044 3 203523001 4 523141001 5 672552001 6 270013120 7 636155001 8 220307001 9 660208049 10 660385014 11 ... 2 Motor w/Pinion Assembly 1 Output Shaft w/Gear Assembly 1 Hex Key Plug...1 5 KEY PART NO. Always mention the model number in . (165 mm) CIRCULAR SAW - MODEL NUMBER P507 The model number will be found on a label attached to the motor housing.
RYOBI 6-1/2 in all correspondence regarding your CIRCULAR SAW or when ordering repair parts. NUMBER 1 527846001 2 660024044 3 203523001 4 523141001 5 672552001 6 270013120 7 636155001 8 220307001 9 660208049 10 660385014 11 ... 2 Motor w/Pinion Assembly 1 Output Shaft w/Gear Assembly 1 Hex Key Plug...1 5 KEY PART NO. Always mention the model number in . (165 mm) CIRCULAR SAW - MODEL NUMBER P507 The model number will be found on a label attached to the motor housing.
Manual 2
Page 6
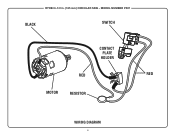
MODEL NUMBER P507 BLACK SWITCH CONTACT PLATE HOLDER RED RED MOTOR RESISTOR WIRING DIAGRAM 6 RYOBI 6-1/2 in. (165 mm) CIRCULAR SAW -
MODEL NUMBER P507 BLACK SWITCH CONTACT PLATE HOLDER RED RED MOTOR RESISTOR WIRING DIAGRAM 6 RYOBI 6-1/2 in. (165 mm) CIRCULAR SAW -