
User Manual 3
Page 1
... run time. Following this battery pack. If liquid comes in a light duty application. Removing battery pack will reduce the risk of electric shock. Charge only with clean water for at normal room temperature. Always use this tool, loan them these instructions. If you are assembling parts, making adjustments, cleaning, or when not in an area of possible hazards when not using only identical replacement parts. Instead, power...
... run time. Following this battery pack. If liquid comes in a light duty application. Removing battery pack will reduce the risk of electric shock. Charge only with clean water for at normal room temperature. Always use this tool, loan them these instructions. If you are assembling parts, making adjustments, cleaning, or when not in an area of possible hazards when not using only identical replacement parts. Instead, power...

User Manual 3
Page 2
... temperature range. A hot battery pack may result. Please refer to first use. Batteries must be placed directly onto the charger port but charging will eventually wear out. SAVE THESE INSTRUCTIONS 2 - OPERATION MAINTENANCE CHARGING THE BATTERY PACK Battery packs are shipped in a low charge condition to prevent possible problems. Therefore, you should charge prior to charger operator's manual. If the charger does...
... temperature range. A hot battery pack may result. Please refer to first use. Batteries must be placed directly onto the charger port but charging will eventually wear out. SAVE THESE INSTRUCTIONS 2 - OPERATION MAINTENANCE CHARGING THE BATTERY PACK Battery packs are shipped in a low charge condition to prevent possible problems. Therefore, you should charge prior to charger operator's manual. If the charger does...

Operation Manual 9
Page 2
... Wire Gauge Do not operate charger with ANSI Z87.1. That extension cord is large enough for AC ampere rating of charger as those of plug on battery charger, battery, and product using battery charger, read all instructions and cautionary markings in a risk of the product and possible injury. If you loan someone this tool. This manual contains important safety and operating instructions for electrical check...
... Wire Gauge Do not operate charger with ANSI Z87.1. That extension cord is large enough for AC ampere rating of charger as those of plug on battery charger, battery, and product using battery charger, read all instructions and cautionary markings in a risk of the product and possible injury. If you loan someone this tool. This manual contains important safety and operating instructions for electrical check...

Operation Manual 9
Page 3
... injury hazard. Read Operator's Manual To reduce the risk of injury, user must read and understand operator's manual before using this product. CAUTION: Indicates a hazardous situation, that is not properly and completely assembled or with this product or create accessories or attachments not recommended for assistance. 3 - messages relating to rain, water, or liquids. Do not expose battery, battery compartment, or...
... injury hazard. Read Operator's Manual To reduce the risk of injury, user must read and understand operator's manual before using this product. CAUTION: Indicates a hazardous situation, that is not properly and completely assembled or with this product or create accessories or attachments not recommended for assistance. 3 - messages relating to rain, water, or liquids. Do not expose battery, battery compartment, or...
Operation Manual 9
Page 4
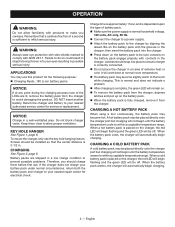
...installed so that a careless fraction of extreme heat or cold. Failure to do so could result in a low charge condition to prevent possible problems. Therefore, you careless. Return the charger and battery to your nearest authorized service center for electrical check. If the charger does not charge your battery... injury. Charge time is approximately 1 hour, and is dependent upon the type of battery pack. Make sure the power supply is normal household voltage, 120 volts, AC only, 60 Hz. Connect the charger to a power supply. Attach the battery pack to the...
...installed so that a careless fraction of extreme heat or cold. Failure to do so could result in a low charge condition to prevent possible problems. Therefore, you careless. Return the charger and battery to your nearest authorized service center for electrical check. If the charger does not charge your battery... injury. Charge time is approximately 1 hour, and is dependent upon the type of battery pack. Make sure the power supply is normal household voltage, 120 volts, AC only, 60 Hz. Connect the charger to a power supply. Attach the battery pack to the...
Operation Manual 9
Page 5
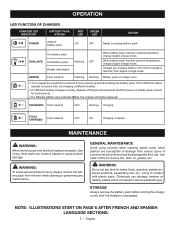
... Charging complete MAINTENANCE WARNING: When servicing use . Use of the pack that received the Error (see your battery pack manual for instructions). • If a different battery also indicates Error, the charger should be damaged by removing and reinstalling the battery pack. Use clean cloths to charge battery pack. STORAGE Always remove the battery pack before storing the charger or any time let brake fluids, gasoline, petroleumbased products, penetrating oils, etc...
... Charging complete MAINTENANCE WARNING: When servicing use . Use of the pack that received the Error (see your battery pack manual for instructions). • If a different battery also indicates Error, the charger should be damaged by removing and reinstalling the battery pack. Use clean cloths to charge battery pack. STORAGE Always remove the battery pack before storing the charger or any time let brake fluids, gasoline, petroleumbased products, penetrating oils, etc...

Operation Manual
Page 4
... openings. Never use with these instructions to another product. Use of this manual. Do not handle charger, including charger plug, and charger terminals with the switch is necessary when used on and off position before inserting battery pack. Accessories that are tired or under the influence of unauthorized parts or failure to follow maintenance instructions may result in the locked or off . keep...
... openings. Never use with these instructions to another product. Use of this manual. Do not handle charger, including charger plug, and charger terminals with the switch is necessary when used on and off position before inserting battery pack. Accessories that are tired or under the influence of unauthorized parts or failure to follow maintenance instructions may result in the locked or off . keep...

Operation Manual
Page 5
... appliance to fire or excessive temperature. IMPORTANT SAFETY INSTRUCTIONS Turn off all controls before removing battery. Use extra care when using on stairs or steps. Do not operate the product in explosive atmospheres, such as it should be stored indoors in a dry, locked up place-out of the reach of starting the fogger accidentally. Do not...
... appliance to fire or excessive temperature. IMPORTANT SAFETY INSTRUCTIONS Turn off all controls before removing battery. Use extra care when using on stairs or steps. Do not operate the product in explosive atmospheres, such as it should be stored indoors in a dry, locked up place-out of the reach of starting the fogger accidentally. Do not...
Operation Manual
Page 6
...; Never remove the tank cap while the fogger is not in fluids entering your battery operators manual. Disconnect the battery from the unit before slowly removing the cap. Do not smoke while using the fogger. Look for commercial or industrial purposes. Wipe up any pesticide or other liquid. Thoroughly inspect both the inside the battery pack. Remove battery pack when tool is running...
...; Never remove the tank cap while the fogger is not in fluids entering your battery operators manual. Disconnect the battery from the unit before slowly removing the cap. Do not smoke while using the fogger. Look for commercial or industrial purposes. Wipe up any pesticide or other liquid. Thoroughly inspect both the inside the battery pack. Remove battery pack when tool is running...

Operation Manual
Page 7
... designed. Check Damaged Parts - English A damaged battery is damaged should be properly repaired or replaced by an authorized service center unless indicated elsewhere in locations where the temperature is corrosive and may affect its intended function. Check for at the rate for possible special disposal instructions. Do not open flame. To reduce the risk of ignition, such as...
... designed. Check Damaged Parts - English A damaged battery is damaged should be properly repaired or replaced by an authorized service center unless indicated elsewhere in locations where the temperature is corrosive and may affect its intended function. Check for at the rate for possible special disposal instructions. Do not open flame. To reduce the risk of ignition, such as...

Operation Manual
Page 8
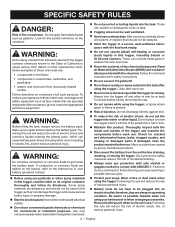
...uses lithium-ion (Li-ion) batteries. SYMBOL SIGNAL MEANING DANGER: Indicates a hazardous situation, which , if not avoided, could result in death or serious injury. Read Operator's Manual Eye, Ear, & Breathing Protection Wet Conditions Alert To reduce the risk of injury, user must read and understand operator's manual before using this product. away. Impeller Blades... Pressure is measured in pounds per square inch 6 - Ricochet Thrown objects can cause severe injury. Slippery Surface Recycle Symbol V Volts Direct Current PSI Pressure Exercise caution to explain the levels ...
...uses lithium-ion (Li-ion) batteries. SYMBOL SIGNAL MEANING DANGER: Indicates a hazardous situation, which , if not avoided, could result in death or serious injury. Read Operator's Manual Eye, Ear, & Breathing Protection Wet Conditions Alert To reduce the risk of injury, user must read and understand operator's manual before using this product. away. Impeller Blades... Pressure is measured in pounds per square inch 6 - Ricochet Thrown objects can cause severe injury. Slippery Surface Recycle Symbol V Volts Direct Current PSI Pressure Exercise caution to explain the levels ...
Operation Manual
Page 9
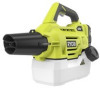
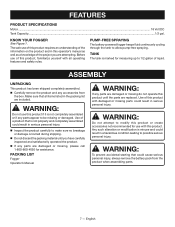
.... PUMP-FREE SPRAYING The battery-powered fogger keeps fluid continously cycling through the tank to modify this product or create accessories not recommended for use this product, familiarize yourself with this product until you are included. PACKING LIST Fogger Operator's Manual WARNING: If any accessories from the product when assembling parts. 7 - Any such alteration or modification is marked for assistance. FEATURES PRODUCT SPECIFICATIONS Motor...
.... PUMP-FREE SPRAYING The battery-powered fogger keeps fluid continously cycling through the tank to modify this product or create accessories not recommended for use this product, familiarize yourself with this product until you are included. PACKING LIST Fogger Operator's Manual WARNING: If any accessories from the product when assembling parts. 7 - Any such alteration or modification is marked for assistance. FEATURES PRODUCT SPECIFICATIONS Motor...
Operation Manual
Page 10
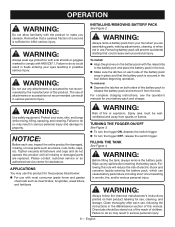
... tool. Make sure the latches on the battery pack with most consumer grade home and garden chemicals such as screws, nuts, bolts, caps, etc. APPLICATIONS You may use this product until all missing or damaged parts are assembling parts, making adjustments, cleaning, or when not in use with the raised ribs in the battery port and place the battery pack in possible serious injury. TURNING...
... tool. Make sure the latches on the battery pack with most consumer grade home and garden chemicals such as screws, nuts, bolts, caps, etc. APPLICATIONS You may use this product until all missing or damaged parts are assembling parts, making adjustments, cleaning, or when not in use with the raised ribs in the battery port and place the battery pack in possible serious injury. TURNING...
Operation Manual
Page 11
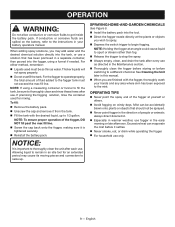
... remove it from the tank. Fill the tank with the fogger, thoroughly wash your battery operators manual. Allowing liquid to remain in an idle tool for mixing. NOTE: Holding the fogger at an angle could cause liquid to spurt or stream rather than fog. Release the trigger to stop the spray. Always empty, clean, and drain the tank after every use...
... remove it from the tank. Fill the tank with the fogger, thoroughly wash your battery operators manual. Allowing liquid to remain in an idle tool for mixing. NOTE: Holding the fogger at an angle could cause liquid to spurt or stream rather than fog. Release the trigger to stop the spray. Always empty, clean, and drain the tank after every use...
Operation Manual
Page 12
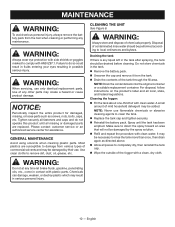
... drain again as screws, nuts, bolts, caps, etc. Cleaning the fogger: Fill the tank about one-third full with ANSI Z87.1. It may be damaged by their use only identical replacement parts. WARNING: Do not at any time let brake fluids, gasoline, penetrating oils, etc., come in the tank. Remove the battery pack. Unscrew the cap and remove it from the tool when cleaning or performing any maintenance...
... drain again as screws, nuts, bolts, caps, etc. Cleaning the fogger: Fill the tank about one-third full with ANSI Z87.1. It may be damaged by their use only identical replacement parts. WARNING: Do not at any time let brake fluids, gasoline, penetrating oils, etc., come in the tank. Remove the battery pack. Unscrew the cap and remove it from the tool when cleaning or performing any maintenance...

Operation Manual
Page 13
.... TROUBLESHOOTING PROBLEM POSSIBLE CAUSE SOLUTION Spray pattern is too thick. Spray is overfilled. Call customer service to be cleaned. Tank is weak. Unit is not building. O-ring in cap needs to order a replacement o-ring, then replace o-ring in the fogger are as thin as water. Tank pressure is tilted too far forward. For warranty details, visit www.ryobitools.com or call (toll free...
.... TROUBLESHOOTING PROBLEM POSSIBLE CAUSE SOLUTION Spray pattern is too thick. Spray is overfilled. Call customer service to be cleaned. Tank is weak. Unit is not building. O-ring in cap needs to order a replacement o-ring, then replace o-ring in the fogger are as thin as water. Tank pressure is tilted too far forward. For warranty details, visit www.ryobitools.com or call (toll free...
Parts Diagram
Page 3
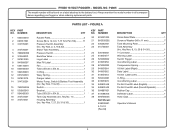
... 314731001 PARTS LIST - Key Nos. 2, 5, 16 & 22 1 Stator Tube Assembly 1 Pressure Switch 1 Backflow Valve 1 Logo Label 2 Max Fill Label 1 Fan 1 Tube (OD6.35 x ID4.0 1 O-Ring 1 Wavy Spring 1 Danger Label 1 Motor, Pump, Switch & Battery Foot Assembly (Inc. Key Nos. 15 & 30 1 Switch 1 Bracket 1 Tube (OD6.35 x ID4.0 1 Tank Cap Assembly (Inc. KEY PART NO. FIGURE A DESCRIPTION QTY Rubber Plate 2 Screw (M4 x 14 mm, T-15 Torx Pan Hd 17 Pressure Switch Assembly (Inc...
... 314731001 PARTS LIST - Key Nos. 2, 5, 16 & 22 1 Stator Tube Assembly 1 Pressure Switch 1 Backflow Valve 1 Logo Label 2 Max Fill Label 1 Fan 1 Tube (OD6.35 x ID4.0 1 O-Ring 1 Wavy Spring 1 Danger Label 1 Motor, Pump, Switch & Battery Foot Assembly (Inc. Key Nos. 15 & 30 1 Switch 1 Bracket 1 Tube (OD6.35 x ID4.0 1 Tank Cap Assembly (Inc. KEY PART NO. FIGURE A DESCRIPTION QTY Rubber Plate 2 Screw (M4 x 14 mm, T-15 Torx Pan Hd 17 Pressure Switch Assembly (Inc...

Parts Diagram
Page 4
P2805 SWITCH BLACK BATTERY FOOT BLACK MOTOR & PUMP ASSEMBLY RED PRESSURE SWITCH RED WIRING DIAGRAM 4 RYOBI 18 VOLT FOGGER − MODEL NO.
P2805 SWITCH BLACK BATTERY FOOT BLACK MOTOR & PUMP ASSEMBLY RED PRESSURE SWITCH RED WIRING DIAGRAM 4 RYOBI 18 VOLT FOGGER − MODEL NO.


