Ryobi P2052 Support and Manuals
Get Help and Manuals for this Ryobi item

Popular Ryobi P2052 Manual Pages
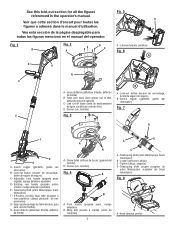
User Manual - Page 2
... las figuras mencionó en el manual del operador. Line cut-off blade (lame de sectionnement de ligne, cuchilla de corte del hilo)
D - Switch trigger (gâchette, gatillo del interruptor)
Fig. 7
E
Fig. 3
B
B
F
H G
A - Lock-out button (bouton de verrouillage, botón de seguro de seguro)
C - Edger guide (guidage du taille-bordure, guí...
User Manual - Page 5
... if the operation is properly installed and securely fastened. Always wear... properly repaired or replaced by an authorized service dealer....parts - They are doing. Don't expose appliance or string trimmer to do the job better and safer at least 50 ft. Use of moving parts. Replace... all instructions before storing, servicing, or changing accessories such as in any moving parts.
&#...
User Manual - Page 6
... Remove or disconnect battery before servicing, cleaning or removing material from ...in. Following this string trimmer can explode in the ...instructions.
Do not open flame. If exposed, flush with local codes for example, metal wire, rope, or the like. Do not use . Do not use them these instructions. To install...Use only the manufacturer's replacement line in the cutting head. The battery...
User Manual - Page 7
...
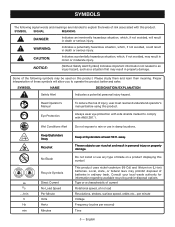
To reduce the risk of injury, user must read and understand operator's manual before using this symbol. Local, state, or federal laws may prohibit disposal...information not related to explain the levels of these symbols will result in death or serious injury. Do not install or use in damp locations. Please study them and learn their meaning.
Thrown objects can ricochet and result ...
User Manual - Page 8
... cutoff blade.
EDGER GUIDE
The edger guide allows the string trimmer to help prevent loss of the project you are attempting.
Before use . TELESCOPING SHAFT
The string trimmer can be adjusted to...of this operator's manual as well as an edger. GRASS DEFLECTOR
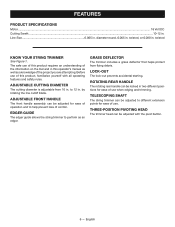
The trimmer includes a grass deflector that helps protect from 10 in . FEATURES
PRODUCT SPECIFICATIONS
Motor...18 Volt DC...
User Manual - Page 9
...with the
holes in the trimmer head. Install supplied screws and tighten by turning clockwise
with Screws Operator's Manual
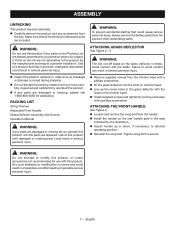
WARNING:
If any parts on the rear handle pole ...the trimmer head with damaged or missing parts could result in serious personal injury.
Remove supplied screws from the handle. n Install the handle on the Packing List are replaced.
Failure...
User Manual - Page 10
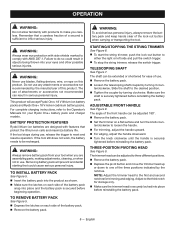
... extended or shortened for trimming and edging. TO INSTALL BATTERY PACK
See Figure 5. Insert the...Ryobi lithium-ion batteries are assembling parts, making adjustments, cleaning, or when not in use , release the trigger to reset and resume operation.
English For complete charging instructions, refer to the Operator's Manuals for storage only. Make sure the trimmer...
User Manual - Page 11
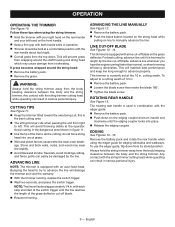
... with the edger guide. Remove the battery pack. Push down on line to manually advance the line. CUTTING TIPS
See Figure 11. Keep the trimmer tilted toward the ...MANUALLY
See Figure 12. Remove the battery pack. Push the black button located on the string head while
pulling on the edging coupler and turn handle end
clockwise until it is currently set...
User Manual - Page 12
...repaired or replaced by their use. Make sure the end of spool retainer.
Pull spool retainer up to be replaced at an Authorized Service Center.
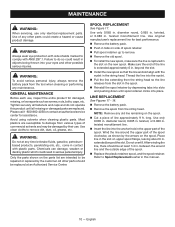
SPOOL REPLACEMENT
See Figure 17. Thread the line into your eyes and other parts...the parts list are replaced. twisted, or 0.080 in .
WARNING:
Always wear eye protection with side shields marked to do not operate this manual.
10...
User Manual - Page 13
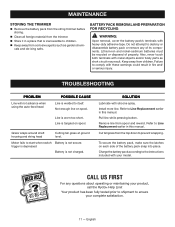
...Replacement earlier in this manual. Charge the battery pack according to the instructions included with your product, call the Ryobi® Help Line! CALL US FIRST
For any of properly.
TROUBLESHOOTING
PROBLEM...questions about operating or maintaining your model. Lithium-ion and nickel-cadmium ...parts as garden chemi- Install more line. Pull line while pressing button.
English
User Manual - Page 14
..., including any defective part, must be performed by the use ;
90 days, if used for any other purpose, such as specified in this operator's manual. The expense of delivering the product to the service center for warranty work must be returned to the owner after repair or replacement will be repaired or replaced without assuming any...
Ryobi P2052 Reviews
We have not received any reviews for Ryobi yet.