
User Manual (English)
Page 8
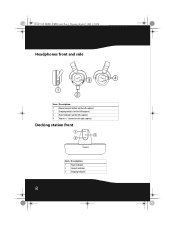
08-1077 RF-WHP01-WHP02.book Page 8 Thursday, March 27, 2008 1:29 PM Headphones front and side 3 4 1 2 Item Description 1 Manual connect button (on the left earpiece) 2 Charging contacts (on the left earpiece) 3 Power indicator (on the right earpiece) Docking station front 1 3 2 Item Description 1 Power indicator 2 Connect indicator 3 Charging indicator 8 button (on the left earpiece) 4 Volume +/-
08-1077 RF-WHP01-WHP02.book Page 8 Thursday, March 27, 2008 1:29 PM Headphones front and side 3 4 1 2 Item Description 1 Manual connect button (on the left earpiece) 2 Charging contacts (on the left earpiece) 3 Power indicator (on the right earpiece) Docking station front 1 3 2 Item Description 1 Power indicator 2 Connect indicator 3 Charging indicator 8 button (on the left earpiece) 4 Volume +/-
User Manual (English)
Page 21
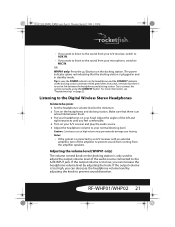
...volume is plugged in and in standby mode. If the output volume is too high, you can increase the headphone volume level by adjusting the knob to connect the system manually using the CONNECT button. The power indicator glows red indicating that the docking station is too low, you ... your A/V receiver and play the audio source. 5 Adjust the headphone volume to the AUX INPUT jack. RF-WHP01/WHP02 21 Tip: In case the POWER indicator on the headphones and the CONNECT indicator on the headphones and docking station. 08-1077 RF-WHP01-WHP02.book Page 21 Thursday, March 27, 2008 1:29 PM • ...
...volume is plugged in and in standby mode. If the output volume is too high, you can increase the headphone volume level by adjusting the knob to connect the system manually using the CONNECT button. The power indicator glows red indicating that the docking station is too low, you ... your A/V receiver and play the audio source. 5 Adjust the headphone volume to the AUX INPUT jack. RF-WHP01/WHP02 21 Tip: In case the POWER indicator on the headphones and the CONNECT indicator on the headphones and docking station. 08-1077 RF-WHP01-WHP02.book Page 21 Thursday, March 27, 2008 1:29 PM • ...


