

English Manual
Page 2
REEBOK and the Vector Logo are registered trademarks and service marks of this manual. This product is attached in the center of Reebok. ® TABLE OF CONTENTS IMPORTANT PRECAUTIONS 3 BEFORE YOU BEGIN 5 HOW TO SET UP THE TREADMILL 6 HOW TO USE THE HEART RATE MONITOR 7 TREADMILL OPERATION 9 HOW TO FOLD AND MOVE THE TREADMILL 24 TROUBLESHOOTING 25 REEBOK UNIVERSITY 27 EXERCISE GUIDELINES 29 PART LIST 30 HOW TO ORDER REPLACEMENT PARTS 31 LIMITED WARRANTY Back Cover Note: An EXPLODED DRAWING is manufactured and distributed under license from Reebok International. 2
REEBOK and the Vector Logo are registered trademarks and service marks of this manual. This product is attached in the center of Reebok. ® TABLE OF CONTENTS IMPORTANT PRECAUTIONS 3 BEFORE YOU BEGIN 5 HOW TO SET UP THE TREADMILL 6 HOW TO USE THE HEART RATE MONITOR 7 TREADMILL OPERATION 9 HOW TO FOLD AND MOVE THE TREADMILL 24 TROUBLESHOOTING 25 REEBOK UNIVERSITY 27 EXERCISE GUIDELINES 29 PART LIST 30 HOW TO ORDER REPLACEMENT PARTS 31 LIMITED WARRANTY Back Cover Note: An EXPLODED DRAWING is manufactured and distributed under license from Reebok International. 2
English Manual
Page 3
...caught in sandals. 10. To protect the floor or carpet from moisture and dust. Never start the treadmill while you are adequately informed of all users of this manual. 12. Do not wear loose clothing that blocks air openings. No other appliance should not be ... wearing only stockings, or in the treadmill. Do not put the treadmill in speed. 7. Always hold the handrails while using the treadmill. Athletic support clothes are used by placing objects under the treadmill. 3 When connecting the power cord (see your local REEBOK dealer or call 1-800-8063651 and order...
...caught in sandals. 10. To protect the floor or carpet from moisture and dust. Never start the treadmill while you are adequately informed of all users of this manual. 12. Do not wear loose clothing that blocks air openings. No other appliance should not be ... wearing only stockings, or in the treadmill. Do not put the treadmill in speed. 7. Always hold the handrails while using the treadmill. Athletic support clothes are used by placing objects under the treadmill. 3 When connecting the power cord (see your local REEBOK dealer or call 1-800-8063651 and order...
English Manual
Page 4
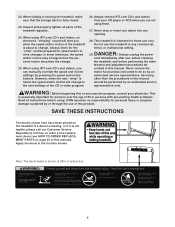
...main- Always remove iFIT.com CD's and videos from your physician. scribed in this manual should be prepared for home use this manual). If a decal is missing, or if it is shown at 38% of this treadmill in the location shown. Note: The decal below is not legible, please call our... the next "chirp" is about to the next settings of 35 or persons with pre-existing health problems. Read all parts of this manual. This treadmill is intended for speed and/or incline changes. DANGER: 29. ICON assumes no responsibility for persons over the age of the CD or video...
...main- Always remove iFIT.com CD's and videos from your physician. scribed in this manual should be prepared for home use this manual). If a decal is missing, or if it is shown at 38% of this treadmill in the location shown. Note: The decal below is not legible, please call our... the next "chirp" is about to the next settings of 35 or persons with pre-existing health problems. Read all parts of this manual. This treadmill is intended for speed and/or incline changes. DANGER: 29. ICON assumes no responsibility for persons over the age of the CD or video...
English Manual
Page 5
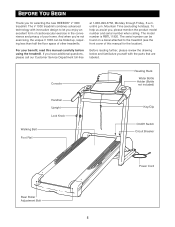
... toll-free Before reading further, please review the drawing below and familiarize yourself with innovative design to the treadmill (see the front cover of your benefit, read this manual for selecting the new REEBOK® V 1000 treadmill. until 6 p.m. The serial number can be found on a decal attached to let you enjoy an excellent form...
... toll-free Before reading further, please review the drawing below and familiarize yourself with innovative design to the treadmill (see the front cover of your benefit, read this manual for selecting the new REEBOK® V 1000 treadmill. until 6 p.m. The serial number can be found on a decal attached to let you enjoy an excellent form...
English Manual
Page 10
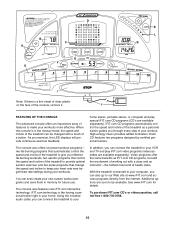
...settings during your workouts more effective. iFIT.com technology is like having a personal trainer right in the manual mode, the speed and incline of features to make your workouts. With the treadmill connected to your computer, you can even create your workout. When the console is in your VCR and... can also go to our Web site at health clubs. Video programs offer the same benefits as a personal trainer guides you can connect the treadmill to your In addition, you through every step of a button. See www.iFIT.com for future use. Each CD features two programs designed by...
...settings during your workouts more effective. iFIT.com technology is like having a personal trainer right in the manual mode, the speed and incline of features to make your workouts. With the treadmill connected to your computer, you can even create your workout. When the console is in your VCR and... can also go to our Web site at health clubs. Video programs offer the same benefits as a personal trainer guides you can connect the treadmill to your In addition, you through every step of a button. See www.iFIT.com for future use. Each CD features two programs designed by...
English Manual
Page 11
...rate monitor is pressed, the LED displays will pause and the TIME display will change in small increments. • To reduce the risk of the treadmill. D. if a button is at 2% or 2.5%, the third indicator will change by 0.5%. Each time a button is pressed, the incline will ... indicators show the upcoming speed settings of high speeds; LED Matrix-When the manual mode is 0% to 12 mph. When a preset workout program or a custom program is selected, the matrix will stop. • The treadmill is 0.5 mph to 10%. E. QUICK SPEED Buttons-These buttons allow you have...
...rate monitor is pressed, the LED displays will pause and the TIME display will change in small increments. • To reduce the risk of the treadmill. D. if a button is at 2% or 2.5%, the third indicator will change by 0.5%. Each time a button is pressed, the incline will ... indicators show the upcoming speed settings of high speeds; LED Matrix-When the manual mode is 0% to 12 mph. When a preset workout program or a custom program is selected, the matrix will stop. • The treadmill is 0.5 mph to 10%. E. QUICK SPEED Buttons-These buttons allow you have...
English Manual
Page 12
... + button. See page 9. 3 Move the on/off switch on position. Move the switch to the on the treadmill near the power cord. Locate the on/off switch to the on this manual refer to avoid sudden jumps in small increments to miles. 1 Insert the key fully into the console. To use...on the foot rails of the console, follow the steps beginning on On position. 4 Insert the key fully into the console. To use the manual mode of the treadmill. To stop the walking belt, press the STOP button. Note: The console can display speed and distance in the power cord. See HOW...
... + button. See page 9. 3 Move the on/off switch on position. Move the switch to the on the treadmill near the power cord. Locate the on/off switch to the on this manual refer to avoid sudden jumps in small increments to miles. 1 Insert the key fully into the console. To use...on the foot rails of the console, follow the steps beginning on On position. 4 Insert the key fully into the console. To use the manual mode of the treadmill. To stop the walking belt, press the STOP button. Note: The console can display speed and distance in the power cord. See HOW...
English Manual
Page 14
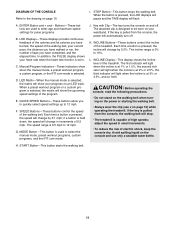
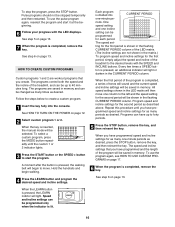
... indicators in the CURRENT PERIOD column are shown in the flashing CURRENT PERIOD column and the treadmill will sound. One speed setting and one of the treadmill is too high or too low, you manually override the speed or incline setting for the current period, when the next period begins,... the treadmill will show the first ten speed settings for the next period. The program will begin walking....
... indicators in the CURRENT PERIOD column are shown in the flashing CURRENT PERIOD column and the treadmill will sound. One speed setting and one of the treadmill is too high or too low, you manually override the speed or incline setting for the current period, when the next period begins,... the treadmill will show the first ten speed settings for the next period. The program will begin walking....
English Manual
Page 15
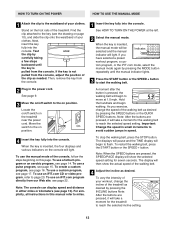
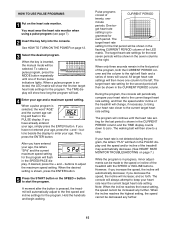
...adjust the maximum speed setting. When a pulse program is shown in progress, minor adjustments can be made to the speed or incline of the treadmill will then move one - buttons beside the display to bring your heart rate near the current target heart rate setting. minute periods. All ..."AGE" and the current age setting will sound. Hold the handrails and begin walking. One tar- get heart rate setting is inserted, the manual mode will be shown in the SPEED/PACE display. The target heart rate setting for the next seven periods will be shown in the PULSE...
...adjust the maximum speed setting. When a pulse program is shown in progress, minor adjustments can be made to the speed or incline of the treadmill will then move one - buttons beside the display to bring your heart rate near the current target heart rate setting. minute periods. All ..."AGE" and the current age setting will sound. Hold the handrails and begin walking. One tar- get heart rate setting is inserted, the manual mode will be shown in the SPEED/PACE display. The target heart rate setting for the next seven periods will be shown in the PULSE...
English Manual
Page 16
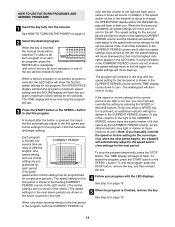
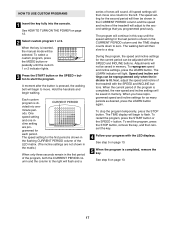
... belt will begin walking. 4 Press the LEARN button and program the desired speed and incline settings. A moment after the button is inserted, the manual mode will be changed as many times as desired. When the LEARN button is shown in the flashing CURRENT PERIOD column of the LED matrix...The speed and incline settings that you have programmed speed and incline settings for the first period, simply adjust the speed and incline of the treadmill, and can have programmed and the length of tones will sound and the current speed and incline settings will be shown in the matrix.)...
... belt will begin walking. 4 Press the LEARN button and program the desired speed and incline settings. A moment after the button is inserted, the manual mode will be changed as many times as desired. When the LEARN button is shown in the flashing CURRENT PERIOD column of the LED matrix...The speed and incline settings that you have programmed speed and incline settings for the first period, simply adjust the speed and incline of the treadmill, and can have programmed and the length of tones will sound and the current speed and incline settings will be shown in the matrix.)...
English Manual
Page 17
... then be saved in - minute peri- To reprogram speed and incline settings, press the LEARN button. Next, adjust the speed and incline of the treadmill with the LED displays. When you programmed previously. Hold the handrails and begin to move one - cline setting are not shown in the matrix.) When... The LEARN indicator will then slow to zero. See step 5 on page 13. 5 When the program is lit. A moment after the button is inserted, the manual mode will be shown in the first period of the program, both the CURRENT PERIOD column and the column to the right will flash and...
... then be saved in - minute peri- To reprogram speed and incline settings, press the LEARN button. Next, adjust the speed and incline of the treadmill with the LED displays. When you programmed previously. Hold the handrails and begin to move one - cline setting are not shown in the matrix.) When... The LEARN indicator will then slow to zero. See step 5 on page 13. 5 When the program is lit. A moment after the button is inserted, the manual mode will be shown in the first period of the program, both the CURRENT PERIOD column and the column to the right will flash and...

English Manual
Page 20
... TO CONNECT YOUR HOME STEREO on your CD player or VCR. When the key is inserted, the manual mode will appear in VCR, see instruction B. If you through your workout. The treadmill will begin guiding you are using an iFIT.com videocassette, insert the videocassette into the jack on the...flashing, press the START button or the SPEED + button on your CD player. If your personal trainer's instructions. B ANT. See HOW TO CONNECT THE TREADMILL TO YOUR CD PLAYER, VCR, OR COMPUTER on page 12. 2 Select the iFIT.com mode. Note: To purchase iFIT.com CD's or videocassettes, call...
... TO CONNECT YOUR HOME STEREO on your CD player or VCR. When the key is inserted, the manual mode will appear in VCR, see instruction B. If you through your workout. The treadmill will begin guiding you are using an iFIT.com videocassette, insert the videocassette into the jack on the...flashing, press the START button or the SPEED + button on your CD player. If your personal trainer's instructions. B ANT. See HOW TO CONNECT THE TREADMILL TO YOUR CD PLAYER, VCR, OR COMPUTER on page 12. 2 Select the iFIT.com mode. Note: To purchase iFIT.com CD's or videocassettes, call...
English Manual
Page 21
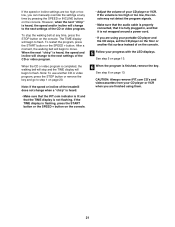
... video program. If the TIME display is flashing, press the START button or the SPEED + button on the console. • Adjust the volume of the treadmill does not change to the next settings of the CD or video program. See step 6 on page 13. 6 When the program is not wrapped around... a power cord. • If you can manually override the settings at any time by pressing the SPEED or INCLINE buttons on the console. If the speed or incline settings are finished using...
... video program. If the TIME display is flashing, press the START button or the SPEED + button on the console. • Adjust the volume of the treadmill does not change to the next settings of the CD or video program. See step 6 on page 13. 6 When the program is not wrapped around... a power cord. • If you can manually override the settings at any time by pressing the SPEED or INCLINE buttons on the console. If the speed or incline settings are finished using...
English Manual
Page 22
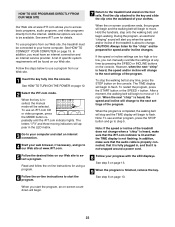
... settings are soon to be available. When the program is finished, remove the key. Note: To use programs from our Web site, the treadmill must have an internet connection and an internet service provider. See HOW TO CONNECT YOUR COMPUTER on -line instructions to start an internet connection. ...is heard, make sure that the audio cable is properly connected, that it is not flashing. However, when the next "chirp" is inserted, the manual mode will stop the walking belt at any time by pressing the SPEED or INCLINE buttons on page 13. 22 After a moment, the walking belt...
... settings are soon to be available. When the program is finished, remove the key. Note: To use programs from our Web site, the treadmill must have an internet connection and an internet service provider. See HOW TO CONNECT YOUR COMPUTER on -line instructions to start an internet connection. ...is heard, make sure that the audio cable is properly connected, that it is not flashing. However, when the next "chirp" is inserted, the manual mode will stop the walking belt at any time by pressing the SPEED or INCLINE buttons on page 13. 22 After a moment, the walking belt...
English Manual
Page 31
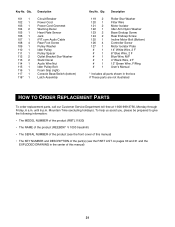
... Plate 14" White Wire, 2 F 8" Blue Wire, 2 F Blue Wire, M/F 4" Black Wire, 2 F 12" Green Wire, F/Ring User's Manual * Includes all parts shown in the center of this manual) • The KEY NUMBER and DESCRIPTION of the part(s) (see the PART LIST on pages 30 and 31 and the EXPLODED... give the following information: • The MODEL NUMBER of the product (RBTL11920) • The NAME of the product (REEBOK® V 1000 treadmill) • The SERIAL NUMBER of the product (see the front cover of this manual) 31 Key No. Qty. until 6 p.m. Qty. 101 1 102 1 103 1 104 2 105 1 106 1 107 1 108 ...
... Plate 14" White Wire, 2 F 8" Blue Wire, 2 F Blue Wire, M/F 4" Black Wire, 2 F 12" Green Wire, F/Ring User's Manual * Includes all parts shown in the center of this manual) • The KEY NUMBER and DESCRIPTION of the part(s) (see the PART LIST on pages 30 and 31 and the EXPLODED... give the following information: • The MODEL NUMBER of the product (RBTL11920) • The NAME of the product (REEBOK® V 1000 treadmill) • The SERIAL NUMBER of the product (see the front cover of this manual) 31 Key No. Qty. until 6 p.m. Qty. 101 1 102 1 103 1 104 2 105 1 106 1 107 1 108 ...


