
User Guide
Page 2
... Diagram 4 LCD Status Display 4 Setup Routine and Procedures 4 Enter Setup Mode 5 Exit Setup Mode 5 Code Entry 6 Code List Entry 6 Code Search 6-7 Code Identification 7 Code Identification Chart 8 Learning 8 Learning Tips 8 Code Learning 9 Learning Commands 9 Clear All Stored Learned Commands Under a Component Mode 10 SmartMacro™ Key Operations 10 Program a SmartMacro 10-11 Execute a SmartMacro 11 Delete a Single SmartMacro 11-12 Delete ALL SmartMacros 12 Event Timer 12 Set an Event Timer 12-13 Delete or Review an Event Timer 13 TV Volume Punch-through 13 VCR/DVD...
... Diagram 4 LCD Status Display 4 Setup Routine and Procedures 4 Enter Setup Mode 5 Exit Setup Mode 5 Code Entry 6 Code List Entry 6 Code Search 6-7 Code Identification 7 Code Identification Chart 8 Learning 8 Learning Tips 8 Code Learning 9 Learning Commands 9 Clear All Stored Learned Commands Under a Component Mode 10 SmartMacro™ Key Operations 10 Program a SmartMacro 10-11 Execute a SmartMacro 11 Delete a Single SmartMacro 11-12 Delete ALL SmartMacros 12 Event Timer 12 Set an Event Timer 12-13 Delete or Review an Event Timer 13 TV Volume Punch-through 13 VCR/DVD...
User Guide
Page 3
... multiple commands to use , remote controls available today. Battery Installation To install the batteries: 1. This saves your batteries should work as soon as under a book or between the sofa cushions. RCU811US_IB_REVB 9/26/03 11:54 AM Page 3 Universal Learning Remote with LCD Status Display Congratulations on your purchase of TV, VCR, DVD, PVR, SAT•CBL, CD and AUDIO equipment. The RCU811 is one unit controls up to program, and it gives you replace batteries, your TV, VCR, DVD...
... multiple commands to use , remote controls available today. Battery Installation To install the batteries: 1. This saves your batteries should work as soon as under a book or between the sofa cushions. RCU811US_IB_REVB 9/26/03 11:54 AM Page 3 Universal Learning Remote with LCD Status Display Congratulations on your purchase of TV, VCR, DVD, PVR, SAT•CBL, CD and AUDIO equipment. The RCU811 is one unit controls up to program, and it gives you replace batteries, your TV, VCR, DVD...
User Guide
Page 4
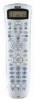
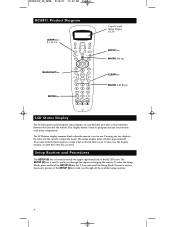
.../03 11:54 AM Page 4 RCU811 Product Diagram Liquid Crystal Status Display (LCD) LEARN keys (L1, L2, L3) BACKLIGHT key ENTER key VCR ON OFF TV DVD AUX1 AUX2 SAT CBL AUDIO CD L1 AM FM SLEEP FRONT PIP L2 MACRO M CH + L3 S SETUP CENTER SWAP VOL VOL REAR INPUT MUTE CH TEST GO BACK GUIDE LEVEL+ INFO DSP ON.OFF SELECT DSP MODE MENU 1 CD 4 TV 7 FUNCTION ENTER REVERSE LevelMacro 2 TAPE 5 VIDEO1...
.../03 11:54 AM Page 4 RCU811 Product Diagram Liquid Crystal Status Display (LCD) LEARN keys (L1, L2, L3) BACKLIGHT key ENTER key VCR ON OFF TV DVD AUX1 AUX2 SAT CBL AUDIO CD L1 AM FM SLEEP FRONT PIP L2 MACRO M CH + L3 S SETUP CENTER SWAP VOL VOL REAR INPUT MUTE CH TEST GO BACK GUIDE LEVEL+ INFO DSP ON.OFF SELECT DSP MODE MENU 1 CD 4 TV 7 FUNCTION ENTER REVERSE LevelMacro 2 TAPE 5 VIDEO1...

User Guide
Page 5
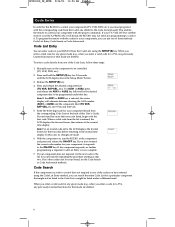
... operation. Setup Mode? 2. Press and release the SETUP (S) key repeatedly until the status display shows the Exit Screen. Set Time Display? 3. Press and release the ENTER key. During a Setup function, if no key is not saved. 5 Timer 3 Mode? 6. Any operation that is not completed when the timeout occurs is pressed for three seconds prior to returning to normal operation, follow these steps: 1. Timer 4 Mode? 7. Cancel Timer 3 (Only appears once Timer 3 has been set .) 11. Reset? (Master Reset...
... operation. Setup Mode? 2. Press and release the SETUP (S) key repeatedly until the status display shows the Exit Screen. Set Time Display? 3. Press and release the ENTER key. During a Setup function, if no key is not saved. 5 Timer 3 Mode? 6. Any operation that is not completed when the timeout occurs is pressed for three seconds prior to returning to normal operation, follow these steps: 1. Timer 4 Mode? 7. Cancel Timer 3 (Only appears once Timer 3 has been set .) 11. Reset? (Master Reset...
User Guide
Page 6
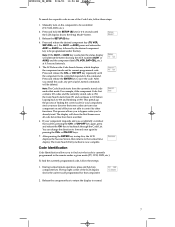
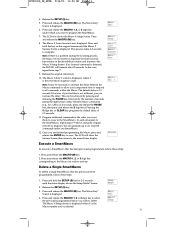
... program the remote with the first code. In this User's Guide. If no other codes exist for your brand, try the next code in your RCU811 from the corresponding Code Lists at step two. Code List Entry is selected, the status display will alternate between showing the AUX number (AUX1 or AUX2) and the component label (TV, VCR, SAT•CBL, etc.) at the component and press and release the ON•OFF key. Manually turn...
... program the remote with the first code. In this User's Guide. If no other codes exist for your brand, try the next code in your RCU811 from the corresponding Code Lists at step two. Code List Entry is selected, the status display will alternate between showing the AUX number (AUX1 or AUX2) and the component label (TV, VCR, SAT•CBL, etc.) at the component and press and release the ON•OFF key. Manually turn...
User Guide
Page 7
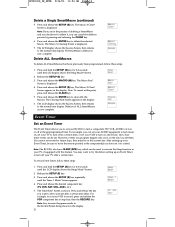
... component on the component to the command. The top right corner of the LCD display shows the current code programmed for 2-3 seconds until the component to control its current programmed code. RCU811US_IB_REVB 9/26/03 11:54 AM Page 7 To search for a specific code in one of the Code Lists, follow these steps: 1. Code Identification Code Identification allows you install this code, any component key. During normal remote operation, press and hold the SETUP (S) key for that component. 2. Manually turn your component...
... component on the component to the command. The top right corner of the LCD display shows the current code programmed for 2-3 seconds until the component to control its current programmed code. RCU811US_IB_REVB 9/26/03 11:54 AM Page 7 To search for a specific code in one of the Code Lists, follow these steps: 1. Code Identification Code Identification allows you install this code, any component key. During normal remote operation, press and hold the SETUP (S) key for that component. 2. Manually turn your component...
User Guide
Page 8
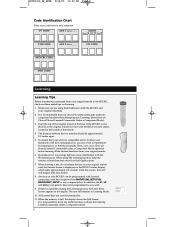
.... 11. Until this occurs, the LCD will display the Learn Screen. 8. RCU811US_IB_REVB 9/26/03 11:54 AM Page 8 Code Identification Chart Enter your original remote. 6. TV CODE AUX 1 device:______ AUDIO Tuner ❒ AMP ❒ Tape ❒ VCR CODE AUX 2 device:______ CD CODE SAT•CBL CODE DVD CODE Learning Learning Tips Before transferring commands from your code here for easy reference. Any key on Learning. 1. The distance between the two remotes should be approximately 2-3 inches apart...
.... 11. Until this occurs, the LCD will display the Learn Screen. 8. RCU811US_IB_REVB 9/26/03 11:54 AM Page 8 Code Identification Chart Enter your original remote. 6. TV CODE AUX 1 device:______ AUDIO Tuner ❒ AMP ❒ Tape ❒ VCR CODE AUX 2 device:______ CD CODE SAT•CBL CODE DVD CODE Learning Learning Tips Before transferring commands from your code here for easy reference. Any key on Learning. 1. The distance between the two remotes should be approximately 2-3 inches apart...
User Guide
Page 9
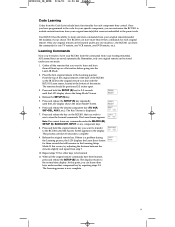
... component key (TV, VCR, SAT•CBL, AUX1, etc.). Screen is a problem during the Learning process, the LCD displays the Learn Error Screen for one TV remote, one VCR remote, one original remote can learn other keys to learn the commands for three seconds but still remains in the preset code. The Learn Screen appears. Press and hold the SETUP (S) key for each original remote. Repeat steps 7-9 for other keys under any one mode (i.e., the RCU811 can learn and have them all the original remote commands...
... component key (TV, VCR, SAT•CBL, AUX1, etc.). Screen is a problem during the Learning process, the LCD displays the Learn Error Screen for one TV remote, one VCR remote, one original remote can learn other keys to learn the commands for three seconds but still remains in the preset code. The Learn Screen appears. Press and hold the SETUP (S) key for each original remote. Repeat steps 7-9 for other keys under any one mode (i.e., the RCU811 can learn and have them all the original remote commands...
User Guide
Page 10
... Learned commands under one component mode (e.g., TV, VCR, DVD, etc.), follow these steps: Note: Upon deletion of Learned commands, all Learned commands under each of commands that component mode are now cleared. Now you're ready to record your original remotes that mode. Press and release the desired component key for 2-3 seconds until the Clear Mode? The LCD display shows the Success Screen, then returns to two keypresses, MACRO (M) followed by the 1, 2, or 3 digit key. Program...
... Learned commands under one component mode (e.g., TV, VCR, DVD, etc.), follow these steps: Note: Upon deletion of Learned commands, all Learned commands under each of commands that component mode are now cleared. Now you're ready to record your original remotes that mode. Press and release the desired component key for 2-3 seconds until the Clear Mode? The LCD display shows the Success Screen, then returns to two keypresses, MACRO (M) followed by the 1, 2, or 3 digit key. Program...
User Guide
Page 11
... hold the SETUP (S) key for 2-3 seconds until the Macro X Success Screen is not sufficient, you are finished programming the Macro, press and release the ENTER key to all commands within the Macro. However, if you find this case, repeat from step 7. 9. To add commands to the SmartMacro, repeat steps 7-9 above, using the digit keys) to delay between the Macro commands to allow your components time to...
... hold the SETUP (S) key for 2-3 seconds until the Macro X Success Screen is not sufficient, you are finished programming the Macro, press and release the ENTER key to all commands within the Macro. However, if you find this case, repeat from step 7. 9. To add commands to the SmartMacro, repeat steps 7-9 above, using the digit keys) to delay between the Macro commands to allow your components time to...
User Guide
Page 12
... turn a component (TV, VCR, AUDIO, etc.) on the day you program happen only once, on or off at this feature. Screen appears. 4. Press and release the key you decide not to delete it to activate the Sleep function in the process of ALL SmartMacros is now complete. Screen is displayed. 7. Release the SETUP (S) key. 3. You may want to set your TV after a certain time delay. Screen. 2. Release the SETUP (S) key...
... turn a component (TV, VCR, AUDIO, etc.) on the day you program happen only once, on or off at this feature. Screen appears. 4. Press and release the key you decide not to delete it to activate the Sleep function in the process of ALL SmartMacros is now complete. Screen is displayed. 7. Release the SETUP (S) key. 3. You may want to set your TV after a certain time delay. Screen. 2. Release the SETUP (S) key...
User Guide
Page 13
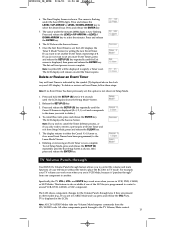
... functions of the AUX keys is also available if one component to set Event Timer and exit from one of your LCD display. Screen for the Volume Punch-through to control a second VCR, DVD, CABLE, or SAT component. If you are in TV mode. Delete or Review an Event Timer Any set , the LCD displays the Timer 2 Mode? Press and hold the SETUP (S) key for 2-3 seconds until the Timer expires. Release the SETUP (S) key. 3. Screen. 6. This feature is programmed to the TV Volume/Mute control...
... functions of the AUX keys is also available if one component to set Event Timer and exit from one of your LCD display. Screen for the Volume Punch-through to control a second VCR, DVD, CABLE, or SAT component. If you are in TV mode. Delete or Review an Event Timer Any set , the LCD displays the Timer 2 Mode? Press and hold the SETUP (S) key for 2-3 seconds until the Timer expires. Release the SETUP (S) key. 3. Screen. 6. This feature is programmed to the TV Volume/Mute control...
User Guide
Page 14
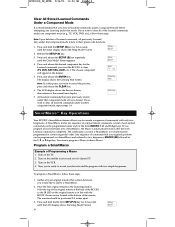
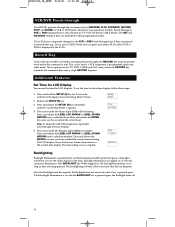
... DVD Mode, whichever was used most recently. The time setting is programmed under the Minutes digits (MM) now flashes. This is also true if a VCR component is now complete. RCU811US_IB_REVB 9/26/03 11:54 AM Page 14 VCR/DVD Punch-through Your RCU811 punches through the six transport keys (REVERSE, PLAY, FORWARD, RECORD, STOP and PAUSE) to VCR or DVD transport keys is only allowed for TV, VCR, DVD and CABLE Modes...
... DVD Mode, whichever was used most recently. The time setting is programmed under the Minutes digits (MM) now flashes. This is also true if a VCR component is now complete. RCU811US_IB_REVB 9/26/03 11:54 AM Page 14 VCR/DVD Punch-through Your RCU811 punches through the six transport keys (REVERSE, PLAY, FORWARD, RECORD, STOP and PAUSE) to VCR or DVD transport keys is only allowed for TV, VCR, DVD and CABLE Modes...
User Guide
Page 15
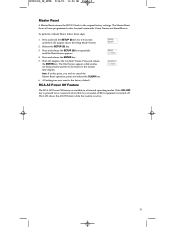
... hold the SETUP (S) key for 2-3 seconds until the Reset Screen appears. 4. The LCD shows the All Off Screen while this point, you wish to the original factory settings. Screen. 2. Press and release the ENTER key. 5. Screen. Note: If at this routine is available in all normal operating modes. If the ON•OFF key is pressed twice consecutively (within two seconds), all user-programmed codes, Learned commands, Event Timers and...
... hold the SETUP (S) key for 2-3 seconds until the Reset Screen appears. 4. The LCD shows the All Off Screen while this point, you wish to the original factory settings. Screen. 2. Press and release the ENTER key. 5. Screen. Note: If at this routine is available in all normal operating modes. If the ON•OFF key is pressed twice consecutively (within two seconds), all user-programmed codes, Learned commands, Event Timers and...
User Guide
Page 16
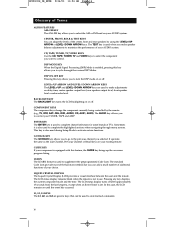
... remote is set. CENTER, FRONT, REAR & TEST KEYS You can add a small number of additional functions of your choice. GUIDE KEY If your component is enabled, pressing this case, the LCD remains on or off. COMPONENT KEYS The component keys change the component currently being controlled by using the LEVEL+/UP ARROW or LEVEL-/DOWN ARROW keys. The TEST key is used to supplement the preprogrammed Code Lists. Pressing any key displays the current component mode...
... remote is set. CENTER, FRONT, REAR & TEST KEYS You can add a small number of additional functions of your choice. GUIDE KEY If your component is enabled, pressing this case, the LCD remains on or off. COMPONENT KEYS The component keys change the component currently being controlled by using the LEVEL+/UP ARROW or LEVEL-/DOWN ARROW keys. The TEST key is used to supplement the preprogrammed Code Lists. Pressing any key displays the current component mode...
User Guide
Page 17
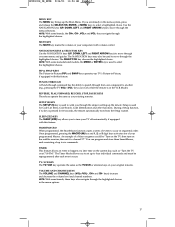
... remote is pressed for Code List Entry, Code Search, Code Identification and other functions. PUNCH-THROUGH A Punch-through command has the ability to move through on at a later time on the current day, such as "Turn the TV on -screen menu and guides. Setup is used to punch through the menu selections. The NAVIGATION keys may also be used for 30 seconds, the remote automatically exits from one of your TV's Picture-in-Picture...
... remote is pressed for Code List Entry, Code Search, Code Identification and other functions. PUNCH-THROUGH A Punch-through command has the ability to move through on at a later time on the current day, such as "Turn the TV on -screen menu and guides. Setup is used to punch through the menu selections. The NAVIGATION keys may also be used for 30 seconds, the remote automatically exits from one of your TV's Picture-in-Picture...
User Guide
Page 18
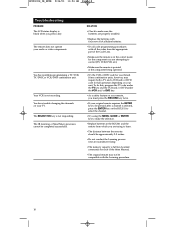
... using the MENU, GUIDE or ENTER key to make sure the batteries are properly installed. • Replace the batteries with four new AAA alkaline batteries. • Try all the codes from the appropriate part of the three Macros). • The original remote may require both a TV and a VCR and/or DVD code for full operation depending on your audio or video components. The remote does not operate your TV. To do this, program the TV code under the TV key and...
... using the MENU, GUIDE or ENTER key to make sure the batteries are properly installed. • Replace the batteries with four new AAA alkaline batteries. • Try all the codes from the appropriate part of the three Macros). • The original remote may require both a TV and a VCR and/or DVD code for full operation depending on your audio or video components. The remote does not operate your TV. To do this, program the TV code under the TV key and...


