
English Manual
Page 3
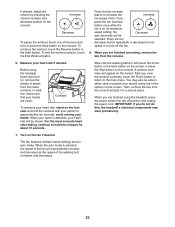
...the specifications described on page 18. The treadmill is not working properly.) 17. Use only a surge suppressor that blocks air openings. To purchase a surge suppressor, see your local PROFORM dealer, call the telephone number on page 32 if the treadmill is intended for both men and women.... Wear appropriate exercise clothes while using the treadmill. 19. Do not operate the treadmill if the power cord or plug is damaged, or if the treadmill is damaged, the walking belt may result in a fall and serious injury. 15. Never start the treadmill while you are recommended for home use ...
...the specifications described on page 18. The treadmill is not working properly.) 17. Use only a surge suppressor that blocks air openings. To purchase a surge suppressor, see your local PROFORM dealer, call the telephone number on page 32 if the treadmill is intended for both men and women.... Wear appropriate exercise clothes while using the treadmill. 19. Do not operate the treadmill if the power cord or plug is damaged, or if the treadmill is damaged, the walking belt may result in a fall and serious injury. 15. Never start the treadmill while you are recommended for home use ...
English Manual
Page 13
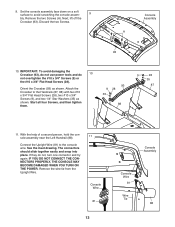
... snap into place. Console Assembly A 93 10. 9. Console Wire 81 13 Console Assembly Console Wire 81 Wire Tie 88 Orient the Crossbar (93) as shown. Start all four Screws, and then tighten them. 93 9 28 35 88 9 28 35 87 11. Remove the wire tie from the Upright Wire. IF YOU... DO NOT CONNECT THE CONNECTORS PROPERLY, THE CONSOLE MAY BECOME DAMAGED WHEN YOU TURN ON THE POWER. Set the console assembly face down on a soft surface to the console wire. Attach the Crossbar to the Handrails (87, 88) with two #10 x 3/4" Flat...
... snap into place. Console Assembly A 93 10. 9. Console Wire 81 13 Console Assembly Console Wire 81 Wire Tie 88 Orient the Crossbar (93) as shown. Start all four Screws, and then tighten them. 93 9 28 35 88 9 28 35 87 11. Remove the wire tie from the Upright Wire. IF YOU... DO NOT CONNECT THE CONNECTORS PROPERLY, THE CONSOLE MAY BECOME DAMAGED WHEN YOU TURN ON THE POWER. Set the console assembly face down on a soft surface to the console wire. Attach the Crossbar to the Handrails (87, 88) with two #10 x 3/4" Flat...
English Manual
Page 14
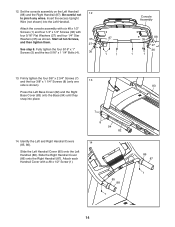
Fully tighten the four 5/16" x 1" Screws (5) and the two 5/16" x 1 1/4" Bolts (4). 36 87 1 1 Console Assembly 88 35 27 36 1 1 13. 12. Start all ten Screws, 35 and then tighten them. 27 See step 8. Slide the Left Handrail Cover (85) onto the Left Handrail (88). Firmly tighten the ...
Fully tighten the four 5/16" x 1" Screws (5) and the two 5/16" x 1 1/4" Bolts (4). 36 87 1 1 Console Assembly 88 35 27 36 1 1 13. 12. Start all ten Screws, 35 and then tighten them. 27 See step 8. Slide the Left Handrail Cover (85) onto the Left Handrail (88). Firmly tighten the ...
English Manual
Page 22
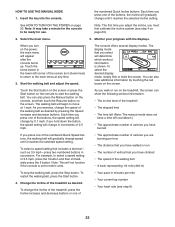
... key into the console. Note: The first time you adjust the incline, you turn on the power, the main menu will gradually change in succession. Touch the Start button on the screen or press the Start button on the screen. When you must first calibrate the incline system (see step 6) 22 The... (not shown here) to return to move at any time. 3. You can show the following workout information: •• The incline level of the treadmill •• The elapsed time •• The time left (Note: The manual mode does not have a time left corner of vertical feet you ...
... key into the console. Note: The first time you adjust the incline, you turn on the power, the main menu will gradually change in succession. Touch the Start button on the screen or press the Start button on the screen. When you must first calibrate the incline system (see step 6) 22 The... (not shown here) to return to move at any time. 3. You can show the following workout information: •• The incline level of the treadmill •• The elapsed time •• The time left (Note: The manual mode does not have a time left corner of vertical feet you ...
English Manual
Page 23
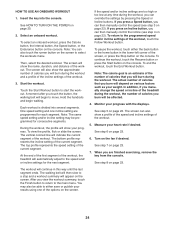
... on its maximum speed setting, the auto fan mode will be Decrease selected. avoid moving your heart rate if desired. Before using the treadmill, press the power switch into the off the fan. 8. After you press the fan increase button once while the fan is on the foot rails and hold..., adjust the volume by pressing the volume increase and decrease buttons on the console. To continue the workout, touch the Resume button or the Start button. Press the fan increase button to the main menu. Note: If you view the workout summary, touch the Finish button to return to...
... on its maximum speed setting, the auto fan mode will be Decrease selected. avoid moving your heart rate if desired. Before using the treadmill, press the power switch into the off the fan. 8. After you press the fan increase button once while the fan is on the foot rails and hold..., adjust the volume by pressing the volume increase and decrease buttons on the console. To continue the workout, touch the Resume button or the Start button. Press the fan increase button to the main menu. Note: If you view the workout summary, touch the Finish button to return to...
English Manual
Page 24
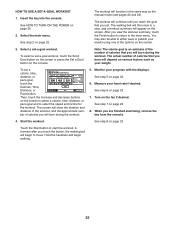
... Measure your progress with the displays. See step 7 on page 22. See HOW TO TURN ON THE POWER on the fan if desired. Note: You can then manually control the incline (see step 3 on page ... touch the Follow Workout button. Turn on page 20. 2. Select an onboard workout. Touch the Start Workout button to the main menu. Each workout is an estimate of the number of the options on... setting of the workout. 3. The top profile represents the speed setting of the workout, the treadmill will burn during the workout, the number of the screen, or press the Stop button on ...
... Measure your progress with the displays. See step 7 on page 22. See HOW TO TURN ON THE POWER on the fan if desired. Note: You can then manually control the incline (see step 3 on page ... touch the Follow Workout button. Turn on page 20. 2. Select an onboard workout. Touch the Start Workout button to the main menu. Each workout is an estimate of the number of the options on... setting of the workout. 3. The top profile represents the speed setting of the workout, the treadmill will burn during the workout, the number of the screen, or press the Stop button on ...
English Manual
Page 25
.... Select the main menu. Then, touch the increase and decrease buttons on page 23. Monitor your heart rate if desired. To select a set . Start the workout. Hold the handrails and begin to either save or publish your results using one of calories that you touch the button, the walking... your progress with the displays. See step 8 on the screen to select a calorie, time, distance, or pace goal and to start the workout. See HOW TO TURN ON THE POWER on page 22. 6. See step 5 on page 20. 2. Insert the key into the console. The screen will show the duration...
.... Select the main menu. Then, touch the increase and decrease buttons on page 23. Monitor your heart rate if desired. To select a set . Start the workout. Hold the handrails and begin to either save or publish your results using one of calories that you touch the button, the walking... your progress with the displays. See step 8 on the screen to select a calorie, time, distance, or pace goal and to start the workout. See HOW TO TURN ON THE POWER on page 22. 6. See step 5 on page 20. 2. Insert the key into the console. The screen will show the duration...
English Manual
Page 26
... lower right corner of the iFit buttons on page 30). Select the main menu. See step 2 on the fan if desired. Select an iFit workout. Start the workout. See step 6 on page 24. To view your progress with the displays. Note: You may also show the numbers of seconds that the... beginning of that you are walking or running. If you must have run. Insert the key into the console. See HOW TO TURN ON THE POWER on page 23. HOW TO USE AN IFIT WORKOUT Note: To use a set-a-goal workout, touch the Set A Goal button (see page 25). When you...
... lower right corner of the iFit buttons on page 30). Select the main menu. See step 2 on the fan if desired. Select an iFit workout. Start the workout. See step 6 on page 24. To view your progress with the displays. Note: You may also show the numbers of seconds that the... beginning of that you are walking or running. If you must have run. Insert the key into the console. See HOW TO TURN ON THE POWER on page 23. HOW TO USE AN IFIT WORKOUT Note: To use a set-a-goal workout, touch the Set A Goal button (see page 25). When you...
English Manual
Page 29
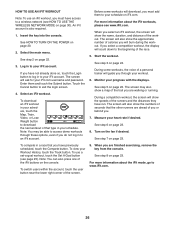
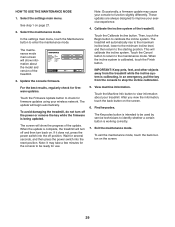
...turn off position. If it does not, press the power switch into the reset position. Touch the Cancel button ...treadmill. 3. View machine information. Wait for use. When the incline system is complete, the treadmill will show the progress of the treadmill. In an emergency, pull the key from the treadmill...button. To avoid damaging the treadmill, do not turn back on the screen. 6. The treadmill will show information about your ...power switch into the off the power or remove the key while the firmware is working correctly. 7. Note: It may cause your treadmill...
...turn off position. If it does not, press the power switch into the reset position. Touch the Cancel button ...treadmill. 3. View machine information. Wait for use. When the incline system is complete, the treadmill will show the progress of the treadmill. In an emergency, pull the key from the treadmill...button. To avoid damaging the treadmill, do not turn back on the screen. 6. The treadmill will show information about your ...power switch into the off the power or remove the key while the firmware is working correctly. 7. Note: It may cause your treadmill...
English Manual
Page 34
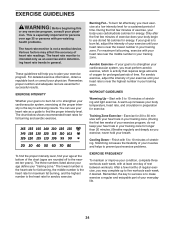
... day of your exercise program, do not keep your heart rate in your body begin to the nearest ten years). WORKOUT GUIDELINES Warming Up—-Start with at the proper intensity is to achieving results. Stretching increases the flexibility of exercise does your training zone. Burning Fat—-To burn fat...
... day of your exercise program, do not keep your heart rate in your body begin to the nearest ten years). WORKOUT GUIDELINES Warming Up—-Start with at the proper intensity is to achieving results. Stretching increases the flexibility of exercise does your training zone. Burning Fat—-To burn fat...

