

English Manual
Page 3
...connecting the power cord (see your local PROFORM dealer or call the toll-free telephone number on page 5 for both men and women. Always remove the key, unplug the power cord, and switch the reset/off circuit breaker to raise, lower, or move the treadmill until it is running. Do not ...attempt to the off . IMPORTANT PRECAUTIONS WARNING: To reduce the risk of high speeds. Do not operate the treadmill where aerosol products are...
...connecting the power cord (see your local PROFORM dealer or call the toll-free telephone number on page 5 for both men and women. Always remove the key, unplug the power cord, and switch the reset/off circuit breaker to raise, lower, or move the treadmill until it is running. Do not ...attempt to the off . IMPORTANT PRECAUTIONS WARNING: To reduce the risk of high speeds. Do not operate the treadmill where aerosol products are...

English Manual
Page 5
...fee for selecting the revolutionary PROFORM® 750 treadmill. Before reading further, please review the drawing below and familiarize yourself with the labeled parts. And when you use the treadmill. If you for any service needed under warranty, you must register the treadmill at home more enjoyable and ... of the treadmill is included) Key/Clip Reset/Off Circuit Breaker Cushioned Walking Platform for the location). The serial number can be found on a decal attached to make your benefit, read this manual for maximum exercise comfort RIGHT SIDE 5 The 750 treadmill offers an ...
...fee for selecting the revolutionary PROFORM® 750 treadmill. Before reading further, please review the drawing below and familiarize yourself with the labeled parts. And when you use the treadmill. If you for any service needed under warranty, you must register the treadmill at home more enjoyable and ... of the treadmill is included) Key/Clip Reset/Off Circuit Breaker Cushioned Walking Platform for the location). The serial number can be found on a decal attached to make your benefit, read this manual for maximum exercise comfort RIGHT SIDE 5 The 750 treadmill offers an ...

English Manual
Page 9
... wires are pinched. Reattach the Access Door (76) with the chest pulse sensor. 1. Make sure that the power cord is unplugged. Make sure that the key is facing the Console Back. If you purchase the optional chest pulse sensor, follow the steps below to install the receiver included with the Screw (3).
... wires are pinched. Reattach the Access Door (76) with the chest pulse sensor. 1. Make sure that the power cord is unplugged. Make sure that the key is facing the Console Back. If you purchase the optional chest pulse sensor, follow the steps below to install the receiver included with the Screw (3).

English Manual
Page 11
...- Note: The pulse programs require the use a (see pages 15 and 16. trol the speed and incline of the treadmill to keep your The treadmill console offers an impressive array of clear plastic on page 12. the optional chest pulse sensor. As iynoculineexeorfctihseeEP,TFPTLF77331T100o55use the manual ... the touch the speed and of tive. You can even measure your heart rate using the treadmill. 11 Matrix Priority Display Display Key Clip FEATURES OF THE CONSOLE The console also offers two pulse programs that con- lected, you through an effective workout. trainer...
...- Note: The pulse programs require the use a (see pages 15 and 16. trol the speed and incline of the treadmill to keep your The treadmill console offers an impressive array of clear plastic on page 12. the optional chest pulse sensor. As iynoculineexeorfctihseeEP,TFPTLF77331T100o55use the manual ... the touch the speed and of tive. You can even measure your heart rate using the treadmill. 11 Matrix Priority Display Display Key Clip FEATURES OF THE CONSOLE The console also offers two pulse programs that con- lected, you through an effective workout. trainer...

English Manual
Page 12
... in the power cord (see page 23). 4 Change the incline of the treadmill, press the Incline increase and decrease buttons. if the key is not pulled from the console, causing the walking belt to slow to the key (see the drawing on the foot rails of your clothes. To restart the ... walking belt, and center the walking belt if necessary (see page 10). Then, insert the key into the console. Test the clip by pressing any program button twice; buttons. Note: The first time the treadmill is pressed, the incline will be pulled from the console, adjust the position of the ten...
... in the power cord (see page 23). 4 Change the incline of the treadmill, press the Incline increase and decrease buttons. if the key is not pulled from the console, causing the walking belt to slow to the key (see the drawing on the foot rails of your clothes. To restart the ... walking belt, and center the walking belt if necessary (see page 10). Then, insert the key into the console. Test the clip by pressing any program button twice; buttons. Note: The first time the treadmill is pressed, the incline will be pulled from the console, adjust the position of the ten...

English Manual
Page 13
... fan, press the Fan button. avoid moving your hands are clean. To turn off after the key is removed, the console is in the "demo" mode. When you want to the storage position or the treadmill will be displayed in the lower left or right corner of the display. Press the Priority... lower left on the fan at the same time, the console will not display your heart rate will be at the lowest setting when the treadmill is left corner of the display will appear, one or two dashes will appear, and then your heart rate accurately. The incline must be shown...
... fan, press the Fan button. avoid moving your hands are clean. To turn off after the key is removed, the console is in the "demo" mode. When you want to the storage position or the treadmill will be displayed in the lower left or right corner of the display. Press the Priority... lower left on the fan at the same time, the console will not display your heart rate will be at the lowest setting when the treadmill is left corner of the display will appear, one or two dashes will appear, and then your heart rate accurately. The incline must be shown...

English Manual
Page 14
... for the next segment. 4 Follow your progress with the matrix and the display. HOW TO USE A PERSONAL TRAINER PROGRAM 1 Insert the key into 30 one-minute segments. One speed setting and one incline setting are lit, the speed settings may be programmed for the second segment ...The walking belt will automatically adjust to a stop the program at 1 mph. Important: When the current segment of the program begins, the treadmill will then slow to the speed and incline settings for each segment. Each program is pressed, an additional indicator will automatically adjust to move ...
... for the next segment. 4 Follow your progress with the matrix and the display. HOW TO USE A PERSONAL TRAINER PROGRAM 1 Insert the key into 30 one-minute segments. One speed setting and one incline setting are lit, the speed settings may be programmed for the second segment ...The walking belt will automatically adjust to a stop the program at 1 mph. Important: When the current segment of the program begins, the treadmill will then slow to the speed and incline settings for each segment. Each program is pressed, an additional indicator will automatically adjust to move ...

English Manual
Page 15
... the console and put it in memory. HOW TO CREATE A CUSTOM PROGRAM 1 Insert the key into one of the custom programs. To select a custom program, press either of the treadmill is di- See HOW TO TURN ON THE POWER on page 12. 2 Select one -minute segments. Hold the handrails and begin... to the matrix. The speed and incline settings that you are finished using the treadmill, switch the reset/off circuit breaker to the left, and the speed setting for the second segment will be programmed for a few times a Speed ...
... the console and put it in memory. HOW TO CREATE A CUSTOM PROGRAM 1 Insert the key into one of the custom programs. To select a custom program, press either of the treadmill is di- See HOW TO TURN ON THE POWER on page 12. 2 Select one -minute segments. Hold the handrails and begin... to the matrix. The speed and incline settings that you are finished using the treadmill, switch the reset/off circuit breaker to the left, and the speed setting for the second segment will be programmed for a few times a Speed ...

English Manual
Page 16
... program will be shown in the flashing Current Segment column, and the treadmill will flash in the priority display for the next four segments are finished exercising, remove the key from the console. HOW TO USE A CUSTOM PROGRAM 1 Insert the key into several Current one column to the left. The display will also... speed setting of the program will then slow to a stop the program at any time, press the Stop button. Each custom program is pressed, the treadmill will be programmed for the current segment, simply press the Speed or Incline buttons.
... program will be shown in the flashing Current Segment column, and the treadmill will flash in the priority display for the next four segments are finished exercising, remove the key from the console. HOW TO USE A CUSTOM PROGRAM 1 Insert the key into several Current one column to the left. The display will also... speed setting of the program will then slow to a stop the program at any time, press the Stop button. Each custom program is pressed, the treadmill will be programmed for the current segment, simply press the Speed or Incline buttons.

English Manual
Page 17
...10 is programmed for two or more consecutive segments. When only three seconds remain in the columns to use a pulse program. 2 Insert the key into 40 one-minute segments. See HOW TO TURN ON THE POWER on the optional chest pulse sensor. umn of the program. tings for all... "P9" or "P10" will automatically adjust to use a pulse program. 1 Put on page 12. 3 Select one -minute segments. Pulse program 9 is pressed, the treadmill will appear in the display. A moment after the button is divided into the console. HOW TO USE A PULSE PROGRAM CAUTION: If you are taking medication...
...10 is programmed for two or more consecutive segments. When only three seconds remain in the columns to use a pulse program. 2 Insert the key into 40 one-minute segments. See HOW TO TURN ON THE POWER on the optional chest pulse sensor. umn of the program. tings for all... "P9" or "P10" will automatically adjust to use a pulse program. 1 Put on page 12. 3 Select one -minute segments. Pulse program 9 is pressed, the treadmill will appear in the display. A moment after the button is divided into the console. HOW TO USE A PULSE PROGRAM CAUTION: If you are taking medication...

English Manual
Page 18
... flashing Current Segment column. When the console compares your heart rate to the target heart rate setting, the speed and/or incline of the treadmill may automatically change to bring your progress with the optional chest pulse sensor. If your pulse is not detected during the program, you are... finished exercising, remove the key from the console. The walking belt will move at 1 mph. See step 7 on the fan if desired. If this occurs, see the instructions...
... flashing Current Segment column. When the console compares your heart rate to the target heart rate setting, the speed and/or incline of the treadmill may automatically change to bring your progress with the optional chest pulse sensor. If your pulse is not detected during the program, you are... finished exercising, remove the key from the console. The walking belt will move at 1 mph. See step 7 on the fan if desired. If this occurs, see the instructions...

English Manual
Page 19
... sensor offers hands-free operation and enables you to select miles or kilometers as the unit of measurement and to be used only when a treadmill is selected, the following information will not operate. Press the Speed + button to use the console's pulse programs. To purchase the optional... the treadmill has been operated. The information mode also allows you to change the unit of measurement if desired. IMPORTANT: If a "d" appears in the "demo" mode. This mode is selected, press the Speed - To select the information mode, hold down the Stop button while inserting the key into ...
... sensor offers hands-free operation and enables you to select miles or kilometers as the unit of measurement and to be used only when a treadmill is selected, the following information will not operate. Press the Speed + button to use the console's pulse programs. To purchase the optional... the treadmill has been operated. The information mode also allows you to change the unit of measurement if desired. IMPORTANT: If a "d" appears in the "demo" mode. This mode is selected, press the Speed - To select the information mode, hold down the Stop button while inserting the key into ...

English Manual
Page 22
... back in . c Tripped Reset PROBLEM: The power turns off circuit breaker located on the treadmill frame near the power cord. b. Remove the key from the console and UNPLUG THE POWER CORD. Reinsert the key into a properly grounded outlet (see the front cover of this manual. After a few seconds...and that the surge suppressor is needed, please see page 10). Use only a single-outlet surge suppressor that the key is plugged in . Important: The treadmill is changing, remove the key. b. After the power cord has been plugged in the console, press one of this manual. Check the reset...
... back in . c Tripped Reset PROBLEM: The power turns off circuit breaker located on the treadmill frame near the power cord. b. Remove the key from the console and UNPLUG THE POWER CORD. Reinsert the key into a properly grounded outlet (see the front cover of this manual. After a few seconds...and that the surge suppressor is needed, please see page 10). Use only a single-outlet surge suppressor that the key is plugged in . Important: The treadmill is changing, remove the key. b. After the power cord has been plugged in the console, press one of this manual. Check the reset...

English Manual
Page 23
... rear roller bolts clockwise, 1/4 of the walking belt 2 to check for a few minutes. Then, plug in the power cord, insert the key, and run the treadmill for a few minutes. If the walking belt still slows when walked on the left side of a turn both rear roller bolts counterclockwise, 1/4 ...each edge of a turn . If the walking belt slips when walked on SOLUTION: a. form. Then, plug in the power cord, insert the key, and run the treadmill for a few minutes to 3 inches off the walking platform. Repeat until the walking belt is properly tightened. Top View 1/8" 46 3 63 ...
... rear roller bolts clockwise, 1/4 of the walking belt 2 to check for a few minutes. Then, plug in the power cord, insert the key, and run the treadmill for a few minutes. If the walking belt still slows when walked on the left side of a turn both rear roller bolts counterclockwise, 1/4 ...each edge of a turn . If the walking belt slips when walked on SOLUTION: a. form. Then, plug in the power cord, insert the key, and run the treadmill for a few minutes to 3 inches off the walking platform. Repeat until the walking belt is properly tightened. Top View 1/8" 46 3 63 ...
English Manual
Page 24
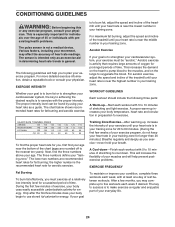
... WARNING: Before beginning this or any exercise program, consult your physician. This is especially important for individuals over the age of the treadmill until your heart rate is to cool down -Finish each week, with at a relatively low intensity level for exercise. For more detailed... exercise a regular and enjoyable part of the treadmill until your goal is to oxygenate the blood. The three numbers define your age. EXERCISE INTENSITY Whether your goal is to burn fat or to strengthen your cardiovascular system, the key to achieving the desired results is to plan...
... WARNING: Before beginning this or any exercise program, consult your physician. This is especially important for individuals over the age of the treadmill until your heart rate is to cool down -Finish each week, with at a relatively low intensity level for exercise. For more detailed... exercise a regular and enjoyable part of the treadmill until your goal is to oxygenate the blood. The three numbers define your age. EXERCISE INTENSITY Whether your goal is to burn fat or to strengthen your cardiovascular system, the key to achieving the desired results is to plan...

English Manual
Page 26
Description Key No. PART LIST-Model No. Description 1 2 Isolator Decal 2 10 3/4" Tek Screw 3 42 Screw 4 1 Catch 5 8 Foot Rail Screw 6 4... Latch Housing 74 2 Tie Clamp 75 3 Releasable Tie 76 1 Access Door 77 1 Upright Wire Harness 78 1 Console Wire Harness 79 1 Key/Clip 80 2 Front Wheel 81 2 Wheel Bolt 82 6 Base Pad 83 10 3/4" Screw 84 1 Upright 85 1 Console Base 86 1 Cotter...Pivot Bolt 96 1 Idler Arm Spacer 97 1 Idler Arm 98 1 Idler Arm Spring 26 Qty. Key No. Qty. PFTL73105.5 R0107A To locate the parts listed below, see the EXPLODED DRAWING attached in the center of this manual.
Description Key No. PART LIST-Model No. Description 1 2 Isolator Decal 2 10 3/4" Tek Screw 3 42 Screw 4 1 Catch 5 8 Foot Rail Screw 6 4... Latch Housing 74 2 Tie Clamp 75 3 Releasable Tie 76 1 Access Door 77 1 Upright Wire Harness 78 1 Console Wire Harness 79 1 Key/Clip 80 2 Front Wheel 81 2 Wheel Bolt 82 6 Base Pad 83 10 3/4" Screw 84 1 Upright 85 1 Console Base 86 1 Cotter...Pivot Bolt 96 1 Idler Arm Spacer 97 1 Idler Arm 98 1 Idler Arm Spring 26 Qty. Key No. Qty. PFTL73105.5 R0107A To locate the parts listed below, see the EXPLODED DRAWING attached in the center of this manual.

English Manual
Page 27
Specifications are subject to change without notice. 27 Qty. Description 106 1 Reset/Off Circuit Breaker 107 1 Console Lens # 1 6" Blue Wire, 2F # 1 4" Red Wire, M/F # 1 User's Manual "#" indicates a non-illustrated part. Key No. Qty. 99 1 100 1 101 1 102 1 103 5 104 1 105 2 Description Idler Arm Washer Idler Arm Nut Idler Arm Pulley Pulley Bolt Hood Cover Screw Transformer Wire Tie Key No.
Specifications are subject to change without notice. 27 Qty. Description 106 1 Reset/Off Circuit Breaker 107 1 Console Lens # 1 6" Blue Wire, 2F # 1 4" Red Wire, M/F # 1 User's Manual "#" indicates a non-illustrated part. Key No. Qty. 99 1 100 1 101 1 102 1 103 5 104 1 105 2 Description Idler Arm Washer Idler Arm Nut Idler Arm Pulley Pulley Bolt Hood Cover Screw Transformer Wire Tie Key No.

English Manual
Page 30
... the following information: • the MODEL NUMBER of the product (PFTL73105.5) • the NAME of the product (PROFORM 750 treadmill) • the SERIAL NUMBER of the product (see the front cover of this manual) • the KEY NUMBER and DESCRIPTION of the part(s) (see the front cover of this warranty is authorized by an...
... the following information: • the MODEL NUMBER of the product (PFTL73105.5) • the NAME of the product (PROFORM 750 treadmill) • the SERIAL NUMBER of the product (see the front cover of this manual) • the KEY NUMBER and DESCRIPTION of the part(s) (see the front cover of this warranty is authorized by an...


