

English Manual
Page 4
...rental, or institutional setting. 27. This treadmill is running. Always remove the key, unplug the power cord, and press the power switch into any opening on page 21.) You must be performed by an authorized ser- Never remove the motor hood un- SAVE THESE INSTRUCTIONS 4 Inspect ...and properly tighten all parts of the power switch.) 21. Always unplug the power cord immediately after use only. nance and adjustment procedures described in this treadmill in this manual should be ...
...rental, or institutional setting. 27. This treadmill is running. Always remove the key, unplug the power cord, and press the power switch into any opening on page 21.) You must be performed by an authorized ser- Never remove the motor hood un- SAVE THESE INSTRUCTIONS 4 Inspect ...and properly tighten all parts of the power switch.) 21. Always unplug the power cord immediately after use only. nance and adjustment procedures described in this treadmill in this manual should be ...

English Manual
Page 23
... on , see the front cover of the specifications described on SOLUTION: a. Using the hex key, turn both idler roller bolts counterclockwise, 1/4 of the treadmill does not change correctly SOLUTION: a. When the walking belt is about 1/8 in . (5 to lift each edge of the Pulley (48). If the ...in the power cord, insert the key, and run the treadmill for a correct speed reading. If necessary, loosen the #8 x 3/4" Truss Head Screw 18 47 (18), move the Reed Switch slightly, and then 73 retighten the Screw. Reattach the Motor Hood (not 48 shown) with the Reed Switch. Turn...
... on , see the front cover of the specifications described on SOLUTION: a. Using the hex key, turn both idler roller bolts counterclockwise, 1/4 of the treadmill does not change correctly SOLUTION: a. When the walking belt is about 1/8 in . (5 to lift each edge of the Pulley (48). If the ...in the power cord, insert the key, and run the treadmill for a correct speed reading. If necessary, loosen the #8 x 3/4" Truss Head Screw 18 47 (18), move the Reed Switch slightly, and then 73 retighten the Screw. Reattach the Motor Hood (not 48 shown) with the Reed Switch. Turn...
English Manual
Page 26
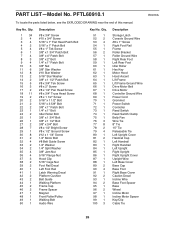
..." x 1 1/2" Bolt 5/16" x 3 5/8" Bolt 3/8" x 1" Patch Bolt 1/4" x 1" Bolt Idler Roller Bolt 3/8" x 1 3/4" Bolt 3/8" x 1 1/2" Bolt 3/8" x 3/4" Bolt #8 x 1/2" Bright Screw #8 x 1/2" Ground Screw #12 x 1 1/4" Screw 1/4" Motor Bolt #8 Belt Guide Screw 1/4" Washer 1/4" Split Washer 3/8" Jam Nut 5/16" Flange Nut Hood Clip 5/16" Cage Nut Foot Rail Decal Left Foot Rail Latch Warning... Cover Base Cap Base Foot Right Base Cover Caution Decal Incline Wire Base Foot Spacer Base Wheel Incline Motor Incline Motor Spacer Key/Clip Cable Tie R0910A 26 PART LIST-Model No. PFTL60910.1 To locate the parts listed ...
..." x 1 1/2" Bolt 5/16" x 3 5/8" Bolt 3/8" x 1" Patch Bolt 1/4" x 1" Bolt Idler Roller Bolt 3/8" x 1 3/4" Bolt 3/8" x 1 1/2" Bolt 3/8" x 3/4" Bolt #8 x 1/2" Bright Screw #8 x 1/2" Ground Screw #12 x 1 1/4" Screw 1/4" Motor Bolt #8 Belt Guide Screw 1/4" Washer 1/4" Split Washer 3/8" Jam Nut 5/16" Flange Nut Hood Clip 5/16" Cage Nut Foot Rail Decal Left Foot Rail Latch Warning... Cover Base Cap Base Foot Right Base Cover Caution Decal Incline Wire Base Foot Spacer Base Wheel Incline Motor Incline Motor Spacer Key/Clip Cable Tie R0910A 26 PART LIST-Model No. PFTL60910.1 To locate the parts listed ...
English Manual
Page 32
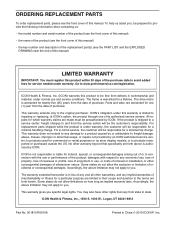
... will be responsible for twenty-five (25) years from defects in connection with respect to you specific legal rights. This warranty gives you . The drive motor is warranted for which warranty claims are made must register this product to state. Accordingly, the above limitation may also have other warranty beyond that...
... will be responsible for twenty-five (25) years from defects in connection with respect to you specific legal rights. This warranty gives you . The drive motor is warranted for which warranty claims are made must register this product to state. Accordingly, the above limitation may also have other warranty beyond that...


