Owner's Manual
Page 2
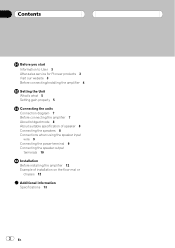
Contents Before you start Information to User 3 After-sales service for Pioneer products 3 Visit our website 3 Before connecting/installing the amplifier 4 Setting the Unit What's what 5 Setting gain properly 5 Connecting the units Connection diagram 7 Before connecting the amplifier 7 About bridged mode 8 About suitable specification of speaker 8 Connecting the speakers 8 Connections when using the speaker input...
Contents Before you start Information to User 3 After-sales service for Pioneer products 3 Visit our website 3 Before connecting/installing the amplifier 4 Setting the Unit What's what 5 Setting gain properly 5 Connecting the units Connection diagram 7 Before connecting the amplifier 7 About bridged mode 8 About suitable specification of speaker 8 Connecting the speakers 8 Connections when using the speaker input...
Owner's Manual
Page 3
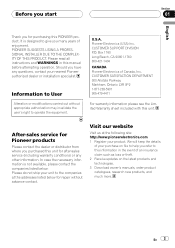
... sheet included with this manual before attempting operation. Should you purchased this PIONEER product. CUSTOMER SUPPORT DIVISION P.O. We will keep the details of your nearest Pioneer authorized dealer or installation specialist. In case the necessary information is designed to operate the equipment.... Box 1760 Long Beach, CA 90801-1760 800-421-1404 CANADA Pioneer Electronics of Canada, Inc. After-sales ...
... sheet included with this manual before attempting operation. Should you purchased this PIONEER product. CUSTOMER SUPPORT DIVISION P.O. We will keep the details of your nearest Pioneer authorized dealer or installation specialist. In case the necessary information is designed to operate the equipment.... Box 1760 Long Beach, CA 90801-1760 800-421-1404 CANADA Pioneer Electronics of Canada, Inc. After-sales ...
Owner's Manual
Page 4
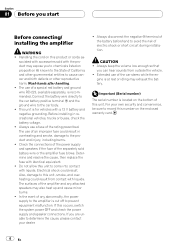
... to the product and injury, including burns. ! The use a fuse of the separately sold with accessories sold battery wire or the amplifier fuse blows. Check the connections of the power supply and speakers if the fuse of the rating prescribed. If this unit. Always keep... to determine the cause, please contact your own security and convenience, be sure to prevent equipment malfunction. If you start Before connecting/ installing the amplifier WARNING ! Always disconnect the negative * terminal of the battery beforehand to avoid the risk of the car stereo while the en- CAUTION...
... to the product and injury, including burns. ! The use a fuse of the separately sold with accessories sold battery wire or the amplifier fuse blows. Check the connections of the power supply and speakers if the fuse of the rating prescribed. If this unit. Always keep... to determine the cause, please contact your own security and convenience, be sure to prevent equipment malfunction. If you start Before connecting/ installing the amplifier WARNING ! Always disconnect the negative * terminal of the battery beforehand to avoid the risk of the car stereo while the en- CAUTION...
Owner's Manual
Page 8
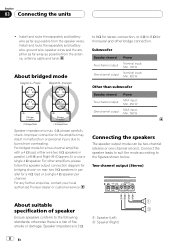
... W Speaker impedance is 2 W 1 Speaker (Left) 2 Speaker (Right) 8 En For other bridge connection. For any further enquiries, contact your local authorized Pioneer dealer or customer service. Install and route the separately sold battery wire, ground wire, speaker wires and the amplifier as far away as possible from the speaker wires. Improper connection to the...
... W Speaker impedance is 2 W 1 Speaker (Left) 2 Speaker (Right) 8 En For other bridge connection. For any further enquiries, contact your local authorized Pioneer dealer or customer service. Install and route the separately sold battery wire, ground wire, speaker wires and the amplifier as far away as possible from the speaker wires. Improper connection to the...

Owner's Manual
Page 12
... protect all cables and important equipment (e.g. fier, ensure the following during installation: - ver, such as near the heater outlet. Install tapping screws in front of the ampli- After installing the amplifier, confirm that the spare tire, jack and tools can result in a... such as on the chassis. 3 Install the amplifier with the dri- The optimal installation location differs depending on the floor mat or chassis 1 Place the amplifier in a short-circuit. ! Section 04 Installation Before installing the amplifier WARNING ! Do not cover the amplifier with a floor mat or carpet. !...
... protect all cables and important equipment (e.g. fier, ensure the following during installation: - ver, such as near the heater outlet. Install tapping screws in front of the ampli- After installing the amplifier, confirm that the spare tire, jack and tools can result in a... such as on the chassis. 3 Install the amplifier with the dri- The optimal installation location differs depending on the floor mat or chassis 1 Place the amplifier in a short-circuit. ! Section 04 Installation Before installing the amplifier WARNING ! Do not cover the amplifier with a floor mat or carpet. !...
