
User manual
Page 1
NEED HELP FAST? Wireless Music Center + Station WACS700 THANK YOU FOR CHOOSING PHILIPS! If you have read your instructions and still need assistance, you may access our online help at www.usasupport.philips.com or call 1-888-PHILIPS(744-5477) while with your Philips product more enjoyable. User manual Manuel d'utilisation Manual del usuario Read your Quick-Use guide and/or owner's manual first for quick tips that make using your product, (and model/serial number).
NEED HELP FAST? Wireless Music Center + Station WACS700 THANK YOU FOR CHOOSING PHILIPS! If you have read your instructions and still need assistance, you may access our online help at www.usasupport.philips.com or call 1-888-PHILIPS(744-5477) while with your Philips product more enjoyable. User manual Manuel d'utilisation Manual del usuario Read your Quick-Use guide and/or owner's manual first for quick tips that make using your product, (and model/serial number).

User manual
Page 11
English FM radio Tuning to radio stations 41 Storing preset radio stations 41 Autostore: automatic programming Manual programming To listen to a preset station RDS 42 NEWS 42 Activating NEWS Deactivating NEWS AUX/SLEEP AUX (Listening to an external source) ......... 43 SLEEP 43 Reset Reset 44 Specifications 45 Troubleshooting 46-48 Appendix How to mount your Center and Station onto walls 49-50 Contents 11
English FM radio Tuning to radio stations 41 Storing preset radio stations 41 Autostore: automatic programming Manual programming To listen to a preset station RDS 42 NEWS 42 Activating NEWS Deactivating NEWS AUX/SLEEP AUX (Listening to an external source) ......... 43 SLEEP 43 Reset Reset 44 Specifications 45 Troubleshooting 46-48 Appendix How to mount your Center and Station onto walls 49-50 Contents 11
User manual
Page 13
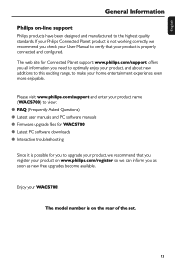
..., we recommend that your product is properly connected and configured. Please visit: www.philips.com/support and enter your product name (WACS700) to view: ● FAQ (Frequently Asked Questions) ● Latest user manuals and PC software manuals ● Firmware upgrade files for WACS700 ● Latest PC software downloads ● Interactive troubleshooting Since it is possible...
..., we recommend that your product is properly connected and configured. Please visit: www.philips.com/support and enter your product name (WACS700) to view: ● FAQ (Frequently Asked Questions) ● Latest user manuals and PC software manuals ● Firmware upgrade files for WACS700 ● Latest PC software downloads ● Interactive troubleshooting Since it is possible...

User manual
Page 18
...MENU - selects HD source (located on and selects Radio source or the audio input from an additional connected appliance - selects Radio source or the audio input from an additional connected appliance 2 y - In standby mode: ... the display screen upward or downward • REFRESH - SURROUND - manually programs preset radio stations ≤ Ç - enters or exits setup menu ≥ 3 / 4 SCROLL - press briefly to switch the set on Center) - English Controls ^ MUSIC BROADCAST - In standby mode: switches the set 's display Station's remote control 1 ™ 2 ¡ ) 3 4 ...
...MENU - selects HD source (located on and selects Radio source or the audio input from an additional connected appliance - selects Radio source or the audio input from an additional connected appliance 2 y - In standby mode: ... the display screen upward or downward • REFRESH - SURROUND - manually programs preset radio stations ≤ Ç - enters or exits setup menu ≥ 3 / 4 SCROLL - press briefly to switch the set on Center) - English Controls ^ MUSIC BROADCAST - In standby mode: switches the set 's display Station's remote control 1 ™ 2 ¡ ) 3 4 ...

User manual
Page 19
... or downward 6 View - toggles playback display and previous option list 7 Repeat - ajusts/displays/switches off temporarily 19 HD: moves music playback between Center and Station # Same Artist - HD/CD/AUX: turns NEWS function on (DBB1, DBB2, DBB3) or off & Program - switches the ...CD: returns to scroll through the option list 1 - HD/CD: skips tracks backward/forward (in playback screen) ¡ O, P - manually programs preset radio stations * Menu - HD/CD: searches track passage backward/ forward (in playback screen) ™ MUTE - turns the bass enhancement on or off ...
... or downward 6 View - toggles playback display and previous option list 7 Repeat - ajusts/displays/switches off temporarily 19 HD: moves music playback between Center and Station # Same Artist - HD/CD/AUX: turns NEWS function on (DBB1, DBB2, DBB3) or off & Program - switches the ...CD: returns to scroll through the option list 1 - HD/CD: skips tracks backward/forward (in playback screen) ¡ O, P - manually programs preset radio stations * Menu - HD/CD: searches track passage backward/ forward (in playback screen) ™ MUTE - turns the bass enhancement on or off ...

User manual
Page 22
... line's end to the ceiling C Connecting an additional appliance It is possible to the owner's manual of other end of the audio cables to the AUDIO OUT terminals of the red/white audio cables (not supplied) to the red socket AUX IN R and the white plug to the ... appliance, e.g. TV,VCR, Laser Disc player, DVD player with the Center or Station. 1 Insert the red plug of the additional appliance B Connecting to your PC ● Connect the supplied Ethernet cable to your computer's Ethernet port. For details, see the manual Connect to Center's ETHERNET and your PC ETHERNET R L...
... line's end to the ceiling C Connecting an additional appliance It is possible to the owner's manual of other end of the audio cables to the AUDIO OUT terminals of the red/white audio cables (not supplied) to the red socket AUX IN R and the white plug to the ... appliance, e.g. TV,VCR, Laser Disc player, DVD player with the Center or Station. 1 Insert the red plug of the additional appliance B Connecting to your PC ● Connect the supplied Ethernet cable to your computer's Ethernet port. For details, see the manual Connect to Center's ETHERNET and your PC ETHERNET R L...

User manual
Page 24
...appears on the display of Center's remote control 2 Press the navigation controls 3 or 4 and 2 to select Station Using the remote control WACS700 are equipped with synchronous display, Center's remote control consumes more power than normal remote controls. Center's remote control will return ... display on the remote control's display. To operate Station using the Station's remote control. - Some functional keys on the Center or Station you insert new batteries into it. see the manual Connect to an existing wireless PC network. By using the remote control again, repeat the above...
...appears on the display of Center's remote control 2 Press the navigation controls 3 or 4 and 2 to select Station Using the remote control WACS700 are equipped with synchronous display, Center's remote control consumes more power than normal remote controls. Center's remote control will return ... display on the remote control's display. To operate Station using the Station's remote control. - Some functional keys on the Center or Station you insert new batteries into it. see the manual Connect to an existing wireless PC network. By using the remote control again, repeat the above...

User manual
Page 32
... the MENU screen, use the navigation controls 3 or 4 and 2 to select. 4 Press 3 or 4 and 2 to select ➜ A list of your favorite music On Center's hard disk., you can also create your playlists on your PC to learn how to install DMM software. 1 Press MENU to enter the MENU screen...or 4 and 2 once or more to enter the album/track list 2 Press 3 or 4 to enter the MENU screen b. Refer to the manual Connect to your computer via Philips Digital Media Manager (DMM). Press MENU to highlight a selected playlist, album or track 3 To select Delete Playlist, Delete Album or Delete Track a....
... the MENU screen, use the navigation controls 3 or 4 and 2 to select. 4 Press 3 or 4 and 2 to select ➜ A list of your favorite music On Center's hard disk., you can also create your playlists on your PC to learn how to install DMM software. 1 Press MENU to enter the MENU screen...or 4 and 2 once or more to enter the album/track list 2 Press 3 or 4 to enter the MENU screen b. Refer to the manual Connect to your computer via Philips Digital Media Manager (DMM). Press MENU to highlight a selected playlist, album or track 3 To select Delete Playlist, Delete Album or Delete Track a....

User manual
Page 33
... loader, CD graphic printed side facing you inted Si Printed side this way Pr Ripping CDs With WAC700 Center, you can rip audio CD tracks from your PC. For more of the track being recorded. (a default album name, e.g. Services supplied and/or ...; UNMARK 4 To select Rec quality, a. To update your Gracenote® music recognition service database, see the manual Connect to be found in Center's built-in music recognition technology and related content delivery. Gracenote is restricted. CD and music-related data from Gracenote, Inc., copyrightC 2000-2005 Gracenote. Patents: #5,987,...
... loader, CD graphic printed side facing you inted Si Printed side this way Pr Ripping CDs With WAC700 Center, you can rip audio CD tracks from your PC. For more of the track being recorded. (a default album name, e.g. Services supplied and/or ...; UNMARK 4 To select Rec quality, a. To update your Gracenote® music recognition service database, see the manual Connect to be found in Center's built-in music recognition technology and related content delivery. Gracenote is restricted. CD and music-related data from Gracenote, Inc., copyrightC 2000-2005 Gracenote. Patents: #5,987,...

User manual
Page 34
... press MUTE. If power failure occurs during playback (for audio CDs only) ● During playback, press RECORD. &#... 4 and 2 to enter the album of the track being recorded Helpful hints: - Refer to the manual Connect to your recording 1 Select HD source 2 In Albums, use the navigation controls 3 or 4...find your ripped tracks After MP3 conversion is completed, you organize the music files on Center's harddisk Importing from Radio or External source A maximum of 3-hour recording...to the desired radio station (See Tuner,Tuning to convert the ripped tracks into MP3 files. - It takes some...
... press MUTE. If power failure occurs during playback (for audio CDs only) ● During playback, press RECORD. &#... 4 and 2 to enter the album of the track being recorded Helpful hints: - Refer to the manual Connect to your recording 1 Select HD source 2 In Albums, use the navigation controls 3 or 4...find your ripped tracks After MP3 conversion is completed, you organize the music files on Center's harddisk Importing from Radio or External source A maximum of 3-hour recording...to the desired radio station (See Tuner,Tuning to convert the ripped tracks into MP3 files. - It takes some...

User manual
Page 36
... Station ● To broadcast music to the station again, you have switched the Station(s) to standby mode (see the manual Connect to your setting of Center and Station. Press MENU b. Press MENU b. you switch Center to enter Station Mgnt menu c. On Station(s) 1 Check you have selected HD/AUX source on the Station(s) or have to stop MUSIC BROADCAST on Center and then, activate MUSIC...
... Station ● To broadcast music to the station again, you have switched the Station(s) to standby mode (see the manual Connect to your setting of Center and Station. Press MENU b. Press MENU b. you switch Center to enter Station Mgnt menu c. On Station(s) 1 Check you have selected HD/AUX source on the Station(s) or have to stop MUSIC BROADCAST on Center and then, activate MUSIC...

User manual
Page 37
...Refer to the manual Connect to select ➜ On the Center 's display shows the list of Center or Station, firmware version and free harddisk space (for Stations starts On the Stations, ● Select AUX mode and enter Installation Mode by : a. Press MENU b. On Center, ● ...Select HD mode and then, enter Installation Mode by : a. In Station Mgnt menu, use the navigation controls 3 or 4 and 2 to your WACS700 1 Switch on WAC700 Center (or WAS700 Station) and select HD source 2 To select Information on Center or Station a. Use the navigation...
...Refer to the manual Connect to select ➜ On the Center 's display shows the list of Center or Station, firmware version and free harddisk space (for Stations starts On the Stations, ● Select AUX mode and enter Installation Mode by : a. Press MENU b. On Center, ● ...Select HD mode and then, enter Installation Mode by : a. In Station Mgnt menu, use the navigation controls 3 or 4 and 2 to your WACS700 1 Switch on WAC700 Center (or WAS700 Station) and select HD source 2 To select Information on Center or Station a. Use the navigation...

User manual
Page 41
... then automatically play 3 Press and hold 3 or 4 until optimal reception is found Manual programming 1 Tune to your desired radio station (see Tuning to radio stations) 2 On the remote control, press Program to store the station ➜ The station is shown ➜ When you store more ) ➜ Playback screen appears. Press MENU b. If you are stored...
... then automatically play 3 Press and hold 3 or 4 until optimal reception is found Manual programming 1 Tune to your desired radio station (see Tuning to radio stations) 2 On the remote control, press Program to store the station ➜ The station is shown ➜ When you store more ) ➜ Playback screen appears. Press MENU b. If you are stored...

User manual
Page 44
...The set enters Installation Mode ➜ The search for Stations starts If both Center and Stations are not reset: ● On the Stations, select AUX mode and enter Installation Mode by : a. b. English Reset Reset If desired, you did in manual Connect to your PC) 1 Check the set is... Use the navigation controls 3 or 4 and 2 to enter Restore settings 5 Press 3 or 4 and 2 to exit Installation Mode when all the Stations are found If the Center is reset and Stations are reset: ● Do as you can restore your Center or Stations to their default setting (including the network setting).
...The set enters Installation Mode ➜ The search for Stations starts If both Center and Stations are not reset: ● On the Stations, select AUX mode and enter Installation Mode by : a. b. English Reset Reset If desired, you did in manual Connect to your PC) 1 Check the set is... Use the navigation controls 3 or 4 and 2 to enter Restore settings 5 Press 3 or 4 and 2 to exit Installation Mode when all the Stations are found If the Center is reset and Stations are reset: ● Do as you can restore your Center or Stations to their default setting (including the network setting).

User manual
Page 46
...Option 2 in Connect to your PC. ✔ Change the operating channel of your Center and Station when connecting them to an existing wireless PC network.To learn about how to change channels, see the manual Connect to your PC: Option 2. ✔ If possible, change the operating channels ...time setup, Station's display shows "Searching for Center". ✔ Check you have placed the Center and Station side by following these hints, consult your dealer or Philips for help. If you are playing the set 's slow response to power supply ✔ When adding a new station, check your center is in...
...Option 2 in Connect to your PC. ✔ Change the operating channel of your Center and Station when connecting them to an existing wireless PC network.To learn about how to change channels, see the manual Connect to your PC: Option 2. ✔ If possible, change the operating channels ...time setup, Station's display shows "Searching for Center". ✔ Check you have placed the Center and Station side by following these hints, consult your dealer or Philips for help. If you are playing the set 's slow response to power supply ✔ When adding a new station, check your center is in...

Quick start guide
Page 2
...'sr fWirmAwCaSr7e00upgrades - QQuiicckkstsatrat rgutidgeuide A CCoonnnneecct/Setup B EEnnjjooy C FFrAeQquently Asked Questions GB Quick start guide Wireless Music Center + Station 2 User manual Manuel d'utilisation Manual del usuario Benutzerhandücher WACS700 User manual Wireless Music System Wireless Music Center + Station WACS700 WACS700 3 CCoonnnneeccttttooyyoouurrPPCC WWhahtaytoyuoucacnandodowwitihthyoyouur rPPCCInInstsatalllelerrCCDD?? - C-onCnoencnteycotuyroW ur WACAC770000CCeenntteerr ttoo yyoouurr PC or home networkk ddiirreeccttllyy,,vviaiawwirireeddrroouuteterr or...
...'sr fWirmAwCaSr7e00upgrades - QQuiicckkstsatrat rgutidgeuide A CCoonnnneecct/Setup B EEnnjjooy C FFrAeQquently Asked Questions GB Quick start guide Wireless Music Center + Station 2 User manual Manuel d'utilisation Manual del usuario Benutzerhandücher WACS700 User manual Wireless Music System Wireless Music Center + Station WACS700 WACS700 3 CCoonnnneeccttttooyyoouurrPPCC WWhahtaytoyuoucacnandodowwitihthyoyouur rPPCCInInstsatalllelerrCCDD?? - C-onCnoencnteycotuyroW ur WACAC770000CCeenntteerr ttoo yyoouurr PC or home networkk ddiirreeccttllyy,,vviaiawwirireeddrroouuteterr or...

Quick start guide
Page 3
...; : indicates minimum reception • For wall mounting, please refer to the User Manual, Appendix: How to mount your Center or Station and power them up Station) 3 Finally, to both Center & Station will enter HD(Harddisk) mode (see screen illustration at the right) (Make sure ... to playback music stored in the HD to relocate Center and Station as you desire: • Simply unplug your Center and Station onto walls. Separating your Center and Station by side on a flat and firm surface. 2 Connect WACS700 to power supply, first the Center and then the Station Center/Station: •...
...; : indicates minimum reception • For wall mounting, please refer to the User Manual, Appendix: How to mount your Center or Station and power them up Station) 3 Finally, to both Center & Station will enter HD(Harddisk) mode (see screen illustration at the right) (Make sure ... to playback music stored in the HD to relocate Center and Station as you desire: • Simply unplug your Center and Station onto walls. Separating your Center and Station by side on a flat and firm surface. 2 Connect WACS700 to power supply, first the Center and then the Station Center/Station: •...

Quick start guide
Page 7
...for all displayed tracks at 4 time speed and best quality. B Build music library on Center You can also select to use a lower quality in case of voice only content (see the User Manual, HD: Building music library on Center for recording • Press and hold MARK • UNMARK to select/... of the track being recorded. Ripping CDs 1 Insert a CD into the Center's CD loader, with the printed graphics facing you. • Reading CD appears. • Audio CD: List of tracks appears • For CD recorded with MP3/WMA music files: List of file folders appears.To enter a track list, press ...
...for all displayed tracks at 4 time speed and best quality. B Build music library on Center You can also select to use a lower quality in case of voice only content (see the User Manual, HD: Building music library on Center for recording • Press and hold MARK • UNMARK to select/... of the track being recorded. Ripping CDs 1 Insert a CD into the Center's CD loader, with the printed graphics facing you. • Reading CD appears. • Audio CD: List of tracks appears • For CD recorded with MP3/WMA music files: List of file folders appears.To enter a track list, press ...

Quick start guide
Page 8
See User manual, Build music library on Center Importing from the radio or external source. Recording from Radio or External source A maximum of 3-hour recording can find and playback the ripped tracks from ... converted yet. To find the album of recorded tracks. If power failure occurs during the conversion, you can be made from your PC See the manual Connect to convert the ripped tracks into MP3 files. 6 To stop recording, press STOP IMPORTANT! • It takes some time to your PC...
See User manual, Build music library on Center Importing from the radio or external source. Recording from Radio or External source A maximum of 3-hour recording can find and playback the ripped tracks from ... converted yet. To find the album of recorded tracks. If power failure occurs during the conversion, you can be made from your PC See the manual Connect to convert the ripped tracks into MP3 files. 6 To stop recording, press STOP IMPORTANT! • It takes some time to your PC...

Quick start guide
Page 10
...2 to select your music collection using the Philips Digital Media Manager (supplied) 2005 © Koninklijie Philips Electronics N.V. Listen to FM Radio 1 Connect the supplied FM wire antenna to your Center and Station (see User manual, Installation) 2 Press SOURCE until the Center or Station enters Radio mode. (... up networks, transfer and manage your desired station To find out more ) ETHERNET R L AUX IN LINE OUT R L 75 FM ANTENNA VOLTAGE SELECTOR NOT FOR ALL VERSIONS Center 3 To pre-store available radio stations: a. All rights reserved. 3141 075 20764 GB www.philips.com...
...2 to select your music collection using the Philips Digital Media Manager (supplied) 2005 © Koninklijie Philips Electronics N.V. Listen to FM Radio 1 Connect the supplied FM wire antenna to your Center and Station (see User manual, Installation) 2 Press SOURCE until the Center or Station enters Radio mode. (... up networks, transfer and manage your desired station To find out more ) ETHERNET R L AUX IN LINE OUT R L 75 FM ANTENNA VOLTAGE SELECTOR NOT FOR ALL VERSIONS Center 3 To pre-store available radio stations: a. All rights reserved. 3141 075 20764 GB www.philips.com...


