
Operation Manual
Page 1
... recycled paper • Specifications and external dimensions are subject to change without notice. 57343 Copyright © PENTAX Corporation 2004 01-200402 Printed in Japan Digital Camera Operating Manual To ensure the best performance from your camera, please read the Operating Manual before using the camera. PENTAX Corporation 2-36-9,Maeno-cho, Itabashi-ku, Tokyo 174-8639, JAPAN (http://www...
... recycled paper • Specifications and external dimensions are subject to change without notice. 57343 Copyright © PENTAX Corporation 2004 01-200402 Printed in Japan Digital Camera Operating Manual To ensure the best performance from your camera, please read the Operating Manual before using the camera. PENTAX Corporation 2-36-9,Maeno-cho, Itabashi-ku, Tokyo 174-8639, JAPAN (http://www...

Operation Manual
Page 2
... technology. Regarding copyrights Images taken using the unified standard for the direct printout of the LCD monitor in this manual are for buying the PENTAX Optio S4i Digital Camera. Copyright © 2002 inSilicon Corporation. Please read this manual safe, as items for display. You can be used in helping you for anything other brands or product names...
... technology. Regarding copyrights Images taken using the unified standard for the direct printout of the LCD monitor in this manual are for buying the PENTAX Optio S4i Digital Camera. Copyright © 2002 inSilicon Corporation. Please read this manual safe, as items for display. You can be used in helping you for anything other brands or product names...
Operation Manual
Page 8
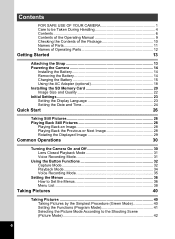
... to be Taken During Handling 4 Contents 6 Contents of the Operating Manual 9 Checking the Contents of the Package 10 Names of Parts 11 Names of Operating Parts 12 Getting Started 13 Attaching the Strap 13 Powering the Camera 14 Installing the Battery 14 Removing the Battery 14 Charging the Battery...28 Playing Back an Image 28 Playing Back the Previous or Next Image 28 Rotating the Displayed Image 29 Common Operations 30 Turning the Camera On and Off 30 Lens Closed Playback Mode 31 Voice Recording Mode 31 Using the Button Functions 32 Capture Mode 32 Playback Mode ...
... to be Taken During Handling 4 Contents 6 Contents of the Operating Manual 9 Checking the Contents of the Package 10 Names of Parts 11 Names of Operating Parts 12 Getting Started 13 Attaching the Strap 13 Powering the Camera 14 Installing the Battery 14 Removing the Battery 14 Charging the Battery...28 Playing Back an Image 28 Playing Back the Previous or Next Image 28 Rotating the Displayed Image 29 Common Operations 30 Turning the Camera On and Off 30 Lens Closed Playback Mode 31 Voice Recording Mode 31 Using the Button Functions 32 Capture Mode 32 Playback Mode ...

Operation Manual
Page 11
... memos. 6 Playback/Deleting/Editing This chapter explains how to use the menus. Contents of the Operating Manual This operating manual contains the following chapters. 1 Getting Started 1 This chapter explains what to do after purchasing the camera before you want to start taking pictures. indicates information that is useful to be taken when operating...
... memos. 6 Playback/Deleting/Editing This chapter explains how to use the menus. Contents of the Operating Manual This operating manual contains the following chapters. 1 Getting Started 1 This chapter explains what to do after purchasing the camera before you want to start taking pictures. indicates information that is useful to be taken when operating...

Operation Manual
Page 12
Checking the Contents of the Package Camera Optio S4i Strap O-ST20 (∗) Software (CD-ROM) S-SW20 AV cable I-AVC7 (∗) USB cable I-USB7 (∗) Rechargeable lithium-ion battery D-LI8 (∗) Battery charger D-BC20 (∗) AC plug cord D-CO2J Operating Manual (this manual) Operating Manual (PC Connection Manual) Items marked with an asterisk (∗) are also available as optional accessories. For other optional accessories, refer to "Optional Accessories" (p.127). 10
Checking the Contents of the Package Camera Optio S4i Strap O-ST20 (∗) Software (CD-ROM) S-SW20 AV cable I-AVC7 (∗) USB cable I-USB7 (∗) Rechargeable lithium-ion battery D-LI8 (∗) Battery charger D-BC20 (∗) AC plug cord D-CO2J Operating Manual (this manual) Operating Manual (PC Connection Manual) Items marked with an asterisk (∗) are also available as optional accessories. For other optional accessories, refer to "Optional Accessories" (p.127). 10

Operation Manual
Page 20
... 4 symbols. 3 Connect the AC plug cord to the AC adapter. 4 Plug the AC plug cord into the power outlet. • Make sure that the camera is turned off when connecting or disconnecting the AC adapter. • Make sure that the AC plug cord and connecting cable are taking pictures. •...; Be sure to read the operation manual accompanying the AC adapter before using the adapter. • Be sure to match the 4 symbols when connecting the DC terminals. The data may damage ...
... 4 symbols. 3 Connect the AC plug cord to the AC adapter. 4 Plug the AC plug cord into the power outlet. • Make sure that the camera is turned off when connecting or disconnecting the AC adapter. • Make sure that the AC plug cord and connecting cable are taking pictures. •...; Be sure to read the operation manual accompanying the AC adapter before using the adapter. • Be sure to match the 4 symbols when connecting the DC terminals. The data may damage ...

Operation Manual
Page 34
....71) 3 qsz button Changes the focus mode as follows. (1p.69) Macro mode (1p.69) Super Macro mode (1p.69) Infinity-Landscape mode (1p.69) Manual Focus mode (1p.70) Focusing Area mode (1p.70) 4 Zoom button Changes the size of the subject. (1p.26) 5 Q Playback button Switches to the slim...) You can assign a different function to the QUICK button by selecting [Custom Function] on the [B Set-up ] menu. (1p.121) Adjusts the ratio when the digital filter is set to the Playback mode.
....71) 3 qsz button Changes the focus mode as follows. (1p.69) Macro mode (1p.69) Super Macro mode (1p.69) Infinity-Landscape mode (1p.69) Manual Focus mode (1p.70) Focusing Area mode (1p.70) 4 Zoom button Changes the size of the subject. (1p.26) 5 Q Playback button Switches to the slim...) You can assign a different function to the QUICK button by selecting [Custom Function] on the [B Set-up ] menu. (1p.121) Adjusts the ratio when the digital filter is set to the Playback mode.

Operation Manual
Page 35
7 Four-way controller (23) (2) Selects self-timer mode, remote control mode and continuous shooting mode. (3) Displays the Capture mode screen and changes the Capture mode. (23) Adjusts the focus in manual focus mode. (1p.70) 8 OK button Selects a menu item. (1p.36) Performs spot autofocus at the standard autofocus distance in manual focus mode. 9 DISPLAY button Changes the information displayed on the LCD monitor. (1p.68, 92) 10 MENU button 3 Displays the [A Rec.Mode], [Q Playback] and [B Set-up] menus. (1p.36) Common Operations 33
7 Four-way controller (23) (2) Selects self-timer mode, remote control mode and continuous shooting mode. (3) Displays the Capture mode screen and changes the Capture mode. (23) Adjusts the focus in manual focus mode. (1p.70) 8 OK button Selects a menu item. (1p.36) Performs spot autofocus at the standard autofocus distance in manual focus mode. 9 DISPLAY button Changes the information displayed on the LCD monitor. (1p.68, 92) 10 MENU button 3 Displays the [A Rec.Mode], [Q Playback] and [B Set-up] menus. (1p.36) Common Operations 33

Operation Manual
Page 47
...1p.65 Taking Underwater Moving Pictures 1p.54 Playing Back Moving Pictures 1p.91 45 Use the LCD monitor when recording moving pictures using the digital zoom. • The Marine Moving Picture mode enables you keep the shutter release button pressed for more than one second, pictures will ... using the waterproof case (optional). The focus is set to On. • Only Autofocus mode, Infinity-Landscape mode and Manual Focus mode can be set to a fixed position in Autofocus mode. • Only the digital zoom can be recorded when [Time-Lapse Movie] is set in Moving Picture mode.
...1p.65 Taking Underwater Moving Pictures 1p.54 Playing Back Moving Pictures 1p.91 45 Use the LCD monitor when recording moving pictures using the digital zoom. • The Marine Moving Picture mode enables you keep the shutter release button pressed for more than one second, pictures will ... using the waterproof case (optional). The focus is set to On. • Only Autofocus mode, Infinity-Landscape mode and Manual Focus mode can be set to a fixed position in Autofocus mode. • Only the digital zoom can be recorded when [Time-Lapse Movie] is set in Moving Picture mode.

Operation Manual
Page 71
... in .). The focus mode changes each time the button is pressed halfway. The camera is ready to the subject is r Super Macro mode approx. 6 cm - 20 cm (2.4 in. - 8 in .). z Manual Focus mode Adjust the focus manually with the four-way controller. q Macro mode This mode is used when the ...distance to the subject is fixed at the middle position and only the digital zoom can be used when the distance to take pictures...
... in .). The focus mode changes each time the button is pressed halfway. The camera is ready to the subject is r Super Macro mode approx. 6 cm - 20 cm (2.4 in. - 8 in .). z Manual Focus mode Adjust the focus manually with the four-way controller. q Macro mode This mode is used when the ...distance to the subject is fixed at the middle position and only the digital zoom can be used when the distance to take pictures...

Operation Manual
Page 72
...Autofocus mode, you take your finger off the four-way controller (23). The focus frame is fixed in focus" 1p.131 70 Taking Pictures Manual Focus When the mode is set to full screen on the LCD monitor for focus adjustment. Troubleshooting "Subject is set to Macro or Super ... press any button except the four-way controller (23) or take a picture while looking through the viewfinder when the focus mode is enlarged to z (Manual Focus), the central portion of the resulting picture will differ from what was seen in the viewfinder. The screen returns to focus quickly. To return...
...Autofocus mode, you take your finger off the four-way controller (23). The focus frame is fixed in focus" 1p.131 70 Taking Pictures Manual Focus When the mode is set to full screen on the LCD monitor for focus adjustment. Troubleshooting "Subject is set to Macro or Super ... press any button except the four-way controller (23) or take a picture while looking through the viewfinder when the focus mode is enlarged to z (Manual Focus), the central portion of the resulting picture will differ from what was seen in the viewfinder. The screen returns to focus quickly. To return...

Operation Manual
Page 76
Mode RecordedPixels 2304x1728 Quality Level White Balance AWB FocusingArea Multiple AE Metering Sensitivity Auto MENU Exit OK OK Taking Pictures RBCFGH 2, 3 4 1 MENU Rec.
Mode RecordedPixels 2304x1728 Quality Level White Balance AWB FocusingArea Multiple AE Metering Sensitivity Auto MENU Exit OK OK Taking Pictures RBCFGH 2, 3 4 1 MENU Rec.

Operation Manual
Page 77
White Balance AWB DISP Adjust MENU Exit OK OK The white balance is automatically adjusted. [Complete] appears on the White Balance screen. 2 Point the camera at the blank sheet of paper so that it fills the screen. 3 Press the DISPLAY button. Manual Setting Have a blank sheet of white paper ready. 1 Select [K] (manual) on the LCD monitor and the display returns to the menu screen. 4 Press the OK button. 4 The camera is ready to take the picture. Taking Pictures 75
White Balance AWB DISP Adjust MENU Exit OK OK The white balance is automatically adjusted. [Complete] appears on the White Balance screen. 2 Point the camera at the blank sheet of paper so that it fills the screen. 3 Press the DISPLAY button. Manual Setting Have a blank sheet of white paper ready. 1 Select [K] (manual) on the LCD monitor and the display returns to the menu screen. 4 Press the OK button. 4 The camera is ready to take the picture. Taking Pictures 75

Operation Manual
Page 86
...84 The drive mode setting (gjh) selected using the four-way controller (2) is saved. P MF The manual focus position is saved. P Digital Zoom The [Digital Zoom] setting on the menus for each function when the camera is saved. O Display The LCD monitor display mode is saved. O • Menu items not included... in [Memory] will also be saved when the camera is turned off . • The zoom position setting in the digital zoom range will be reset to be saved in the settings selected on the [A Rec.Mode] menu is ...
...84 The drive mode setting (gjh) selected using the four-way controller (2) is saved. P MF The manual focus position is saved. P Digital Zoom The [Digital Zoom] setting on the menus for each function when the camera is saved. O Display The LCD monitor display mode is saved. O • Menu items not included... in [Memory] will also be saved when the camera is turned off . • The zoom position setting in the digital zoom range will be reset to be saved in the settings selected on the [A Rec.Mode] menu is ...

Operation Manual
Page 87
...Capture mode on E will be registered in User Mode Flash mode Drive mode Focus mode Manual focus position Recorded pixels Quality White balance Focusing area AE metering Sensitivity Digital zoom Instant review Memory Sharpness Saturation Contrast EV compensation Custom function Default Setting Auto Normal ... p.77 p.78 p.63 p.79 p.84 p.80 p.81 p.82 p.83 p.121 85 The camera is ready to select [Memory]. 3 Press the four-way controller (5). Mode EVCompensation ±0.0 3D Mode Parallel FastFwdMovie Off Digital Zoom On Instant Review 1 sec Memory 4 Use the four-way controller (23) to choose...
...Capture mode on E will be registered in User Mode Flash mode Drive mode Focus mode Manual focus position Recorded pixels Quality White balance Focusing area AE metering Sensitivity Digital zoom Instant review Memory Sharpness Saturation Contrast EV compensation Custom function Default Setting Auto Normal ... p.77 p.78 p.63 p.79 p.84 p.80 p.81 p.82 p.83 p.121 85 The camera is ready to select [Memory]. 3 Press the four-way controller (5). Mode EVCompensation ±0.0 3D Mode Parallel FastFwdMovie Off Digital Zoom On Instant Review 1 sec Memory 4 Use the four-way controller (23) to choose...

Operation Manual
Page 101
Make sure that both the TV and the camera are turned off before connecting the cable. 1 Open the terminal cover and connect the AV cable. 2 Connect the other equipment with a video IN jack. Playback/Deleting/Editing 99 Refer to the operating manual for a long time, use of the AV cable ...to which the camera is recommended. Changing the Video Output Format 1p.119 If you can capture and play back images on a TV ...
Make sure that both the TV and the camera are turned off before connecting the cable. 1 Open the terminal cover and connect the AV cable. 2 Connect the other equipment with a video IN jack. Playback/Deleting/Editing 99 Refer to the operating manual for a long time, use of the AV cable ...to which the camera is recommended. Changing the Video Output Format 1p.119 If you can capture and play back images on a TV ...

Operation Manual
Page 133
... objects, fast-moving objects, scenery through window or net, etc. If the subject is outside the focusing area, aim the camera at target and press shutter release button fully, or use Manual Focus mode. Problem Cause Remedy Subject is not in Subject difficult to focus Subjects difficult to focus on using focus...
... objects, fast-moving objects, scenery through window or net, etc. If the subject is outside the focusing area, aim the camera at target and press shutter release button fully, or use Manual Focus mode. Problem Cause Remedy Subject is not in Subject difficult to focus Subjects difficult to focus on using focus...

Operation Manual
Page 134
... to 35 mm - 105 mm in 35 mm format) Maximum Aperture f/2.6 - Main Specifications Camera Type Effective Pixels Sensor Recorded Pixels Sensitivity File Format Quality Level Storage Medium Fully automatic compact digital still camera with built-in memory (approx. 10 MB), SD Memory Card Image Storage Capacity (When using...Picture 2304×1728 pixels, 1600×1200 pixels 1024×768 pixels, 640×480 pixels Moving Picture 320×240 pixels Auto, manual (equivalent to ISO 50, 100, 200, 400) Still Picture JPEG (Exif2.2), DCF, DPOF, PRINT Image Matching II Moving Picture AVI (Open...
... to 35 mm - 105 mm in 35 mm format) Maximum Aperture f/2.6 - Main Specifications Camera Type Effective Pixels Sensor Recorded Pixels Sensitivity File Format Quality Level Storage Medium Fully automatic compact digital still camera with built-in memory (approx. 10 MB), SD Memory Card Image Storage Capacity (When using...Picture 2304×1728 pixels, 1600×1200 pixels 1024×768 pixels, 640×480 pixels Moving Picture 320×240 pixels Auto, manual (equivalent to ISO 50, 100, 200, 400) Still Picture JPEG (Exif2.2), DCF, DPOF, PRINT Image Matching II Moving Picture AVI (Open...

Operation Manual
Page 135
...18 m - 0.5 m (full zoom range) Super Macro: 0.06 m - 0.2 m (Lmanidddslecazpoeo:m∞p(ofusiltliozonoomnlyra) nge) Manual Focus Focus Lock By half-pressing shutter release button 0.18 m - ∞ (0.06 m - ∞ around the focal... Text, Food), Soft Focus, Posterization, Night Scene, Moving Picture, Panorama Assist, 3D, Digital Filter, USER, Marine, Marine Moving Picture EV Compensation ±2 EV (can be set ...type, delay time: approx. 10 sec., 2 sec. Flash Type Auto flash with PENTAX measuring conditions) 8 In/Out Port USB/AV terminal (PC communication type USB 1.1), external...
...18 m - 0.5 m (full zoom range) Super Macro: 0.06 m - 0.2 m (Lmanidddslecazpoeo:m∞p(ofusiltliozonoomnlyra) nge) Manual Focus Focus Lock By half-pressing shutter release button 0.18 m - ∞ (0.06 m - ∞ around the focal... Text, Food), Soft Focus, Posterization, Night Scene, Moving Picture, Panorama Assist, 3D, Digital Filter, USER, Marine, Marine Moving Picture EV Compensation ±2 EV (can be set ...type, delay time: approx. 10 sec., 2 sec. Flash Type Auto flash with PENTAX measuring conditions) 8 In/Out Port USB/AV terminal (PC communication type USB 1.1), external...


