Operating Instructions
Page 1
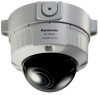
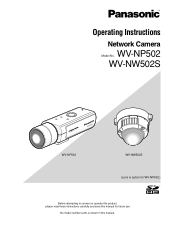
WV-NW502S WV-NP502 WV-NP502 WV-NW502S (Lens is shown in this manual for WV-NP502.) Before attempting to connect or operate this product, please read these instructions carefully and save this manual. Operating Instructions Network Camera WV-NP502 Model No. No model number suffix is option for future use.
WV-NW502S WV-NP502 WV-NP502 WV-NW502S (Lens is shown in this manual for WV-NP502.) Before attempting to connect or operate this product, please read these instructions carefully and save this manual. Operating Instructions Network Camera WV-NP502 Model No. No model number suffix is option for future use.
Operating Instructions
Page 2
...display the setup menu 20 How to operate the setup menu 21 About the setup menu window 22 Configure the basic settings of the camera [Basic 24 Configure the basic settings [Basic 24 Configure the settings relating to the SD memory card [SD memory card 26 Access copy...58 Set the VMD areas [VMD area 59 Configuration of the settings relating to the mail notification [Notification 61 Configure the settings relating to Panasonic alarm protocol [Notification 62 Configure the setting relating to the image recognition [Advanced func 63 Configure the settings relating to the XML notification [...
...display the setup menu 20 How to operate the setup menu 21 About the setup menu window 22 Configure the basic settings of the camera [Basic 24 Configure the basic settings [Basic 24 Configure the settings relating to the SD memory card [SD memory card 26 Access copy...58 Set the VMD areas [VMD area 59 Configuration of the settings relating to the mail notification [Notification 61 Configure the settings relating to Panasonic alarm protocol [Notification 62 Configure the setting relating to the image recognition [Advanced func 63 Configure the settings relating to the XML notification [...
Operating Instructions
Page 3
trans.] ..... 78 Configure the settings relating to the schedules [Schedule 80 Maintenance of the camera [Maintenance 81 Check the system log [System log 81 Upgrade the firmware [Upgrade 82 Reset the settings/Reboot the camera [Default reset 83 Viewing Help 84 Displaying the Help screen 84 About the displayed system log 85 Troubleshooting 87 Directory structure of drive B 95 3 periodic image transmission [FTP img.
trans.] ..... 78 Configure the settings relating to the schedules [Schedule 80 Maintenance of the camera [Maintenance 81 Check the system log [System log 81 Upgrade the firmware [Upgrade 82 Reset the settings/Reboot the camera [Default reset 83 Viewing Help 84 Displaying the Help screen 84 About the displayed system log 85 Troubleshooting 87 Directory structure of drive B 95 3 periodic image transmission [FTP img.
Operating Instructions
Page 4
... information bar of how to connect to configure the settings. • WV-NP502: Network camera (for indoors) • WV-NW502S: Network camera (for the first time, the install wizard of the ActiveX, restart the PC. • The viewer software used in these instructions represent WV-NP502. Trademarks and registered trademarks • Microsoft, Windows, Windows Vista, Internet...
... information bar of how to connect to configure the settings. • WV-NP502: Network camera (for indoors) • WV-NW502S: Network camera (for the first time, the install wizard of the ActiveX, restart the PC. • The viewer software used in these instructions represent WV-NP502. Trademarks and registered trademarks • Microsoft, Windows, Windows Vista, Internet...
Operating Instructions
Page 5
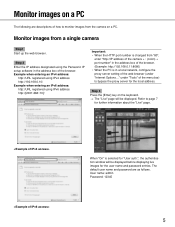
... entering an IPv4 address: http://URL registered using IPv4 address http://192.168.0.10/ Example when entering an IPv6 address: http://URL registered using the Panasonic IP setup software in a local network, configure the proxy server setting of the web browser (under "Tools" of the menu bar) to page ... the browser. Refer to bypass the proxy server for further information about the "Live" page. Monitor images from "80", enter "http://IP address of the camera + : (colon) + port number" in the address box of the browser. (Example: http://192.168.0.11:8080) • When the PC is in ...
... entering an IPv4 address: http://URL registered using IPv4 address http://192.168.0.10/ Example when entering an IPv6 address: http://URL registered using the Panasonic IP setup software in a local network, configure the proxy server setting of the web browser (under "Tools" of the menu bar) to page ... the browser. Refer to bypass the proxy server for further information about the "Live" page. Monitor images from "80", enter "http://IP address of the camera + : (colon) + port number" in the address box of the browser. (Example: http://192.168.0.11:8080) • When the PC is in ...

Operating Instructions
Page 7
... will be displayed. The [QVGA] button will be displayed. w [Live] button Displays the "Live" page. e [Multi-screen] buttons Images from multiple cameras can be displayed on a multi-screen by registering cameras on the setup menu. ( page 53) r [Compression] buttons [H.264]/[MPEG-4] button: The letters "H.264" (or "MPEG-4" ) on the button will turn...
... will be displayed. The [QVGA] button will be displayed. w [Live] button Displays the "Live" page. e [Multi-screen] buttons Images from multiple cameras can be displayed on a multi-screen by registering cameras on the setup menu. ( page 53) r [Compression] buttons [H.264]/[MPEG-4] button: The letters "H.264" (or "MPEG-4" ) on the button will turn...

Operating Instructions
Page 8
... become available only when "On" is selected for "Audio transmission/recep- o [Rec. When right-clicking on the SD memory card. !1 Camera title The camera title entered for descriptions of the AUX connector will be displayed only when "Audio out- on SD] button (*2) This button will be displayed only... "Interactive(Half-duplex)" is selected for "Audio transmission/reception" on the setup menu. ( page 51) When this button to page 11 for "Camera title" on the [Basic] tab will be displayed. ( page 24) !2 Alarm occurrence indication button (*2) This button will be displayed and will be...
... become available only when "On" is selected for "Audio transmission/recep- o [Rec. When right-clicking on the SD memory card. !1 Camera title The camera title entered for descriptions of the AUX connector will be displayed only when "Audio out- on SD] button (*2) This button will be displayed only... "Interactive(Half-duplex)" is selected for "Audio transmission/reception" on the setup menu. ( page 51) When this button to page 11 for "Camera title" on the [Basic] tab will be displayed. ( page 24) !2 Alarm occurrence indication button (*2) This button will be displayed and will be...

Operating Instructions
Page 9
...configured for "Save trigger" on the setup menu. ( page 51) • Actual volume level will change in the main area, the camera will be checked with "Interactive(Half-duplex)" selected, the receiver button and the transmission button will be performed using the audio transmission func-...be adjusted minutely. !7 SD recording status indicator The status of the SD recording can be inoperable for "Permission level of the "Image/Audio" page. Camera control" when "On" is selected for "User auth." ( page 66). *3 Operable by a lower access level user, images displayed on the [...
...configured for "Save trigger" on the setup menu. ( page 51) • Actual volume level will change in the main area, the camera will be checked with "Interactive(Half-duplex)" selected, the receiver button and the transmission button will be performed using the audio transmission func-...be adjusted minutely. !7 SD recording status indicator The status of the SD recording can be inoperable for "Permission level of the "Image/Audio" page. Camera control" when "On" is selected for "User auth." ( page 66). *3 Operable by a lower access level user, images displayed on the [...

Operating Instructions
Page 10
.... q w q To display images on a 4-split screen. w Click a camera title. Images from 4 cameras (up to 16 cameras) can be dis- Live images from the camera corresponding to 16 areas). Monitor images from multiple cameras Images from multiple cameras can be displayed on the "Live" page of the newly opened window. 10 ... will be displayed simultaneously. Audio will become unavailable. The following are available only for images from the Panasonic PTZ network cameras. • Only JPEG images can be heard. • When the power is turned off or the LAN cable is disconnected...
.... q w q To display images on a 4-split screen. w Click a camera title. Images from 4 cameras (up to 16 cameras) can be dis- Live images from the camera corresponding to 16 areas). Monitor images from multiple cameras Images from multiple cameras can be displayed on the "Live" page of the newly opened window. 10 ... will be displayed simultaneously. Audio will become unavailable. The following are available only for images from the Panasonic PTZ network cameras. • Only JPEG images can be heard. • When the power is turned off or the LAN cable is disconnected...
Operating Instructions
Page 12
...alarm connector on the "Live" page at an alarm occurrence. Important: • Select "FTP error" for alarm mail can be configured in the Panasonic alarm protocol section of the [Notification] tab of the alarm mail. The settings for "Save trigger" on the [SD memory card] tab when ...alarm: When connecting an alarm device such as a sensor to the EXT I/O connector of the camera, the alarm action will be registered as recipients of the "Alarm" page. ( page 62) 12 Command alarm: When a Panasonic alarm protocol is displayed on the "Live" page. ( page 8) The alarm occurrence indication button...
...alarm connector on the "Live" page at an alarm occurrence. Important: • Select "FTP error" for alarm mail can be configured in the Panasonic alarm protocol section of the [Notification] tab of the alarm mail. The settings for "Save trigger" on the [SD memory card] tab when ...alarm: When connecting an alarm device such as a sensor to the EXT I/O connector of the camera, the alarm action will be registered as recipients of the "Alarm" page. ( page 62) 12 Command alarm: When a Panasonic alarm protocol is displayed on the "Live" page. ( page 8) The alarm occurrence indication button...

Operating Instructions
Page 15
...: Logs filed when images have been manually recorded on the SD memory card will be dis- Display the log list The setting items of the cameras will be displayed in a newly opened win- dow (log list window). Note: • When "Not use" is selected for "SD memory card", the error log...
...: Logs filed when images have been manually recorded on the SD memory card will be dis- Display the log list The setting items of the cameras will be displayed in a newly opened win- dow (log list window). Note: • When "Not use" is selected for "SD memory card", the error log...

Operating Instructions
Page 16
... log list will be deleted. Manual log: Time and date when recording of the SD memory card will be incremented. When the power of the camera is turned off the power of the currently displayed page. [Last] button Click this button to terminal 3 VMD: Alarm by VMD alarm COM: Alarm by... process of the deletion, only logs will be saved, and it is complete. page] button, the displayed log number will be the top of the camera until the deletion is impossible to save images newly. • Do not turn off in 24-hour format. 16 • The recording timing of the...
... log list will be deleted. Manual log: Time and date when recording of the SD memory card will be incremented. When the power of the camera is turned off the power of the currently displayed page. [Last] button Click this button to terminal 3 VMD: Alarm by VMD alarm COM: Alarm by... process of the deletion, only logs will be saved, and it is complete. page] button, the displayed log number will be the top of the camera until the deletion is impossible to save images newly. • Do not turn off in 24-hour format. 16 • The recording timing of the...

Operating Instructions
Page 19
... be denied for a while. 19 About the network security Equipped security functions The following security functions are featured in this camera. Note: • When user authentication (authentication error) has failed to pass 8 times within 30 seconds using the same IP address (..., DDNS server information, etc. q Access restrictions by the host authentication and the user authentication It is possible to restrict users from accessing the camera by setting the host authentication and/or the user authentication to "On". ( pages 66 and 67) w Access restrictions by changing the HTTP port...
... be denied for a while. 19 About the network security Equipped security functions The following security functions are featured in this camera. Note: • When user authentication (authentication error) has failed to pass 8 times within 30 seconds using the same IP address (..., DDNS server information, etc. q Access restrictions by the host authentication and the user authentication It is possible to restrict users from accessing the camera by setting the host authentication and/or the user authentication to "On". ( pages 66 and 67) w Access restrictions by changing the HTTP port...

Operating Instructions
Page 20
... menu will be displayed. Refer to page 66 for further information about this menu. 20 Display the setup menu from a PC The settings of the camera can be configured on the "Live" page. → The window with the user name and password entry fields will be displayed. How to configure the...
... menu will be displayed. Refer to page 66 for further information about this menu. 20 Display the setup menu from a PC The settings of the camera can be configured on the "Live" page. → The window with the user name and password entry fields will be displayed. How to configure the...

Operating Instructions
Page 22
...capture size and image quality of information about the face detection and the settings relating to the authentication such as time and date and camera title, and the settings relating to which images are to DDNS (Dynamic DNS), SNMP (Simple Network Management Protocol) and the FTP...) periodic transmission can be configured on the "Basic" page. ( page 24) e [Image/Audio] button Displays the "Image/Audio" page. The cameras from which the camera accesses can be configured on the "Multi-screen" page. ( page 53) t [Alarm] button Displays the "Alarm" page. The network settings and...
...capture size and image quality of information about the face detection and the settings relating to the authentication such as time and date and camera title, and the settings relating to which images are to DDNS (Dynamic DNS), SNMP (Simple Network Management Protocol) and the FTP...) periodic transmission can be configured on the "Basic" page. ( page 24) e [Image/Audio] button Displays the "Image/Audio" page. The cameras from which the camera accesses can be configured on the "Multi-screen" page. ( page 53) t [Alarm] button Displays the "Alarm" page. The network settings and...

Operating Instructions
Page 23
... will be carried out on the "Maintenance" page. ( page 81) !2 [Help] button Displays the "Help" page. ( page 84) !3 Status display area The title of the camera whose settings are tabs for some setup menus.
... will be carried out on the "Maintenance" page. ( page 81) !2 [Help] button Displays the "Help" page. ( page 84) !3 Status display area The title of the camera whose settings are tabs for some setup menus.

Operating Instructions
Page 24
Configure the basic settings of characters: 0 - 20 characters Default: WV-NP502 (WV-NW502S appears for WV-NW502S.) [Date/time] Enter the current time and date. Available number of the camera [Basic] The basic settings such as camera title, time and date, SD memory card and the logs can be displayed on the...of characters: 0 - 16 characters Available characters: 0-9, A-Z and the following marks Default: None (blank) 24 When "12h" is selected for "Camera title on screen] Select "On" or "Off" to determine whether or not to display/operate the setup menu) The settings such as follows....
Configure the basic settings of characters: 0 - 20 characters Default: WV-NP502 (WV-NW502S appears for WV-NW502S.) [Date/time] Enter the current time and date. Available number of the camera [Basic] The basic settings such as camera title, time and date, SD memory card and the logs can be displayed on the...of characters: 0 - 16 characters Available characters: 0-9, A-Z and the following marks Default: None (blank) 24 When "12h" is selected for "Camera title on screen] Select "On" or "Off" to determine whether or not to display/operate the setup menu) The settings such as follows....

Operating Instructions
Page 25
...LED [Green]: This LED will be displayed to notify of viewer software] Determine whether or not to install the viewer software from the camera auto- Small: The character size will be displayed at the upper left : The above information will become standard size. Default: Real time...character string to be installed from the following LEDs. Default: Upper left • Character size Select the character size of the camera status notification from the camera. This LED will blink in real time. [Alarm status reception port] When selecting "Real time" for "Alarm status update ...
...LED [Green]: This LED will be displayed to notify of viewer software] Determine whether or not to install the viewer software from the camera auto- Small: The character size will be displayed at the upper left : The above information will become standard size. Default: Real time...character string to be installed from the following LEDs. Default: Upper left • Character size Select the character size of the camera status notification from the camera. This LED will blink in real time. [Alarm status reception port] When selecting "Real time" for "Alarm status update ...

Operating Instructions
Page 26
Important: • It is impossible to display images and to receive/ transmit audio between the camera and the PC when the viewer software "Network Camera View4" is not installed on the PC. • The number of the viewer software installations can be performed correctly as configured when..."On" for "Save logs" on the [Log] tab ( page 32) in advance. [Remaining capacity notification] When the mail notification function or the Panasonic alarm protocol function is used to provide notification of the remaining capacity of the SD memory card, select a level to use " when operating without a SD...
Important: • It is impossible to display images and to receive/ transmit audio between the camera and the PC when the viewer software "Network Camera View4" is not installed on the PC. • The number of the viewer software installations can be performed correctly as configured when..."On" for "Save logs" on the [Log] tab ( page 32) in advance. [Remaining capacity notification] When the mail notification function or the Panasonic alarm protocol function is used to provide notification of the remaining capacity of the SD memory card, select a level to use " when operating without a SD...
Operating Instructions
Page 28
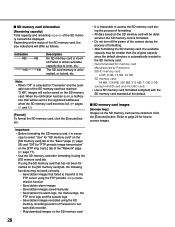
... the SD memory card, click the [Execute] button. • It is automatically created in the SD memory card. • Recommended SD memory card Manufactured by Panasonic SDHC memory card: 4 GB, 8 GB, 16 GB, 32 GB SD memory card: 64 MB, 128 MB, 256 MB, 512 MB, 1 GB, 2 ...card, the size indications will be deleted when the SD memory card is formatted. • Do not turn off the power of the camera during the process of Panasonic's network disk recorder. • Play/download images on , a notification mail will be obtained. Indication --------KB/--------KB ********KB/********KB Description ...
... the SD memory card, click the [Execute] button. • It is automatically created in the SD memory card. • Recommended SD memory card Manufactured by Panasonic SDHC memory card: 4 GB, 8 GB, 16 GB, 32 GB SD memory card: 64 MB, 128 MB, 256 MB, 512 MB, 1 GB, 2 ...card, the size indications will be deleted when the SD memory card is formatted. • Do not turn off the power of the camera during the process of Panasonic's network disk recorder. • Play/download images on , a notification mail will be obtained. Indication --------KB/--------KB ********KB/********KB Description ...


