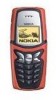

User Guide
Page 2
... and fitness for any loss of data or income or any form without prior notice. All rights reserved. Nokia Xpress-on is a trademark of Nokia Corporation. Nokia reserves the right to make changes and improvements to any of the products described in any special, incidental, ... contents of this document. All rights reserved. Includes RSA BSAFE cryptographic or security protocol software from http://www.nokia.com/phones/ declaration_of_conformity/ Copyright © Nokia Corporation 2001, 2002. The contents of this document are registered trademarks of continuous development.
... and fitness for any loss of data or income or any form without prior notice. All rights reserved. Nokia Xpress-on is a trademark of Nokia Corporation. Nokia reserves the right to make changes and improvements to any of the products described in any special, incidental, ... contents of this document. All rights reserved. Includes RSA BSAFE cryptographic or security protocol software from http://www.nokia.com/phones/ declaration_of_conformity/ Copyright © Nokia Corporation 2001, 2002. The contents of this document are registered trademarks of continuous development.
User Guide
Page 3
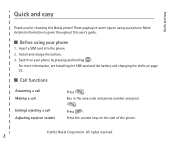
...a call Making a call Ending/ rejecting a call Adjusting earpiece volume Press . More detailed information is given throughout this Nokia phone! Switch on using your phone by pressing and holding . Press . s Before using your phone. ✁ Quick and easy Quick and easy Thank you for choosing this user's guide. For more information, see ...Installing the SIM card and the battery and changing the shells on the side of the phone. ©2002 Nokia Corporation. Press the volume keys on page 23. These pages give some tips on your...
...a call Making a call Ending/ rejecting a call Adjusting earpiece volume Press . More detailed information is given throughout this Nokia phone! Switch on using your phone by pressing and holding . Press . s Before using your phone. ✁ Quick and easy Quick and easy Thank you for choosing this user's guide. For more information, see ...Installing the SIM card and the battery and changing the shells on the side of the phone. ©2002 Nokia Corporation. Press the volume keys on page 23. These pages give some tips on your...

User Guide
Page 4
s Phone book functions Quick save Quick find Key in the name and press OK. Scroll with or to the standby mode. ©2002 Nokia Corporation. All rights reserved. In the standby mode, press of last dialled numbers. Quick and easy ✁ Last number redial Calling your voice mailbox Press ... the menu function you are asked for the voice mailbox number, key it in and press OK. If you want and press . Key in the phone number and press Save. Press and hold .
s Phone book functions Quick save Quick find Key in the name and press OK. Scroll with or to the standby mode. ©2002 Nokia Corporation. All rights reserved. In the standby mode, press of last dialled numbers. Quick and easy ✁ Last number redial Calling your voice mailbox Press ... the menu function you are asked for the voice mailbox number, key it in and press OK. If you want and press . Key in the phone number and press Save. Press and hold .
User Guide
Page 6
... guide ...18 1. Call functions...30 Making and answering calls...30 Making calls...30 Making a call using the phone book...30 Last number redialling ...30 6 ©2002 Nokia Corporation. All rights reserved. Getting started...23 Installing the SIM card and the battery and changing the shells 23... Charging the battery ...26 Switching the phone on and off ...27 Keypad lock (Keyguard)...28 Putting on the sales ...
... guide ...18 1. Call functions...30 Making and answering calls...30 Making calls...30 Making a call using the phone book...30 Last number redialling ...30 6 ©2002 Nokia Corporation. All rights reserved. Getting started...23 Installing the SIM card and the battery and changing the shells 23... Charging the battery ...26 Switching the phone on and off ...27 Keypad lock (Keyguard)...28 Putting on the sales ...
User Guide
Page 7
...40 Replaying, changing or erasing voice tags...40 5. Menu functions ...46 Messages (Menu 1)...46 ©2002 Nokia Corporation. Contents Calling your voice mailbox ...30 Speed dialling a phone number ...31 Making a conference call...31 Answering or rejecting a call ...32 Call waiting...32 Options during......43 6. All rights reserved. 7 Phone book (Names) ...33 Selecting the phone book settings...33 Saving names and phone numbers (Add name)...34 Searching for names and phone numbers ...34 Copying names and phone numbers ...34 Erasing names and phone numbers ...35 Sending and receiving a ...
...40 Replaying, changing or erasing voice tags...40 5. Menu functions ...46 Messages (Menu 1)...46 ©2002 Nokia Corporation. Contents Calling your voice mailbox ...30 Speed dialling a phone number ...31 Making a conference call...31 Answering or rejecting a call ...32 Call waiting...32 Options during......43 6. All rights reserved. 7 Phone book (Names) ...33 Selecting the phone book settings...33 Saving names and phone numbers (Add name)...34 Searching for names and phone numbers ...34 Copying names and phone numbers ...34 Erasing names and phone numbers ...35 Sending and receiving a ...

User Guide
Page 9
... ...62 Anykey answer ...63 Automatic redial...63 Speed dialling...63 Call waiting service ...64 My number sending...64 Line for outgoing calls...64 Phone settings ...64 Language ...64 Cell info display ...65 Welcome note ...65 Network selection ...65 Confirm SIM service actions ...65 Keyguard settings ...66 Locking the keypad automatically ...66 Setting...
... ...62 Anykey answer ...63 Automatic redial...63 Speed dialling...63 Call waiting service ...64 My number sending...64 Line for outgoing calls...64 Phone settings ...64 Language ...64 Cell info display ...65 Welcome note ...65 Network selection ...65 Confirm SIM service actions ...65 Keyguard settings ...66 Locking the keypad automatically ...66 Setting...

User Guide
Page 11
... editor ...84 Drawing a picture ...84 Drawing options ...85 WAP services (Menu 10) ...86 Basic steps for accessing and using a WAP service ...86 Setting up the phone for a WAP service...87 Saving the connection settings received as a text message 87 Keying in the connection settings manually...87 Making a connection to a WAP service... using the keys ...90 Ending a WAP connection ...91 Adjusting the appearance settings of WAP pages...92 Managing bookmarks...92 Service inbox...93 To set the phone to receive service messages ...94 ©2002 Nokia Corporation.
... editor ...84 Drawing a picture ...84 Drawing options ...85 WAP services (Menu 10) ...86 Basic steps for accessing and using a WAP service ...86 Setting up the phone for a WAP service...87 Saving the connection settings received as a text message 87 Keying in the connection settings manually...87 Making a connection to a WAP service... using the keys ...90 Ending a WAP connection ...91 Adjusting the appearance settings of WAP pages...92 Managing bookmarks...92 Service inbox...93 To set the phone to receive service messages ...94 ©2002 Nokia Corporation.

User Guide
Page 13
...phone where blasting is prohibited or when it may cause interference or danger. Don't use is in progress. Do not switch on the phone when wireless phone use near medical equipment. ROAD SAFETY COMES FIRST Don't use the phone... at a refuelling point. SWITCH OFF WHEN REFUELLING Don't use a hand-held phone...rules may get interference, which could affect performance. INTERFERENCE All wireless phones may be dangerous or illegal. Observe restrictions, and follow any regulations or...
...phone where blasting is prohibited or when it may cause interference or danger. Don't use is in progress. Do not switch on the phone when wireless phone use near medical equipment. ROAD SAFETY COMES FIRST Don't use the phone... at a refuelling point. SWITCH OFF WHEN REFUELLING Don't use a hand-held phone...rules may get interference, which could affect performance. INTERFERENCE All wireless phones may be dangerous or illegal. Observe restrictions, and follow any regulations or...

User Guide
Page 14
... connecting to clear the display. QUALIFIED SERVICE Only qualified personnel may install or repair phone equipment. CALLING Ensure the phone is not water-resistant. Give your location. All rights reserved. Don't touch the antenna unnecessarily. WATER-RESISTANCE Your phone is switched on and in the normal position. To answer a call , press . to exit... SAFETY USE SENSIBLY Use only in service. Keep it dry. Press as many times as needed (e.g. BACKUP COPIES Remember to do so. 14 ©2002 Nokia Corporation. Enter the emergency number, then press .
... connecting to clear the display. QUALIFIED SERVICE Only qualified personnel may install or repair phone equipment. CALLING Ensure the phone is not water-resistant. Give your location. All rights reserved. Don't touch the antenna unnecessarily. WATER-RESISTANCE Your phone is switched on and in the normal position. To answer a call , press . to exit... SAFETY USE SENSIBLY Use only in service. Keep it dry. Press as many times as needed (e.g. BACKUP COPIES Remember to do so. 14 ©2002 Nokia Corporation. Enter the emergency number, then press .

User Guide
Page 15
... number of any accessory, grasp and pull the plug, not the cord. ©2002 Nokia Corporation. For availability of these Network Services, you can take advantage of any approval or ...characters and/or services. Dualband is approved for use on the EGSM 900 and GSM 1800 networks. The use with your service provider. A number of any other...special services that you can subscribe to and use this particular phone model. Warning: Use only batteries, chargers and accessories approved by the phone manufacturer for their use with your service provider and obtain ...
... number of any accessory, grasp and pull the plug, not the cord. ©2002 Nokia Corporation. For availability of these Network Services, you can take advantage of any approval or ...characters and/or services. Dualband is approved for use on the EGSM 900 and GSM 1800 networks. The use with your service provider. A number of any other...special services that you can subscribe to and use this particular phone model. Warning: Use only batteries, chargers and accessories approved by the phone manufacturer for their use with your service provider and obtain ...
User Guide
Page 16
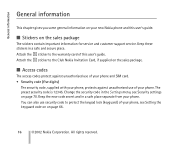
...the security code in the Settings menu, see Setting the keyguard code on on page 66. 16 ©2002 Nokia Corporation. Attach the sticker to the warranty card of your phone, see Security settings on page 70. All rights reserved. Keep the new code secret and in a safe and... secure place. General information General information This chapter gives you some general information on your phone. Keep these stickers in a safe place separate from your new Nokia phone and this user's guide. s Stickers on the sales package. Attach the sticker to the Club...
...the security code in the Settings menu, see Setting the keyguard code on on page 66. 16 ©2002 Nokia Corporation. Attach the sticker to the warranty card of your phone, see Security settings on page 70. All rights reserved. Keep the new code secret and in a safe and... secure place. General information General information This chapter gives you some general information on your phone. Keep these stickers in a safe place separate from your new Nokia phone and this user's guide. s Stickers on the sales package. Attach the sticker to the Club...

User Guide
Page 17
... codes (8 digits) The PUK (Personal Unblocking Key) code is required to notify that For more information, contact your network operator. ©2002 Nokia Corporation. may be displayed during a call encryption is needed when using the 'Call barring' function. General information • PIN code (4 to ... (4 to 8 digits) The PIN2 code, supplied with some functions, such as charging unit counters. Set the phone to request the PIN code each time the phone is usually supplied with the SIM card, contact your SIM card against unauthorised use. These functions are not supplied with...
... codes (8 digits) The PUK (Personal Unblocking Key) code is required to notify that For more information, contact your network operator. ©2002 Nokia Corporation. may be displayed during a call encryption is needed when using the 'Call barring' function. General information • PIN code (4 to ... (4 to 8 digits) The PIN2 code, supplied with some functions, such as charging unit counters. Set the phone to request the PIN code each time the phone is usually supplied with the SIM card, contact your SIM card against unauthorised use. These functions are not supplied with...

User Guide
Page 18
All rights reserved. General information s Typographics used in the guide The display texts that appear on the phone display are indicated in blue colour in this guide, for example Menu. Only the selection key texts without the key symbols are indicated in the text. 18 ©2002 Nokia Corporation. The display texts related to the selection keys and are shown in bold, for example Calling.
All rights reserved. General information s Typographics used in the guide The display texts that appear on the phone display are indicated in blue colour in this guide, for example Menu. Only the selection key texts without the key symbols are indicated in the text. 18 ©2002 Nokia Corporation. The display texts related to the selection keys and are shown in bold, for example Calling.

User Guide
Page 19
... rights reserved. 19 and enable browsing through names, phone numbers, menus or setting options in the standby mode or during a call and exits from a function. ©2002 Nokia Corporation. Power key. When pressed briefly in the phone book and menu functions. 5. Selection keys. Scroll ...keys. answers a call and dials a phone number. In the standby mode, it turns the phone's display lights on or off.
... rights reserved. 19 and enable browsing through names, phone numbers, menus or setting options in the standby mode or during a call and exits from a function. ©2002 Nokia Corporation. Power key. When pressed briefly in the phone book and menu functions. 5. Selection keys. Scroll ...keys. answers a call and dials a phone number. In the standby mode, it turns the phone's display lights on or off.

User Guide
Page 20
Charger connector 2. Infrared (IR) port Charger and headset connectors are used to key in different functions. to are used for various purposes in numbers and letters. s Connectors 1. All rights reserved. and are protected by an integrated flap. 20 ©2002 Nokia Corporation. Your phone 7. Pressing and holding calls your voice mailbox. Headset connector 3.
Charger connector 2. Infrared (IR) port Charger and headset connectors are used to key in different functions. to are used for various purposes in numbers and letters. s Connectors 1. All rights reserved. and are protected by an integrated flap. 20 ©2002 Nokia Corporation. Your phone 7. Pressing and holding calls your voice mailbox. Headset connector 3.

User Guide
Page 21
.... See Keypad lock (Keyguard) on page 28 and Keyguard settings on page 46. See Messages (Menu 1) on page 66. ©2002 Nokia Corporation. The phone's keypad is locked. The phone does not ring or beep when you have been set an alarm. Shows the battery charge level. The higher the bar, the... stronger the signal. The higher the bar, the more of the cellular network at your phone will alert, if you receive a call since all tones have set to the above three indicators, one or more power there is in which the...
.... See Keypad lock (Keyguard) on page 28 and Keyguard settings on page 46. See Messages (Menu 1) on page 66. ©2002 Nokia Corporation. The phone's keypad is locked. The phone does not ring or beep when you have been set an alarm. Shows the battery charge level. The higher the bar, the... stronger the signal. The higher the bar, the more of the cellular network at your phone will alert, if you receive a call since all tones have set to the above three indicators, one or more power there is in which the...

User Guide
Page 22
... profile on page 71. See Closed user group on . All rights reserved. See Call divert on page 70. See Accessory settings on page 62. Your phone You have set the alarm clock to a closed user group (network service). See Timed profile on . You have connected a headset to your calls are limited... to On. Your calls are diverted. See Stopwatch on page 79. See Countdown timer on page 81. 22 ©2002 Nokia Corporation. You have set the stopwatch on page 61. You have selected a Silent profile. All your...
... profile on page 71. See Closed user group on . All rights reserved. See Call divert on page 70. See Accessory settings on page 62. Your phone You have set the alarm clock to a closed user group (network service). See Timed profile on . You have connected a headset to your calls are limited... to On. Your calls are diverted. See Stopwatch on page 79. See Countdown timer on page 81. 22 ©2002 Nokia Corporation. You have set the stopwatch on page 61. You have selected a Silent profile. All your...

User Guide
Page 23
... and the battery and changing the shells Before changing the cover, always switch off the power and disconnect the phone from the charger or any other device. With the back of the phone facing you, take a firm grip of small children. • The SIM card and its contacts can easily be damaged... by scratches or bending, so be careful when handling, inserting or removing the card. • Before installing the SIM card, always make sure that the phone is switched off . ©2002 Nokia Corporation. Getting started 2. Always store and use the...
... and the battery and changing the shells Before changing the cover, always switch off the power and disconnect the phone from the charger or any other device. With the back of the phone facing you, take a firm grip of small children. • The SIM card and its contacts can easily be damaged... by scratches or bending, so be careful when handling, inserting or removing the card. • Before installing the SIM card, always make sure that the phone is switched off . ©2002 Nokia Corporation. Getting started 2. Always store and use the...

User Guide
Page 24
Simultaneously press both release springs on the engine part of the phone and slide the bottom shell off. 3. All rights reserved. Getting started 2. Remove the battery by lifting it from the finger grip. 24 ©2002 Nokia Corporation.
Simultaneously press both release springs on the engine part of the phone and slide the bottom shell off. 3. All rights reserved. Getting started 2. Remove the battery by lifting it from the finger grip. 24 ©2002 Nokia Corporation.

User Guide
Page 25
Make sure that the golden connectors are facing the connector on the phone, and that if you need to remove the SIM card, carefully slide it out of the SIM card slot. 5. All rights reserved. 25 Insert your SIM card under the metal plate. Getting started 4. Replace the battery. ©2002 Nokia Corporation. Note that the bevelled corner is on the right.
Make sure that the golden connectors are facing the connector on the phone, and that if you need to remove the SIM card, carefully slide it out of the SIM card slot. 5. All rights reserved. 25 Insert your SIM card under the metal plate. Getting started 4. Replace the battery. ©2002 Nokia Corporation. Note that the bevelled corner is on the right.


